 by
by Absolutely! Let’s break this down carefully, step by step, so even a beginner can follow. I’ll give a detailed guide on making a crochet beret in a “pixel” or textured style, often using simple stitches to create that blocky/pixel look.

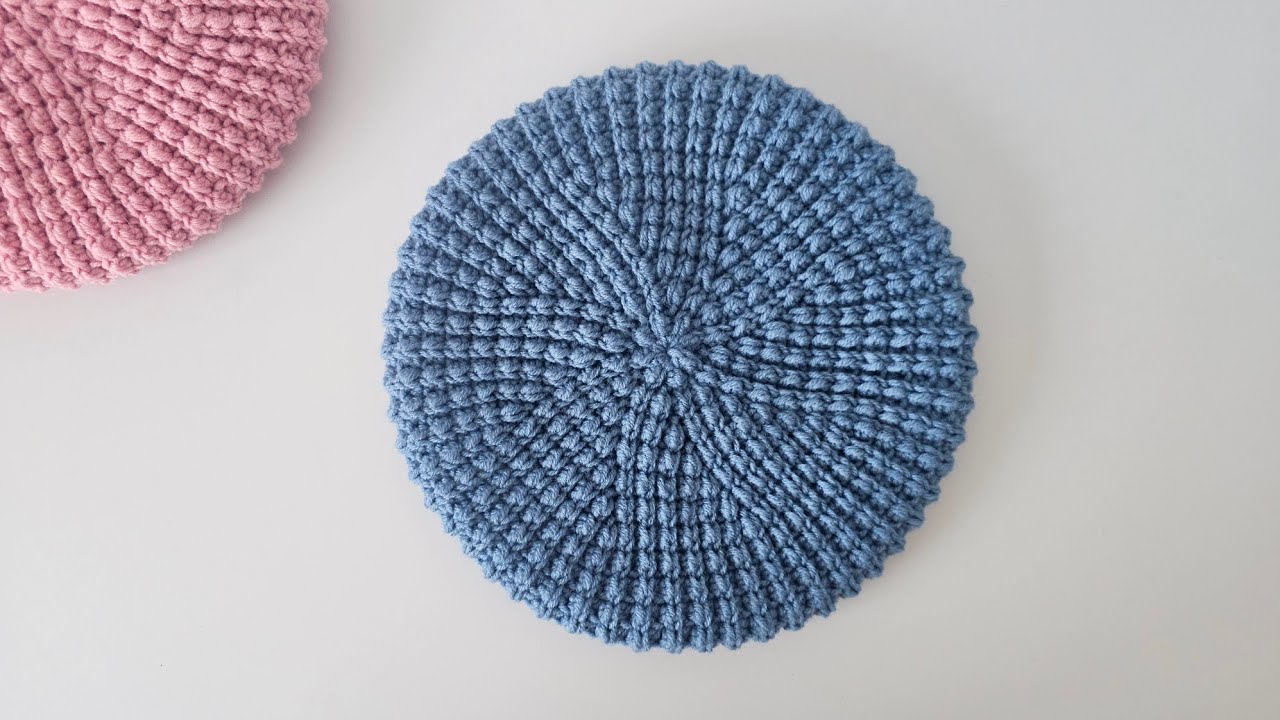
How to Make a Crochet “Pixel” Beret (Beginner-Friendly)
Materials Needed
- Yarn: Worsted weight yarn (medium/4) is ideal. Choose your favorite color or multiple colors for a pixel effect.
- Hook: Size recommended for your yarn (usually 5.0 mm / H-8 for worsted weight).
- Scissors
- Tapestry needle for weaving in ends
- Stitch markers (optional, but helpful)
Basic Stitches You’ll Use
- Chain (ch) – foundation stitch.
- Single Crochet (sc) – creates tight fabric.
- Double Crochet (dc) – taller stitch for texture.
- Front Post / Back Post stitches (optional) – for more “pixel” texture.
Tip: For a pixel look, alternating front post and back post stitches in blocks or using alternating single and double crochet can make that characteristic “blocky” pattern.

Step 1: Start with the Crown
The beret usually begins at the top (crown) in a circular pattern.
- Make a magic ring (adjustable loop).
- Round 1: Crochet 6 single crochets (sc) into the magic ring. Pull tight.
- Round 2: Increase round – 2 sc in each stitch around (total 12 sc).
- Round 3: Increase every other stitch: (sc in next stitch, 2 sc in next stitch) repeat around.
- Round 4: Increase every 2 stitches: (sc in next 2 stitches, 2 sc in next stitch) repeat around.
Continue increasing in this manner until the crown reaches the desired diameter for the top of your head (usually 6–7 inches for adult size).
Step 2: Crochet the Body
Once the crown is wide enough:
- Switch from increasing to working evenly (no more increases).
- For a “pixel” texture, alternate front post double crochet (fpdc) and back post double crochet (bpdc) in a checkerboard or strip pattern:
- Row 1: fpdc, bpdc, fpdc, bpdc…
- Row 2: shift pattern by one stitch for a staggered block effect.
- Repeat for about 4–6 inches, depending on how slouchy you want your beret.
If you want a classic tight beret, just use all sc stitches. For a textured pixel effect, use the post stitches or mix sc/dc.
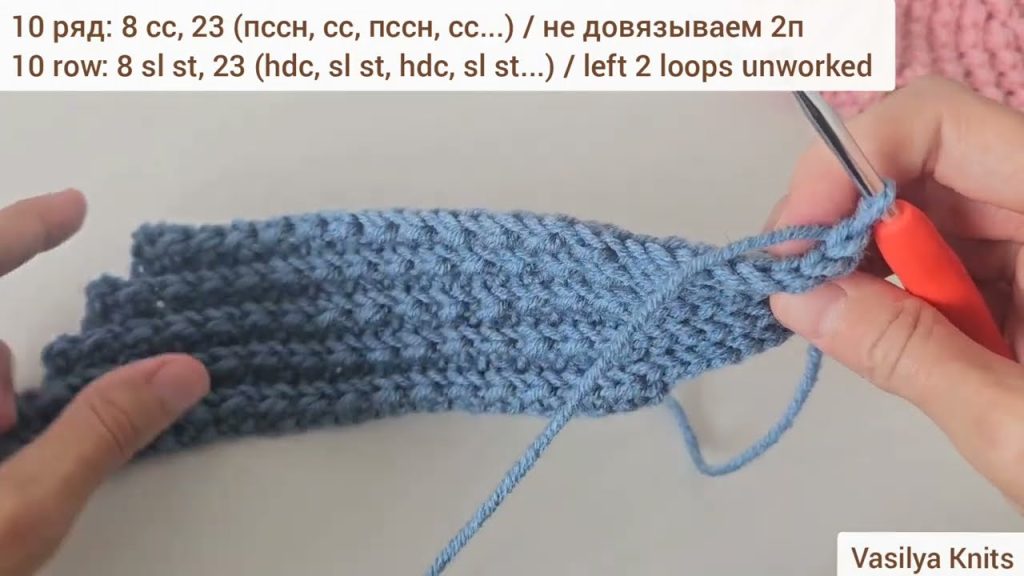
Step 3: Create the Ribbed Band (Optional but Recommended)
The band ensures the beret fits snugly:
- Switch to smaller stitches (sc or half double crochet – hdc).
- Work 1–2 inches around the edge without increasing.
- You can use front post/back post here as well for stretchiness.
Step 4: Finish
- Fasten off the yarn.
- Use a tapestry needle to weave in all loose ends neatly.
- Optional: Lightly steam block the beret to shape it.
Tips for Beginners
- Keep stitch count consistent each round to avoid warping.
- Use stitch markers at the start of each round to track your progress.
- Experiment with colors in a grid-like fashion to enhance the “pixel” effect.
- Try on as you go to make sure the beret fits the head comfortably.
Summary of Steps
- Make magic ring and crochet the crown, increasing gradually.
- Crochet the body of the beret, adding texture (pixels) using post stitches or mixed stitches.
- Add a ribbed band for snug fit.
- Finish by weaving in ends and optionally blocking.
If you want, I can make a beginner-friendly diagram/pattern showing the “pixel” stitch layout for your beret—this makes following along much easier than just written instructions.
Watch tutorial: