 by
by Absolutely! Let’s go step by step to make a cute crochet bear hat. I’ll provide detailed instructions suitable for beginners to intermediate crocheters. You can adjust sizes for babies, kids, or adults.
Materials Needed
- Yarn – Medium weight (worsted) yarn in main color (e.g., brown) and small amount of accent color (e.g., pink or black for nose/inner ears).
- Crochet hook – Size recommended for your yarn (usually 5 mm / H-8 for worsted).
- Tapestry needle – For weaving in ends and sewing pieces.
- Scissors
- Stitch markers – Optional, for marking rounds.
Step 1: Choose Hat Size
Approximate head circumference:
- Baby: 14–16 inches
- Toddler: 16–18 inches
- Child: 18–20 inches
- Adult: 21–23 inches
Adjust number of stitches accordingly. I’ll provide a general formula:
- Start with a magic ring (circle) of 6–8 single crochets (sc) for baby, 10 sc for adult.
- Increase each round until the diameter fits your intended head size.
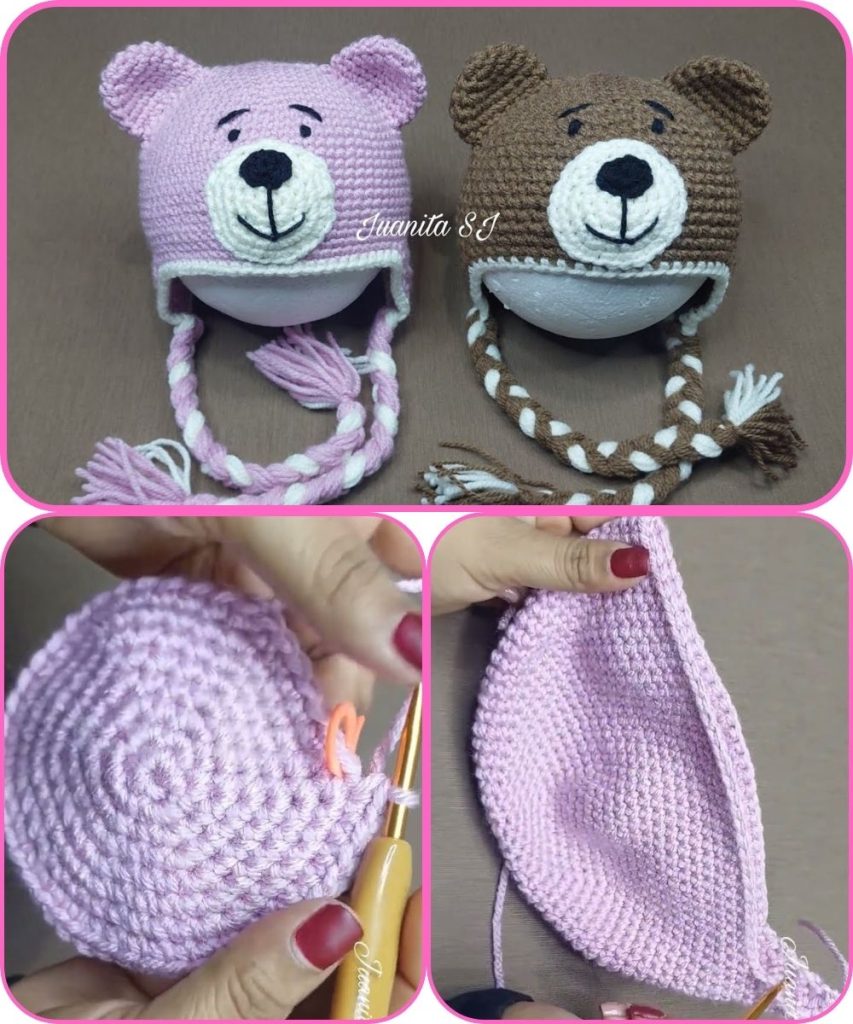
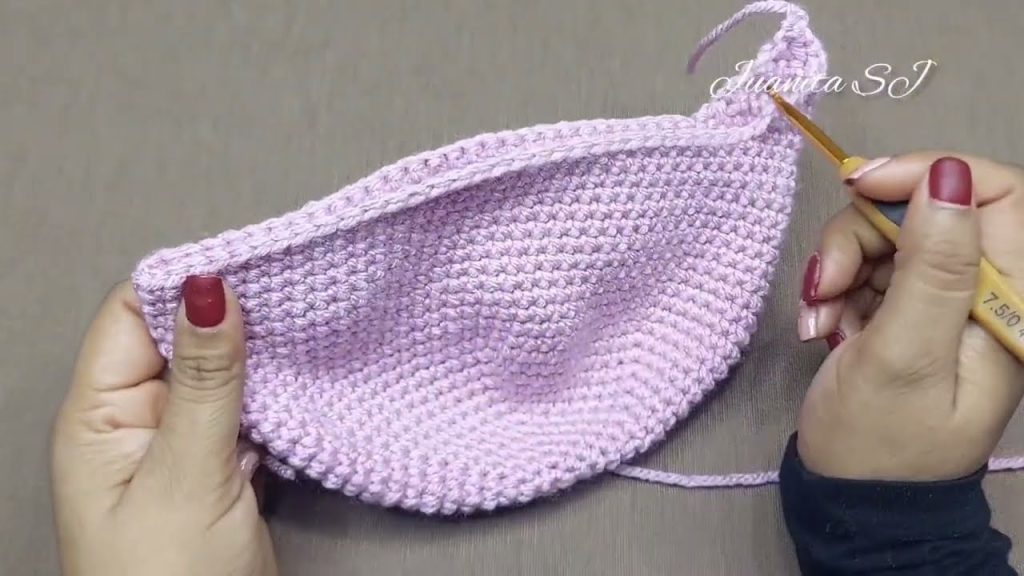
Step 2: Make the Hat Base (Crown)
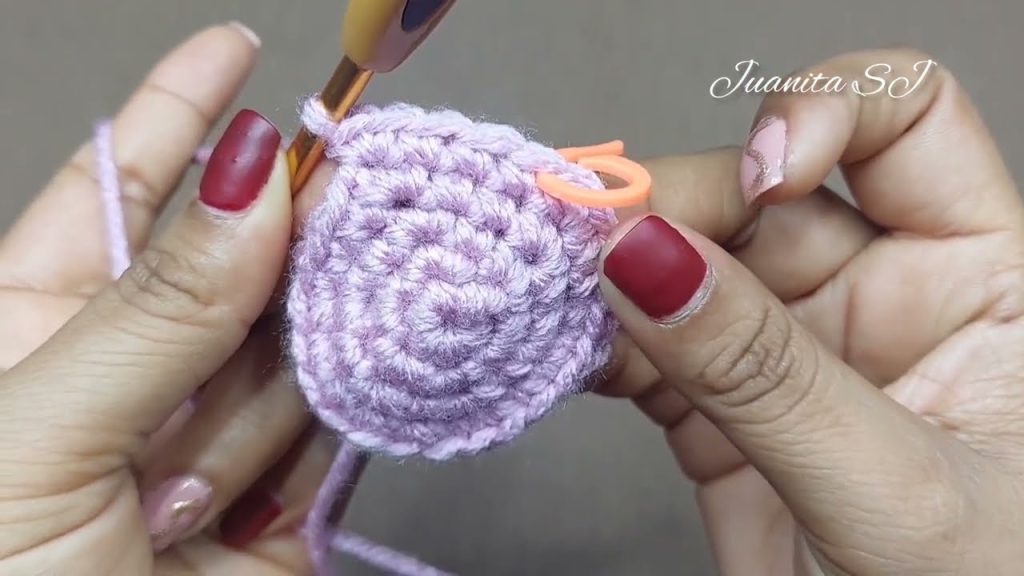
- Round 1: Make a magic ring, work 6 sc inside.
- Round 2: Increase in each stitch around (2 sc in each stitch) → 12 sc.
- Round 3: 1 sc in next st, 2 sc in next st around → 18 sc.
- Round 4: 1 sc in next 2 st, 2 sc in next st around → 24 sc.
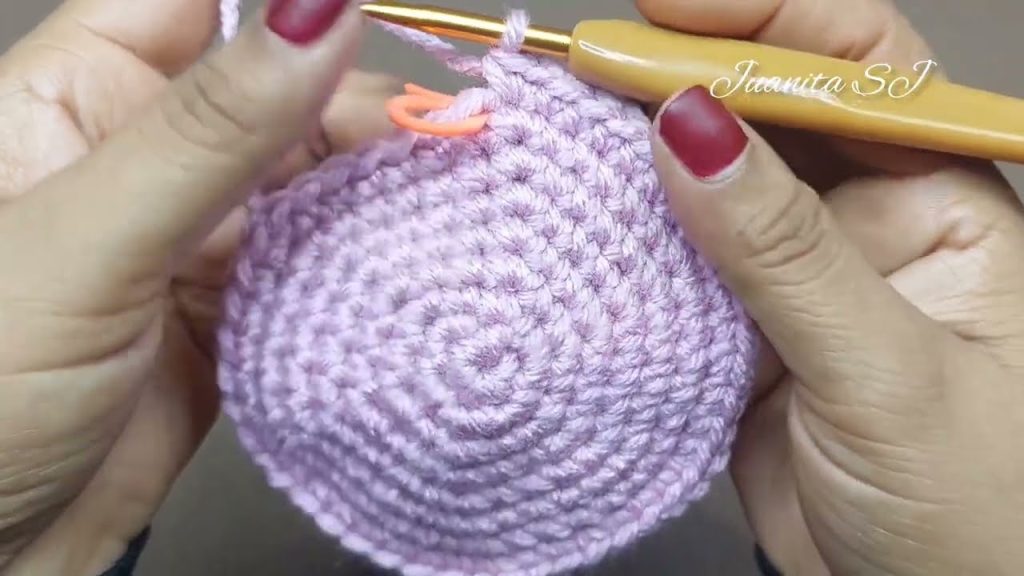
- Round 5: 1 sc in next 3 st, 2 sc in next st around → 30 sc. Continue increasing in this pattern: add 1 more single crochet between increases each round until the crown diameter reaches the head measurement (roughly 6–7 inches for babies, 7–8 inches for adults).
- Rounds 6 onward: Work even rounds (1 sc in each stitch) until the hat reaches the desired height (about 6–8 inches for a baby).
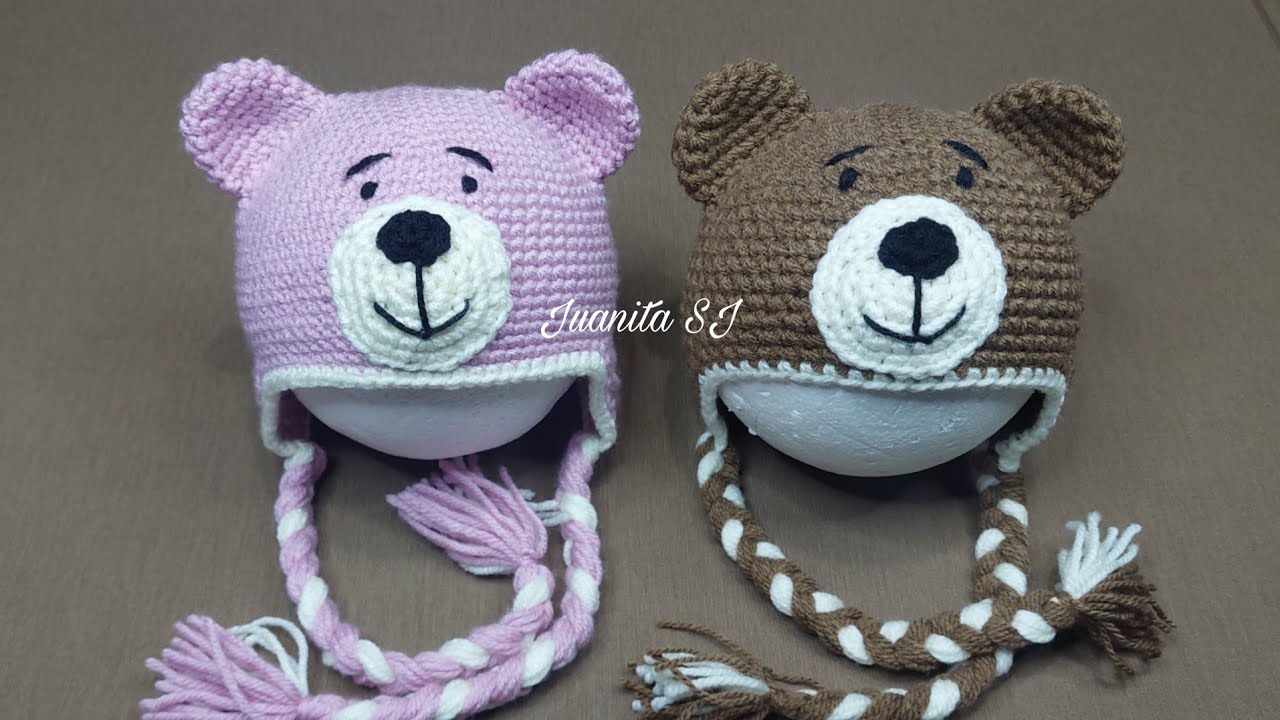
Step 3: Create Bear Ears
You’ll need two ears:
- Round 1: Magic ring, 6 sc in ring.
- Round 2: 2 sc in each stitch around → 12 sc.
- Round 3: 1 sc in next st, 2 sc in next st around → 18 sc.
- Optional Round 4 for larger ears: 1 sc in next 2 st, 2 sc in next st around → 24 sc.
- Finish off, leaving a long tail for sewing.
- Repeat for second ear.
Step 4: Attach the Ears
- Place the ears on the hat symmetrically.
- Use a tapestry needle and yarn tail to sew ears securely to the top sides of the hat.
- Make sure the ears are slightly rounded and upright.
Step 5: Add Facial Features (Optional)
- Eyes: Use black yarn or safety eyes.
- Nose: Use a small triangle or oval shape with black yarn.
- Mouth: Use simple embroidery stitches under the nose.
For a softer look, you can also add blush or inner ear color using a small amount of pink yarn.
Step 6: Finishing
- Weave in all loose ends.
- Check that all attachments are secure, especially if for a baby or toddler.
- Optionally, block the hat lightly to shape it perfectly.
Tips
- Use soft, baby-friendly yarn for infants.
- Make slightly larger ears for a cartoonish, cute look.
- If the hat seems too tight, add an extra round of sc at the base.
- You can also add a pom-pom or scarf for extra cuteness.
If you want, I can draw a visual step-by-step diagram showing each round and how the ears attach—it makes it way easier to follow than text alone.
Watch tutorial: