 by
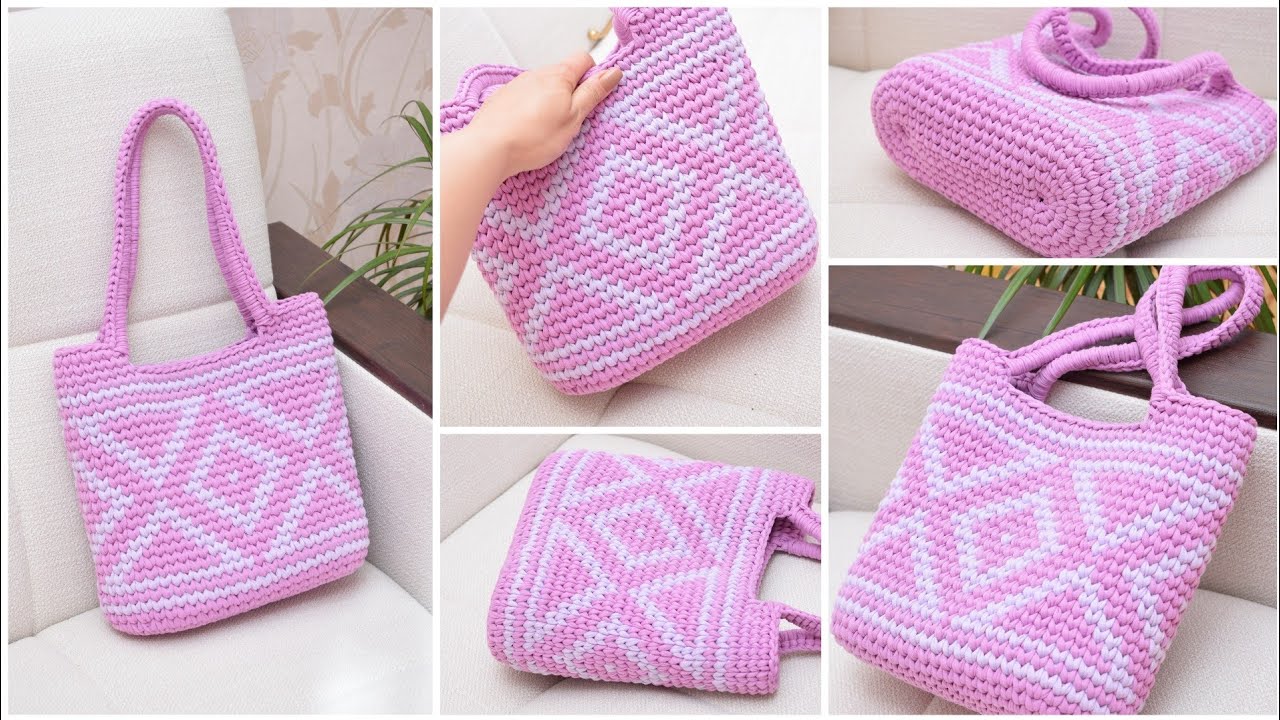
by Absolutely! Let’s go step-by-step through how to make a crochet bag with a Jacquard pattern using T-shirt yarn — also called a Jacquard Crochet Tote Bag.
This guide covers everything from choosing materials to finishing touches.
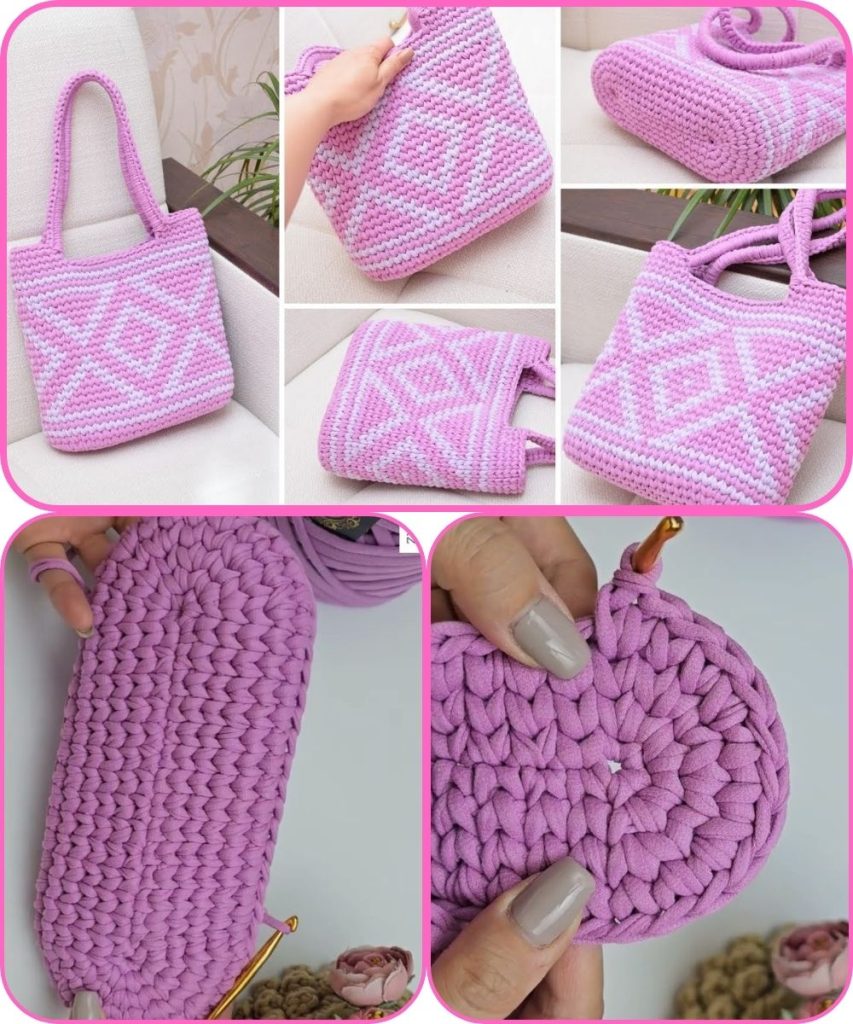
🧶 Project: Jacquard T-Shirt Yarn Crochet Tote Bag
🌸 Overview
A Jacquard crochet bag is a stylish, sturdy tote made with T-shirt yarn and decorated with colorwork patterns (like geometric or floral motifs).
The Jacquard technique involves switching colors in the same row to create intricate designs, similar to tapestry crochet.
🧰 Materials Needed
| Item | Description |
|---|---|
| Yarn | T-shirt yarn (2–3 colors). Choose medium thickness (~6 mm). Cotton or cotton-blend yarns work well. |
| Hook | 8–10 mm crochet hook (depending on yarn thickness). |
| Scissors | For trimming yarn ends. |
| Yarn needle | For weaving in ends. |
| Stitch markers | To mark rounds and pattern changes. |
| Bag handles | Optional: leather handles or crocheted ones. |
| Lining fabric | Optional for a polished interior finish. |
📏 Size (Adjustable)
Typical tote size:
- Width: 30–35 cm (12–14 in)
- Height: 28–32 cm (11–13 in)
- Base: Oval or rectangular, 8–10 cm (3–4 in) deep
🪡 Step-by-Step Instructions
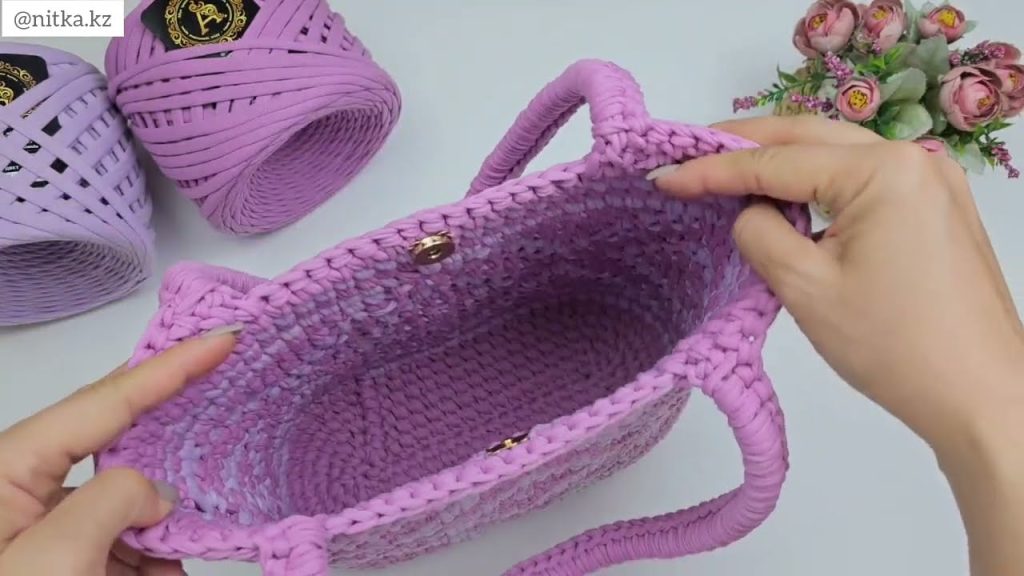
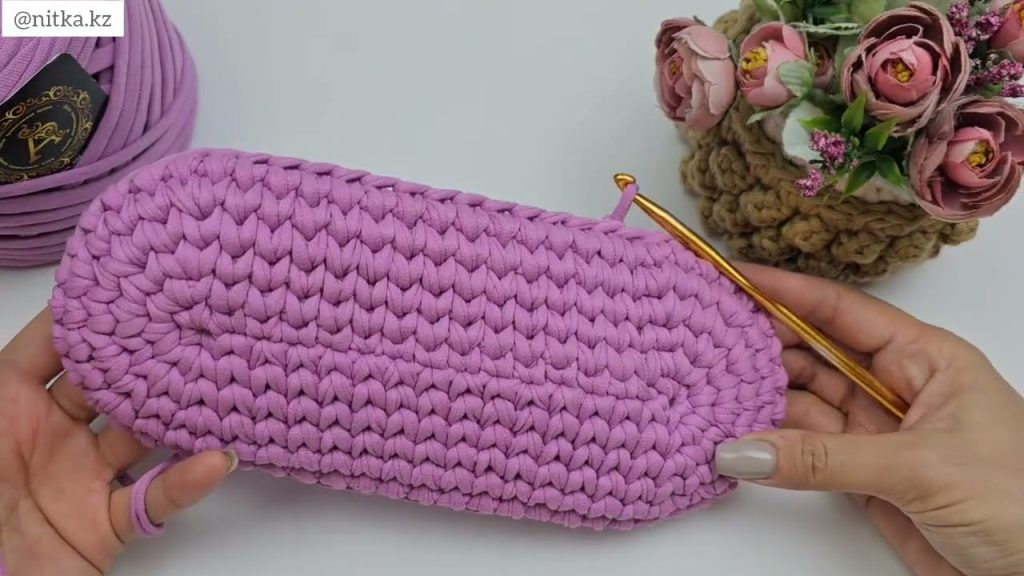
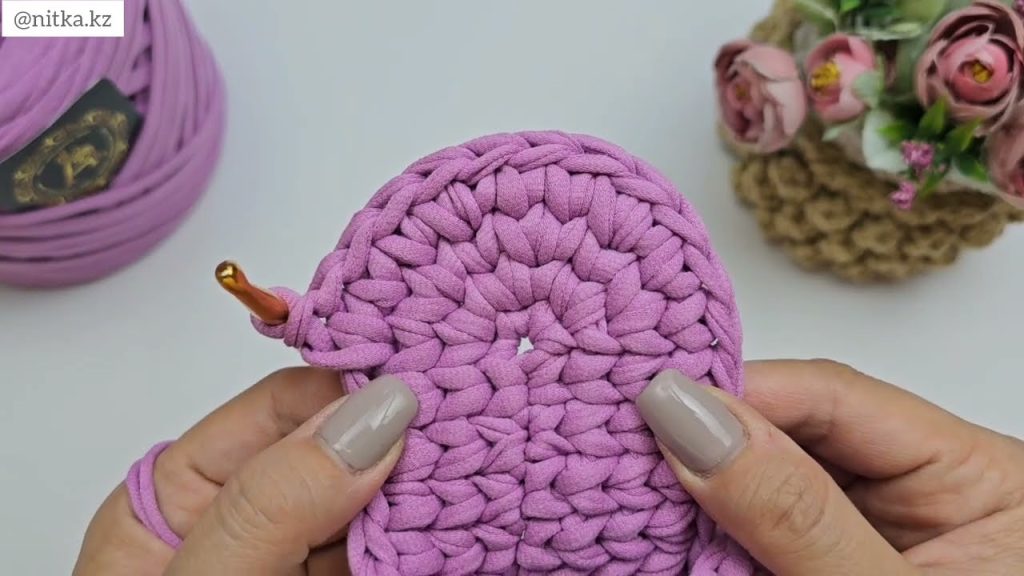
Step 1: Make the Base
- Start with a chain foundation — e.g., chain 25 for a rectangular base.
- Round 1: Work single crochet (SC) in the second chain from hook and along each chain. When you reach the last chain, make 3 SC in the same stitch to turn. Continue working SC on the other side of the chain. Slip stitch to join.
- Round 2–4: Continue working in the round, increasing at corners to keep the base flat.
→ The number of increases depends on your desired bag width. - When the base is the desired size, stop increasing.
Step 2: Build the Body
- Continue crocheting in the round without increases to form the sides of the bag.
Use single crochet (SC) or waistcoat stitch (knit stitch) for a dense texture. - Work until the body is about 5–6 cm tall before starting the Jacquard design.
Step 3: Jacquard (Tapestry) Pattern
- Choose your pattern: You can use simple geometric shapes like diamonds, zigzags, hearts, or letters.
→ Print or draw a colorwork chart (like pixel art) where each square = 1 stitch. - Introduce a second color: When switching colors:
- Work the last yarn-over of the previous stitch with the new color.
- Carry the unused yarn inside the stitch (under the loops) to avoid loose strands.
- Follow the chart row by row, keeping yarn tension even.
- Continue this pattern until your Jacquard section is complete (usually 8–10 rows).
Step 4: Finishing the Top Edge
- Once the pattern is complete, continue a few rows with the main color for a clean finish.
- For a sturdy edge:
- Work 1–2 rounds of slip stitch or reverse single crochet (crab stitch).
- Fasten off and weave in ends neatly.
Step 5: Add Handles
Options:
- Crocheted handles: Chain 40–50, attach with slip stitches on each side.
- Leather handles: Sew or rivet them on for a professional look.
- Rope handles: Thread through reinforced loops or metal rings.
Step 6: Optional — Add Lining
- Cut fabric slightly smaller than the bag interior.
- Sew the side and bottom seams.
- Hand stitch or glue the lining inside the bag to protect from stretching.
✨ Design Tips
- Patterns: Try Aztec motifs, chevrons, or abstract shapes.
- Colors: Contrast two or three tones (e.g., beige + black + gold).
- Texture: Mix stitches (e.g., single crochet + half double crochet rows).
- Reinforcement: Add a plastic canvas or cardboard insert to the base for structure.
🧺 Care Instructions
- Hand wash gently in cool water.
- Lay flat to dry to maintain shape.
- Avoid hanging when wet (T-shirt yarn can stretch).
🖼️ Example Pattern Idea (Simple Geometric)
Row 1–5: Main color (MC)
Row 6: *4 MC, 2 contrast color (CC)* repeat
Row 7: *3 MC, 4 CC* repeat
Row 8: *2 MC, 6 CC* repeat
Row 9: *3 MC, 4 CC* repeat
Row 10: *4 MC, 2 CC* repeat
→ This creates a diamond-like motif around your tote.
Watch tutorial: