 by
by Sure! Here’s a detailed, beginner-friendly guide on how to make a very easy reversible crochet hat — step-by-step, with clear instructions and tips. 🧶
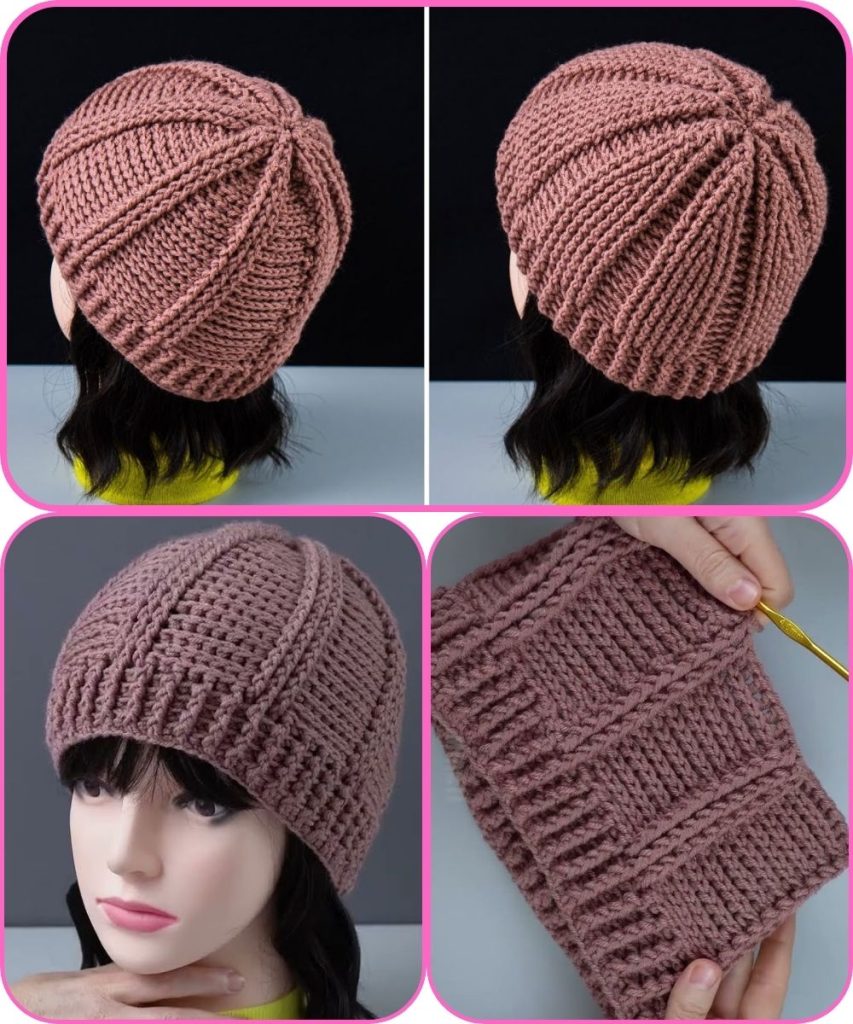
🧢 Reversible Crochet Hat for Beginners
🌈 What Makes It Reversible?
This hat is crocheted in a simple stitch pattern that looks beautiful on both sides — no wrong side! By choosing two colors of yarn, you can make it fully reversible, giving you two different looks in one cozy hat.
🧶 Materials You’ll Need
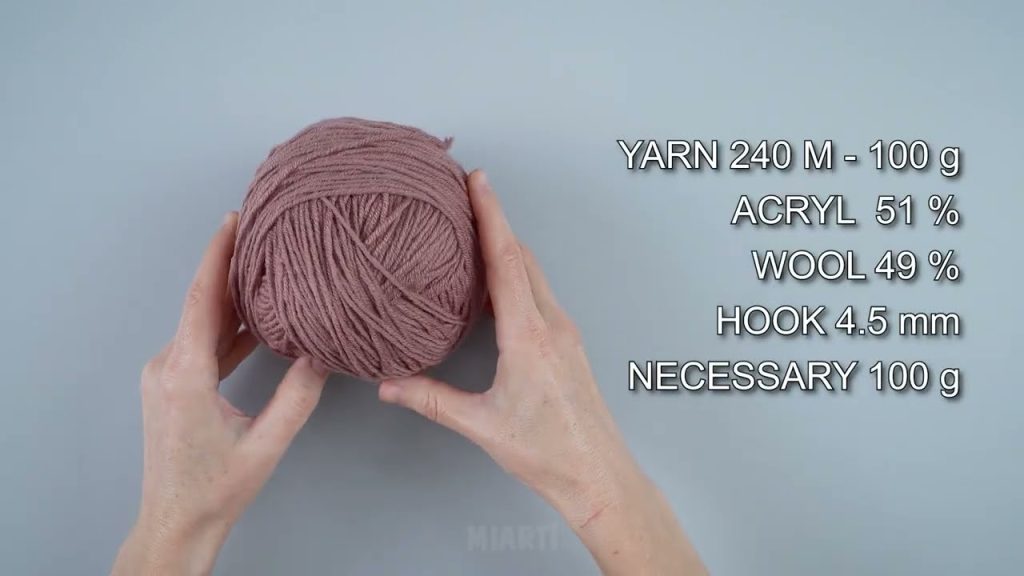
- Yarn:
- Two colors of worsted weight (medium #4) yarn (e.g., acrylic or wool blend).
- About 150–200 yards total (depending on hat size).
- Crochet hook:
- Size H/8 (5.0 mm) or size needed to meet gauge.
- Tapestry needle for weaving in ends.
- Scissors
- Measuring tape
📏 Sizing Guide
Measure around the widest part of your head and use this chart to guide your starting chain length:
| Size | Head Circumference | Hat Height |
|---|---|---|
| Child | 19–20 in (48–51 cm) | 7.5 in (19 cm) |
| Teen/Adult Small | 21–22 in (53–56 cm) | 8 in (20 cm) |
| Adult Large | 23–24 in (58–61 cm) | 8.5 in (22 cm) |
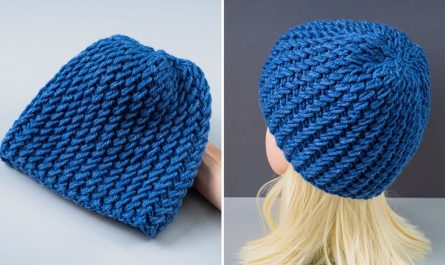
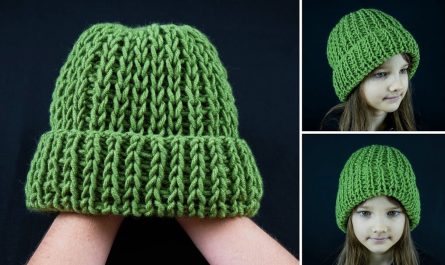
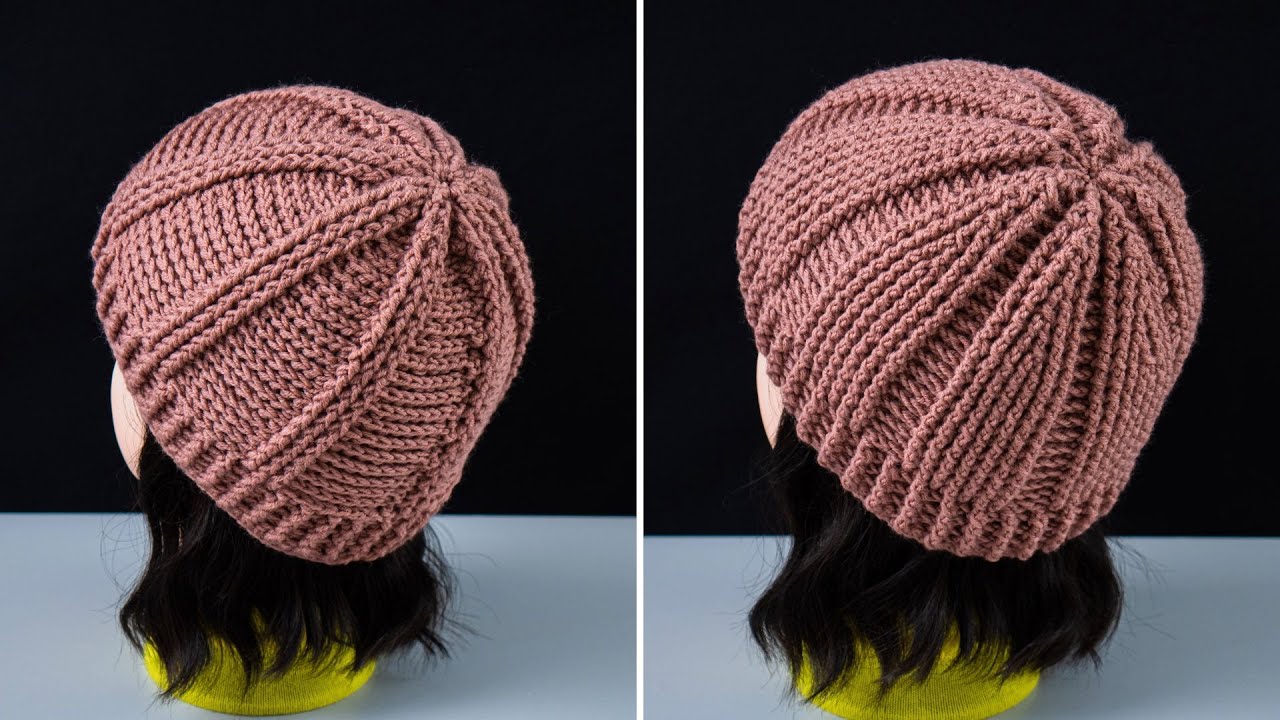
🪡 Stitch Pattern: The Secret to Reversibility
We’ll use half double crochet in the third loop (HDC in 3rd loop) — this creates a knit-like texture on both sides, making the hat reversible and stretchy.
🧵 Step-by-Step Instructions
1. Start with a Foundation Chain
- Using Color A, chain a length equal to your head circumference minus 2 inches (it will stretch).
- Join the chain into a ring with a slip stitch, being careful not to twist it.
2. Round 1: Create the Base
- Chain 1 (does not count as a stitch).
- Work 1 half double crochet (HDC) in each chain around.
- Join with a slip stitch to the first HDC.
- (You can place a stitch marker at the start of each round if you like.)

3. Round 2 and Onward: The Reversible Stitch
- Chain 1.
- Work 1 HDC in the 3rd loop of each stitch around.
- The “third loop” is found behind the top two loops (push the top V forward slightly — you’ll see a horizontal bar below it).
- Join with a slip stitch to the first stitch.
🧶 Tip: Working into the third loop pushes the top loops forward, creating a ribbed texture that looks great on both sides!
4. Continue Rounds
- Repeat Round 2 until your hat measures the desired height (see chart above).
- Optional: After a few inches, you can switch to Color B to make the other side of your reversible hat pop!
5. Decrease Rounds (to close the top)
Once you reach the desired height:
- Round 1 (decrease):
[HDC in 3rd loop in next 6 stitches, HDC2tog in next] — repeat around. - Round 2:
[HDC in 3rd loop in next 4 stitches, HDC2tog] — repeat. - Continue decreasing until only 8–10 stitches remain.
- Fasten off, leaving a long tail.
6. Close the Top
- Thread your tapestry needle with the yarn tail.
- Weave through remaining stitches and pull tightly to close.
- Secure with a knot and weave in all ends.
7. Flip and Style
Turn your hat inside out to see the other color or texture — both sides are wearable!

🌟 Optional Add-Ons
- Add a pom-pom (attach with a button inside so it’s removable when you reverse the hat).
- Add a brim by working a few rounds of single crochet or front-post/back-post stitches before finishing.
💡 Tips for Success
- Keep your tension even — reversible hats look best when stitches are consistent.
- Use a soft yarn so it feels nice on both sides.
- You can make it slouchy by adding extra height before the decrease rounds.
🧢 Summary
| Step | Action | Result |
|---|---|---|
| 1 | Chain and join | Base ring |
| 2 | HDC around | Solid base |
| 3 | HDC in 3rd loop | Reversible texture |
| 4 | Repeat | Build height |
| 5 | Decrease | Shape top |
| 6 | Weave & flip | Finished reversible hat! |
Would you like me to include photo or diagram instructions (like where to find the third loop, or how to do the decreases)? I can make a simple illustrated guide for you.
Watch tutorial: