 by
by Sure! 🧶 Here’s a detailed step-by-step guide on how to make a crochet handbag, perfect for beginners and intermediate crocheters. I’ll include everything — from materials and basic stitches to assembly and finishing touches.
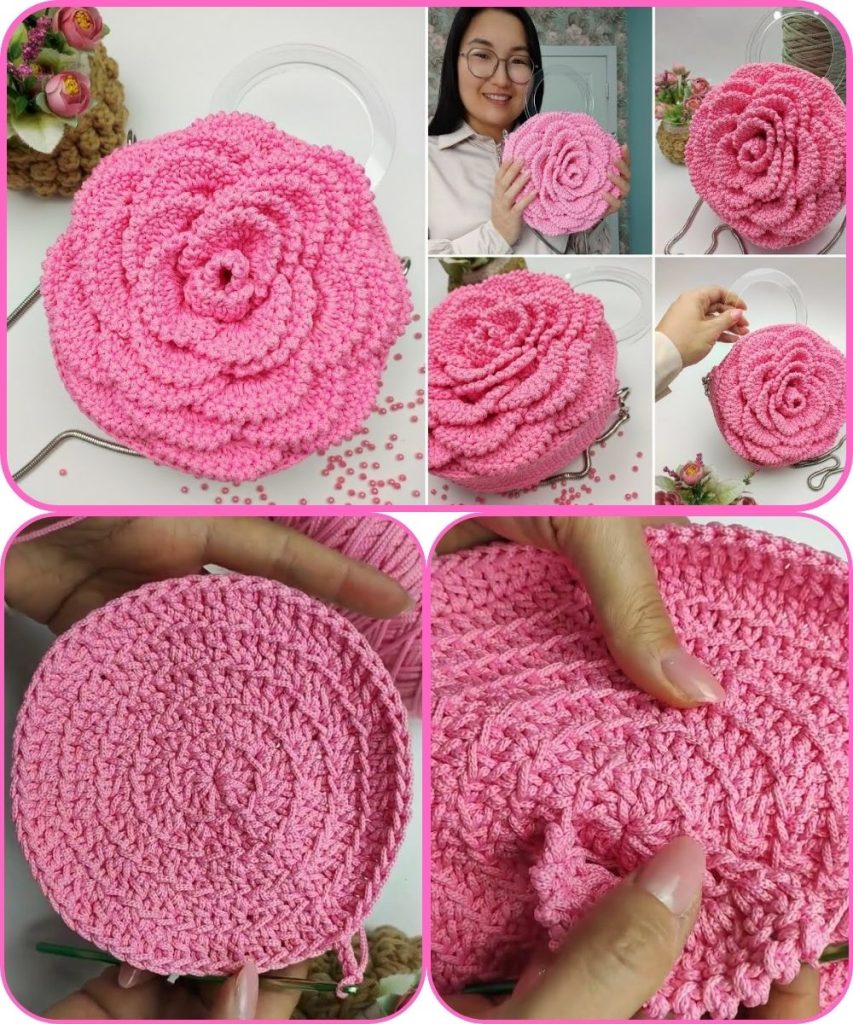
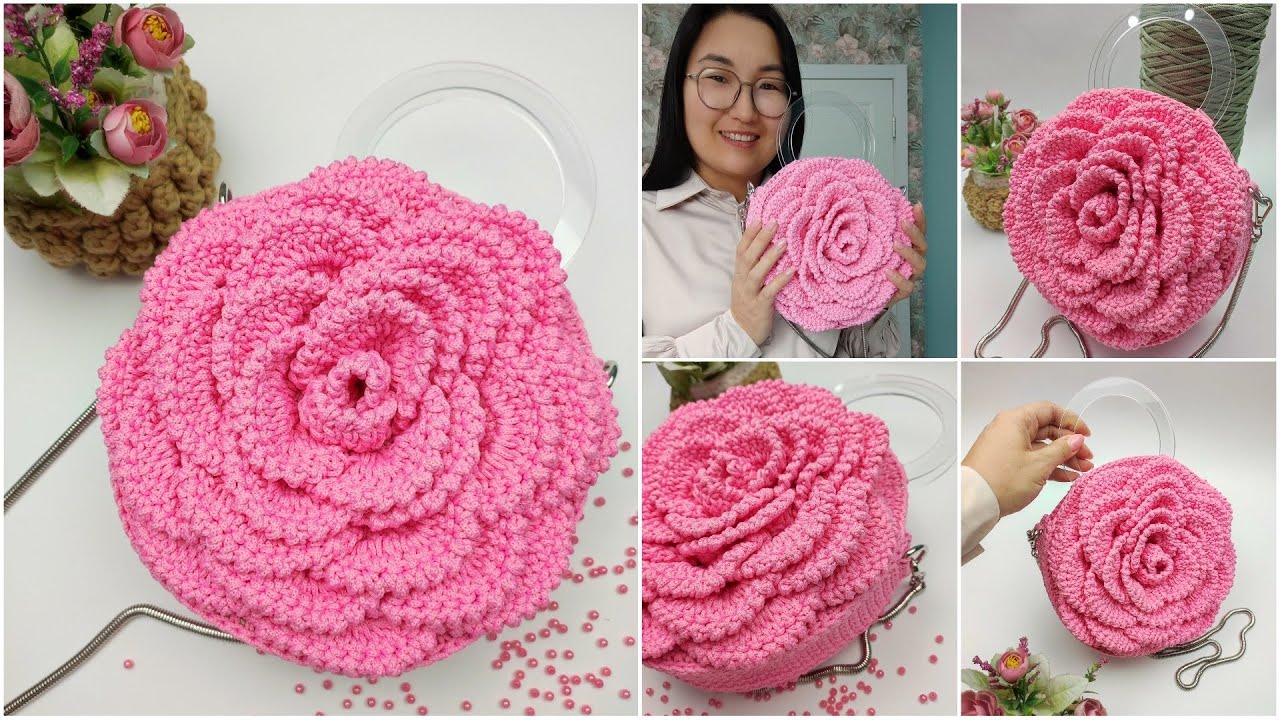
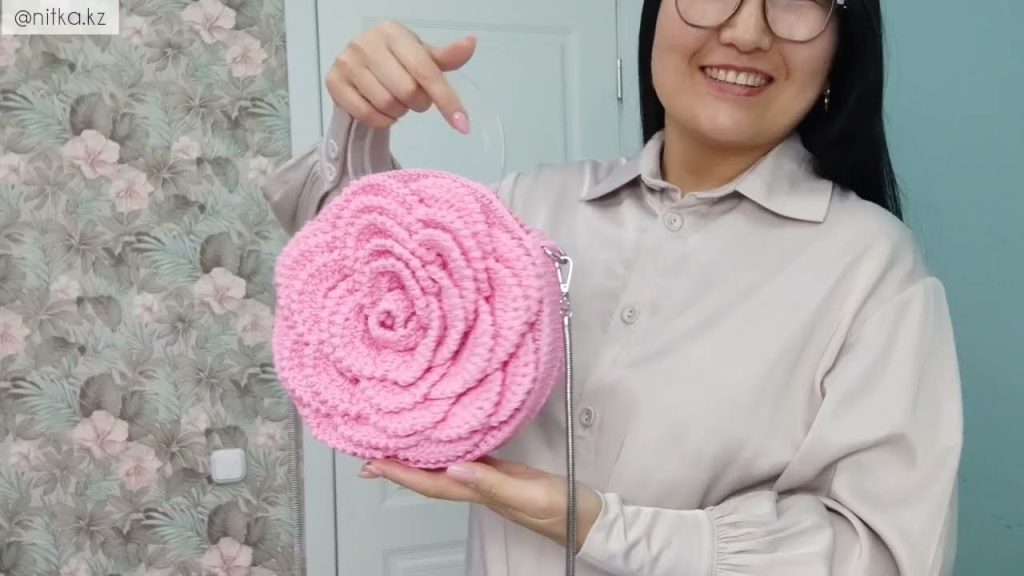
👜 How to Make a Crochet Handbag
🧵 Materials Needed:
- Yarn – Choose a sturdy yarn such as cotton or a cotton-blend (medium or bulky weight recommended).
Example: 2 skeins of 100% cotton yarn, 100g each. - Crochet hook – Size depends on your yarn; usually 4.0mm–5.5mm (check yarn label).
- Scissors
- Yarn needle – for weaving in ends
- Stitch markers – optional but helpful
- Bag handles (optional) – wooden, leather, or crocheted
- Lining fabric (optional) – for a more professional look
- Zipper or magnetic button (optional) – for closure
🪡 Basic Crochet Stitches Used:
- Chain (ch)
- Slip stitch (sl st)
- Single crochet (sc)
- Half double crochet (hdc) or double crochet (dc) – depending on texture preference
- Increase (2 sc in one stitch)
If you’re new, practice these stitches before starting.
🧶 Step-by-Step Instructions
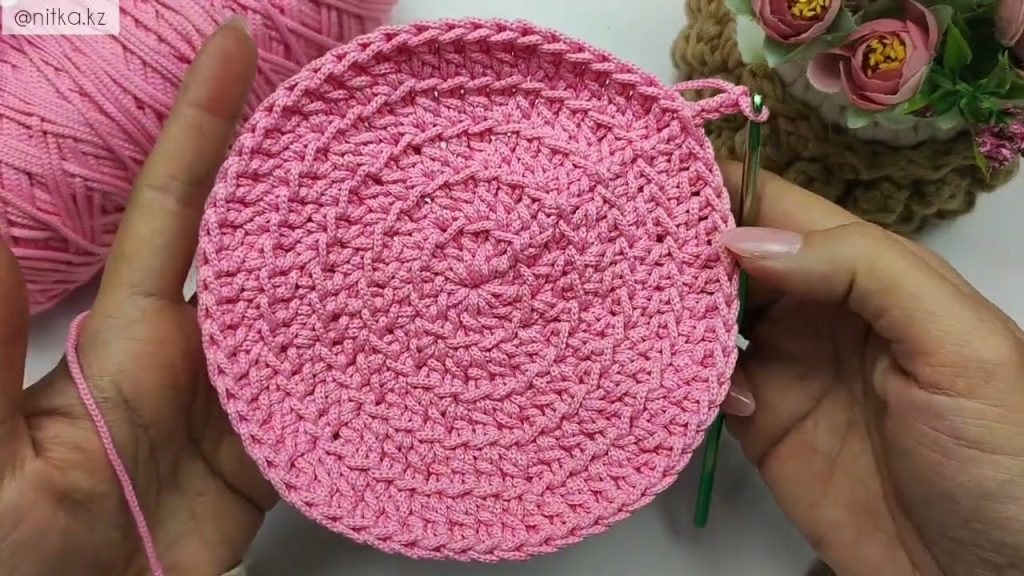
Step 1: Crochet the Base
- Start with a chain: Chain 25–35 stitches (depending on how wide you want your bag).
- Work in rounds:
- Round 1: Sc in 2nd chain from hook, sc across to the last chain.
- In the last chain, work 3 sc to turn the corner.
- Continue working along the bottom of the chain, sc across.
- At the last stitch, work 3 sc again.
- Join with sl st to the first sc.
- Build the base: Continue crocheting around in rounds, increasing 2 sc at each corner (the 3-stitch turns) until your base reaches the desired size (usually an oval shape).
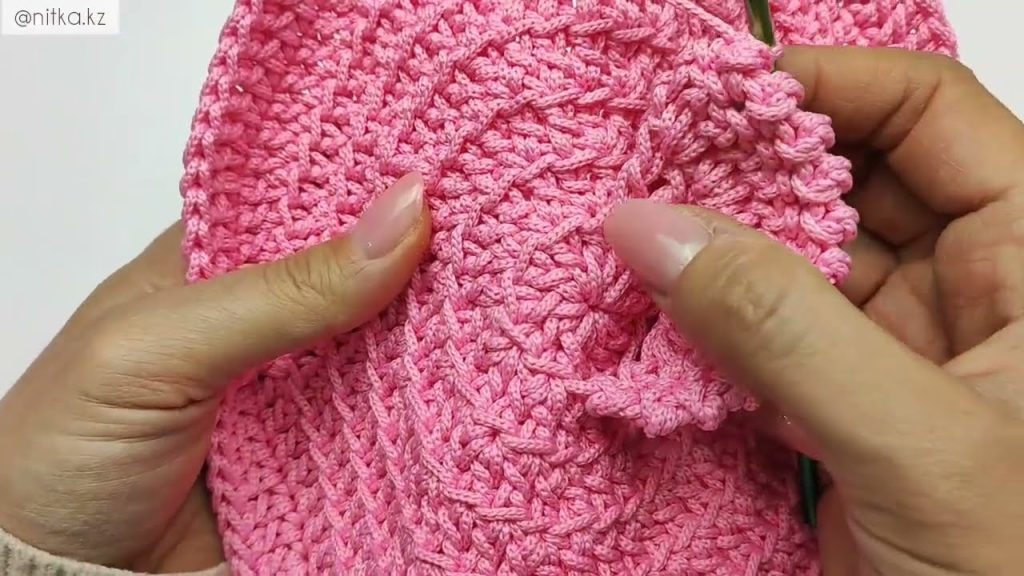
Step 2: Crochet the Body
- Once your base is done, stop increasing to build the bag upward.
- Crochet one stitch in each stitch around (sc, hdc, or dc) for about 20–25 rounds, depending on how tall you want your handbag.
- For texture, you can alternate rows of sc and hdc or use a pattern stitch like moss stitch (sc, ch 1, skip 1, repeat).
Step 3: Create Handles
Option 1: Built-in handles
- Measure about 3–4 inches in from each side.
- Crochet up to that point, chain 10–15 stitches (depending on handle size), skip the same number of stitches, and continue across.
- On the next round, crochet across the chain space to reinforce it.
Option 2: Separate handles
- Crochet or buy handles separately.
- Attach them with yarn or metal rings.
Step 4: Optional Lining (Recommended for durability)
- Cut a piece of fabric slightly larger than the bag’s dimensions.
- Fold and sew the fabric to form a pouch.
- Place it inside the crochet bag and hand-sew it along the top edge.
(Use thread similar in color to your yarn for a neat finish.)
Step 5: Add Closure
- Magnetic snap: Sew one half on each side of the lining before attaching it to the bag.
- Zipper: Hand-sew the zipper between the lining and the top edge of the bag.
- Button loop: Crochet a small chain loop and attach a button.
Step 6: Finishing Touches
- Weave in all yarn ends with a yarn needle.
- Block the bag (lightly steam or shape) to smooth stitches.
- Add embellishments like tassels, flowers, or beads if desired.
💡 Tips for Success
- Use tighter stitches to keep the bag sturdy and less stretchy.
- For extra firmness, you can crochet using two strands of yarn at once.
- If you want a flat bottom, you can sew in a piece of plastic canvas or cardboard (between lining and crochet).
🌸 Simple Crochet Handbag Pattern (Example)
Yarn: Medium weight cotton yarn
Hook: 4.5 mm

Ch 31
Round 1: Sc in 2nd ch from hook and in each ch across. 3 sc in last ch. Work along bottom of chain, sc in each ch, 3 sc in last ch. Join with sl st. (64)
Round 2: Sc around, increasing 2 sc at each corner. Join. (72)
Rounds 3–5: Repeat until base is desired size.
Rounds 6–30: Sc in each st around (no increase). Join.
Round 31: To make handles – Sc 10, ch 15, skip 10, sc 20, ch 15, skip 10, sc 10. Join.
Round 32: Sc around, working into chains for handles.
Finish off and weave in ends.
Would you like me to format this into a PDF printable pattern (with measurements and diagrams)?
I can also include photos or illustrations for each step.
Watch tutorial: