 by
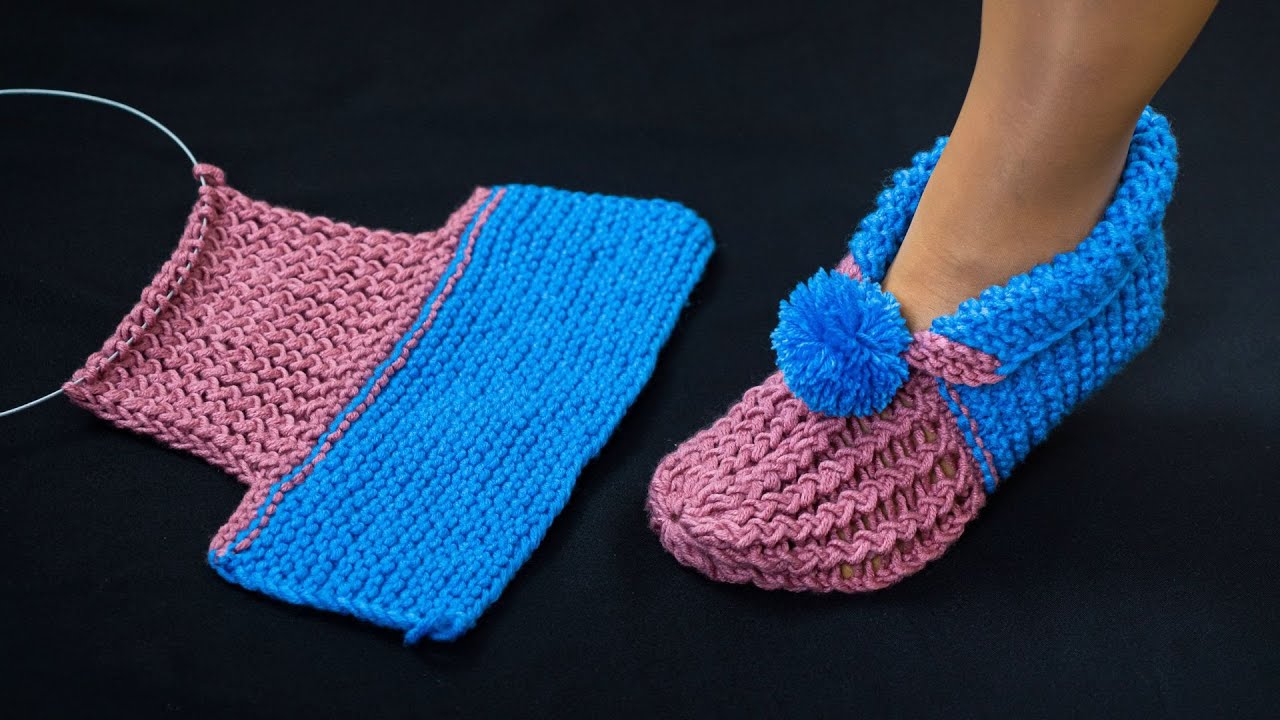
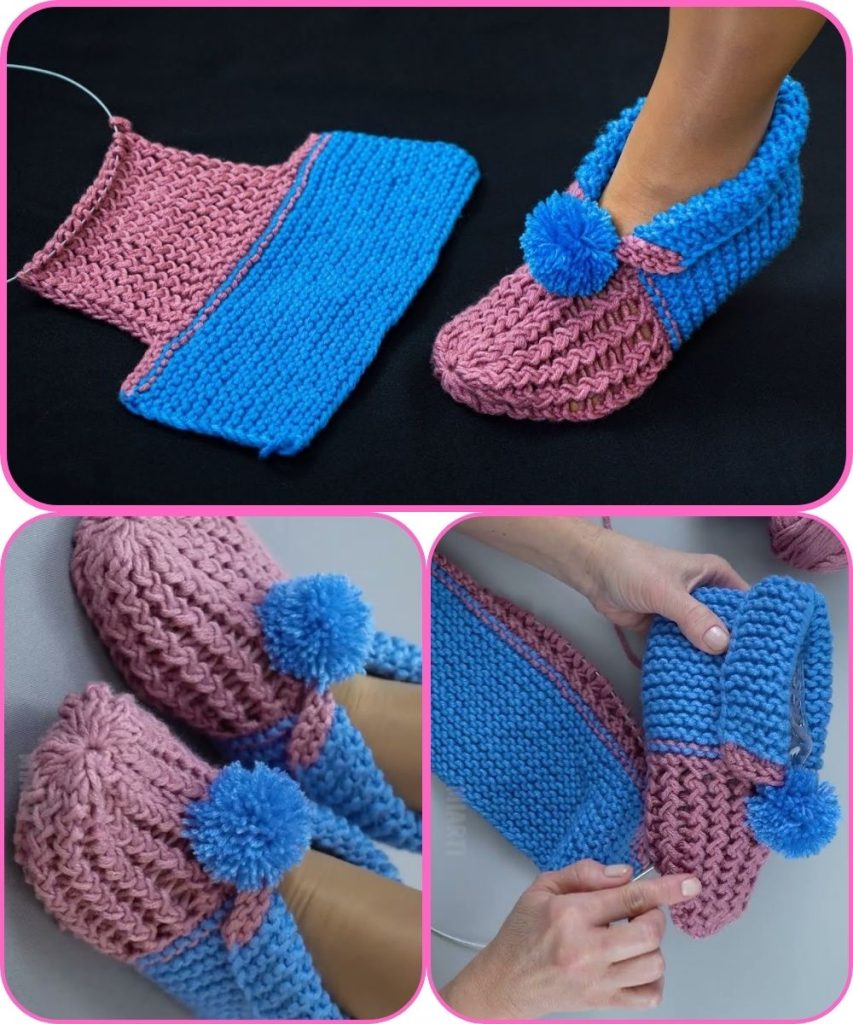
by Absolutely! Let’s make this super easy knitted slippers guide. I’ll give you a step-by-step method suitable for beginners, no fancy stitches required. These slippers are cozy, quick to knit, and customizable.
Materials Needed:
- Yarn: Medium-weight (worsted) yarn, about 100–150g depending on size.
- Knitting needles: Size recommended on your yarn label (usually US 8 / 5mm).
- Scissors
- Tapestry needle (for sewing seams)
- Optional: Non-slip sole fabric or hot glue for extra grip
Step 1: Cast On Stitches
- Decide on the slipper size:
- Small (Women’s 5–6): 28 stitches
- Medium (Women’s 7–8 / Men’s 6–7): 32 stitches
- Large (Women’s 9–10 / Men’s 8–9): 36 stitches
- Use a simple long-tail cast-on method. Make sure the cast-on row is snug but not tight.
Step 2: Knit the Foot Section
- Work in garter stitch (knit every row) until the piece is as long as your foot from heel to toe, minus about 2 inches.
Example: For size Medium, knit ~9 inches.
Tip: Garter stitch makes the fabric stretchy and comfy.
Step 3: Shape the Toe
- Divide stitches into 2 equal halves.
- Decrease rows for toe shaping:
- Row 1: Knit 2 together at the beginning and end of the row
- Row 2: Knit all stitches
- Repeat Row 1 and 2 until ~6–8 stitches remain.
- Cut yarn, leaving a 6-inch tail.
Step 4: Finish the Toe
- Thread the tail through the remaining stitches using a tapestry needle.
- Pull tight to close the toe and secure with a knot.

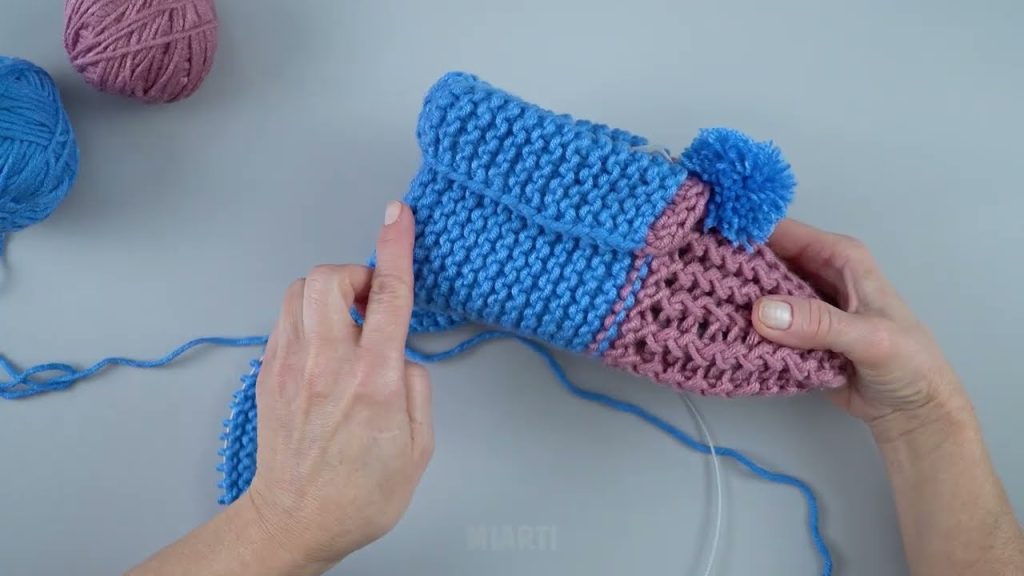
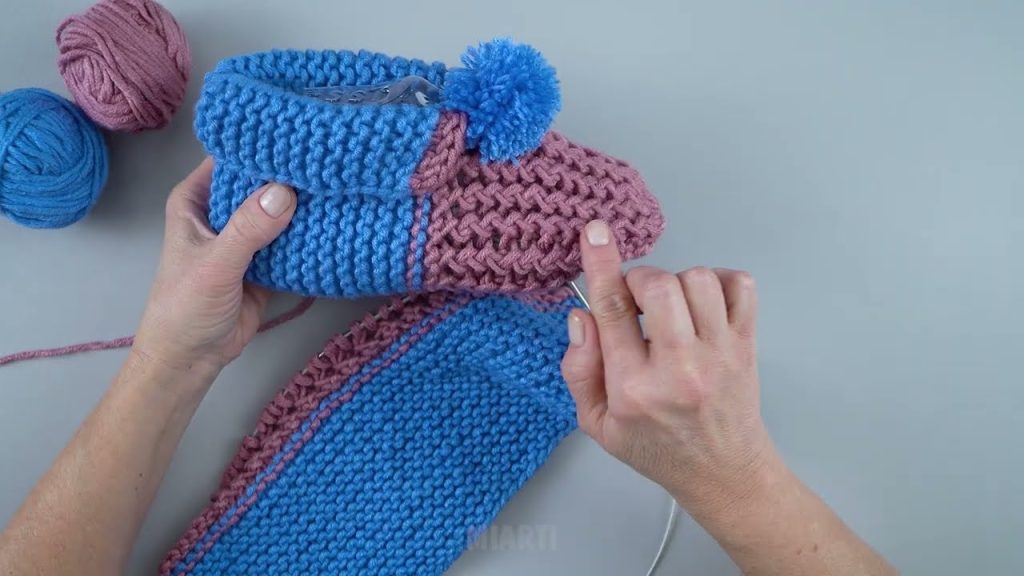
Step 5: Sew the Slipper
- Fold the piece in half lengthwise so toe meets heel.
- Using mattress stitch or simple whip stitch, sew the side seam from the toe to the heel.
Optional: Leave the back open for a slipper sock style.
Step 6: Add Optional Sole or Trim
- You can sew on a felt or non-slip fabric to the bottom for extra grip.
- Optional: Add a small ribbed cuff at the ankle by picking up stitches around the opening and knitting 1×1 rib for 1–2 inches.
Step 7: Repeat for Second Slipper
- Make sure both slippers are identical in size.
- Weave in all loose ends.
✅ Tips for Beginners:
- Use a smooth yarn in a bright color; mistakes are easier to see and fix.
- Keep your tension even; too tight = hard to fit, too loose = floppy slipper.
- Garter stitch is very forgiving, so don’t stress about perfection.
If you want, I can draw a simple diagram showing each step for visual guidance—it makes this pattern even easier to follow for beginners.
Watch tutorial: