by
by Absolutely! Let’s make this fun and practical. I’ll guide you through how to knit a very simple hat while incorporating an interesting stitch pattern that’s beginner-friendly but looks impressive. I’ll break it down step by step.
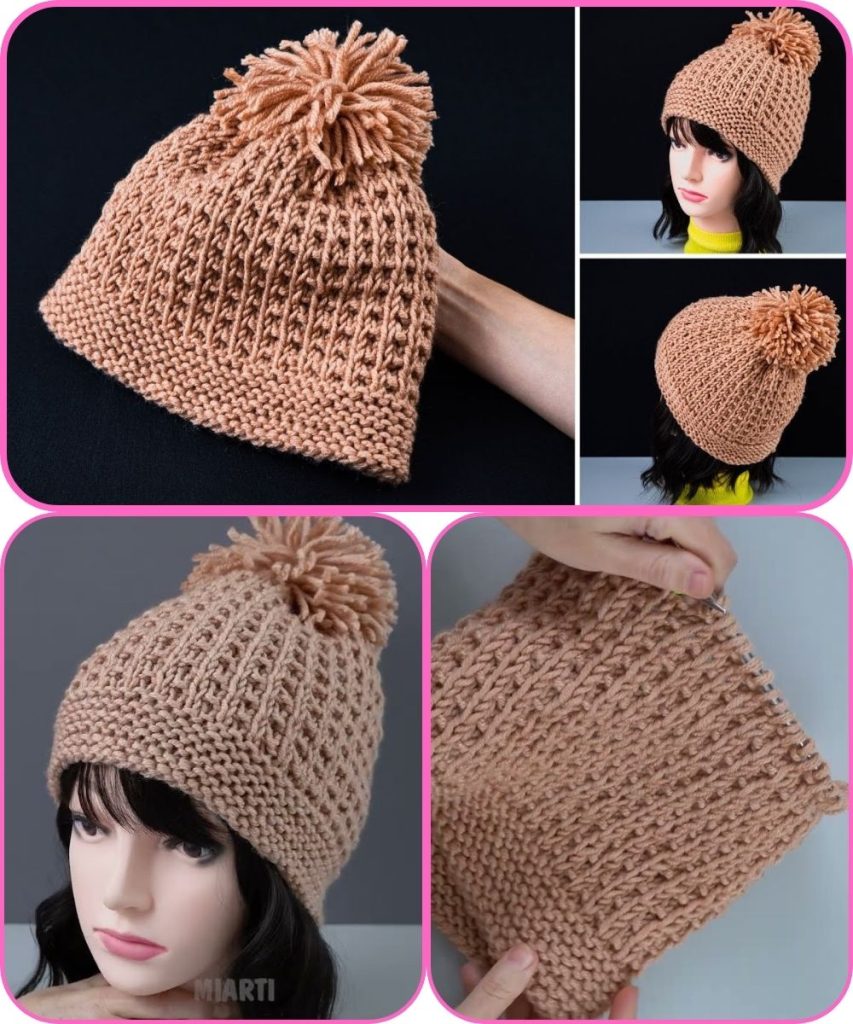
Materials Needed
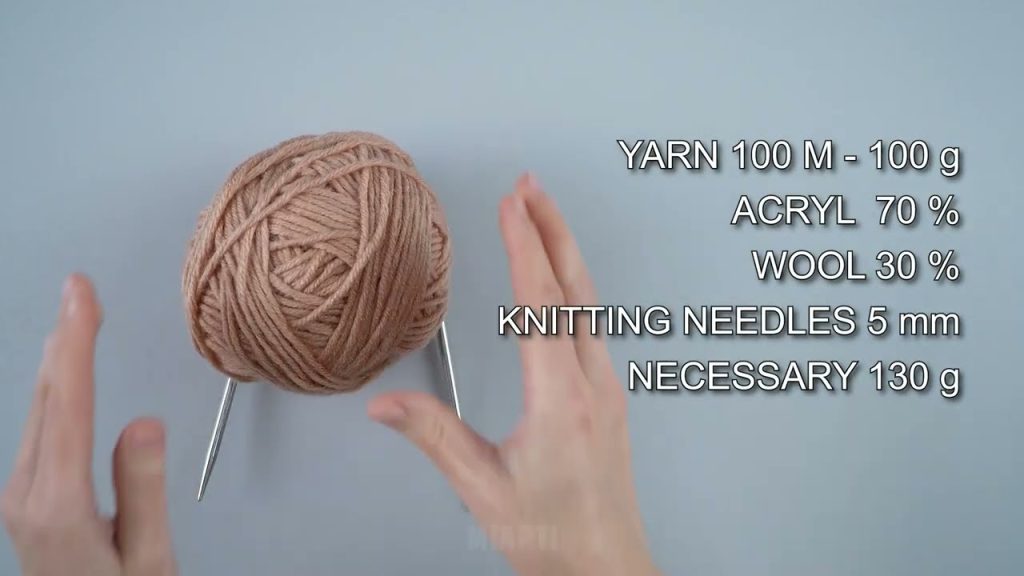
- Yarn: Medium-weight (worsted) yarn, about 100–150g.
- Needles: Circular needles, 16 inches, size US 8 (5mm) or size appropriate for your yarn. You can also use double-pointed needles for the crown.
- Notions: Stitch marker, tapestry needle, scissors.
Step 1: Cast On
- Determine your hat size: Adult hats usually need 80–100 stitches, depending on gauge.
- Cast on 80 stitches (adjust for smaller/larger heads).
- Join in the round carefully, making sure not to twist stitches.
- Place a stitch marker at the beginning of the round.
Step 2: Ribbing (Bottom Edge)
- Knit 1×1 ribbing (K1, P1) for about 1.5–2 inches.
- This creates a stretchy, neat edge that hugs the head.
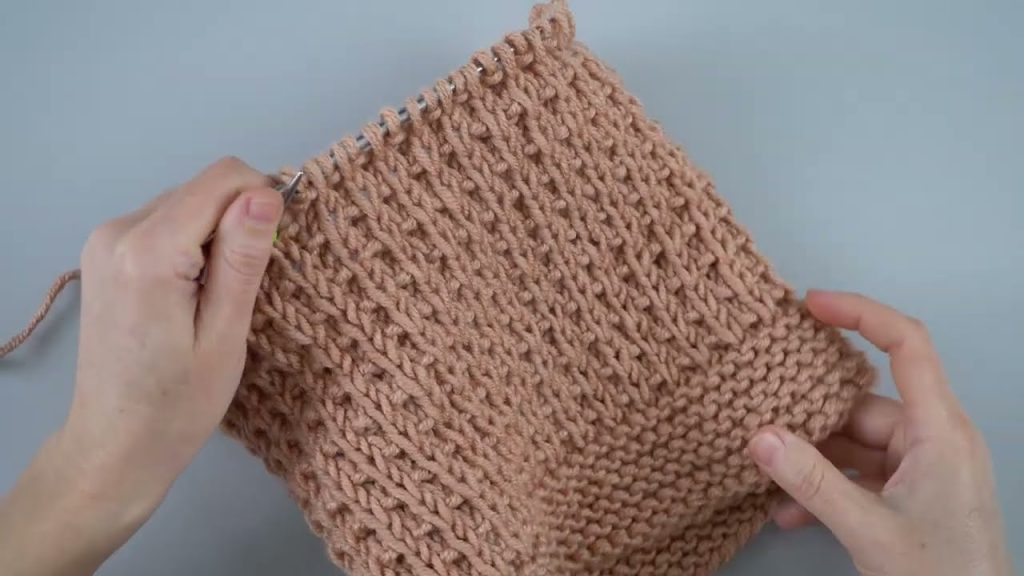
Step 3: The Interesting Stitch Pattern
Here’s a simple but elegant pattern called “Twisted Rib Stitch”, which gives a nice texture without being too complicated:
Pattern Instructions:
- Round 1: Knit 1 through the back loop (Ktbl), Purl 1 around
- Round 2: Knit 1, Purl 1 through the back loop (Ptbl) around
Repeat Rounds 1–2 until the hat measures 6–7 inches from the cast-on edge, depending on desired slouchiness.
Tip: Twisting stitches slightly changes the texture, giving the hat a subtle braided look.
Step 4: Shaping the Crown
To finish the hat, you’ll decrease for the crown:
- Round 1: K8, K2tog around
- Round 2: Knit all
- Round 3: K7, K2tog around
- Round 4: Knit all
- Continue this pattern, decreasing by 1 knit stitch between K2tog each decrease round until 8–10 stitches remain.
Step 5: Finishing
- Cut the yarn, leaving a 6–8 inch tail.
- Thread the tail through a tapestry needle and pull through the remaining stitches.
- Pull tight to close the top of the hat.
- Weave in all ends.
Optional Enhancements
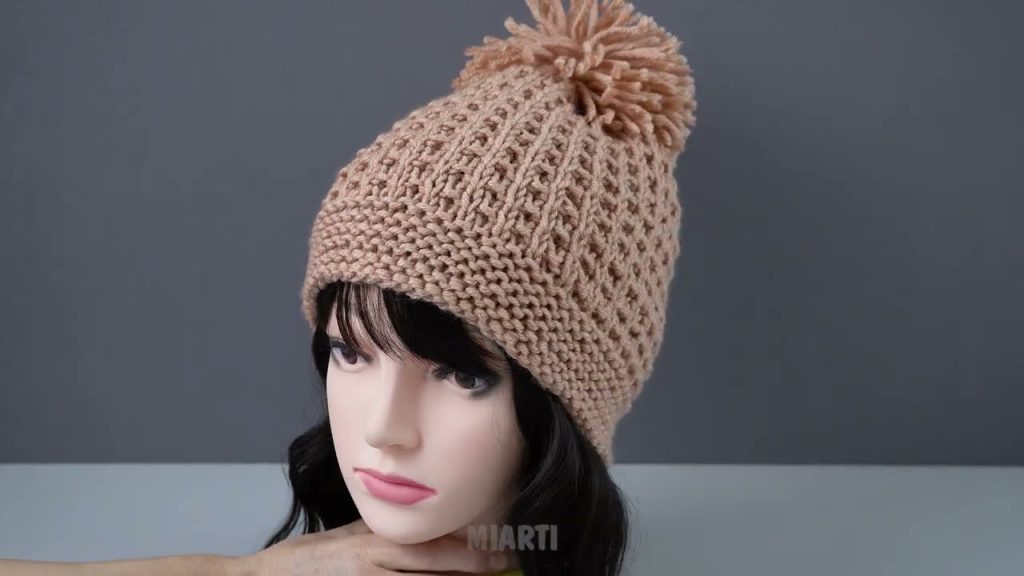
- Add a pom-pom for a playful touch.
- Try using two colors: alternate them every 2 rounds in the twisted rib stitch for a striped effect.
- Experiment with longer twisted sections for a slightly different texture.
This hat is beginner-friendly, quick to knit, and the twisted rib gives it a “fancy” stitch effect without complicated maneuvers like cables or lace.
If you want, I can draw a simple stitch diagram for the twisted rib hat to make it super easy to follow visually.
Watch tutorial: