 by
by Sure! Let’s go step-by-step through how to crochet a bag with a round flap and a convex (raised) pattern — perfect for an elegant, textured accessory. This guide is detailed enough for confident beginners to intermediates.
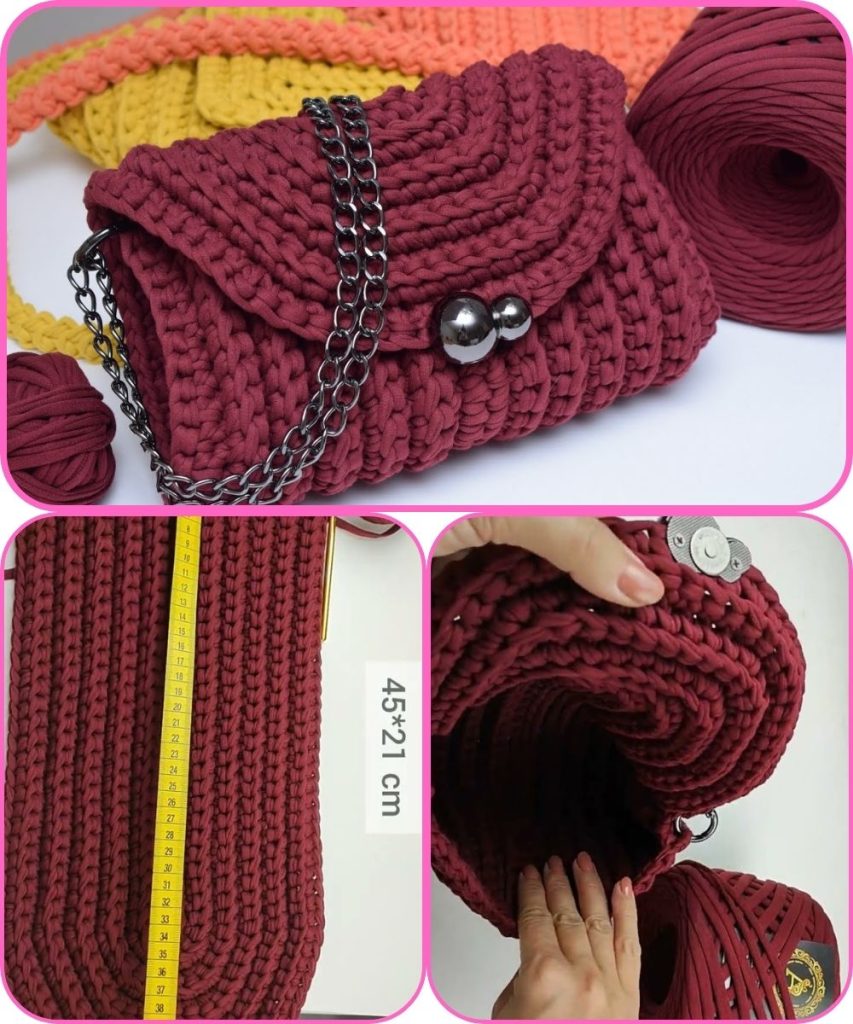
🧶 Project: Crochet Bag with Round Flap and Convex Pattern
✨ Overview
You’ll make a rectangular or oval-shaped bag body with a round flap that features a convex (raised or puffed) stitch pattern — such as bobbles, popcorn, or front-post stitches — for beautiful texture. The bag can be finished with a lining and a strap.
🧰 Materials Needed
| Item | Description |
|---|---|
| Yarn | Medium-weight cotton or acrylic yarn (Category 4) — about 250–300g |
| Crochet hook | 4 mm (or size suitable for your yarn) |
| Stitch markers | To mark the beginning of rounds |
| Tapestry needle | For weaving ends and sewing pieces |
| Lining fabric (optional) | For durability |
| Magnetic snap or button | For closure |
| Bag strap | Crochet, chain, or leather strap |
| Scissors | Standard crafting scissors |
🧩 Step-by-Step Instructions
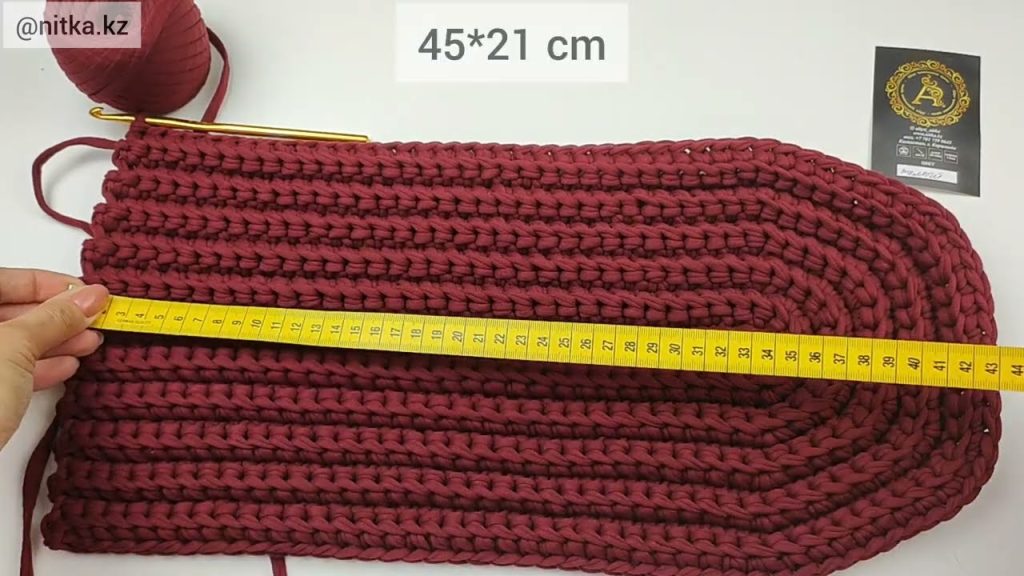
Step 1: Make the Base of the Bag
You can choose a rectangle or oval base, depending on your desired shape.
Oval Base (recommended for round flap):
- Chain 31 (adjust for desired width).
- Round 1: Work 1 sc in the 2nd ch from hook, 1 sc in each chain across. In the last ch, work 3 sc to turn the corner.
Continue along the opposite side of the foundation chain, working 1 sc in each stitch, and 3 sc in the last stitch.
Join with a slip stitch to the first sc. (Total: 64 sc approx.) - Round 2: Chain 1, 1 sc in each stitch, increase (2 sc in one stitch) at each curve corner (the 3 corner stitches).
Continue until desired base size (usually 3–5 rounds).
This creates a flat bottom.
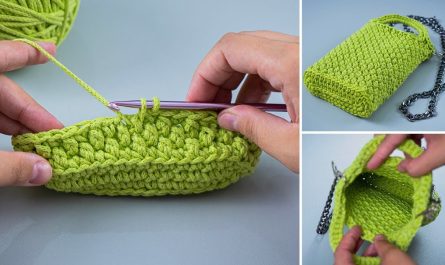
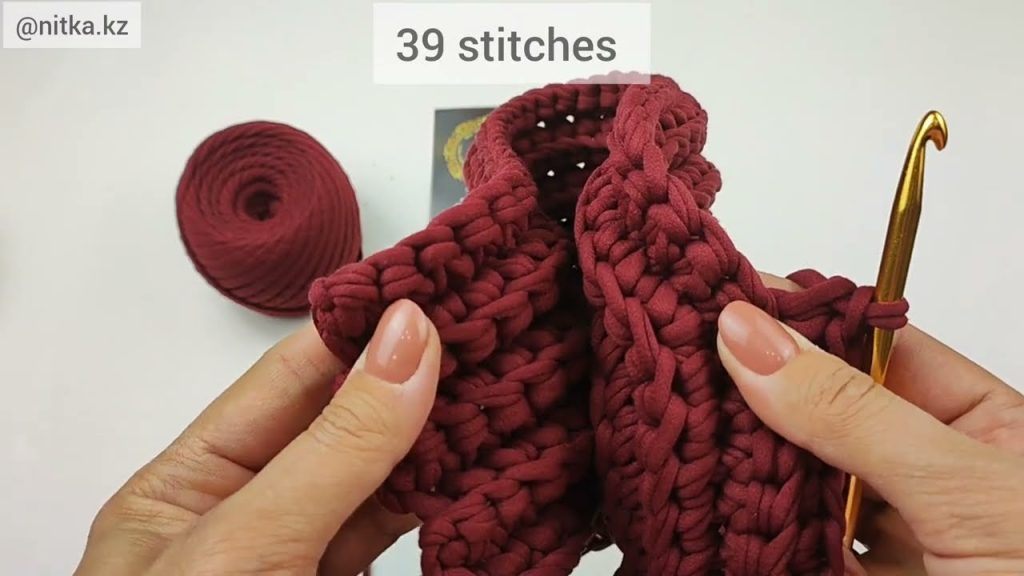
Step 2: Build Up the Body
Now you’ll work in rounds without increasing.
- Round 1 (Side walls): Work 1 sc in the back loops only (BLO) all the way around — this helps the sides turn upward. Join with a slip stitch.
- Next rounds: Work 1 sc (or hdc for taller sides) in each stitch around until the bag reaches your desired height (about 15–20 cm for a medium bag).
💡 Optional: Add a stripe or color change midway for decoration.
Step 3: Crochet the Round Flap
The flap is crocheted separately and attached at the back of the bag.
- Start: Magic ring, chain 2 (doesn’t count as stitch).
- Round 1: Work 10 dc in the ring. Join with a slip stitch.
- Round 2: Chain 2, 2 dc in each stitch around (20 dc).
- Round 3: Chain 2, 1 dc in next stitch, 2 dc in next stitch — repeat (30 dc).
- Continue increasing evenly (adding 10 dc per round) until the flap is the width of your bag (usually 14–16 cm diameter).
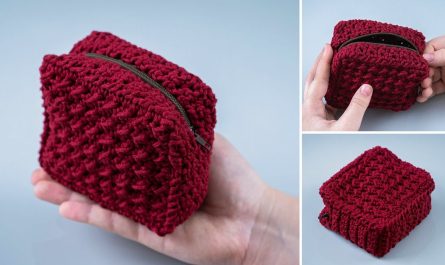
Step 4: Add the Convex (Raised) Pattern to the Flap
You can use several stitch patterns to create a convex effect:
Option 1: Front Post Double Crochet (FPDC) Texture
- Alternate rows of front post dc and back post dc to create raised ridges.
Option 2: Popcorn Stitch Pattern
- Example repeat:
Round X: *1 dc, 1 popcorn stitch in next stitch* — repeat around.Popcorn = 5 dc in same stitch, remove hook, insert into first dc, pull loop through to close.
Option 3: Bobbles or Puff Stitches
- For bobbles: Work 4–5 unfinished dc in same stitch, yarn over, pull through all loops.
- Create a pattern such as alternating bobbles every few stitches for a dotted convex look.
Continue the texture for 3–5 rounds in the center or across the whole flap.
Step 5: Edging the Flap
- When the flap is complete, work one round of single crochet around the edge for a clean finish.
- Add a buttonhole loop (chain space) at the bottom center of the flap if you’re using a button.
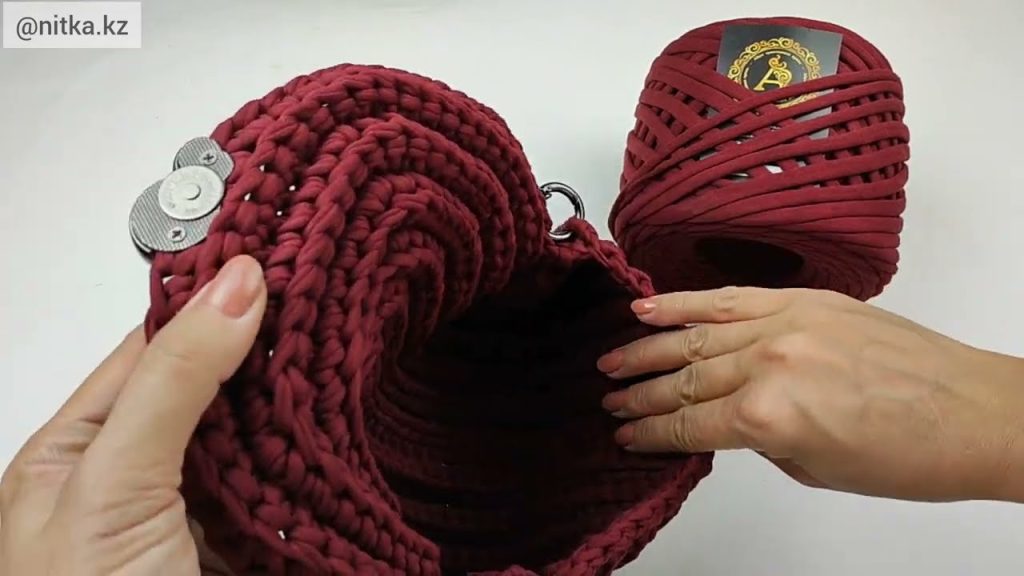
Step 6: Attach the Flap
- Align the top of the bag body with the straight edge of the flap.
- Sew the flap to the back upper edge using a tapestry needle and matching yarn.
Step 7: Add Finishing Touches
- Closure: Sew a button or attach a magnetic snap.
- Strap: Crochet a long chain (about 100–120 cm), then sc across it to make it sturdier — or attach a ready-made strap.
- Lining (optional): Sew a fabric lining slightly smaller than the bag and hand-stitch it inside.
- Block (optional): Steam or shape your bag gently to smooth out edges.
🪡 Stitch Pattern Ideas for the Convex Flap
| Pattern | Texture Level | Description |
|---|---|---|
| Front Post/Back Post DC | Moderate | Ribbed and raised lines |
| Popcorn Stitch | Strong | Dense, rounded puffs |
| Bobbles | Medium | Small, raised dots |
| Puff Stitches | Light | Softly raised, airy feel |
| Cabled Front-Post Pattern | High | Twisting raised pattern, advanced look |
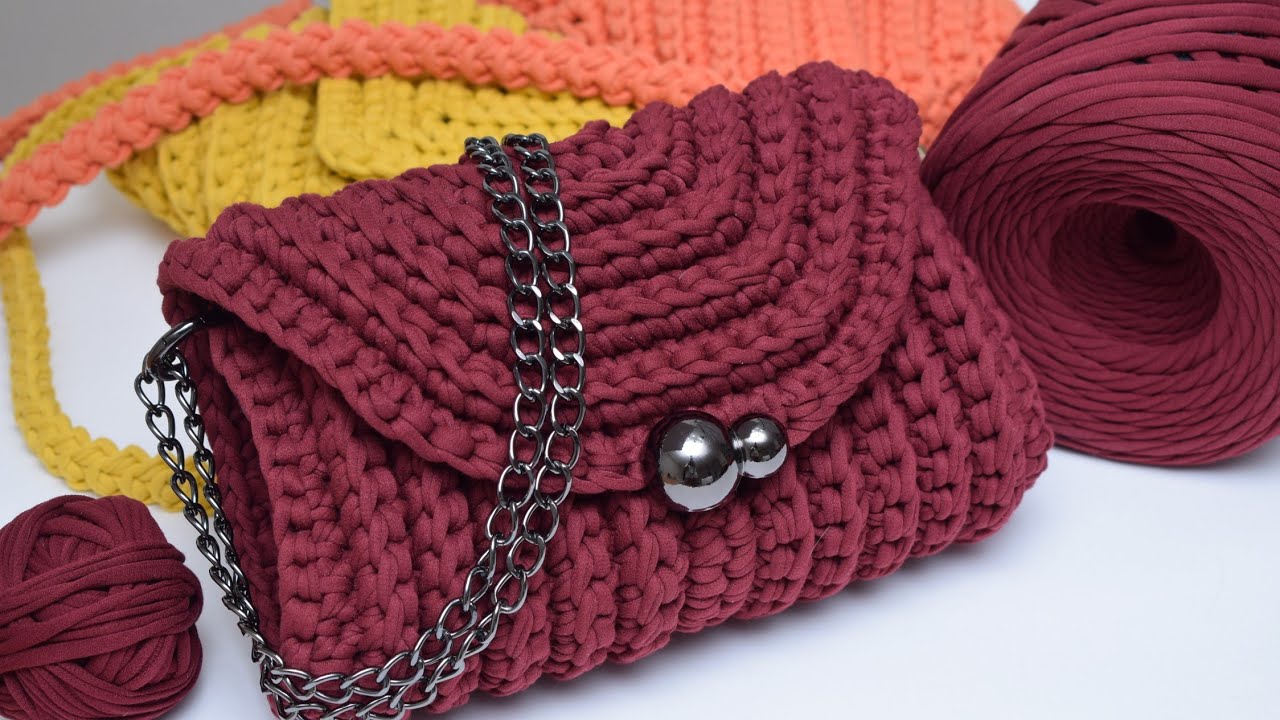
🌼 Customization Ideas
- Use contrasting colors for flap and body.
- Add a leather tag or tassel.
- Crochet a matching mini pouch or coin purse.
- Use shiny yarn or metallic thread for an elegant finish.
Would you like me to include a written pattern sample (with stitch abbreviations and row-by-row instructions) using a specific convex stitch (like bobble or puff)? I can generate a ready-to-use pattern version.
Watch tutorial: