 by
by Absolutely! Let’s create a detailed, beginner-friendly tutorial for making simple crochet slippers. I’ll break it down step by step with explanations, tips, and even a stitch guide. This project is perfect for beginners because it uses basic stitches and works up quickly.
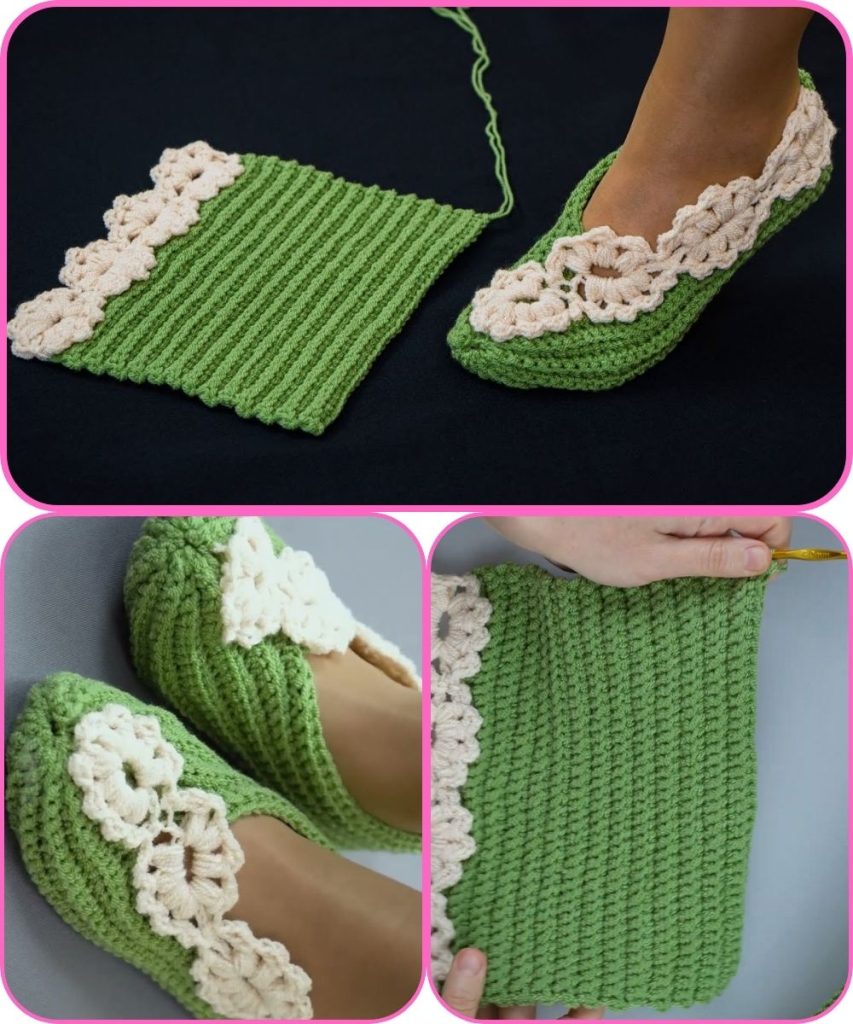
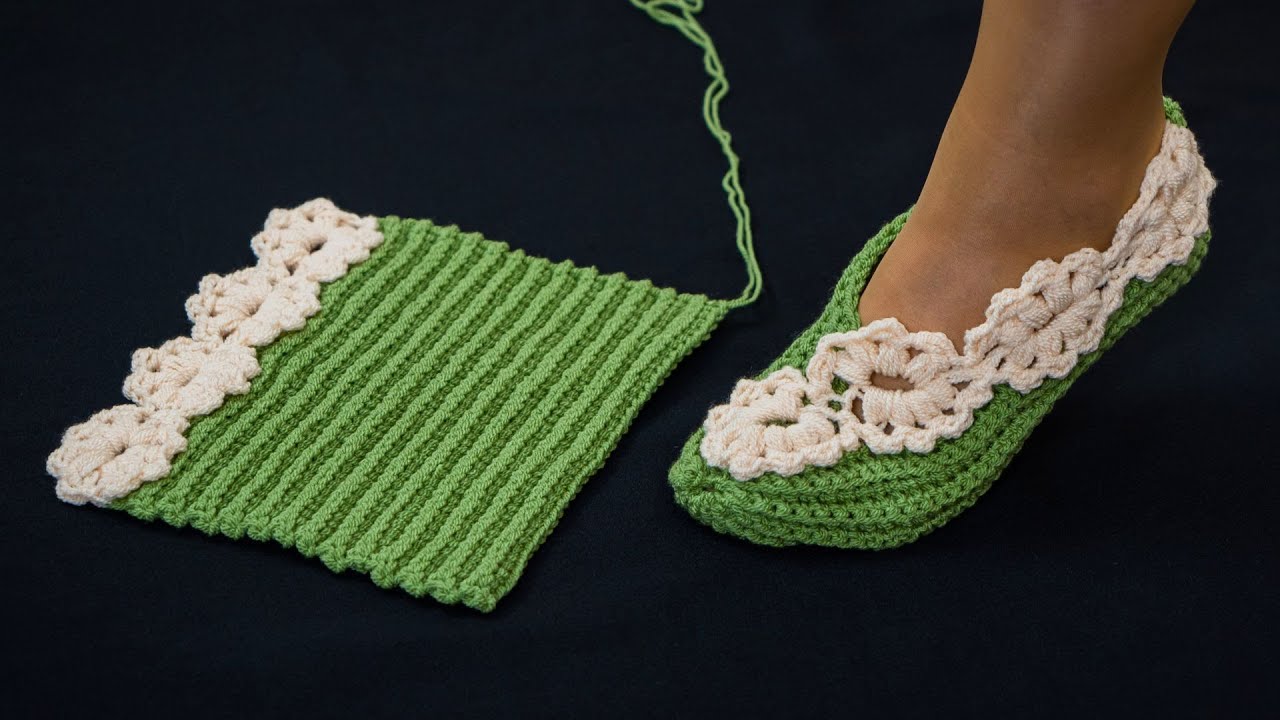
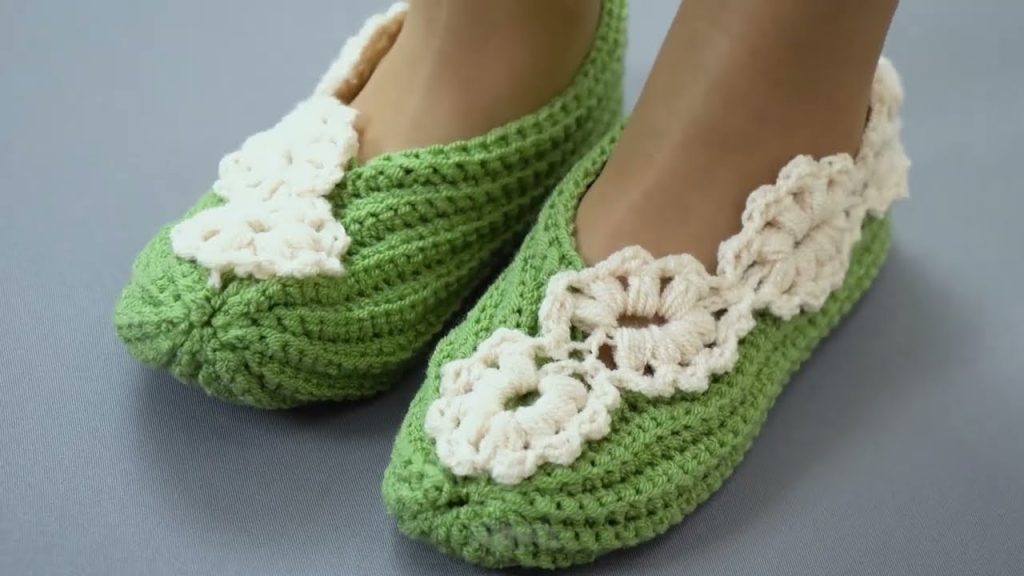
How to Make Simple Crochet Slippers for Beginners
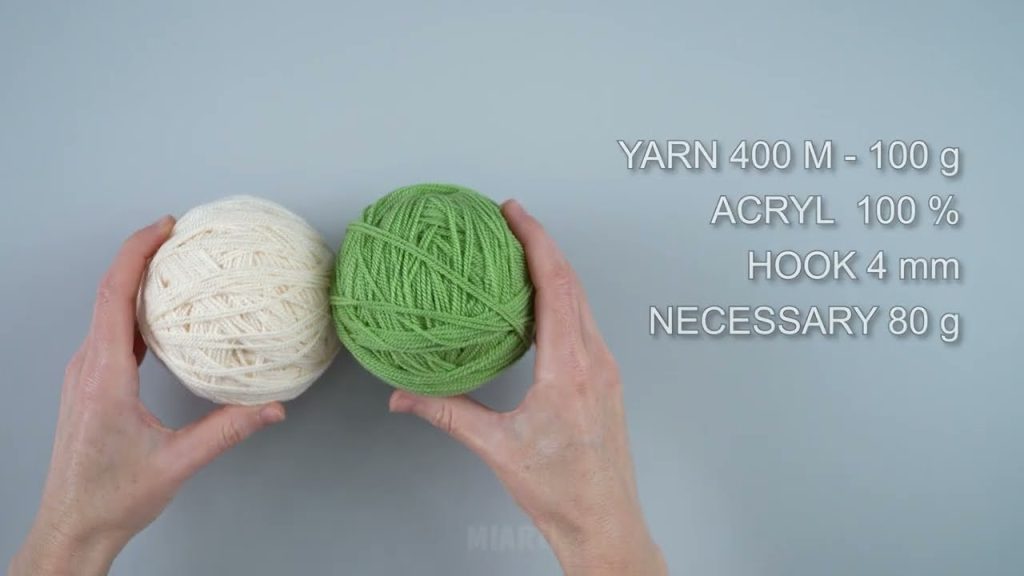
Materials Needed:
- Yarn: Medium-weight (worsted) yarn. Acrylic is great for beginners.
- Crochet Hook: Size H/5mm (or suitable for your yarn).
- Scissors
- Tapestry Needle: For weaving in ends.
- Optional: Stitch marker to mark rounds.
Abbreviations:
- ch = chain
- sl st = slip stitch
- sc = single crochet
- hdc = half double crochet
- dc = double crochet
- st(s) = stitch(es)
Step 1: Make the Sole
The sole is the base of your slipper. You will crochet it flat.
- Chain the Base Length:
- Chain 11 for a small size (adjust for larger sizes: 12–15 chains for medium/large).
- First Row:
- In the second chain from the hook, sc.
- Sc in each chain across.
- At the end, chain 1 and turn.
- Increasing for the Toe:
- Sc in the first stitch, then 2 sc in the next stitch.
- Sc across until 2 sc in the last stitch.
- Turn.
- Repeat this row until the sole reaches the desired width for your foot.
- Continue the Sole:
- Work straight rows of sc until the sole length is suitable for your foot.
- Finish Sole:
- Optionally, add a round of sc around the edge for stability.
Step 2: Crochet the Top of the Slipper
The top can be a simple single crochet rectangle that will be attached to the sole.
- Start from the Toe:
- Attach yarn at the toe of the sole.
- Chain 1, sc evenly across the first row of the sole.
- Build the Top:
- Work in sc, increasing slightly at the first and last stitch if needed to create a rounded shape over the toes.
- Continue sc rows until the top piece reaches just before your ankle.
Step 3: Shape the Heel
- Fold the slipper so the top meets the sole at the heel.
- Slip stitch or sc the sides together to close the heel.

Step 4: Finish the Edge
- Work one round of sc around the top opening of the slipper for a neat finish.
- You can also add a small decorative border using hdc or dc stitches.
Step 5: Weave in Ends
- Use a tapestry needle to weave in all loose ends.
- Trim excess yarn.
Tips for Beginners:
- Try on as you go: Helps adjust size for comfort.
- Use stitch markers: Mark the beginning of rounds to keep your shape consistent.
- Keep tension consistent: Too tight will make the slipper stiff; too loose will make it floppy.
- Experiment with yarn: Soft yarns make cozier slippers.
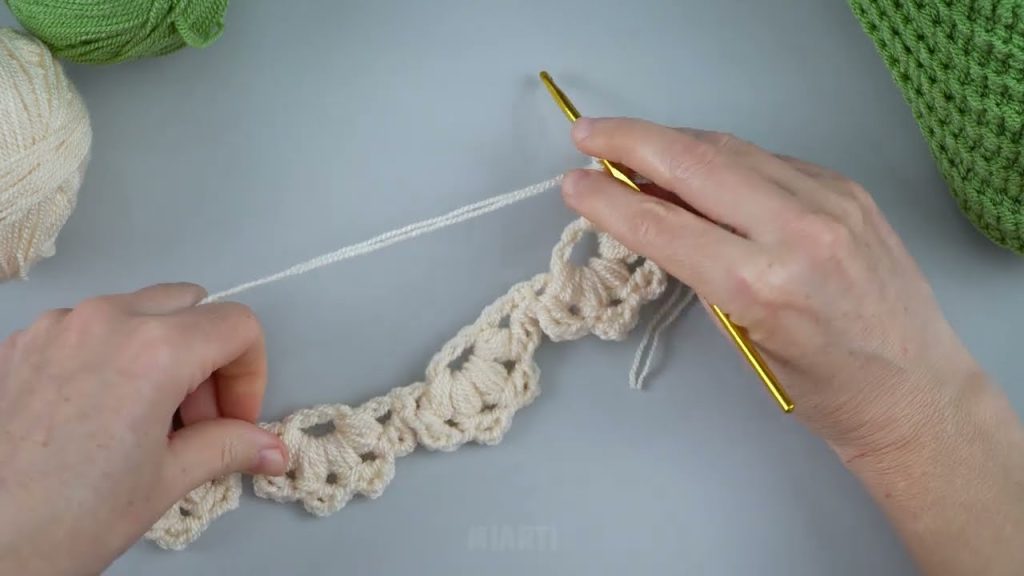
Optional Decorations:
- Add a bow, button, or pom-pom on the top.
- Use contrasting yarn for edging.
This simple slipper pattern is customizable—you can make them as short as a slipper sock or as high as an ankle boot.
If you want, I can also draw a visual step-by-step diagram showing how the sole, top, and sides are worked. It makes this MUCH easier for beginners to follow.
Watch tutorial: