 by
by Here is a clear, detailed, and beginner-friendly guide you can use for a project, homework, or blog-style writing.
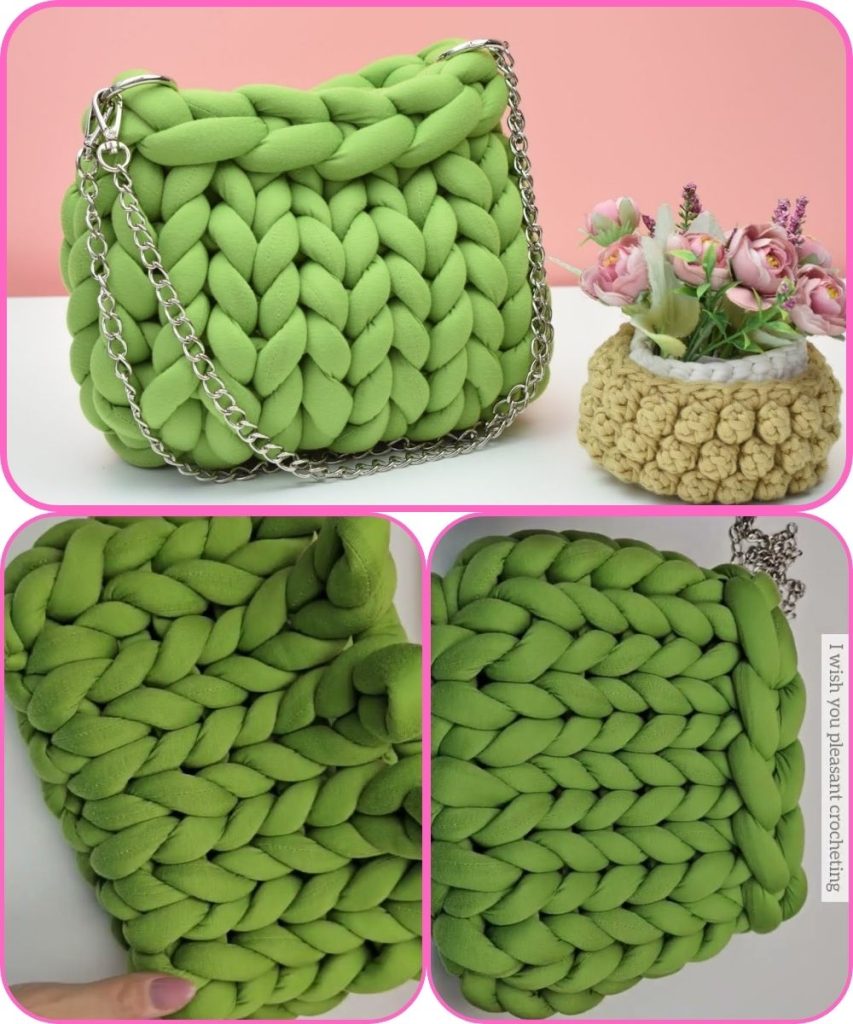
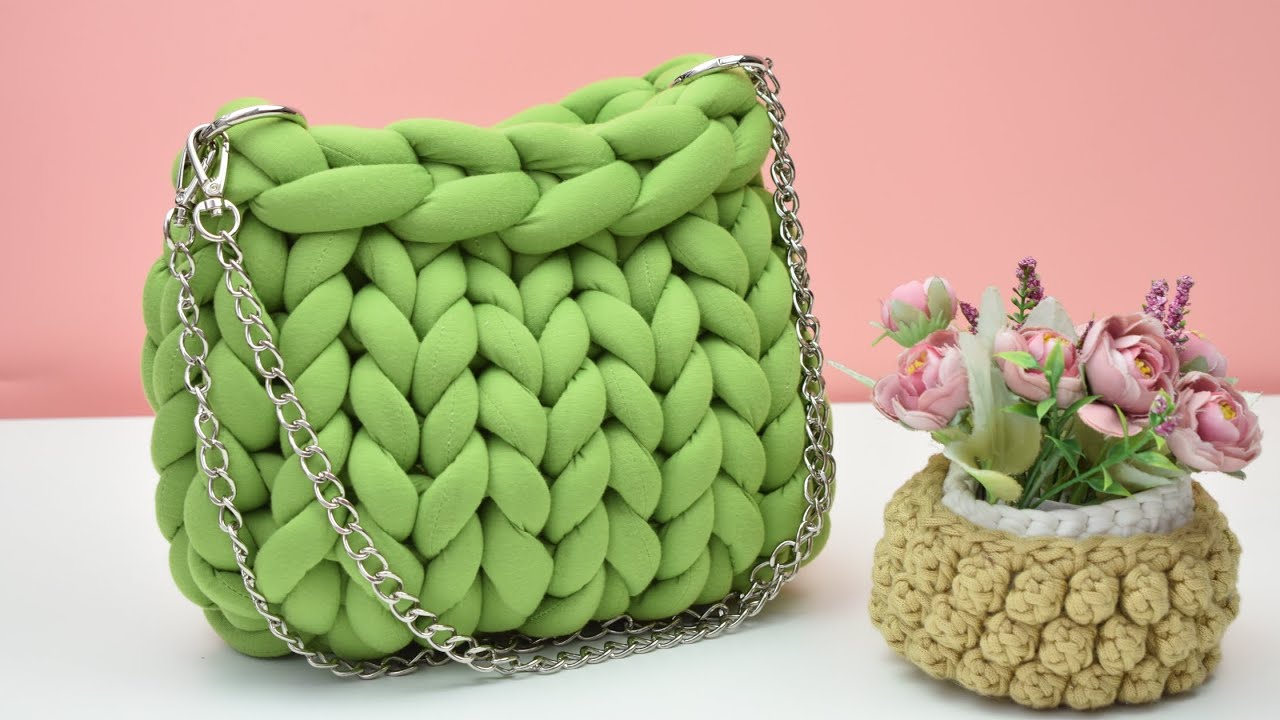
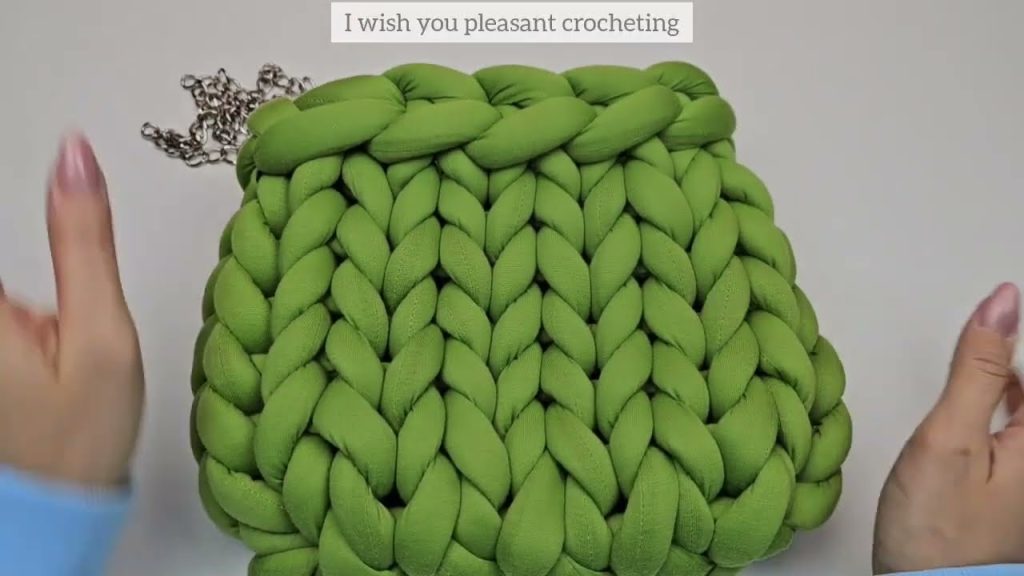
How to Make Hand Knitting: A Quick Bag Made from Tubular Yarn
Hand knitting is a fun and simple craft that allows you to create beautiful items using only your hands—no needles required. One of the easiest and most popular hand-knitting projects is a quick bag made from tubular yarn. This type of yarn is soft, thick, and easy to work with, making it perfect for beginners.
Materials Needed
To make a hand-knitted bag, you will need:
- Tubular yarn (also called tube yarn or chunky yarn) – about 1–2 skeins, depending on the bag size
- Scissors
- A flat surface (table or clean floor)
- Optional: lining fabric, needle, and thread (for finishing)
What Is Tubular Yarn?
Tubular yarn is a thick, hollow yarn that feels soft and flexible. Because of its size, it creates large stitches quickly, allowing you to finish a bag in a short amount of time. It is also lightweight but strong, which makes it ideal for bags.

Step-by-Step Instructions
Step 1: Make a Slip Knot
Start by creating a slip knot at the end of your yarn. This will be your first loop. Place it on your hand and gently tighten it so it is secure but not too tight.
Step 2: Create the Foundation Chain
Using your fingers, pull a new loop through the slip knot to create the next stitch. Continue pulling loops through loops until you have a long chain.
- For a small bag, make about 15–20 loops
- For a larger bag, make 25–30 loops
This chain will be the width of your bag.
Step 3: Start the First Row
Once your foundation chain is complete, begin the next row by pulling a loop through each stitch from the previous row. Work from one end to the other using your fingers. Keep the loops even in size for a neat look.
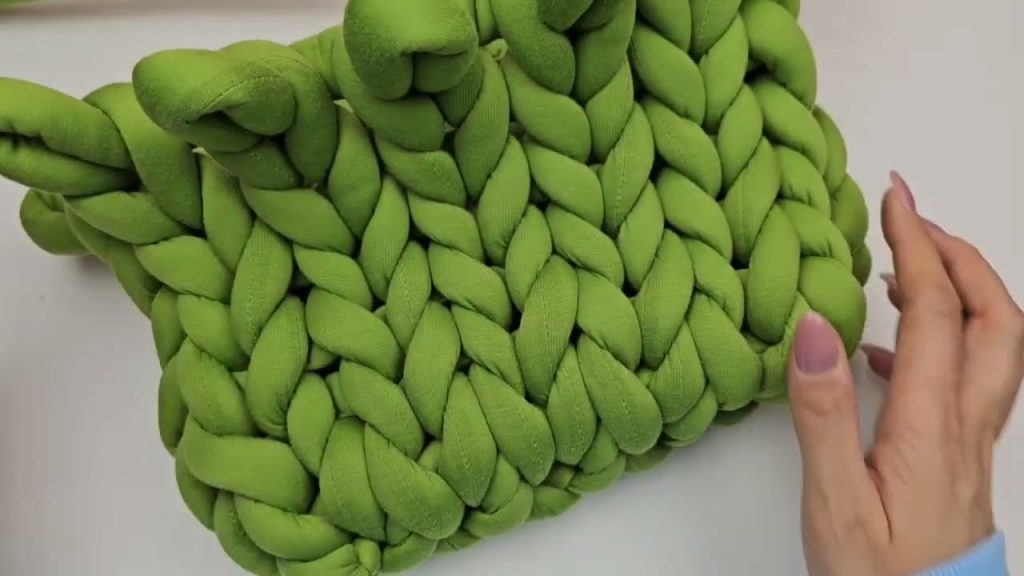
Step 4: Build the Body of the Bag
Continue hand knitting row by row. Each row adds height to your bag.
- Knit about 10–15 rows depending on how tall you want the bag to be.
Make sure your tension stays consistent so the bag holds its shape.
Step 5: Fold and Shape the Bag
When the desired height is reached, fold the knitted piece in half so it looks like a bag. The bottom fold will become the base.
Step 6: Close the Sides
Using the same yarn, stitch the sides together by pulling loops through the edges with your fingers. This creates a strong seam without needing a needle.
Step 7: Make the Handle
To create a handle:
- Attach yarn to one side of the bag
- Hand knit a chain long enough to fit comfortably over your hand or shoulder
- Secure the other end of the handle to the opposite side of the bag
You can make one long strap or two short handles.
Step 8: Finish Off
Cut the yarn, pull the end through the final loop, and tighten. Tuck in any loose ends by weaving them into the stitches with your fingers.
Optional Finishing Touches
- Add a fabric lining for extra strength
- Decorate with buttons, patches, or tassels
- Use a different color for the handle to add style
Tips for Beginners
- Work slowly and keep your stitches loose
- Practice with a small sample first
- Choose soft, stretchy tubular yarn for easier handling
Conclusion
Making a quick bag with hand knitting and tubular yarn is an enjoyable and creative project that requires minimal tools and time. It is perfect for beginners and results in a stylish, handmade bag that you can use or gift. With a little practice, you can experiment with different sizes, colors, and designs.
Watch tutorial: