 by
by Here’s a clear, beginner-friendly, detailed tutorial you can use for a blog post, school project, or crafting guide.
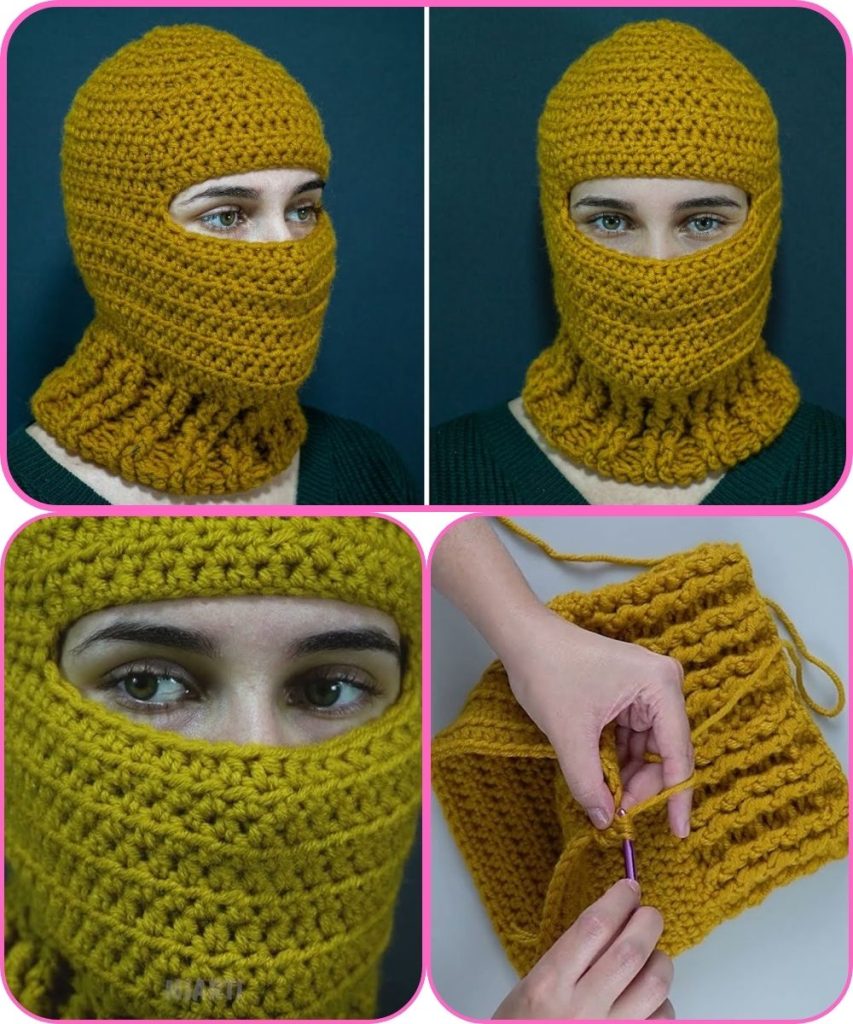
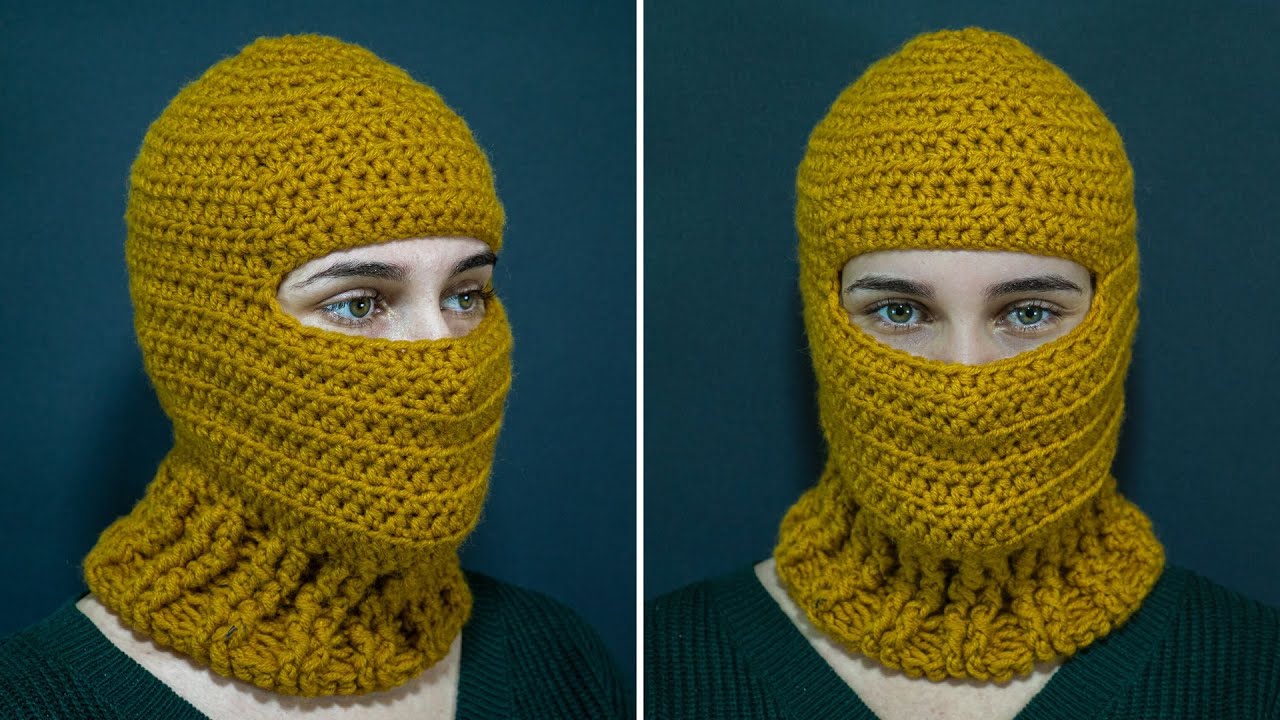
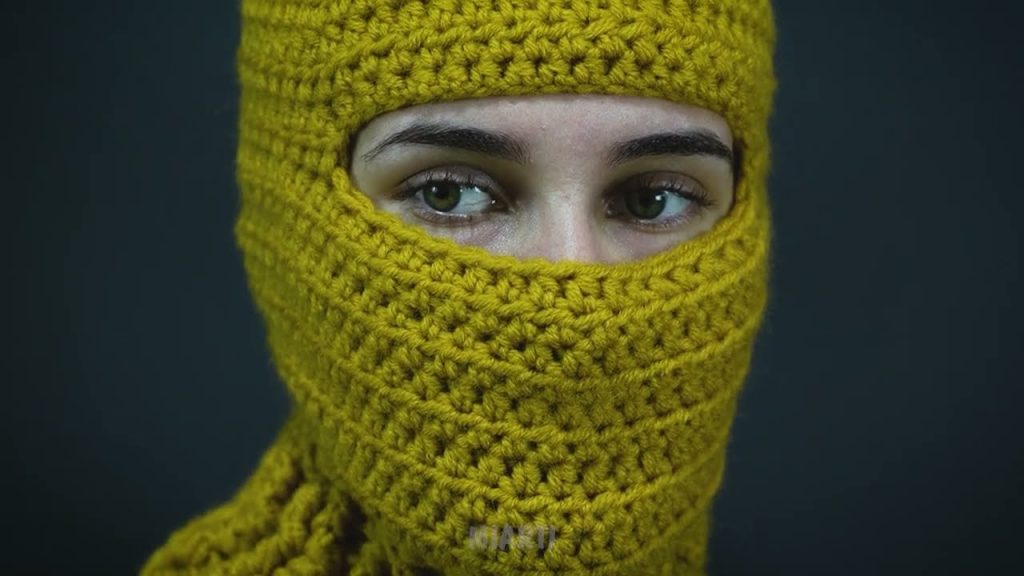
How to Make a Fashionable Crochet Balaclava Hat
A Simple Step-by-Step Tutorial for Beginners
Crochet balaclava hats have become a trendy fashion accessory, especially during colder seasons. They are cozy, stylish, and surprisingly easy to make—even if you’re a beginner! This tutorial will guide you through creating a simple, fashionable crochet balaclava using basic stitches and techniques.
🧶 What Is a Balaclava?
A balaclava is a type of hat that covers the head, neck, and sometimes part of the face. Modern crochet balaclavas are often worn as a fashion statement, with open face designs, soft yarn, and stylish colors.
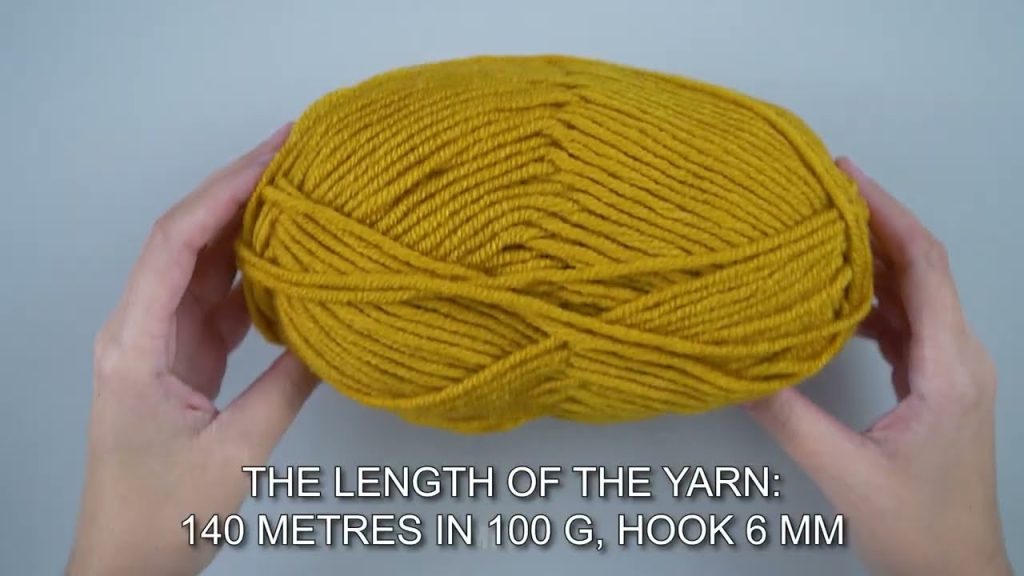
🧵 Materials You’ll Need
- Yarn: Medium-weight yarn (Category 4) is ideal for beginners
- Crochet Hook: 5.0 mm or 5.5 mm (check your yarn label)
- Scissors
- Yarn Needle: For weaving in ends
- Stitch Marker (optional): Helps keep track of rounds
🪡 Basic Stitches Used
This project uses beginner-friendly stitches:
- Chain (ch)
- Single Crochet (sc)
- Half Double Crochet (hdc) (optional for texture)
- Slip Stitch (sl st)
If you know these basics, you’re ready to start!
📏 Step 1: Measure and Chain
- Measure around the head opening (from chin to top of head and back to chin).
- Create a foundation chain that matches this measurement.
- Make sure the chain is not twisted, then join with a slip stitch to form a loop.
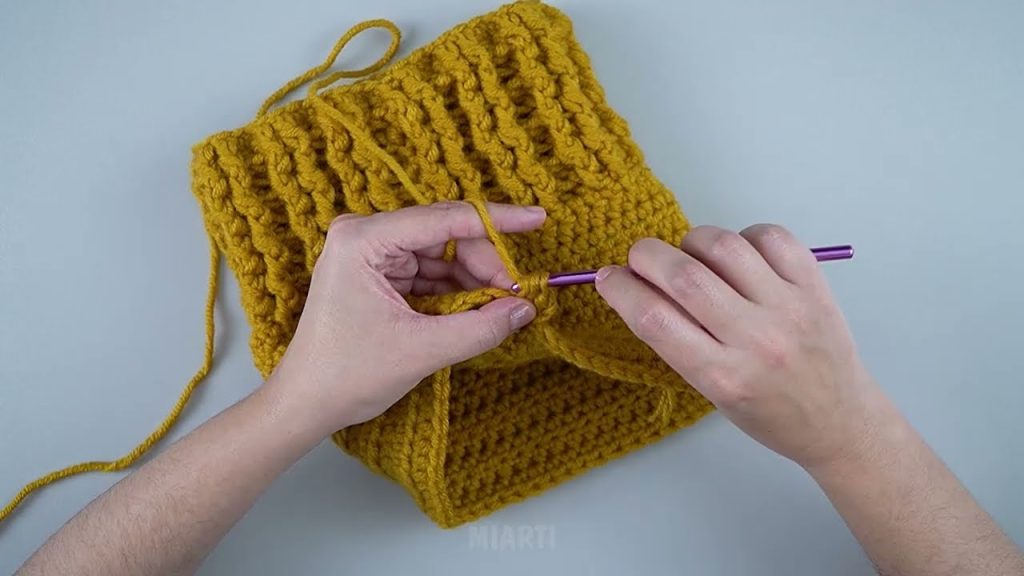
🧢 Step 2: Crochet the Head Section
- Chain 1 and work single crochet into each stitch around.
- Continue crocheting in rounds to build the hood shape.
- Try the piece on occasionally to check the fit.
- Stop once the hood covers the back of the head comfortably.
💡 Tip: Use half double crochet if you want a softer, stretchier look.
😊 Step 3: Create the Face Opening
- Decide how large you want the face opening.
- Crochet back and forth instead of joining rounds.
- Skip stitches in the center to form the opening.
- Continue until the opening feels comfortable around the face.
🧣 Step 4: Add the Neck Coverage
- Rejoin yarn at the bottom of the hood.
- Crochet in rounds to extend the fabric downward.
- This creates a cozy neck warmer effect.
- Stop when it reaches your desired length.
✨ Step 5: Finishing Touches
- Fasten off and cut the yarn.
- Use a yarn needle to weave in loose ends.
- Optional: Add ribbing, color changes, or decorative edges.
🎨 Style Tips
- Choose neutral colors for everyday wear or bright colors for a bold look.
- Chunky yarn creates a modern, cozy style.
- Add a folded edge around the face for extra warmth and style.
🌟 Final Thoughts
Making a crochet balaclava is a fun and rewarding project for beginners. It doesn’t require complicated patterns, and you can easily customize it to match your style. With a little patience and practice, you’ll have a fashionable handmade accessory you can proudly wear or gift!
Watch tutorial: