by
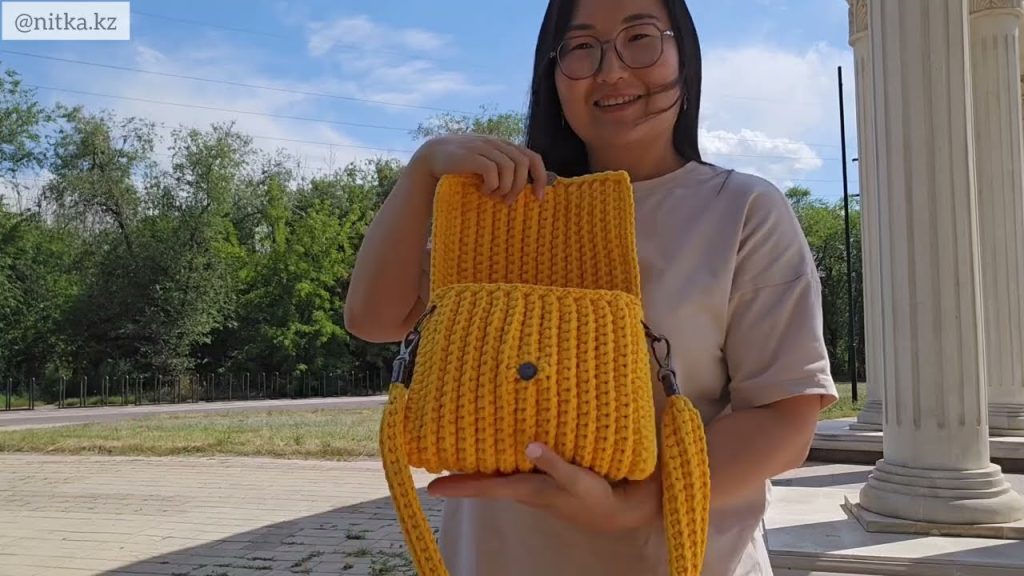
by Here’s a detailed step-by-step guide for making a simple crochet crossbody bag, perfect for beginners! This pattern uses basic stitches and a straightforward construction method: two panels sewn together with a strap added.
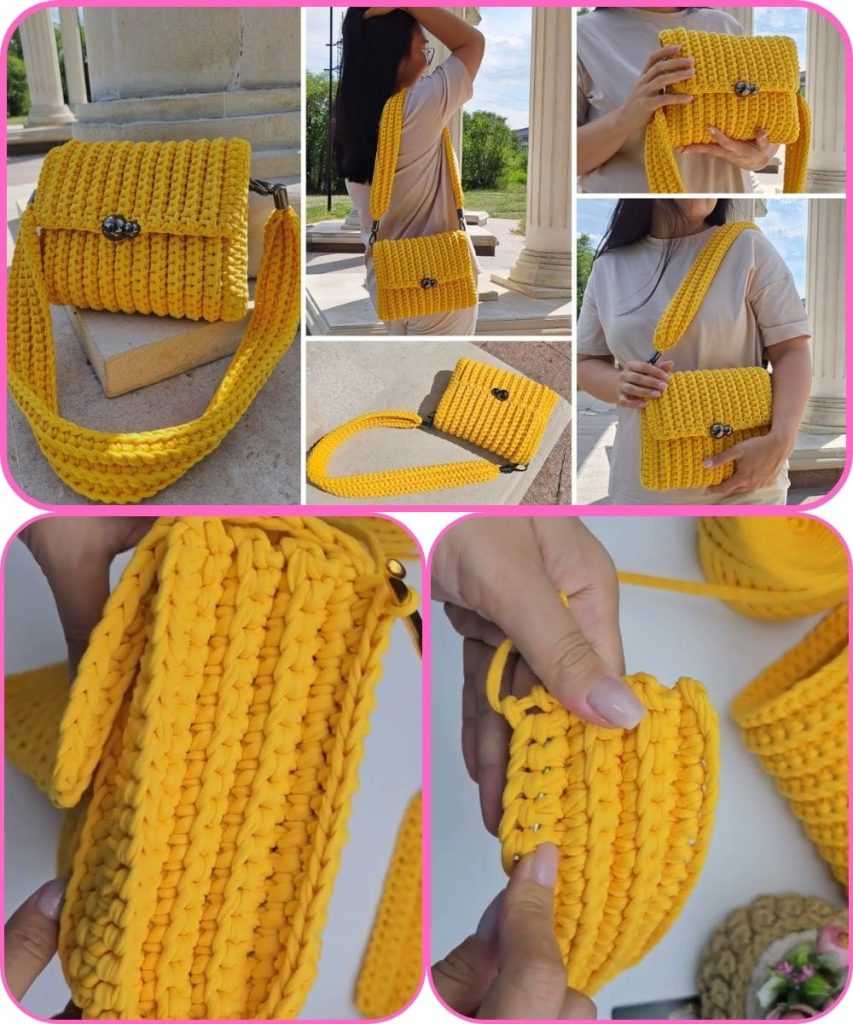
🧶 SIMPLE CROCHET CROSSBODY BAG PATTERN
✨ Finished Size (Approximate)
- Width: 8-9 inches (20-23 cm)
- Height: 6-7 inches (15-18 cm)
- Strap: Adjustable or fixed, around 40-50 inches (100-130 cm)
📋 Materials Needed:
- Worsted Weight Yarn (Category 4) – ~100g
- Crochet Hook – 4.0 mm (G) or 5.0 mm (H), depending on your tension
- Yarn needle – for sewing panels and weaving ends
- Scissors
- Optional: Button, zipper, or magnetic snap for closure
🧵 Crochet Stitches & Abbreviations:
- ch – chain
- sc – single crochet
- hdc – half double crochet
- sl st – slip stitch
- st(s) – stitch(es)
- RS/WS – right side/wrong side
🪡 Pattern Overview:
- Crochet 2 rectangles (front and back).
- Seam them together.
- Add a strap (crocheted or use ready-made).
- Optional: Add a flap or closure.
📌 Step-by-Step Instructions
🧩 Step 1: Create the Bag Panels
Make 2 identical rectangles.
Row 1: Ch 31 (or adjust for desired width)
Row 2: Hdc in 2nd ch from hook and in each ch across. (30 hdc)
Row 3-25: Ch 1, turn. Hdc in each st across. (30 hdc)
👉 Adjust the number of rows for your desired height. Try ~25 rows for a medium size.
Fasten off and weave in ends. Make 2 panels.
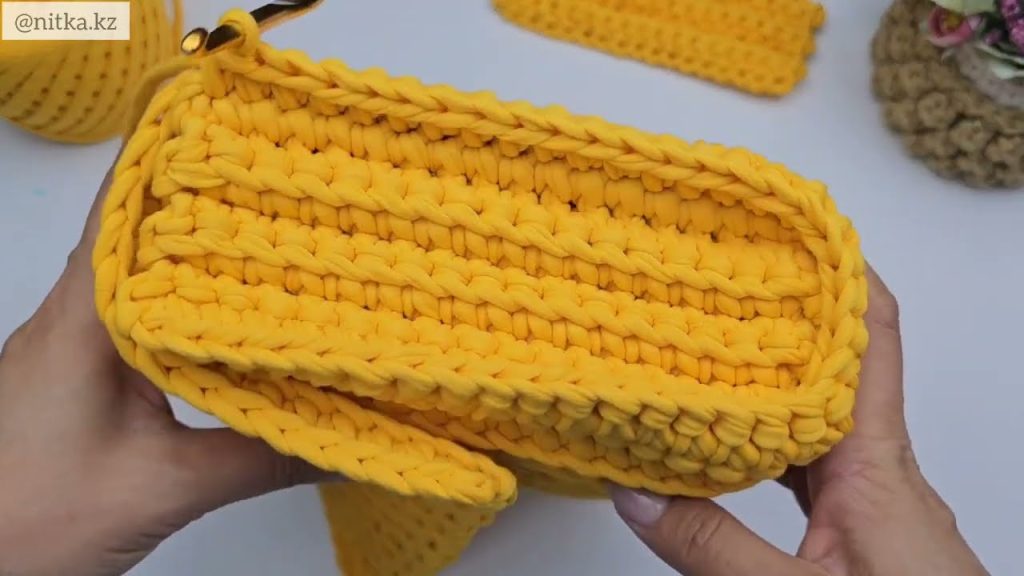
🧩 Step 2: Join the Panels
- Place both rectangles wrong sides together.
- Using sc or sl st, sew 3 sides together (left, bottom, right), leaving the top open.
- You can use a yarn needle or join with a crochet hook:
Join yarn at bottom corner, sc through both layers around the 3 sides.
Fasten off.
🧵 Step 3: Optional – Add a Lining
If desired, sew a fabric lining the same size as your bag. Hand stitch or use fabric glue to attach it inside.
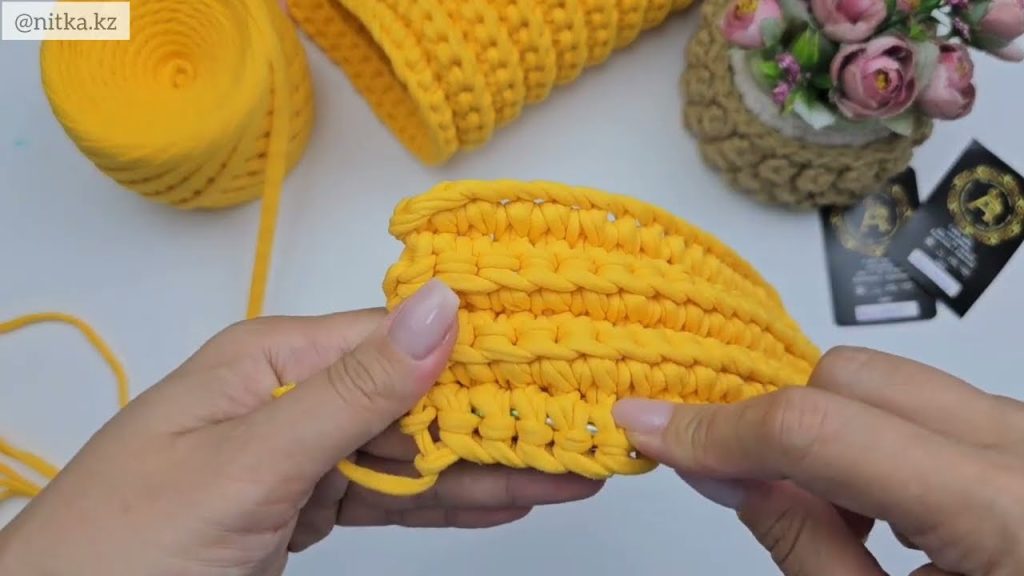
👜 Step 4: Make the Strap
Option A: Crochet a Strap
Ch 100–120 (or desired length).
Row 1: Sc in 2nd ch from hook and in each ch across.
Row 2 (optional for thicker strap): Ch 1, turn. Sc across.
Fasten off.
- Sew each end of the strap to the inside edges of the bag, using a yarn needle or sc them into place.
Option B: Use a Pre-Made Strap
You can also use:
- Leather or canvas strap with swivel hooks
- Braided yarn or macramé cord
✂️ Step 5: Closure (Optional)
- Add a button: sew it to the front, make a small ch loop on back as a closure.
- Add a magnetic snap or zipper for a more polished finish.
- You can also crochet a small flap:
Attach yarn to top back of bag.
Row 1: Ch 1, sc across.
Repeat 5-6 rows.
Taper the ends (e.g., dec sc on both sides).
Add button loop if needed.
🧺 Optional Embellishments
- Add a tassel or fringe
- Crochet flowers or appliqués
- Embroider initials or a pattern
🧼 Care Instructions
- Hand wash gently in cold water
- Lay flat to dry
✅ Summary Checklist
✔ Two hdc rectangles
✔ Seamed 3 sides
✔ Strap added (crochet or ready-made)
✔ Closure/flap optional
✔ Weave in ends
Watch tutorial: