 by
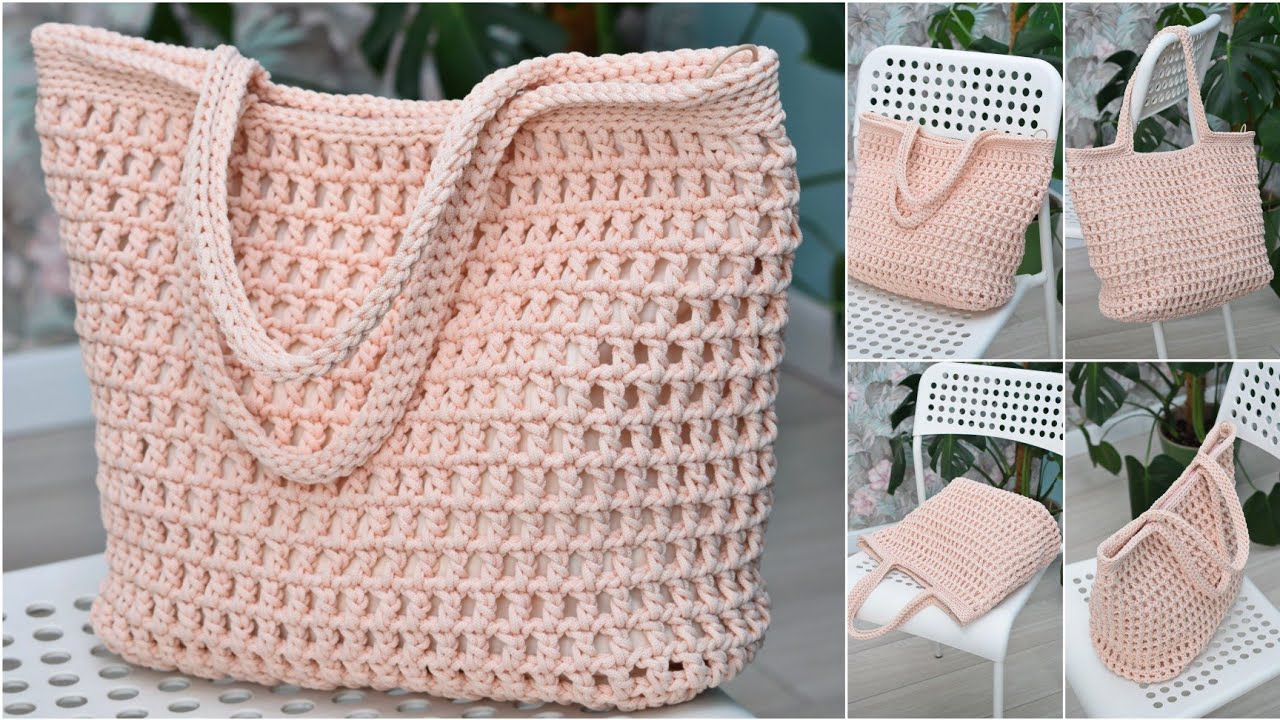
by Here’s a clear, beginner-friendly, detailed tutorial you can use as a Crochet Net Bag pattern. I’ll explain everything step by step and keep it simple 🌿
How to Make a Crochet Net Bag
Beginner Crochet Tutorial & Pattern
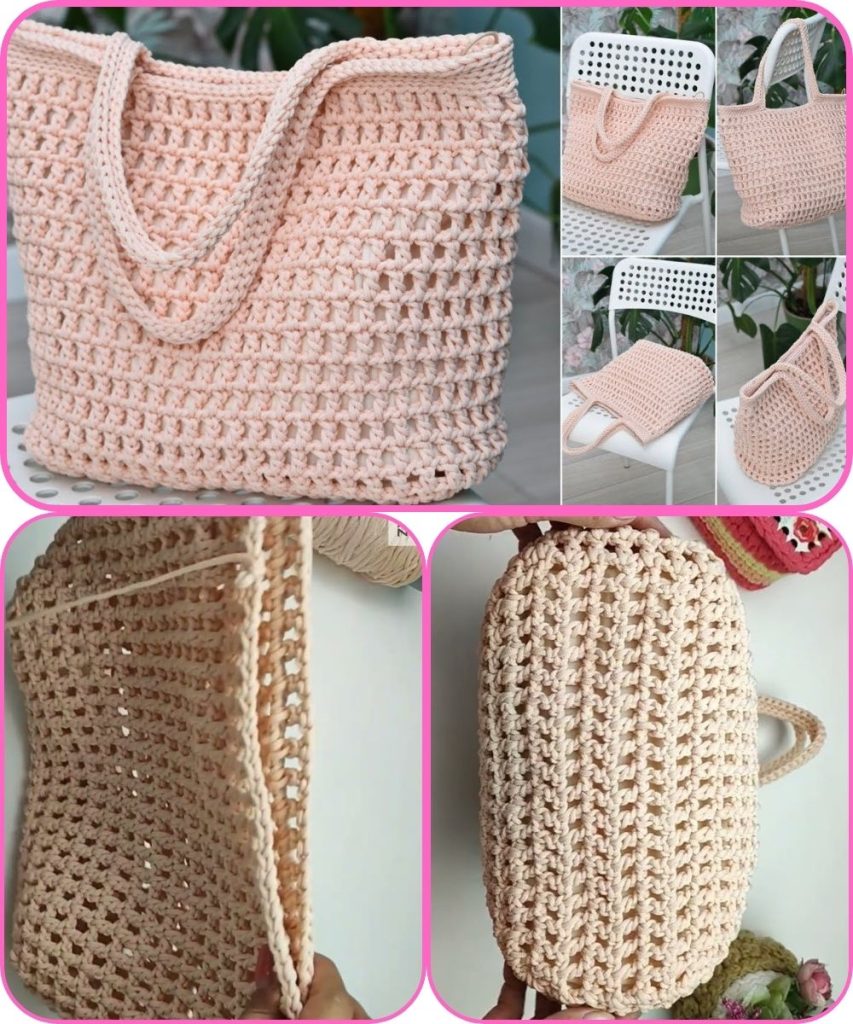
A crochet net bag is a lightweight, stretchy bag that’s perfect for shopping, beach trips, or everyday use. This project is great for beginners because it uses basic stitches and simple repeats.
Materials Needed
- Yarn: Cotton yarn (worsted weight / medium #4 is best for beginners)
- Crochet Hook: 4.5 mm – 5 mm (check your yarn label)
- Scissors
- Yarn Needle (for weaving in ends)
Crochet Stitches Used
You only need a few basic stitches:
- ch – Chain
- sl st – Slip Stitch
- sc – Single Crochet
- dc – Double Crochet
👉 If you are new to crochet, practice these stitches before starting.
Finished Size (Approx.)
- Width: 10–12 inches (stretches wider)
- Length: 12–14 inches (without handles)
Step 1: Make the Base of the Bag
- Chain 31 (you can chain more for a wider bag).
- Row 1:
- Single crochet (sc) in the 2nd chain from the hook
- Sc in each chain across
- Turn your work
- Rows 2–5:
- Chain 1
- Sc in each stitch across
- Turn after each row
This creates a solid base so small items don’t fall out.
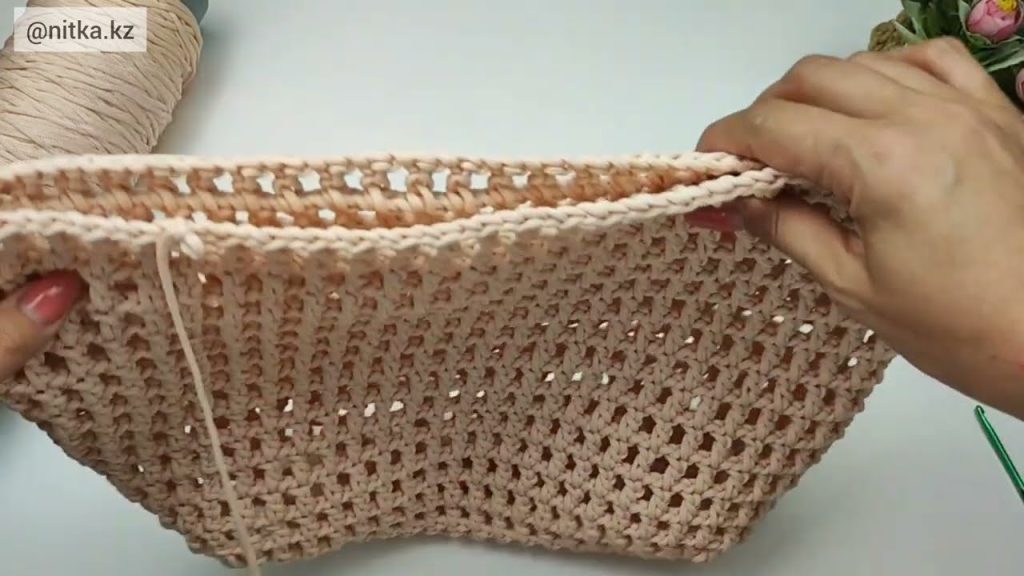
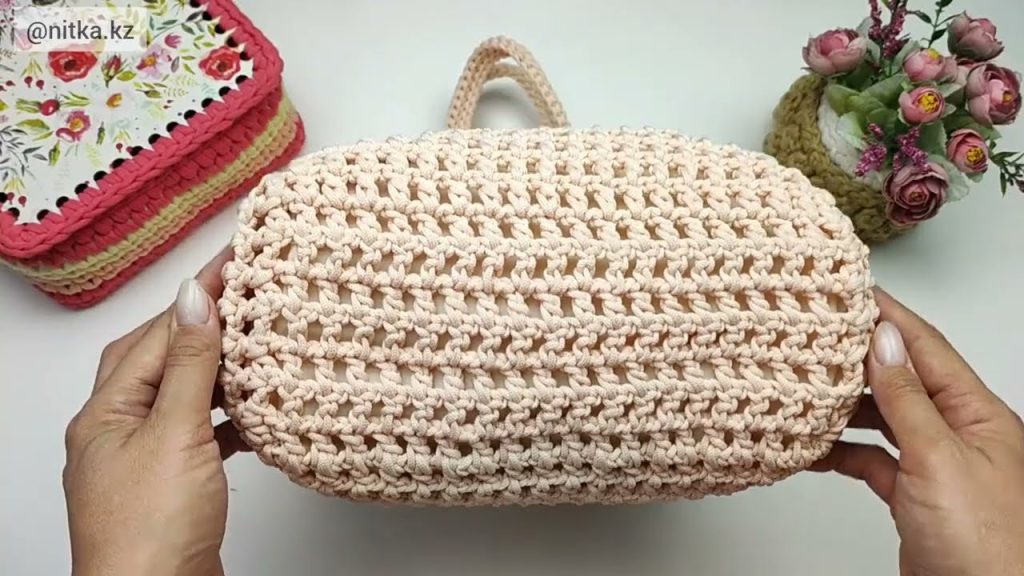
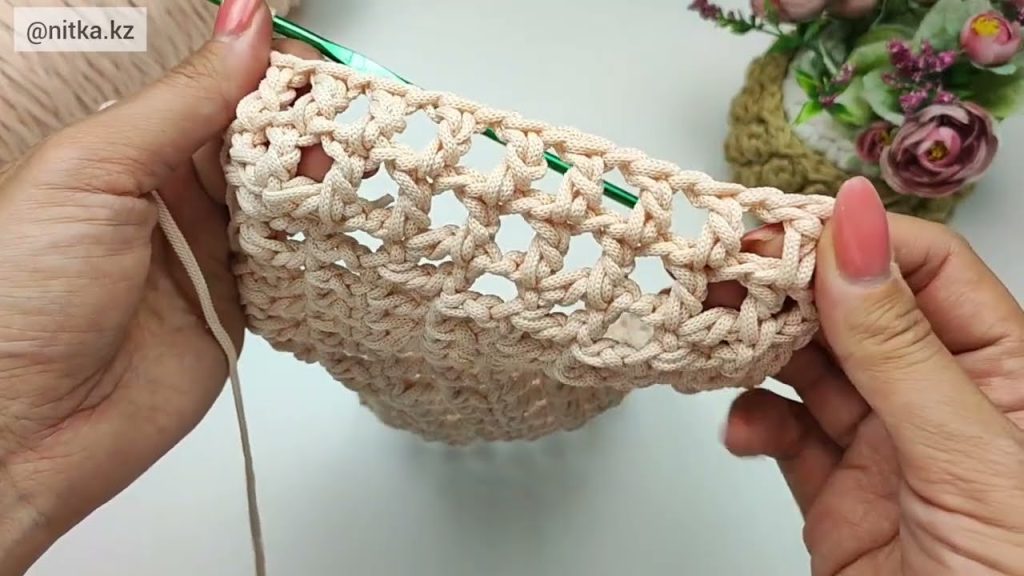
Step 2: Start the Net Pattern
- Round 1:
- Chain 4 (counts as dc + ch 1)
- Skip 1 stitch, dc in next stitch
- Chain 1, skip 1 stitch, dc in next stitch
- Repeat across the row
- Turn
- Round 2 and Onward:
- Chain 4
- Dc into the top of the next dc from the previous row
- Chain 1
- Repeat this pattern for every row
✨ This creates the classic open net texture.
Step 3: Continue Building the Bag
- Repeat the net pattern rows until the bag reaches your desired height
- Usually 20–25 rows works well
- Remember: the bag will stretch when used
Step 4: Join the Sides
- Fold the piece in half (right sides facing together)
- Slip stitch or single crochet along both sides to close the bag
- Turn the bag right side out
Step 5: Create the Handles
- Attach yarn to one side of the bag
- Chain 40–50 (depending on how long you want the handle)
- Attach to the opposite side with a slip stitch
- Repeat for the second handle
- Optional: Single crochet along the handle for extra strength
Step 6: Finish the Bag
- Fasten off yarn
- Weave in all loose ends using a yarn needle
- Stretch the bag gently to shape it
Tips for Beginners
- Cotton yarn works best because it doesn’t stretch too much
- Keep your stitches loose for a flexible net
- Count your stitches to keep edges straight
- Try solid colors first to clearly see the pattern
Customization Ideas
- Add wooden beads to the handles
- Use colorful yarn for a summer look
- Make the base round instead of rectangular
- Add a lining for smaller items
If you want, I can:
- Simplify this pattern even more
- Turn it into a printable PDF
- Write it in short pattern format
- Help you design a round net bag
Watch tutorial: