 by
by Here’s a clear, beginner-friendly guide you can use as an article or tutorial.
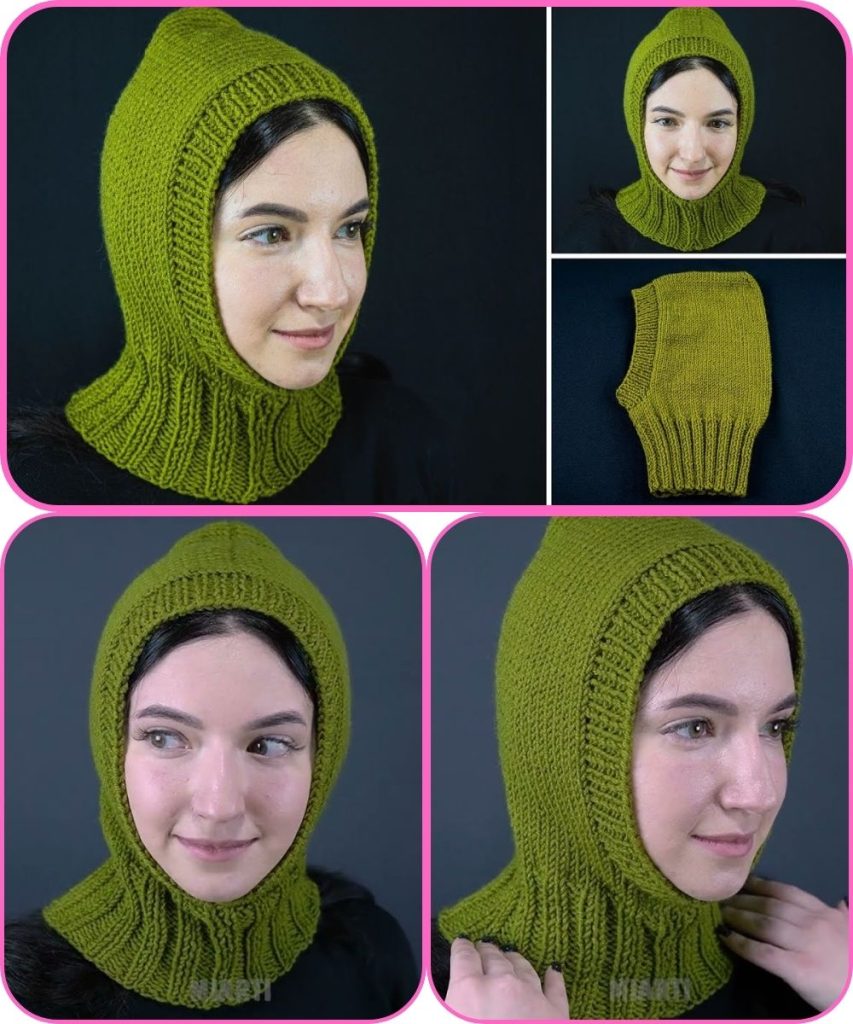
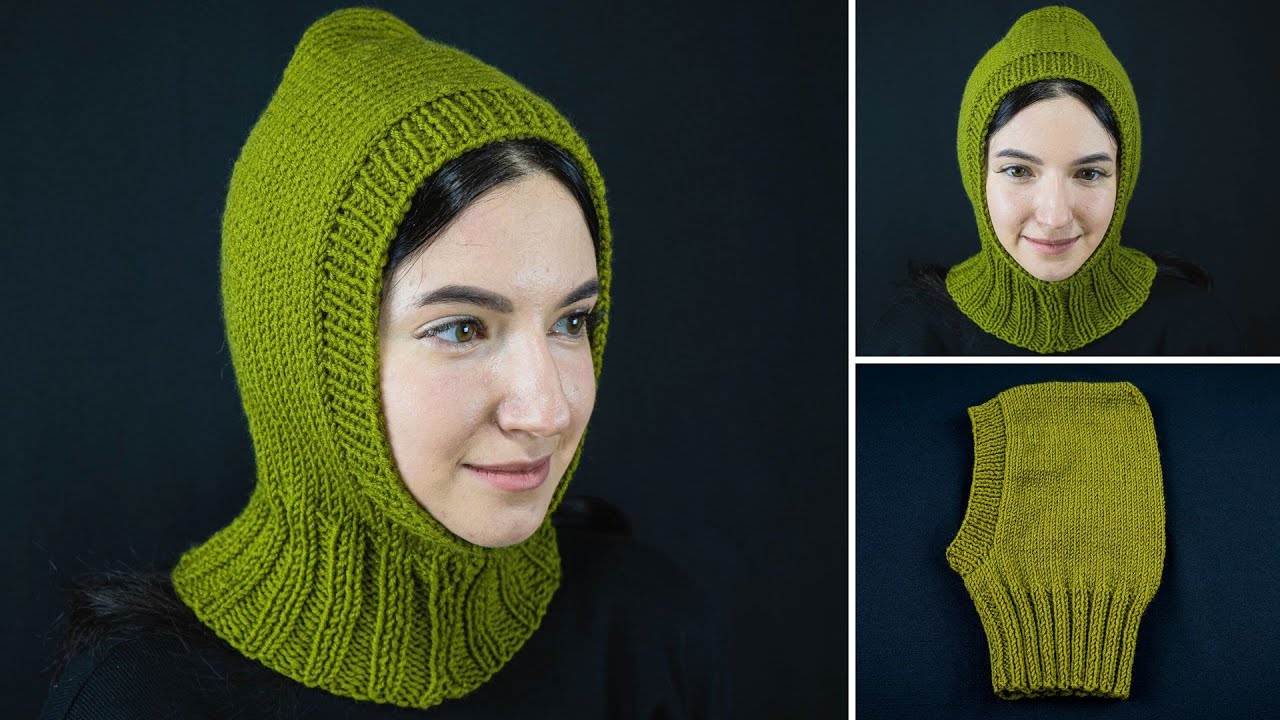
How to Make a Knitted Balaclava Hood in a Couple of Hours
Even a beginner can handle it!
A knitted balaclava hood looks impressive, but it’s actually one of the easiest and fastest winter accessories to make. With basic stitches and chunky yarn, you can finish one in just a couple of hours—even if you’re new to knitting.
Why This Project Is Perfect for Beginners
- Uses simple stitches (knit and purl)
- Made mostly as a rectangle—no complex shaping
- Quick results with thick yarn
- Very forgiving if your tension isn’t perfect
What You’ll Need
- Chunky or super bulky yarn (about 100–150 g)
- Knitting needles (size 8–10 mm / US 11–15)
- Scissors
- Yarn needle for sewing
- Optional: stitch markers
Tip: Choose a soft yarn since the balaclava sits close to your face.
Basic Skills You Need
- Casting on
- Knit stitch
- Purl stitch
- Casting off (binding off)
- Simple seaming
If you can knit a scarf, you can make this balaclava.
Step 1: Cast On
Cast on 40–50 stitches (adult size).
For a tighter fit, use fewer stitches; for a looser hood, use more.
Step 2: Knit the Main Rectangle
You’ll knit a long rectangle that later folds into a hood.
Row pattern (very beginner-friendly):
- Knit every row (this creates garter stitch)
OR, if you want more stretch:
- Row 1: Knit all stitches
- Row 2: Purl all stitches
- Repeat these two rows (this creates rib-like texture)
Continue knitting until the rectangle measures about:
- 45–50 cm (18–20 inches) long
This length covers the head and neck.
Step 3: Create the Face Opening
To make a simple face opening without complicated shaping:
- Knit normally for about ⅓ of the length
- Bind off the middle 10–14 stitches (this is the face hole)
- Knit the remaining stitches
- On the next row, cast on the same number of stitches where you bound off
- Continue knitting to the full length
Don’t worry—this sounds tricky, but it’s just binding off and casting on again in the same row area.
Step 4: Bind Off
Once you reach the full length, bind off all stitches loosely so the edge doesn’t feel tight.
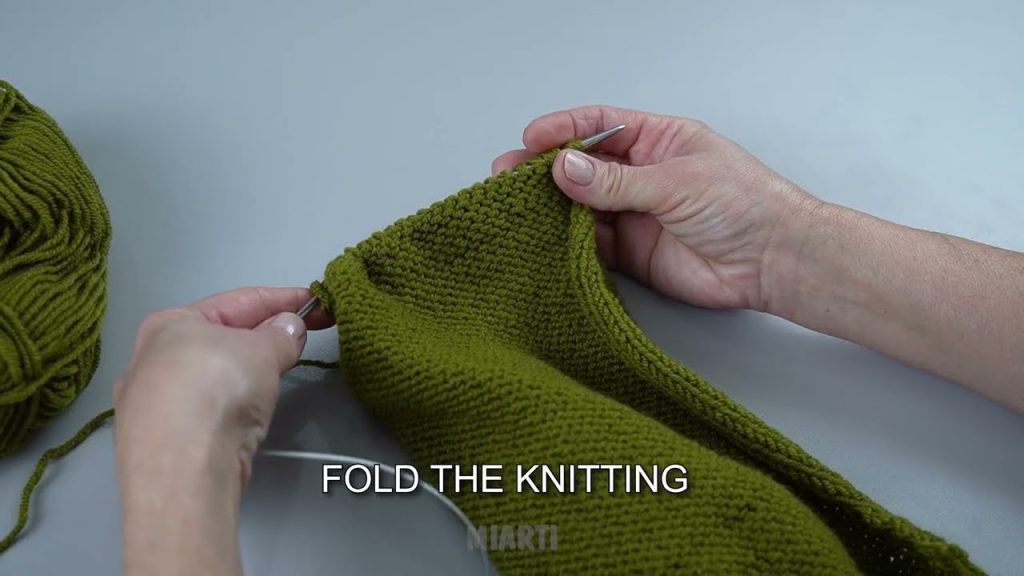
Step 5: Fold and Sew
Now comes the magic!
- Fold the rectangle in half lengthwise
- Sew the top edge together using a yarn needle
- Sew part of the back edge, leaving the face opening clear
Try it on as you go to adjust the fit.
Step 6: Finish and Style
- Weave in all loose ends
- Turn the balaclava right side out
- Roll the face edge slightly for a cozy look (optional)
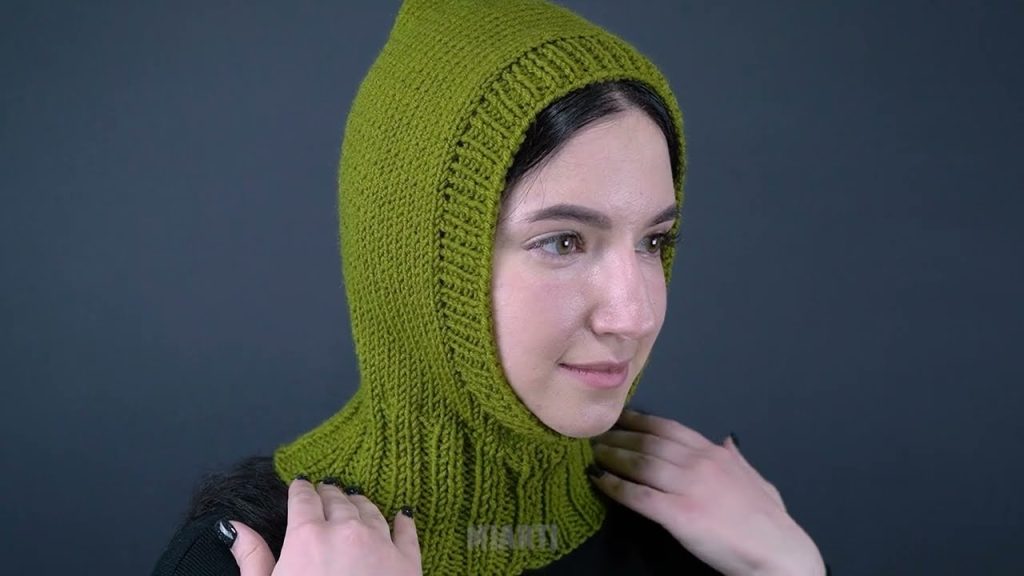
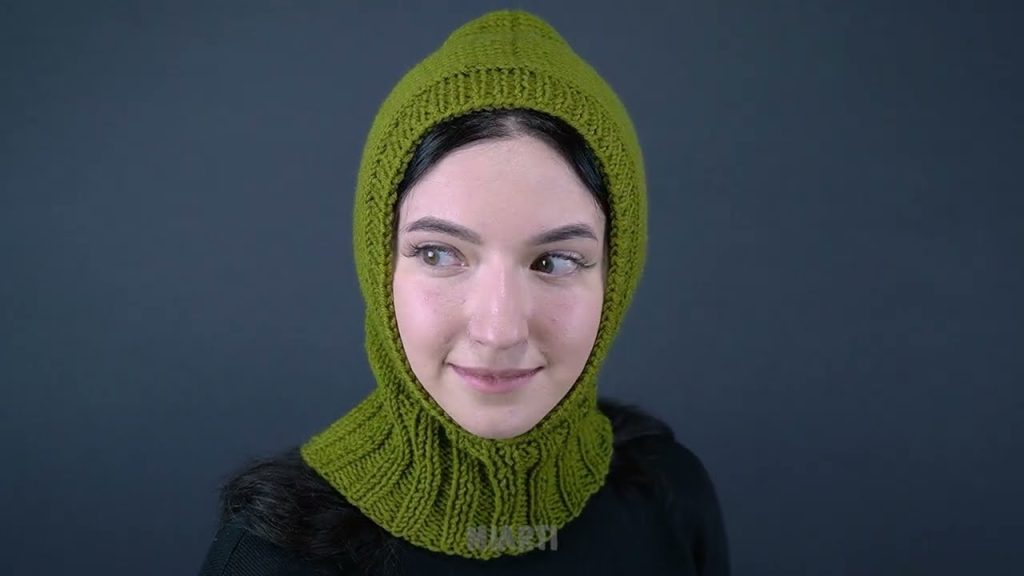
You can wear it as:
- A full balaclava
- A hood with the face open
- A folded neck warmer
Customization Ideas
- Add ribbing at the neck for extra warmth
- Use two colors for stripes
- Knit with wool blend for cold weather or acrylic for everyday wear
Final Thoughts
This knitted balaclava hood proves that stylish, practical projects don’t have to be complicated. With chunky yarn and simple stitches, even a beginner can create a warm, trendy accessory in just a couple of hours.
If you want, I can:
- Simplify this into a short pattern
- Adjust it for kids or teens
- Turn it into a step-by-step checklist or school project write-up
Watch tutorial: