 by
by Below is a clear, beginner-friendly, and detailed tutorial on how to knit a simple hood / balaclava hat. This method avoids complicated shaping and is great even if you’re new to knitting.
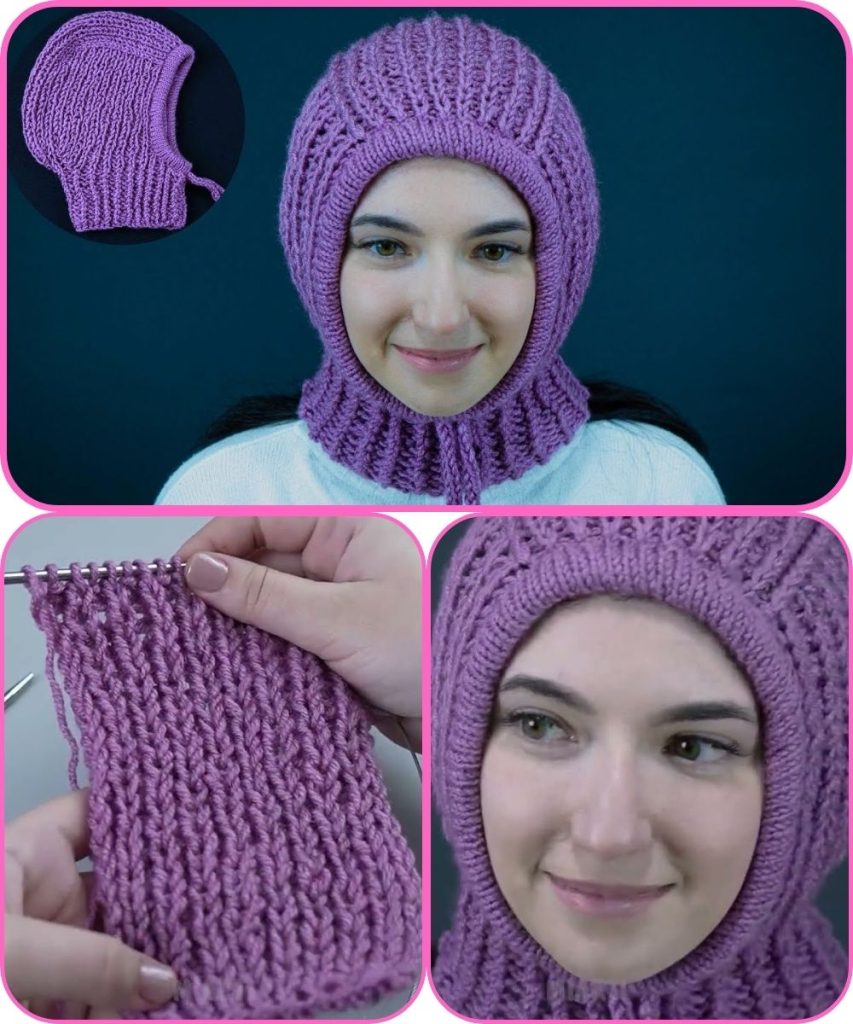
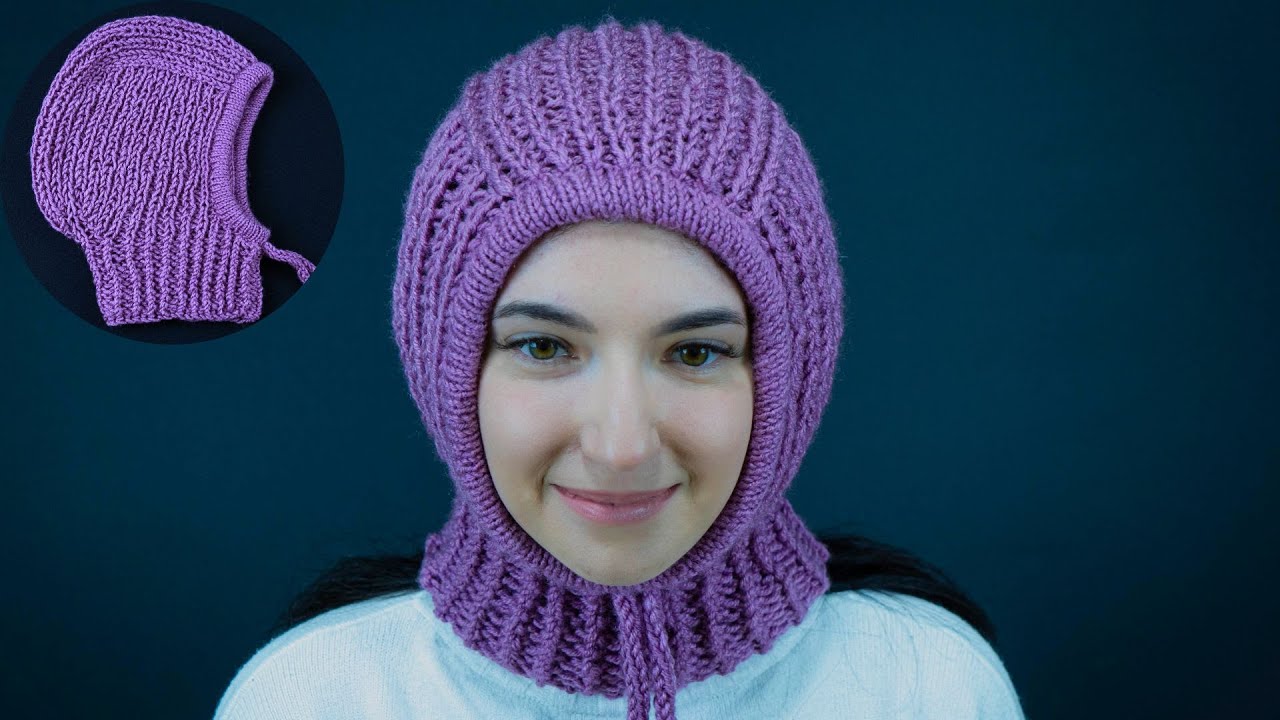
How to Make a Simple Knitted Hood (Balaclava Hat)
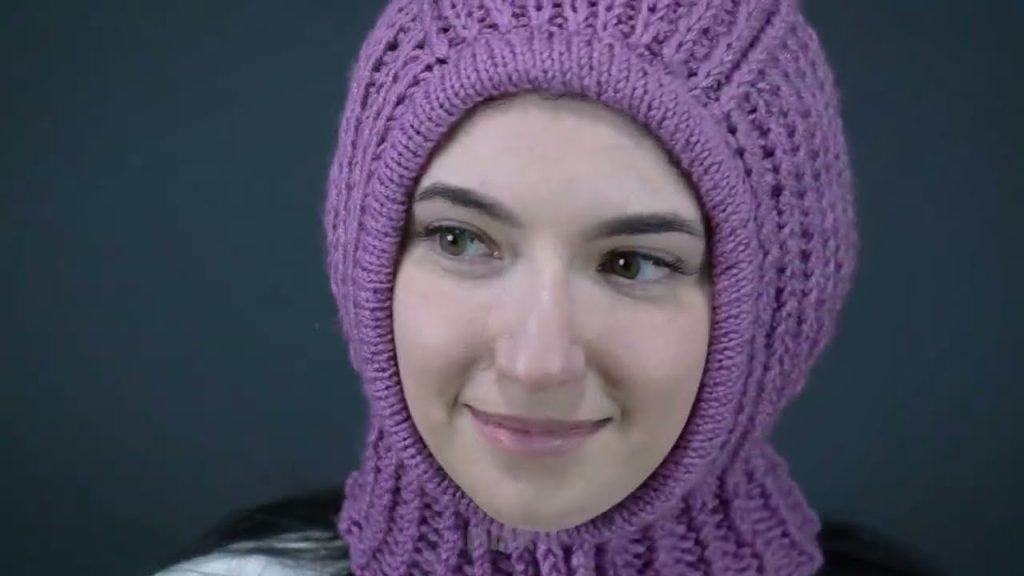
A balaclava is a cozy knitted hood that covers the head, neck, and sometimes part of the face. This tutorial explains an easy construction using mostly basic stitches and straightforward shaping.
Materials You Will Need
- Yarn: Medium weight (worsted / size 4) yarn
Choose soft yarn (acrylic or wool blend) for comfort - Knitting needles:
- Size US 7–9 (4.5–5.5 mm), straight or circular
- Tapestry needle (for sewing seams)
- Scissors
- Stitch marker (optional)
Basic Skills Required
- Casting on
- Knit stitch (K)
- Purl stitch (P)
- Binding off
- Simple seaming
If you can knit and purl, you can make this hood.
Size Guide (Adjustable)
This pattern fits teens to adults.
You can adjust width by casting on more or fewer stitches.
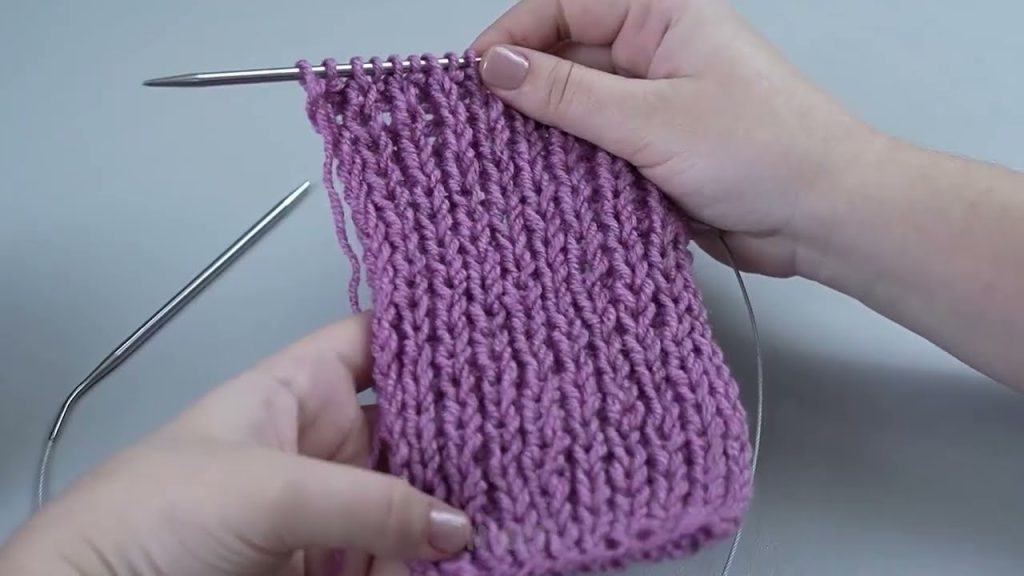
Step 1: Knit the Neck Panel
This part sits around the neck and shoulders.
- Cast on 70–90 stitches (depending on how loose you want it)
- Knit in ribbing for stretch:
- Row pattern:
K2, P2 across the row
- Row pattern:
- Continue ribbing for 6–8 inches (15–20 cm)
This creates a stretchy neck that fits comfortably.
Step 2: Begin the Hood Section
Now you will knit upward to form the hood.
- Switch to stockinette stitch:
- Right side rows: Knit
- Wrong side rows: Purl
- Knit straight without increasing or decreasing
- Continue until the hood measures about:
- 10–11 inches (25–28 cm) from the base of the neck
This rectangle will fold over your head.
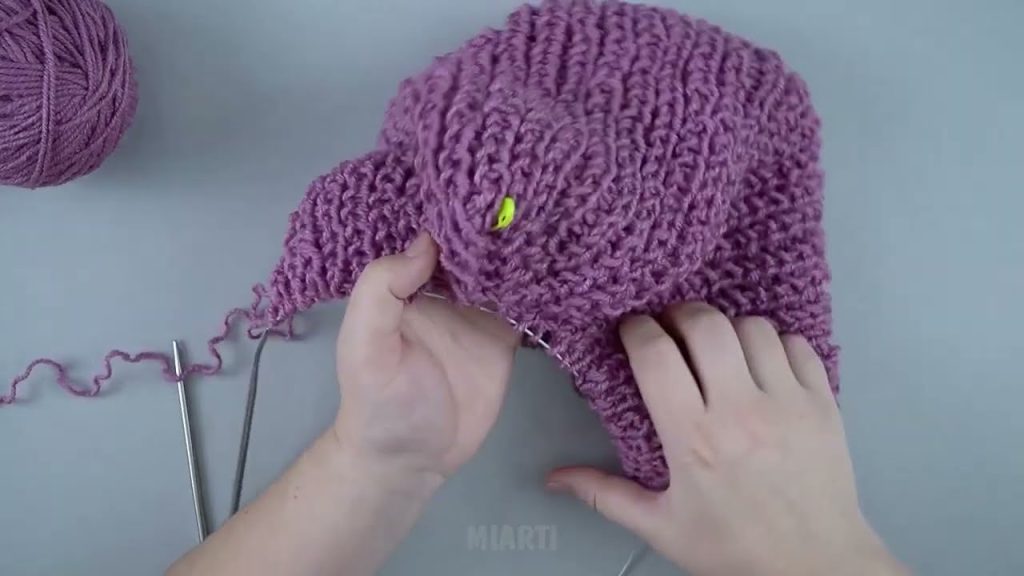
Step 3: Shape the Top of the Hood
Now you will close the top.
Method: Simple Fold-and-Seam
- Bind off all stitches
- Fold the knitted piece in half lengthwise
- Using a tapestry needle, sew the top edge together
This creates the hood shape.
Step 4: Create the Face Opening
To make it look more like a balaclava:
- Pick up stitches along the front edge of the hood
- Knit K1, P1 ribbing for 1–2 inches
- Bind off loosely
This gives a neat and stretchy face opening.
Step 5: Finishing Touches
- Weave in all loose ends
- Lightly stretch or block the hood if needed
- Try it on and adjust for comfort
Optional Customizations
- Add a drawstring around the face opening
- Use chunky yarn for a warmer winter hood
- Add ear flaps by knitting small side panels
- Use seed stitch or garter stitch for texture
Tips for Beginners
- Keep stitches loose around the face
- Use circular needles if the piece feels wide
- Count rows to keep both sides even
- Try it on before sewing the top seam
Final Notes
This simple knitted hood is:
- Warm and practical
- Easy to customize
- Great for beginners
- Perfect for winter or outdoor wear
If you’d like, I can:
- Simplify this into a short pattern
- Adjust it for kids or adults
- Convert it into loom knitting
- Add pictures or diagrams (descriptions)
Watch tutorial: