 by
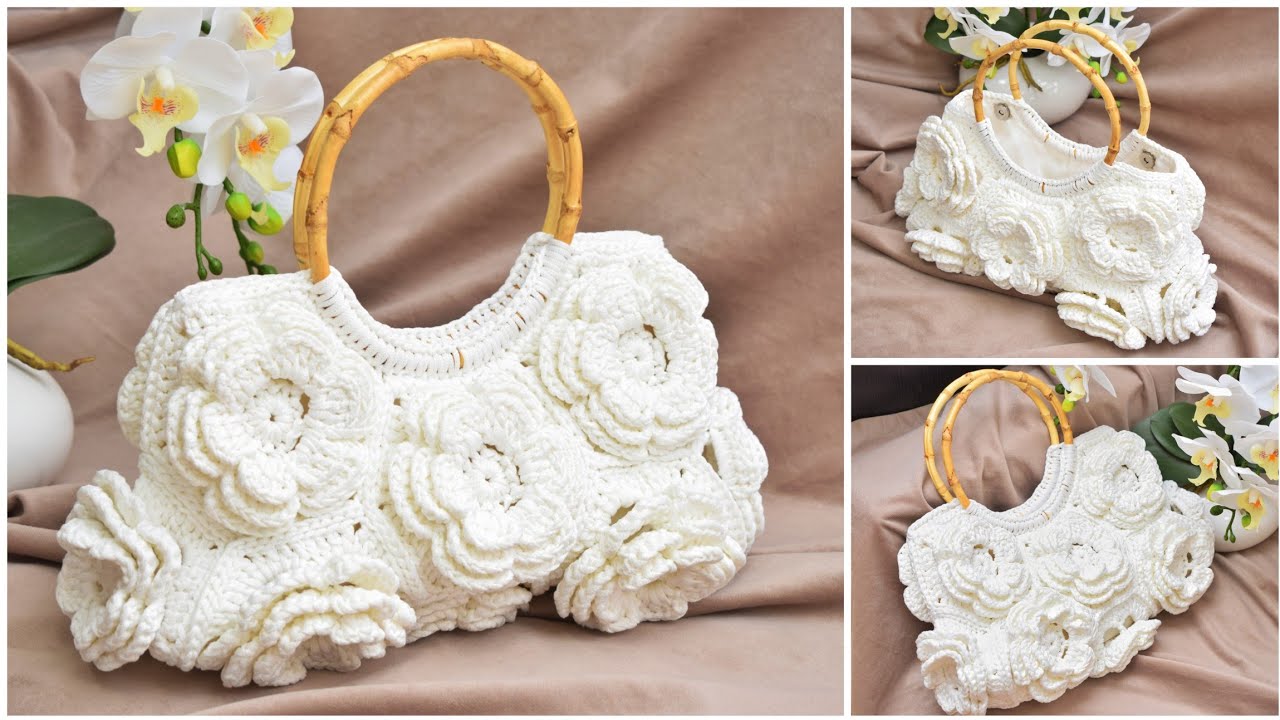
by Here is a clear, detailed write-up you can use for a step-by-step video tutorial description on how to crochet a charming handbag with flowers. You can adjust the wording to match your style or skill level.
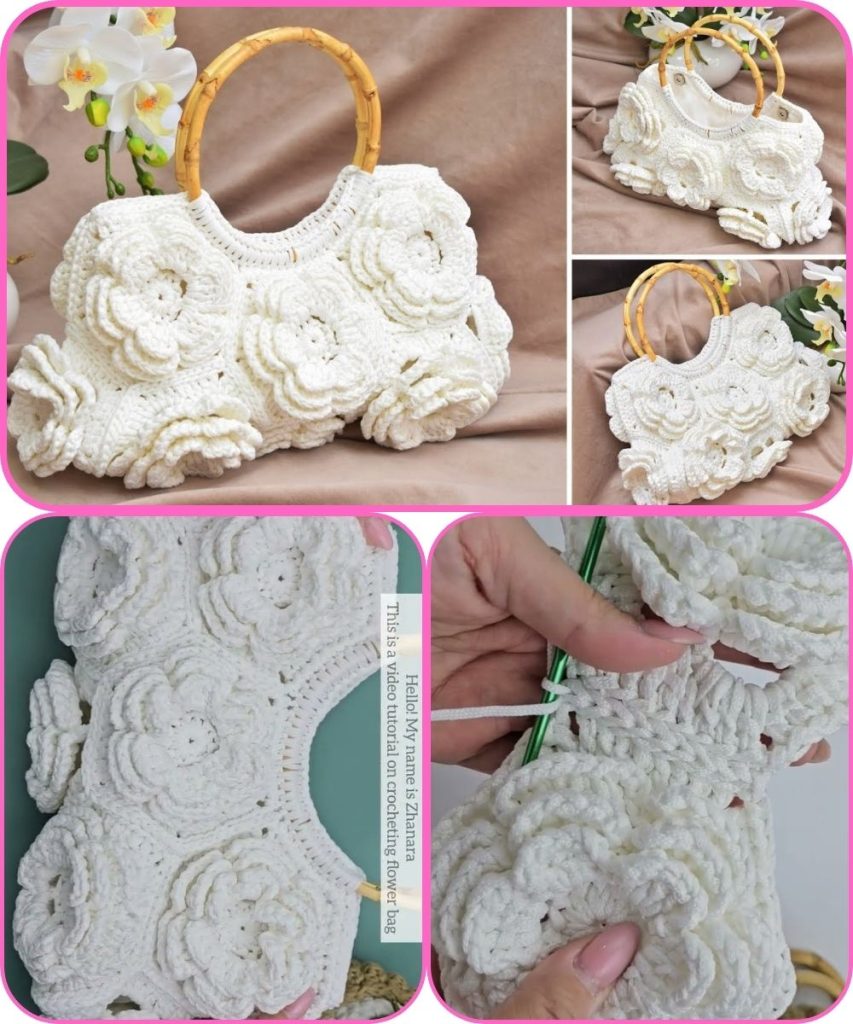
How to Make a Crocheted Handbag with Flowers | Step-by-Step Tutorial
In this tutorial, we are crocheting a charming handmade handbag decorated with beautiful crochet flowers. This project is perfect for beginners to intermediate crocheters and makes a lovely everyday bag or a thoughtful handmade gift.
Materials Needed
- Medium-weight yarn (cotton or acrylic works well)
- Yarn colors:
- Main color for the bag
- Flower colors
- Green (optional, for leaves)
- Crochet hook (size recommended on your yarn label, usually 4–5 mm)
- Scissors
- Yarn needle
- Stitch markers (optional)
- Button, zipper, or magnetic clasp (optional)
- Lining fabric (optional)
Step 1: Crocheting the Base of the Handbag
We begin by creating the base of the bag, which gives structure and size.
- Start with a foundation chain
- Work single crochet or half-double crochet stitches
- Increase evenly at the corners to shape the base
- Continue until the base reaches your desired width and length
📌 Tip: Keep your stitches tight for a sturdy bag.
Step 2: Building the Body of the Bag
Once the base is complete:
- Crochet around the base without increasing
- Work in continuous rounds or rows (depending on your design)
- Continue until the bag reaches your desired height
You can use:
- Single crochet for a firm texture
- Double crochet for a softer, lighter bag
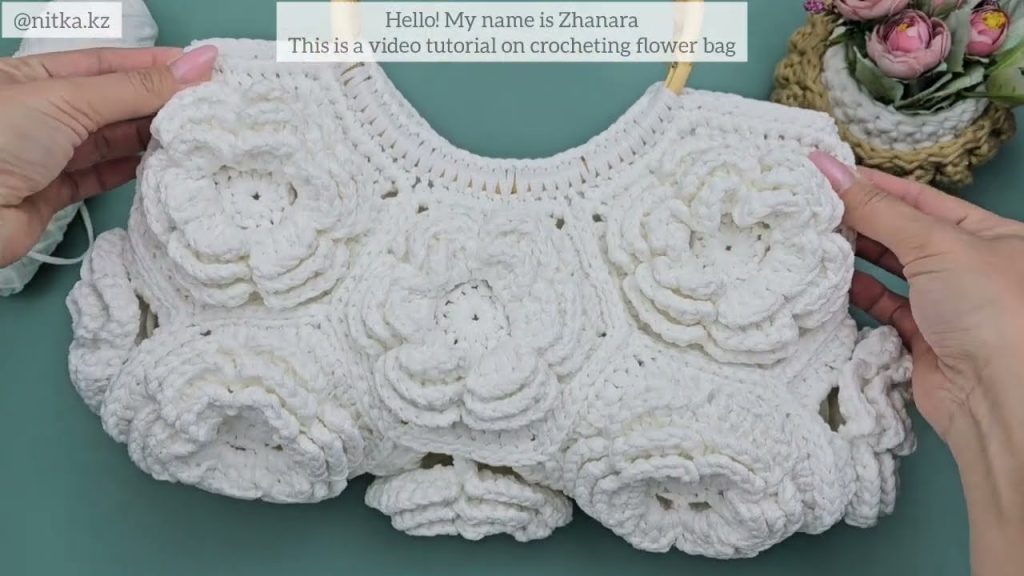
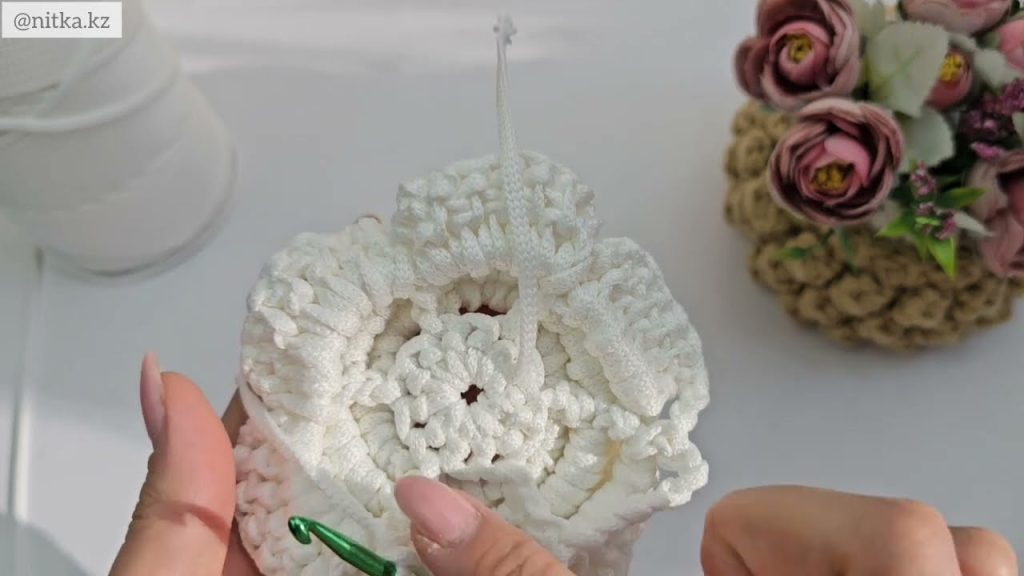
Step 3: Making the Crochet Flowers
Now we create the decorative flowers:
- Start with a magic ring
- Crochet petals using double or treble crochet stitches
- Change colors if desired for layered flowers
- Fasten off and weave in ends
Make as many flowers as you like for your design.
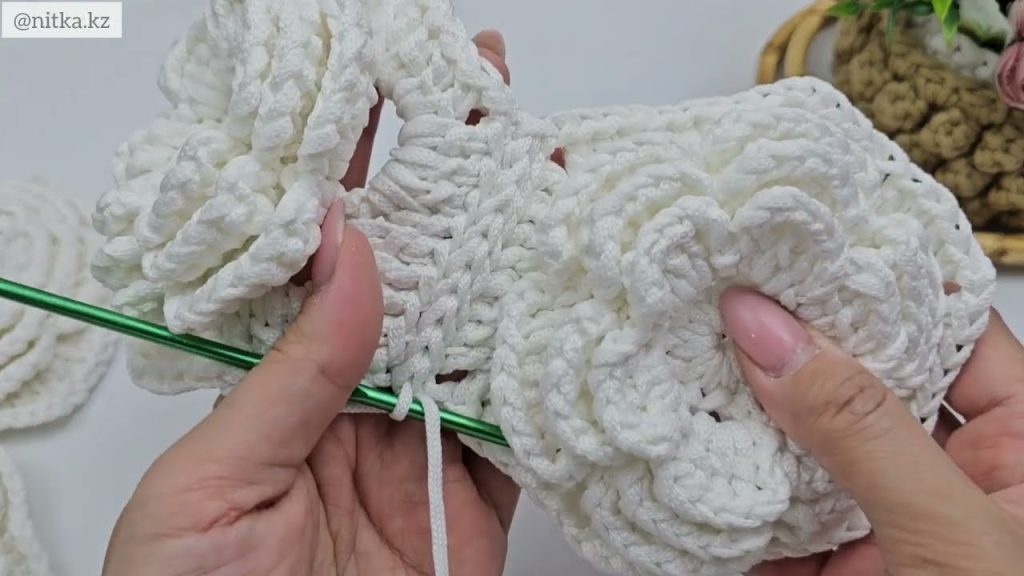
Step 4: Attaching the Flowers
- Arrange the flowers on the front of the bag
- Sew them securely using a yarn needle
- Add leaves or small details if desired
🌸 This is where you can get creative!
Step 5: Crocheting the Handles
- Attach yarn to the side of the bag
- Chain to the desired handle length
- Secure on the opposite side
- Reinforce handles with extra rows for strength
Step 6: Finishing Touches
Optional finishing steps:
- Add a button or zipper closure
- Sew in a fabric lining
- Weave in all loose ends
- Shape the bag gently
Final Result
You now have a beautiful crocheted handbag with floral decoration—perfect for casual outings, gifting, or personal use. This project combines practicality with handmade charm.
If you want, I can also:
- Rewrite this for YouTube description
- Simplify it for beginners
- Create a short version for social media
- Add timestamps for a video tutorial
Watch tutorial: