 by
by Absolutely! I can give you a step-by-step detailed guide on making an easy crochet granny square pouch. I’ll include materials, techniques, and assembly tips so it’s beginner-friendly.

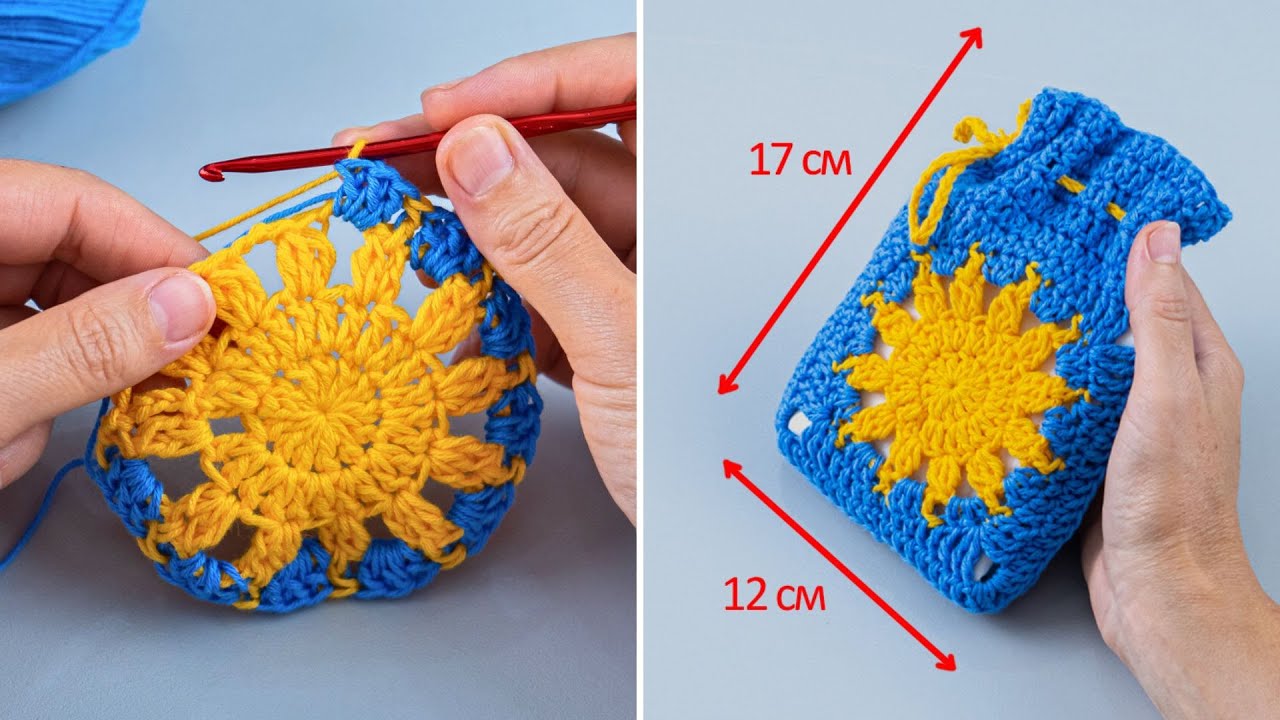
How to Make an Easy Crochet Granny Square Pouch
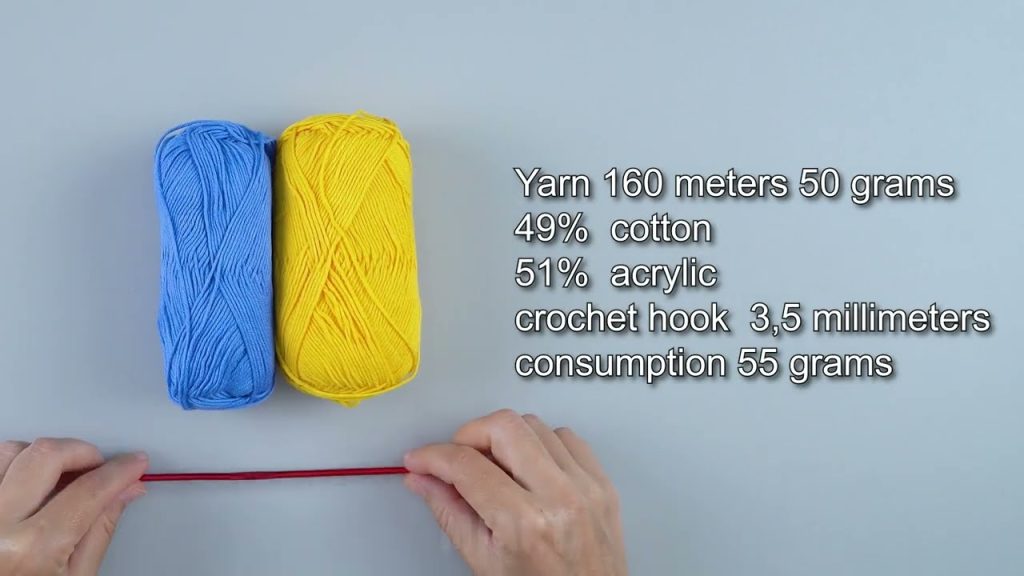
Materials You’ll Need
- Yarn: Medium weight (worsted) yarn in 2–3 colors.
- Crochet Hook: Size recommended on your yarn label (usually 4 mm – 5 mm).
- Scissors
- Yarn Needle: For weaving in ends and sewing pieces together.
- Button, Snap, or Zipper (optional): For closure.
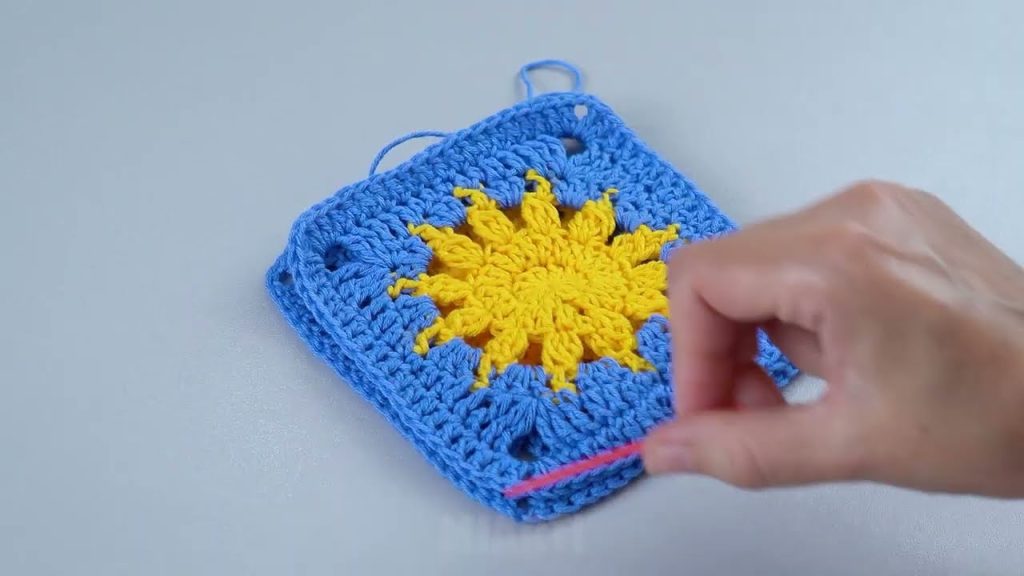
Step 1: Make the Granny Squares
The classic granny square is simple, and for a pouch, you’ll need two squares of the same size.
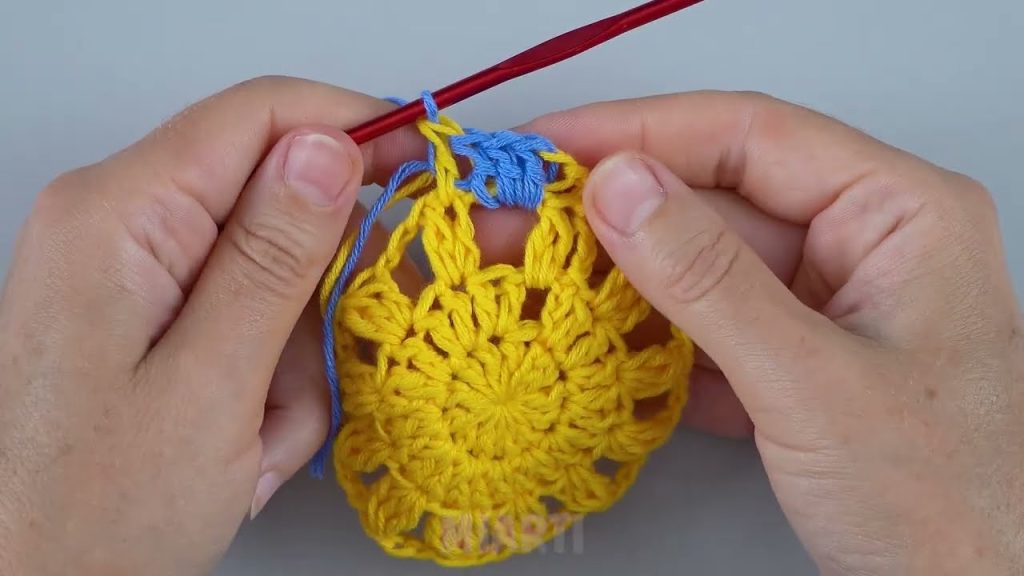
Basic Granny Square Pattern
- Start with a slip knot and chain 4.
- Join with a slip stitch to form a ring.
- Round 1: Chain 3 (counts as first double crochet), then work 2 double crochets into the ring, chain 2, 3 double crochets, chain 2—repeat 4 times, then join with a slip stitch to the top of the starting chain-3.
- Round 2: Slip stitch into the first chain-2 space, chain 3 (counts as first double crochet), work 2 double crochets into the same space, chain 2, 3 double crochets into the same space (this forms a corner).
- In the next chain-2 corner space, work 3 dc, ch 2, 3 dc. Repeat for all 4 corners. Join with slip stitch.
- Round 3 (optional to make it bigger): Repeat Round 2 in each corner, adding 3 dc groups along the sides as needed to grow the square.
Make 2 squares for the front and back of your pouch.
Step 2: Assemble the Pouch
- Align the Squares: Place the two squares together with the “right sides” (the sides you like best) facing outward.
- Join the Squares: Use single crochet (sc) or whip stitch to join along three sides, leaving one side open for the pouch opening.
- Example (single crochet join): Insert hook into both squares’ corners, yarn over, pull through, yarn over again, pull through both loops on hook. Repeat along the edge.
Step 3: Add the Closure
You have a few options:
- Button: Sew a button on the front and make a small loop of chain stitches on the flap.
- Snap: Sew snap buttons inside the flap.
- Zipper: If you know basic zipper installation, sew it along the top opening.
Step 4: Optional Lining (for durability)
- Cut fabric slightly smaller than your granny square pouch.
- Sew the fabric inside to prevent stretching and make it sturdier for coins, makeup, or small items.
Step 5: Finishing Touches
- Weave in all loose ends with your yarn needle.
- Block your pouch (optional) to make it neat and square by lightly wetting it and pinning it flat until dry.
Tips for Beginners
- Use contrasting colors for a fun, vibrant pouch.
- Keep your tension even, so squares match perfectly.
- Practice one small granny square before making the pouch to get comfortable with the stitch pattern.
✅ Result: You’ll have a cute, functional granny square pouch perfect for coins, makeup, or small essentials.
If you want, I can also draw a simple diagram showing how the squares are joined and the pouch shape, which makes it way easier to follow visually.
Watch tutorial: