 by
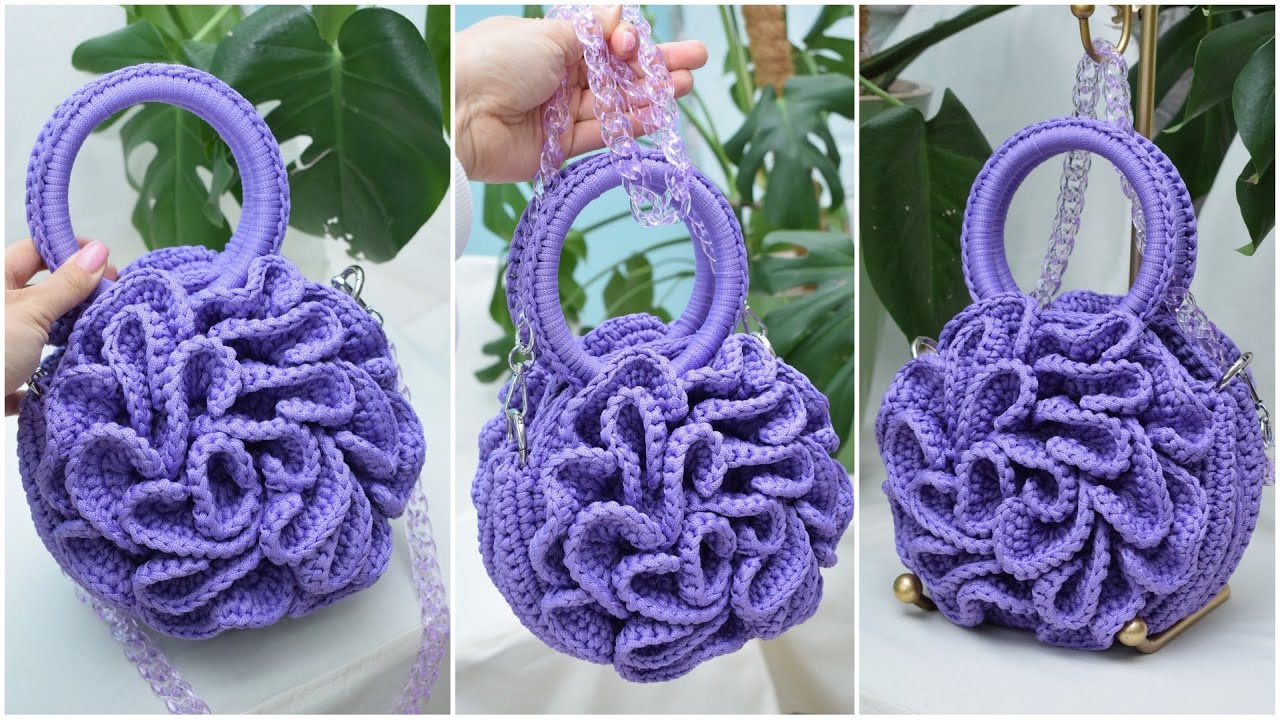
by Sure! Here’s a detailed, step-by-step guide on how to make a Floral Pattern Handbag – Peony Round Bag (Crochet with Polyester Cord).
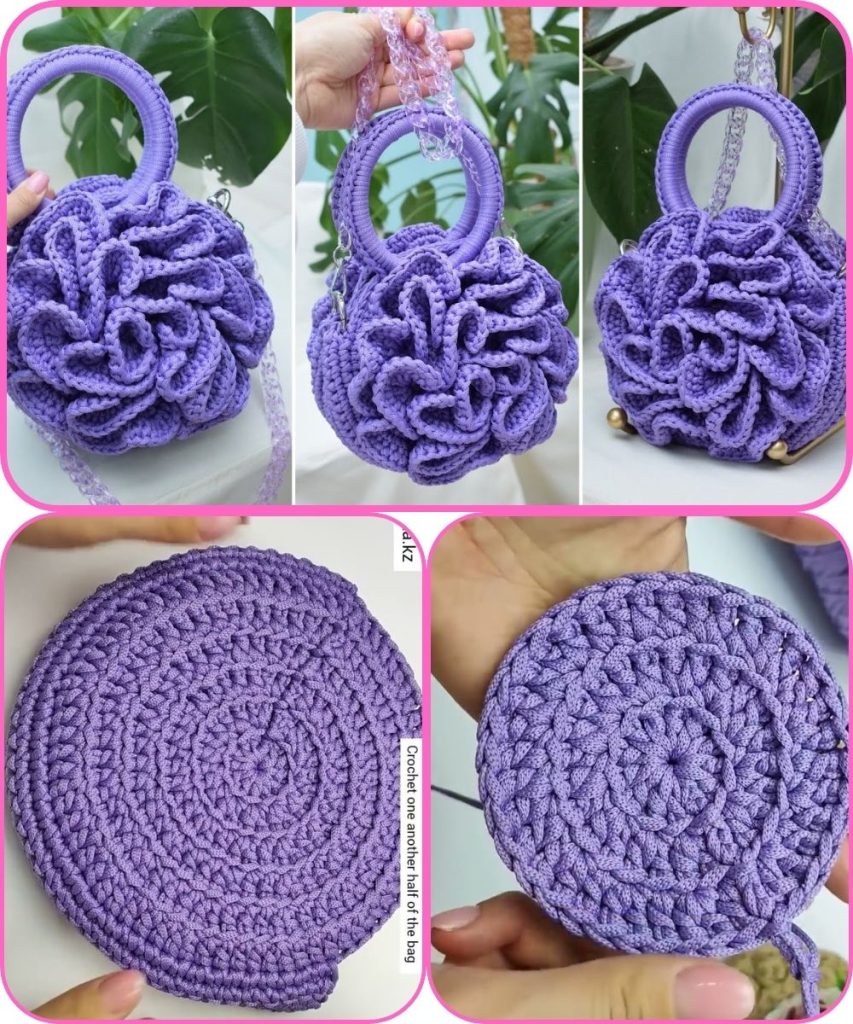
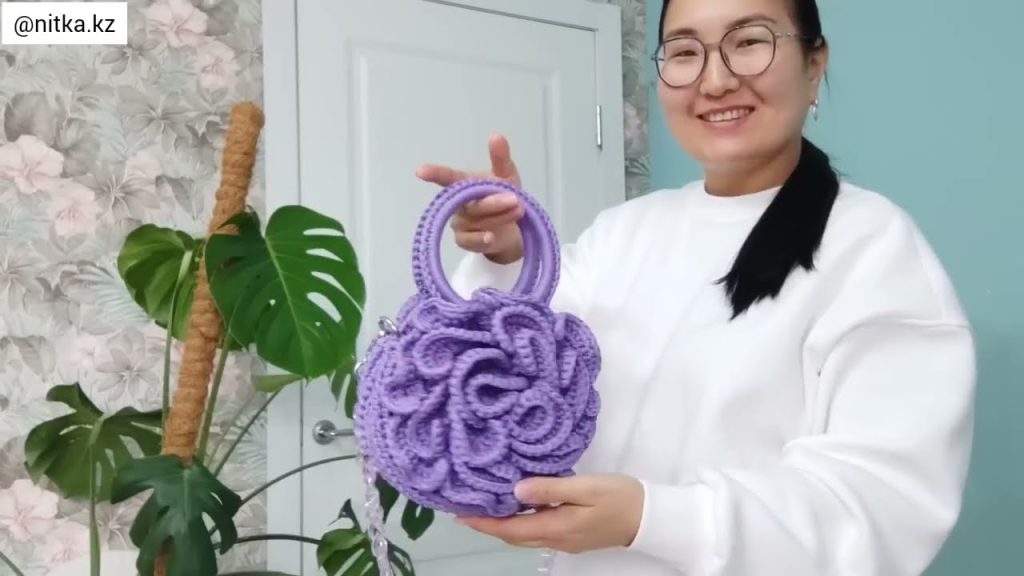
🌸 Floral Pattern Handbag (Peony Bag – Round Crochet Bag)
Overview
This beautiful round floral handbag is designed to resemble a blooming peony flower. It’s made using crochet techniques and polyester cord to create a durable and elegant accessory. Perfect for spring and summer, this bag combines aesthetics with practicality.
🧶 Materials Needed
| Item | Specification / Suggestion |
|---|---|
| Yarn / Cord | Polyester cord, 3 mm thickness (approx. 200–250 g total) |
| Crochet Hook | 3.5 mm – 4 mm (depending on cord thickness) |
| Bag Handles | Round wooden or metal handles (15–20 cm diameter) or crochet cord handles |
| Bag Lining | Cotton fabric (optional, for inner lining) |
| Zipper / Magnetic Snap | For closure (optional) |
| Needle & Thread | For sewing lining and handles |
| Scissors | For cutting cord |
| Stitch Markers | To mark your rounds |
🪡 Skills Required
- Magic ring
- Chain stitch (ch)
- Single crochet (sc)
- Half double crochet (hdc)
- Double crochet (dc)
- Slip stitch (sl st)
- Increasing & decreasing in the round
- Sewing (optional, for lining or handle)
🌺 Pattern Instructions
1. Make the Peony Flower Base (Front Panel)
- Start with a magic ring.
- Work 12 double crochets (dc) into the ring.
- Pull tight and join with a slip stitch to the first dc.
- Round 2 – Petal Base:
- Ch 3 (counts as 1 dc), dc in same stitch, 2 dc in each stitch around.
- Join with sl st. (24 sts total)
- Round 3 – Form Petals:
- Skip 1 stitch, in next stitch make (1 dc, 3 tr, 1 dc) — this forms a petal.
- Repeat around. (12 petals total)
- Join with sl st.
- Round 4 – Second Layer of Petals:
- Work behind the first layer by making chain loops (ch 4, sl st behind next petal).
- In each loop: (1 dc, 4 tr, 1 dc) — these become the larger petals.
- Join and fasten off.
- Continue building 1–2 more layers using the same method, increasing the chain loop length by 1 each round (ch 5, ch 6, etc.) to make larger petals.
- Stop when the circle reaches approx. 18–20 cm diameter (depending on desired bag size).
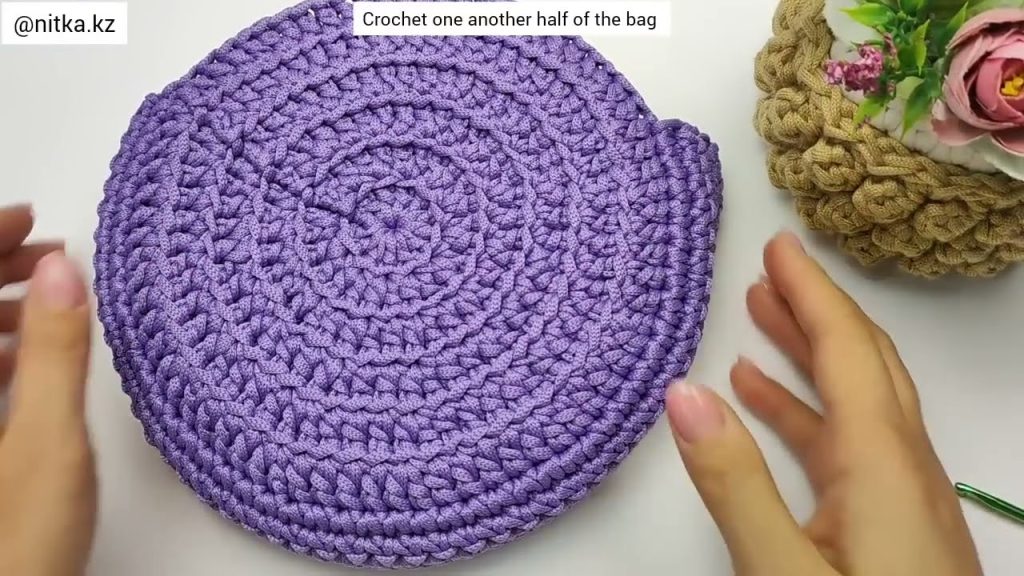
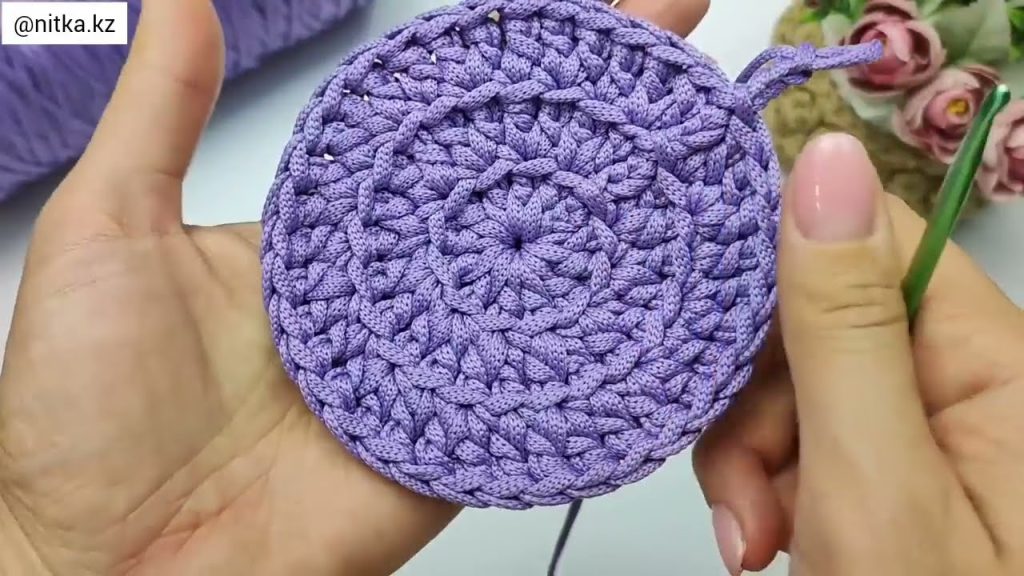
2. Make the Back Panel
- Crochet a plain round circle:
- Start with a magic ring.
- Round 1: 12 dc in ring.
- Round 2: 2 dc in each stitch. (24 sts)
- Round 3: 1 dc, inc (2 dc in next stitch) repeat around.
- Continue increasing evenly until the diameter matches the flower front.
3. Join the Panels
- Place the front and back circles together (right sides facing out).
- Join with single crochet (sc) around the edges, leaving the top open for the bag opening.
4. Add the Handles
- Attach your round handles using slip stitches or by crocheting small loops on each side to secure them.
- If using crochet handles, create a cord strap with single crochet or i-cord and attach securely.
5. (Optional) Add Lining & Closure
- Cut cotton fabric slightly smaller than the bag size.
- Sew it to the inside using a needle and thread.
- Add a zipper or magnetic snap at the top for closure.
🌼 Customization Tips
- Colors: Use gradient or pastel polyester cords to enhance the flower effect.
- Decoration: Add small leaves (crochet green motifs) to the sides.
- Size Adjustment: Increase or decrease rounds to resize the bag.
- Texture: Use a combination of matte and shiny polyester cords for contrast.
🧺 Care Instructions
- Hand wash gently with mild soap.
- Do not iron polyester cord directly; air dry flat.
- Store in a cool, dry place.
🕰️ Estimated Time
- Beginner to intermediate crocheter: 6–8 hours
- Advanced crocheter: 4–5 hours
Would you like me to include a written crochet chart diagram (like round-by-round stitch map) or a printable PDF pattern layout? I can make one for you.
Watch tutorial: