 by
by Below is a clear, detailed, beginner-friendly guide to making a simple knitted hat using the Hyacinth stitch pattern. This pattern creates a textured, flower-like fabric that looks elegant, holds warmth well, and works beautifully for everyday wear.
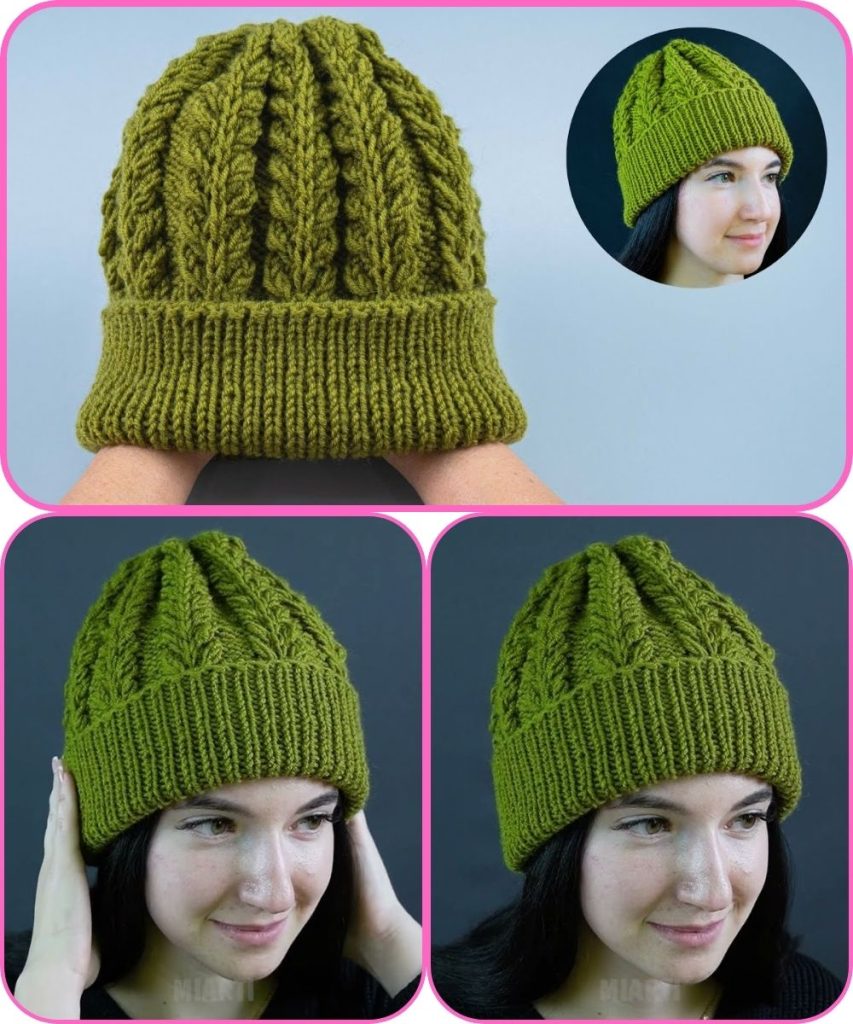
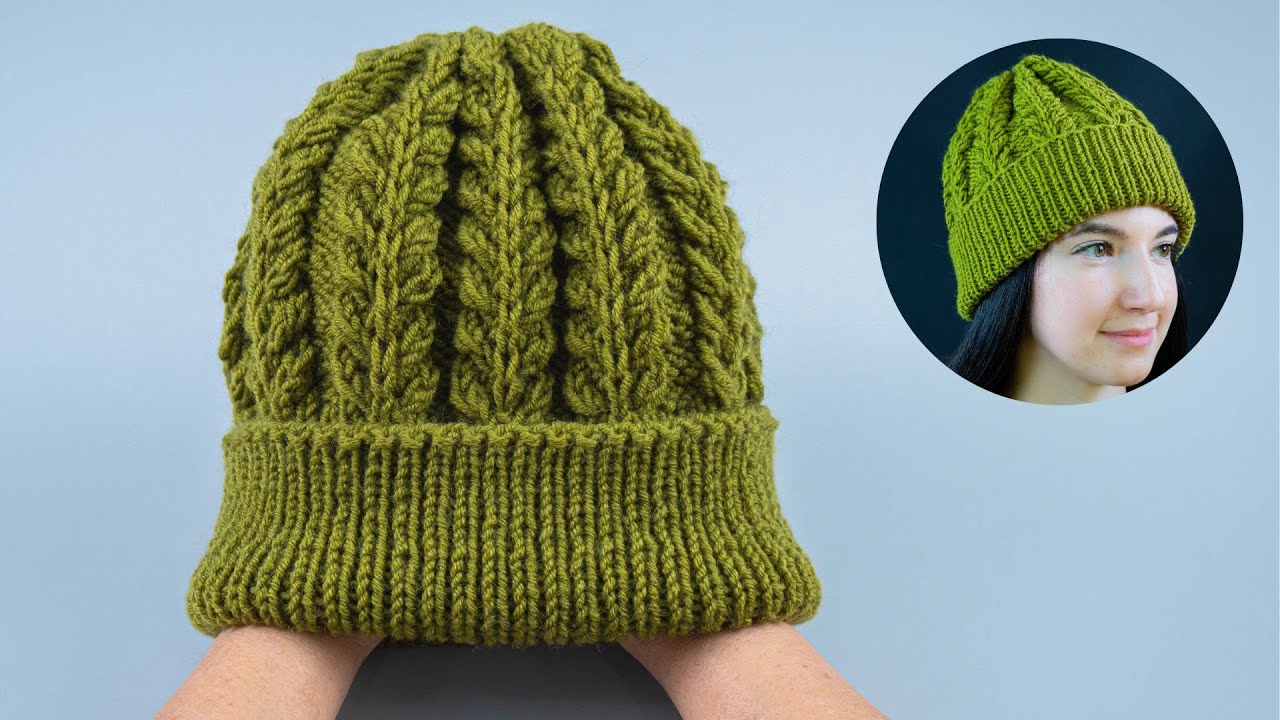
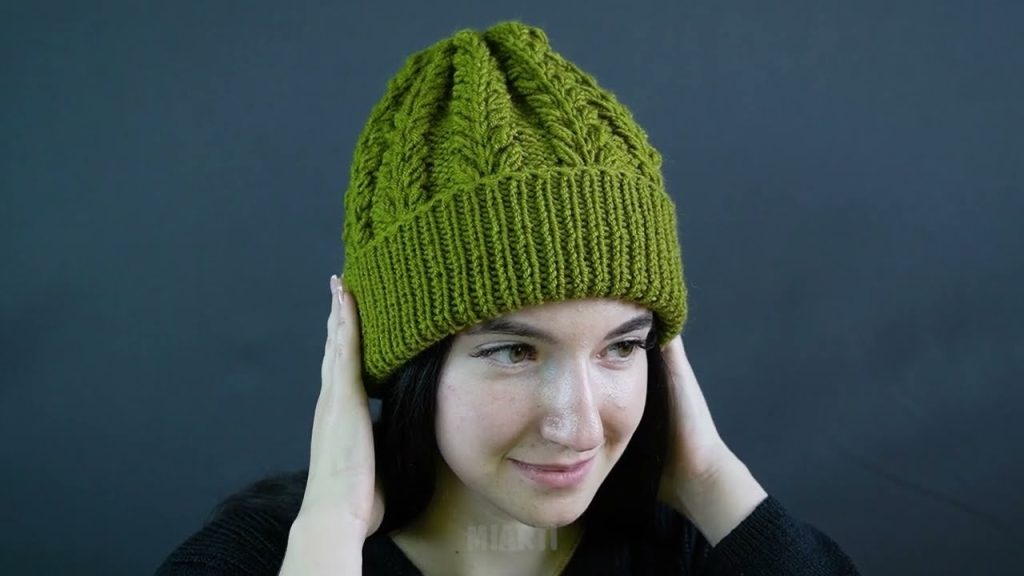
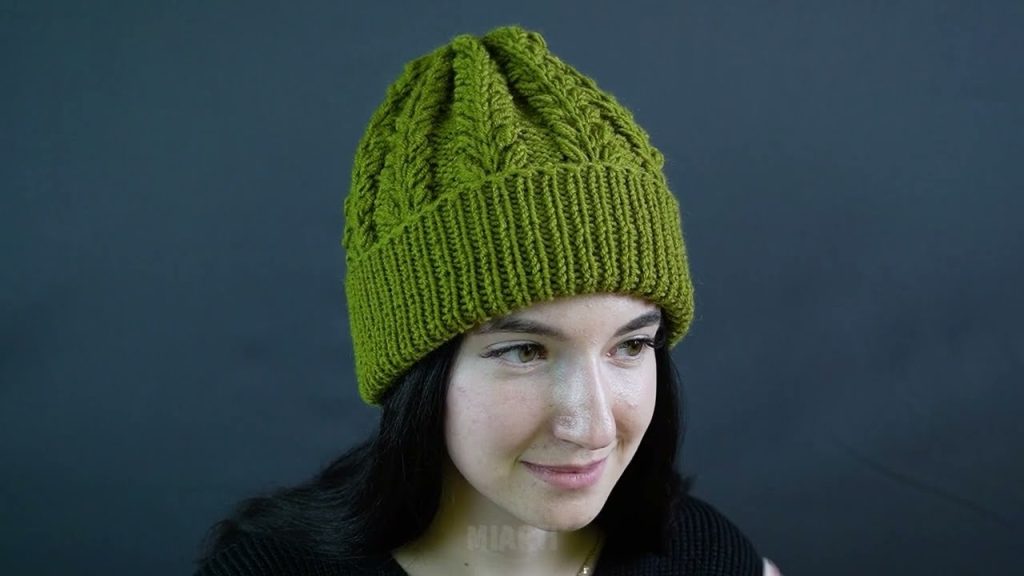
How to Knit a Simple Hyacinth Hat
Beautiful, textured, and warm
About the Hyacinth Pattern
The Hyacinth stitch is a raised, decorative texture made by working clustered stitches into the same spot. The result is a fabric that looks like small blossoms stacked in rows—hence the name Hyacinth. It’s eye-catching but still simple enough for confident beginners.
Materials Needed
- Yarn: Worsted weight (Category 4), ~100–120 g
(Wool or wool blend recommended for warmth) - Needles:
- 4.5 mm (US 7) circular needles (40 cm / 16″)
- Set of double-pointed needles (same size) or longer circular for magic loop
- Stitch marker
- Tapestry needle
- Scissors
Gauge (Approximate)
- 18–20 stitches = 10 cm (4″) in Hyacinth stitch
Gauge doesn’t need to be exact for a hat, but tighter stitches = warmer hat.
Hat Size (Adult – Medium)
- Circumference: ~50–55 cm (20–22″)
- Length: ~22 cm (8.5″) including brim
Abbreviations
- k – knit
- p – purl
- yo – yarn over
- k2tog – knit two together
- st(s) – stitch(es)
- rep – repeat
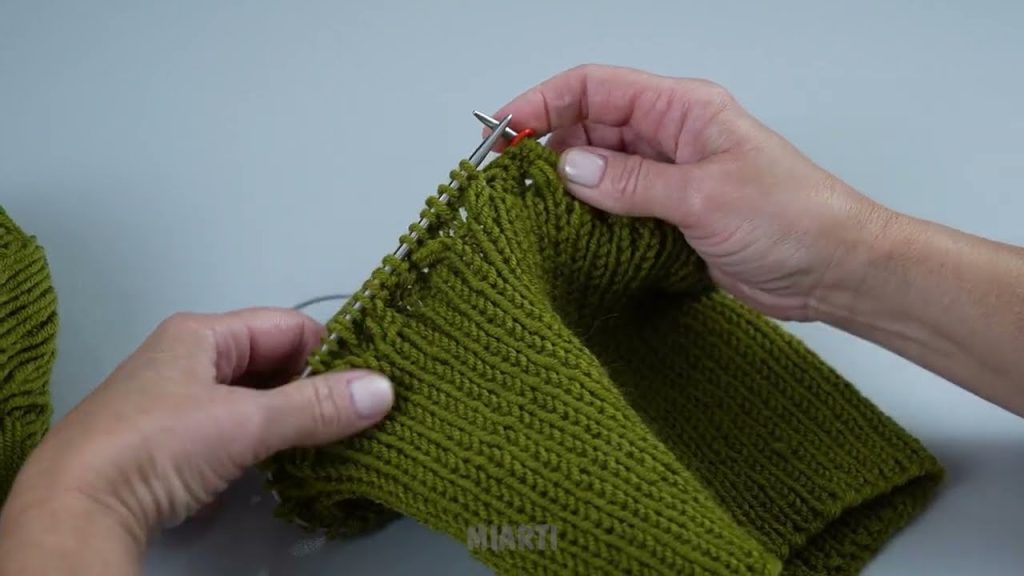
Hyacinth Stitch Pattern (Worked in the Round)
Round 1: k1, yo, k1 all into the same stitch, skip next stitch, repeat around
Round 2: Knit all stitches
Round 3: k1, yo, k1 into the center stitch of previous cluster, skip next stitch, repeat
Round 4: Knit all stitches
👉 Repeat Rounds 1–4 for the pattern.
Instructions
1. Cast On & Brim
- Cast on 88 stitches
- Place marker and join to knit in the round (be careful not to twist)
- Knit 1×1 rib (k1, p1) for 5–6 cm (2–2.5″)
2. Begin Hyacinth Pattern
Switch to Hyacinth stitch rounds:
Repeat Rounds 1–4 until the hat measures about 17 cm (6.5″) from cast-on edge.
The fabric will look thick and textured—perfect for warmth.
3. Crown Decreases
Switch to stockinette (knit every round) for easier shaping.
Decrease Rounds:
- Round 1: k6, k2tog repeat around
- Round 2: Knit
- Round 3: k5, k2tog repeat
- Round 4: Knit
- Continue decreasing this way until 8–10 stitches remain
Cut yarn, thread through remaining stitches, pull tight, and secure.
4. Finishing
- Weave in all ends
- Lightly block if desired (do not stretch)
- Optional: Add a pom-pom or folded brim
Tips for Best Results
- Light-colored yarn shows the Hyacinth texture best
- Wool or alpaca blends enhance stitch definition
- Keep tension even when working clusters
Final Look
This Hyacinth hat has a soft floral texture, excellent insulation, and a refined handmade appearance. It’s perfect as a gift or a cozy winter accessory that looks far more complex than it actually is.
If you’d like, I can also:
- Adjust the pattern for kids or baby sizes
- Convert it to flat knitting
- Create a matching scarf or mittens
Watch tutorial: