 by
by Here’s a clear, beginner-friendly, and detailed tutorial you can use as a blog post, class handout, or video description.
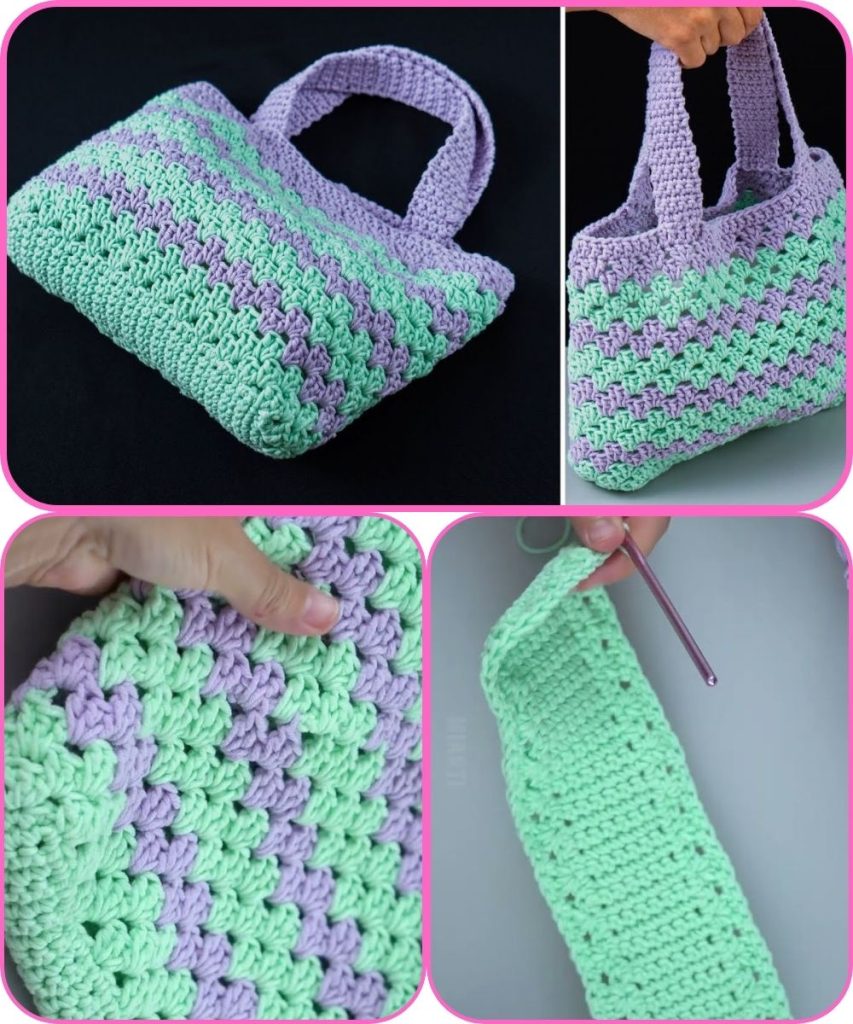
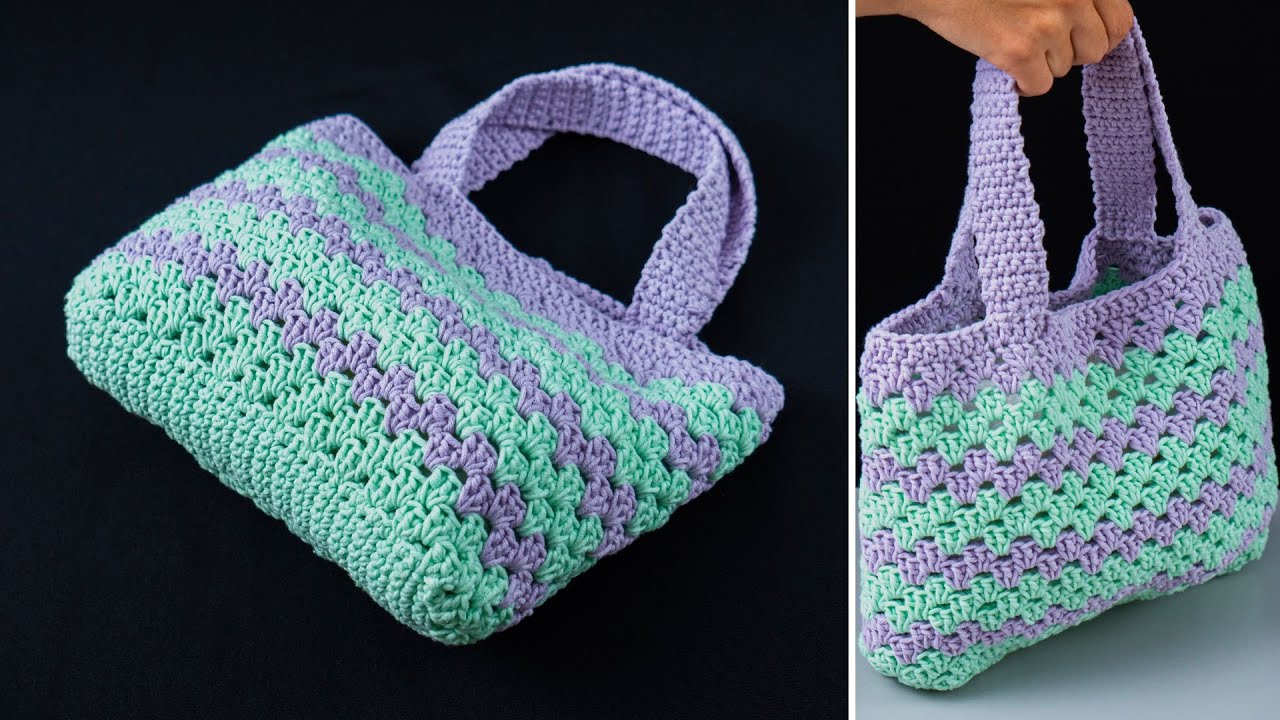
How to Make an Easy Crochet Tote Bag
A Step-by-Step Tutorial for Beginners
Crocheting a tote bag is a perfect beginner project because it’s practical, customizable, and helps you practice basic stitches. This easy crochet tote bag uses simple techniques and creates a sturdy, stylish bag you can use every day.
Skill Level
Beginner
You only need to know basic crochet stitches such as chain and single crochet.
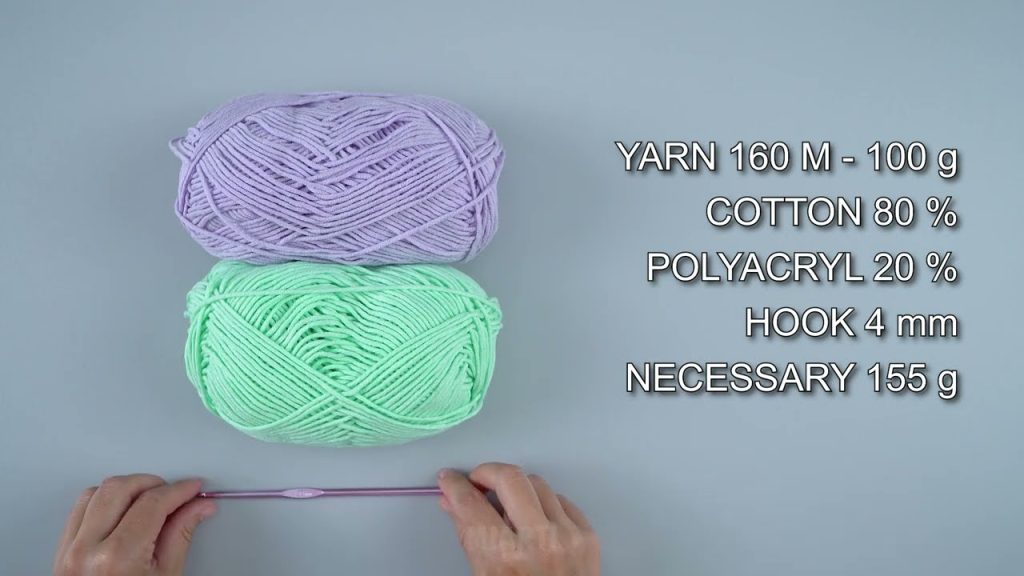
Materials Needed
- Yarn: Medium weight yarn (Category 4 – cotton yarn is recommended for durability)
- Hook: 4.5 mm or 5 mm crochet hook (check yarn label)
- Scissors
- Yarn needle (for weaving in ends)
- Stitch marker (optional but helpful)
Crochet Abbreviations (US Terms)
- ch – chain
- sc – single crochet
- sl st – slip stitch
- st(s) – stitch(es)
- rep – repeat
Finished Size (Approximate)
- Width: 12 inches (30 cm)
- Height: 13 inches (33 cm), not including handles
You can easily adjust the size by adding or reducing stitches.
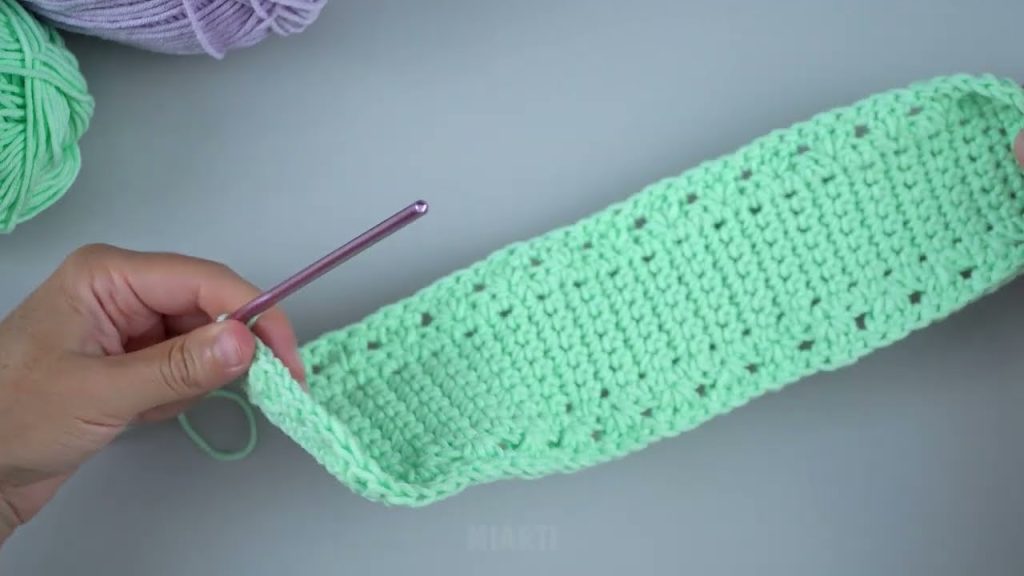
Step 1: Make the Base of the Tote Bag
- Chain 31 (this will be the width of the bag).
- Insert your hook into the second chain from the hook and make 1 sc.
- Continue making 1 sc in each chain across.
- You should have 30 single crochets.
- Chain 1 and turn.
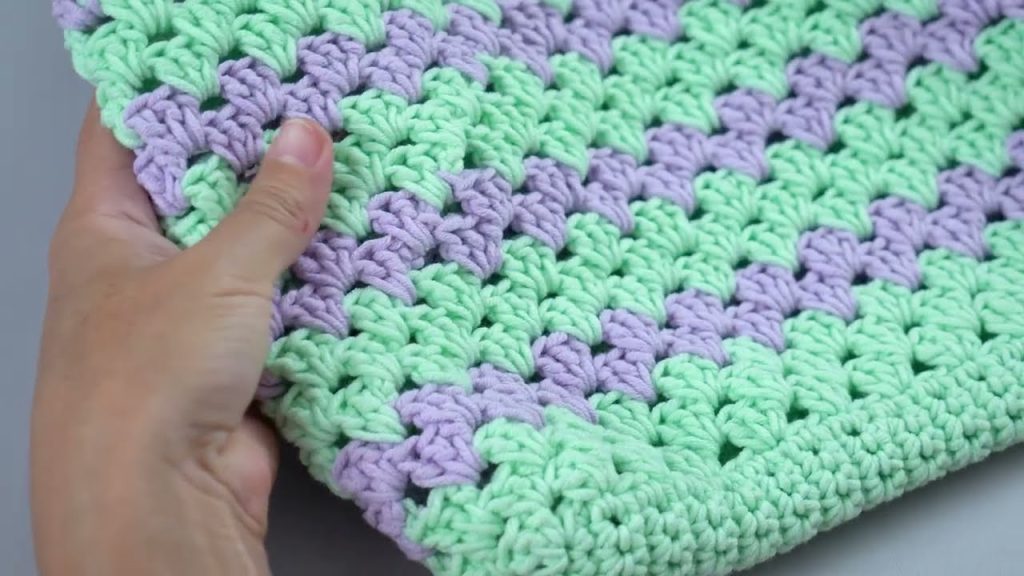
Step 2: Build the Body of the Bag
- Make 1 sc in each stitch across.
- Chain 1 and turn at the end of each row.
- Repeat this row until the piece measures about 13 inches tall.
Tip: Keep your tension even so the bag stays neat and sturdy.
Step 3: Join the Sides
- Fold the rectangle in half with the right sides facing each other.
- Use single crochet or slip stitch to join both sides from bottom to top.
- Fasten off and turn the bag right side out.
Now you have the main body of your tote bag!
Step 4: Create the Handles
- Attach yarn at the top edge of the bag.
- Single crochet evenly around the entire opening.
- When you reach the spot for the handle:
- Chain 40 (or desired handle length)
- Skip the same number of stitches on the bag edge
- Attach with sc
- Continue single crocheting around until you reach the second handle position.
- Repeat the same steps for the second handle.
- Finish the round and slip stitch to join.
Step 5: Strengthen the Handles
- Single crochet 2–3 more rounds around the bag opening and handles to make them strong and comfortable.
- Fasten off and weave in all loose ends using a yarn needle.
Optional Customizations
- Add lining fabric for extra strength
- Use different colors or stripes
- Add a button or magnetic snap
- Decorate with crochet flowers or tassels
Final Thoughts
This easy crochet tote bag is a great project for beginners because it uses simple stitches and basic shaping. Once you master this pattern, you can experiment with different yarns, sizes, and stitch patterns to create your own unique designs.
Happy crocheting! 🧶✨
If you want, I can also:
- Rewrite this as a video script
- Convert it into a PDF pattern
- Simplify it even more for absolute beginners
Watch tutorial: