 by
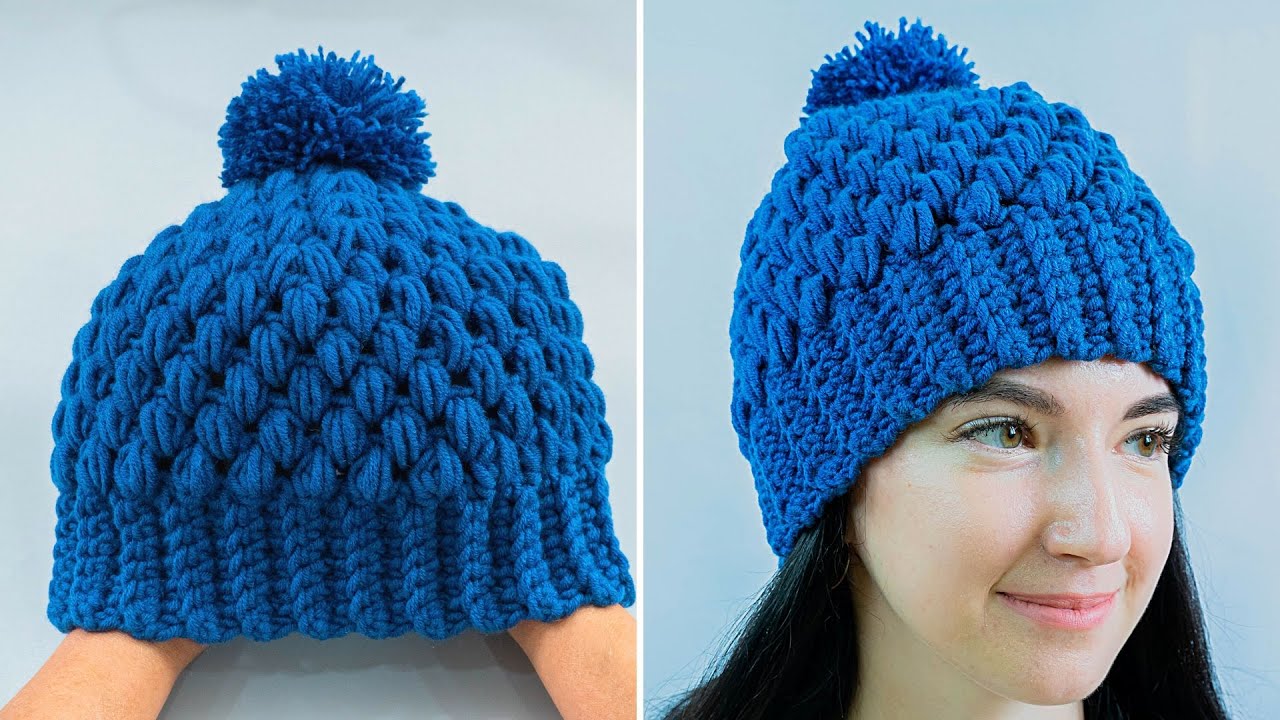
by Here’s a detailed, step-by-step tutorial for making a simple crochet hat with a voluminous (puffy) pattern. This pattern is beginner-friendly but adds a stylish texture so your hat looks full and cozy 🧶✨
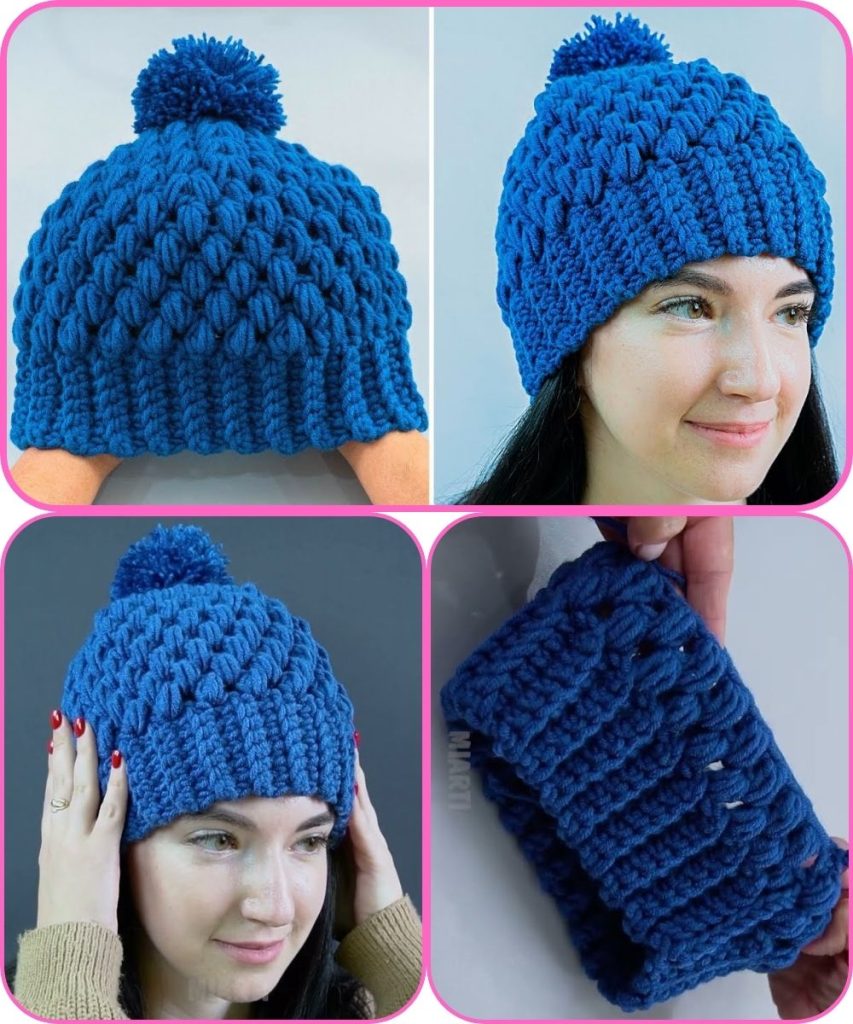
How to Make a Simple Crochet Hat with a Voluminous Pattern – Step by Step
Skill Level
Beginner to intermediate (basic stitches only, with puff stitch for texture)
Finished Size
- Adult medium: Fits most heads (20–22 inches / 51–56 cm)
- Adjustable for children or larger sizes
Materials Needed
- Yarn: Medium weight yarn (Category 4 / worsted weight)
Soft acrylic or cotton yarn works well - Crochet hook: 5 mm (H/8)
- Yarn needle for weaving in ends
- Scissors
- Stitch marker (optional, for rounds)
Stitches Used
- ch – chain
- sc – single crochet
- dc – double crochet
- puff stitch (puff) – 3 double crochets in the same stitch, yarn over and pull through all loops on hook
- sl st – slip stitch
- st(s) – stitch(es)
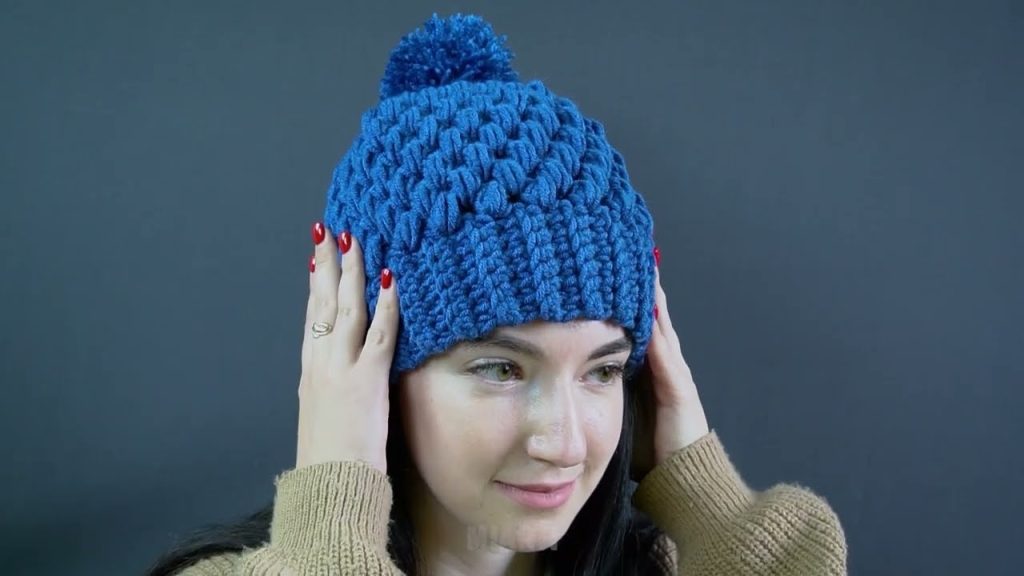
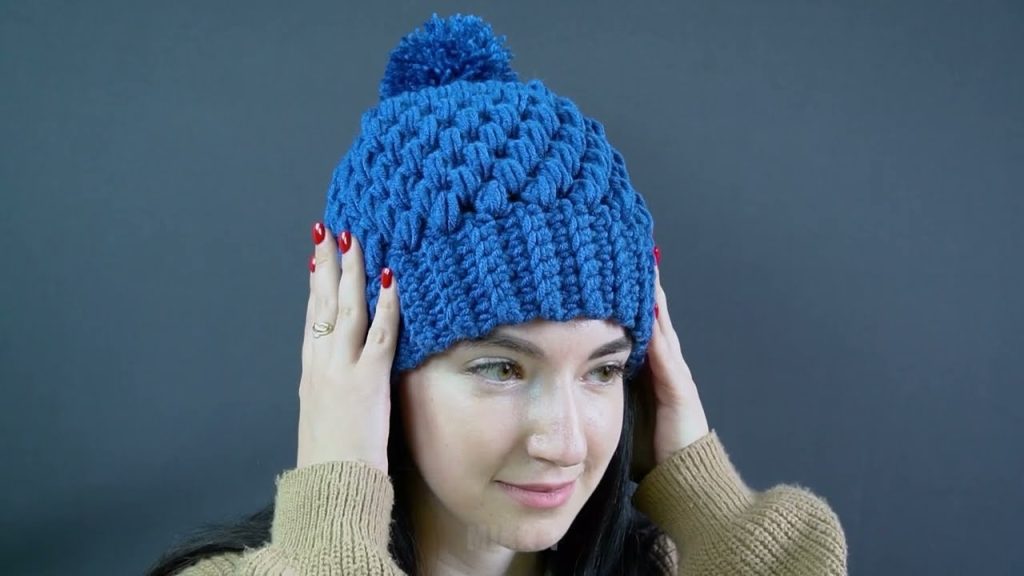
The puff stitch gives the voluminous, puffy texture.
Step 1: Start with a Magic Ring
- Make a magic ring or chain 4 and join with a slip stitch to form a ring.
- Work 6 dc (double crochet) into the ring.
- Pull tight to close the ring.
Step 2: Round 2 – Increase
- Work 2 dc in each stitch around → 12 dc.
- Place a stitch marker at the start of the round to keep track.
Step 3: Round 3 – Increase Again
- 1 dc in first stitch, 2 dc in next stitch → repeat around → 18 dc
Step 4: Continue Increasing for the Crown
- Round 4: 1 dc in next 2 stitches, 2 dc in next stitch → repeat → 24 dc
- Round 5: 1 dc in next 3 stitches, 2 dc in next stitch → repeat → 30 dc
Continue increasing until the crown diameter fits the top of your head (~7–8 inches / 18–20 cm).
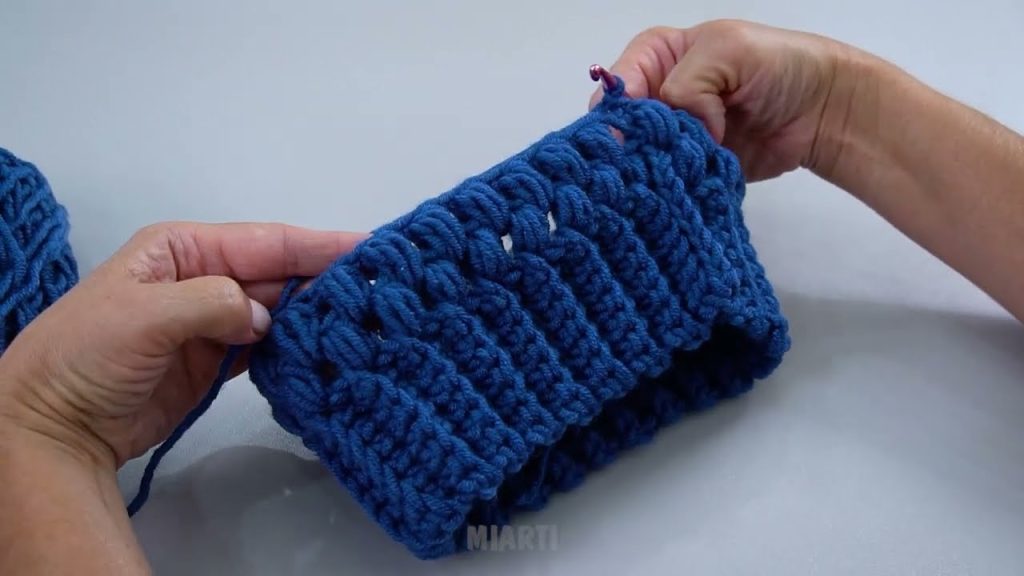
Step 5: Start the Voluminous Body
- Switch to puff stitch for texture.
- Round 1 of puff stitch: puff in next stitch, skip 1 stitch → repeat around
- Round 2: puff in next puff stitch from previous round → continue for 5–6 rounds
This creates a puffy, textured body for your hat.
Step 6: Finish the Bottom Edge
- Work 2–3 rounds of single crochet (sc) around the bottom to create a clean edge.
- Optionally, you can add ribbing: front post and back post single crochet around 1–2 rounds for a snug brim.
Step 7: Finish the Hat
- Cut yarn and pull through the last loop.
- Use a yarn needle to weave in all loose ends.
- Adjust the shape lightly—puff stitches naturally make the hat full and voluminous.
Optional Customizations
- Add a pom-pom on top for extra cuteness
- Use striped yarn or color changes
- Make a slouchy style by adding more puff stitch rounds
- Crochet a matching scarf or mittens with the same puff stitch
Beginner Tips
- Puff stitches can be loose, but keep tension even for a balanced look
- Use a stitch marker to keep track of rounds
- Count stitches carefully during the crown increases
- Start with fewer puff stitch rounds if you want a smaller hat
🎉 Congratulations! You now have a stylish, voluminous crochet hat that looks cozy and fashionable.
I can also make a super-easy one-page printable pattern with rounds and puff stitch placement if you want a visual guide.
Watch tutorial: