 by
by Here’s a detailed, beginner-friendly guide you can use as a blog post, tutorial description, or pattern introduction.
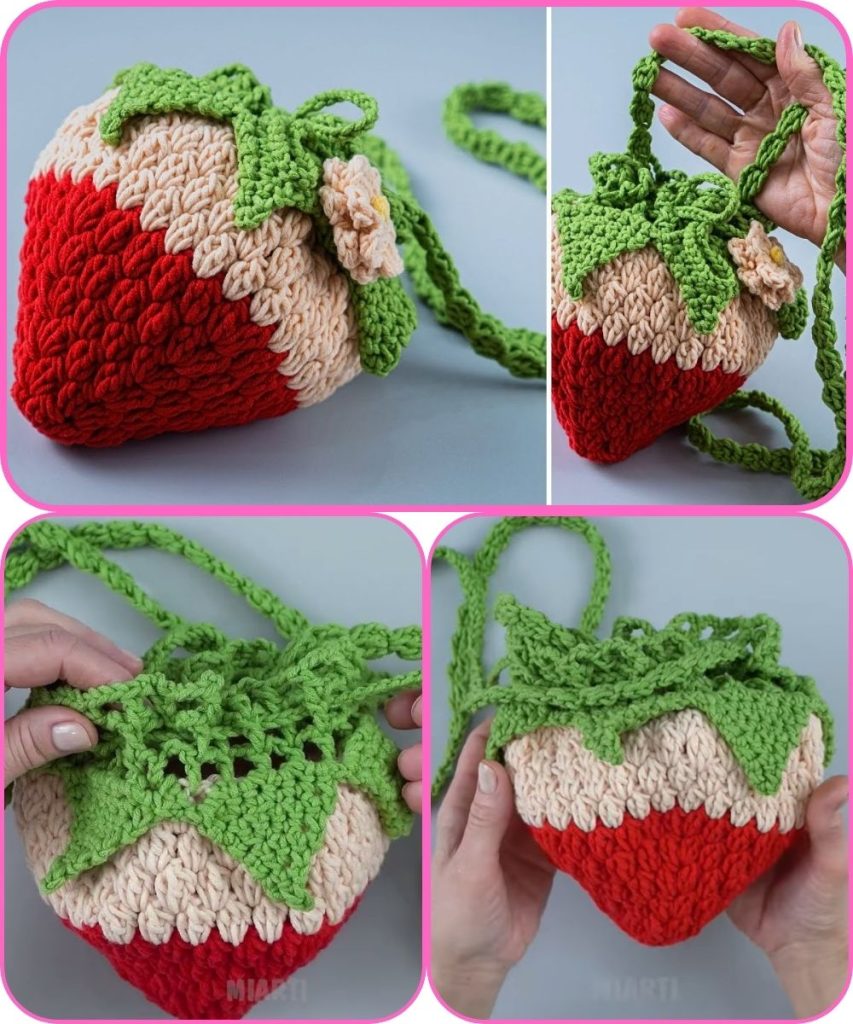
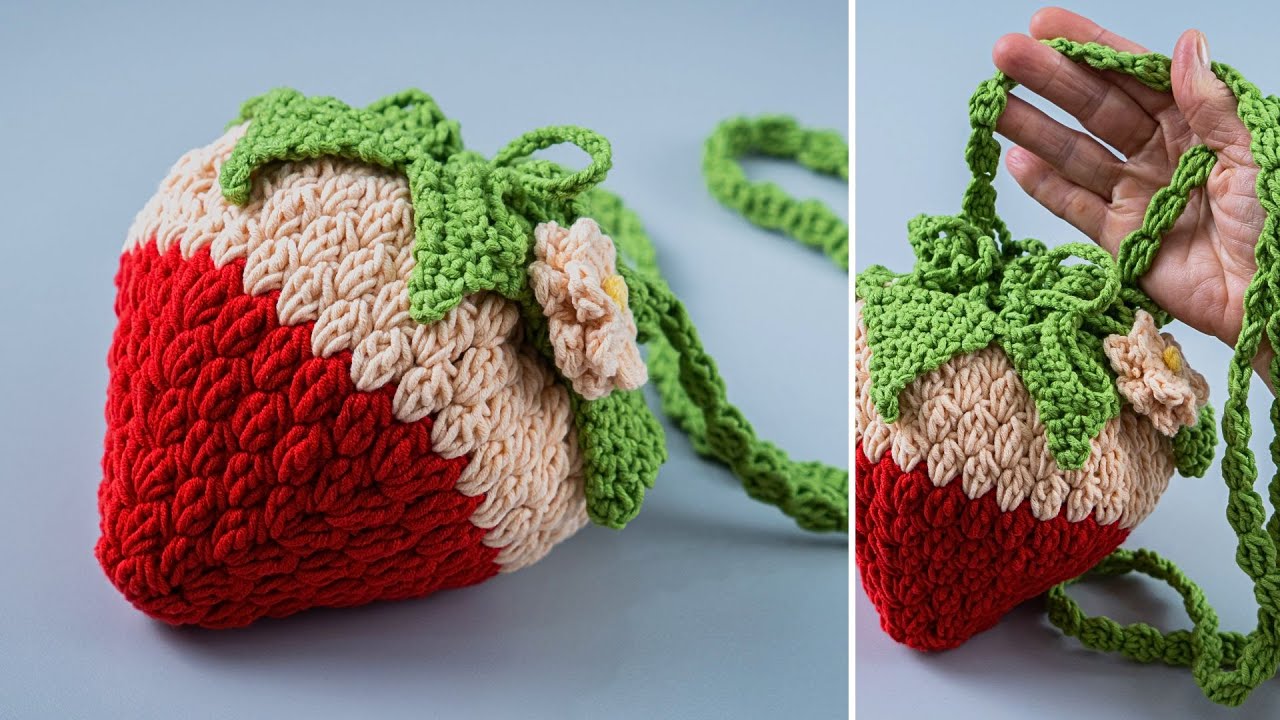
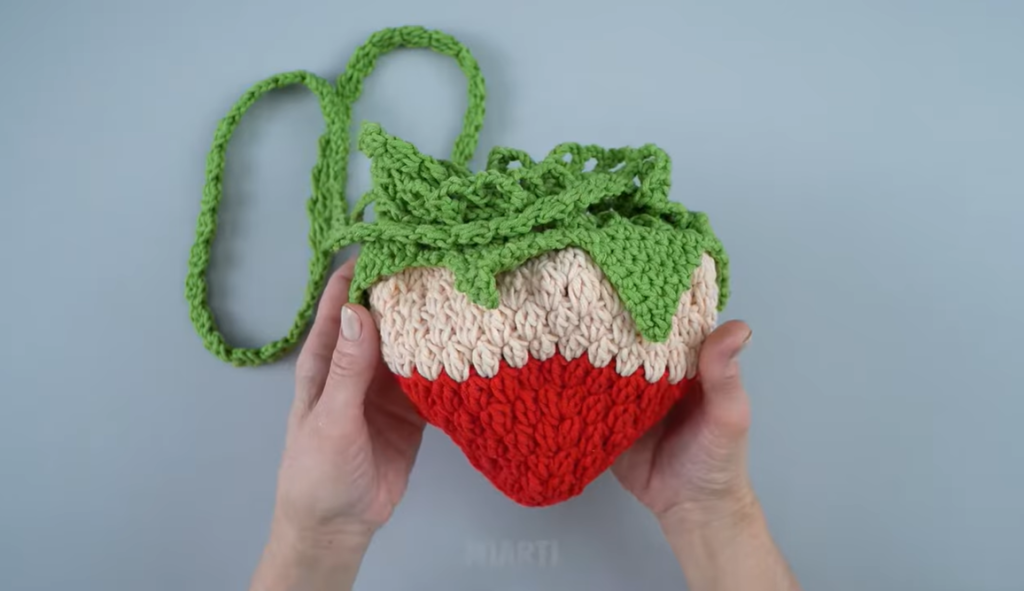
How to Make an Amazing DIY Crochet Strawberry Bag (Easy for Beginners)
Crocheting your own bag is a fun and rewarding project, especially when it’s shaped like a cute strawberry 🍓! This DIY crochet strawberry bag is perfect for beginners because it uses simple stitches, basic shaping, and easy color changes. With just a little patience, you’ll have an adorable handmade bag that’s both stylish and practical.
Why Choose a Strawberry Crochet Bag?
- Cute and trendy design
- Perfect for casual outings or as a gift
- Beginner-friendly stitches
- Customizable size and colors
- Great way to practice shaping and color changes
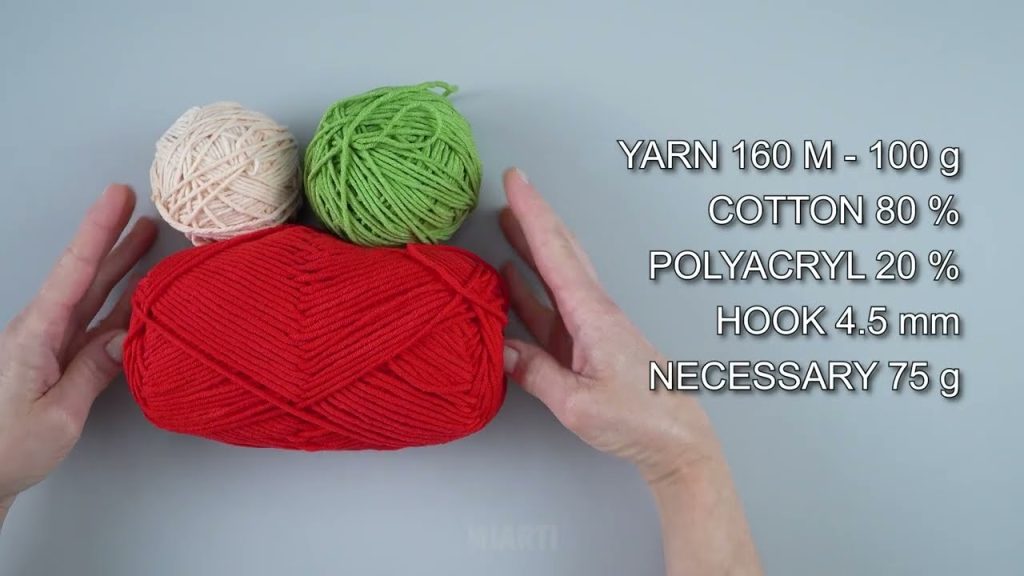
Materials You’ll Need
Before you start, gather the following supplies:
- Yarn
- Red yarn (main body)
- Green yarn (leaves/top)
- Optional white or yellow yarn (for strawberry seeds)
- Crochet hook (usually 4.0–5.0 mm, depending on yarn)
- Scissors
- Yarn needle
- Stitch markers (optional but helpful)
- Button, zipper, or magnetic clasp (optional)
- Lining fabric (optional for durability)
Basic Stitches Used
This project is ideal for beginners because it uses simple crochet techniques:
- Chain (ch)
- Slip stitch (sl st)
- Single crochet (sc)
- Increase (2 sc in one stitch)
- Decrease (sc2tog)
If you know these basics, you’re ready to start!
Step-by-Step Instructions
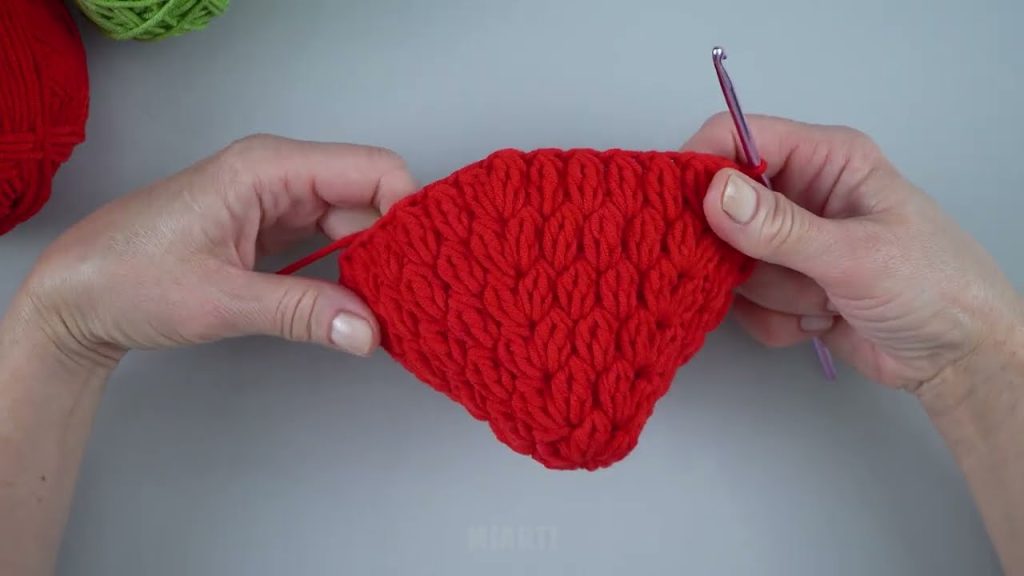
Step 1: Crochet the Base
Begin with a magic ring or chain 4 and join to form a circle.
Crochet single crochets into the ring, increasing evenly each round to create a flat circular base. This will form the bottom of your strawberry bag.
Step 2: Shape the Strawberry Body
Once the base is wide enough, stop increasing and crochet single crochet stitches in continuous rounds.
This creates the rounded strawberry shape. Continue until the bag reaches your desired height.
Step 3: Add Strawberry Seeds (Optional)
Using white or yellow yarn, embroider small “V” or straight stitches around the bag to resemble strawberry seeds.
This step adds charm but can be skipped for a simpler look.

Step 4: Crochet the Green Strawberry Top
Switch to green yarn.
Create leaf shapes by crocheting chains and slip stitches or using simple leaf patterns. These leaves will form the strawberry crown and also help close the bag slightly at the top.
Step 5: Make the Strap
Using red or green yarn:
- Chain to your desired strap length
- Single crochet back along the chain
- Attach securely to both sides of the bag
You can make it a shoulder strap, crossbody strap, or short handle.
Step 6: Finishing Touches
- Weave in all loose ends
- Add a zipper or button if desired
- Sew in fabric lining for extra strength (optional)
Tips for Beginners
- Use cotton or acrylic yarn for better shape
- Count stitches to keep the bag even
- Use stitch markers to track rounds
- Don’t worry about perfection—handmade charm is part of the beauty!
Final Result
Your DIY crochet strawberry bag will be:
- Lightweight
- Cute and eye-catching
- Perfect for daily use or gifts
- A great confidence boost for beginner crocheters
If you’d like, I can also:
- Simplify this into a short pattern
- Write a YouTube video description
- Create a step-by-step crochet pattern
- Help with SEO-friendly blog formatting
Watch tutorial: