 by
by Here is a detailed, beginner-friendly guide on how to crochet a bag using a simple pattern. You can use this as a blog post, assignment, or learning guide.
How to Crochet a Bag with a Simple Pattern
Crocheting a bag is a fun and practical project, perfect for beginners. With basic stitches and simple shaping, you can create a stylish handmade bag for everyday use. This guide explains the materials needed, basic stitches, and step-by-step instructions to crochet a simple bag.
Materials Needed
Before starting, gather the following materials:
- Yarn: Medium-weight yarn (cotton yarn works best for bags because it is strong and durable)
- Crochet Hook: Size 4.5 mm or 5 mm (check the yarn label)
- Scissors
- Yarn Needle: For weaving in ends
- Stitch Marker (optional)
Basic Crochet Stitches Used
You only need a few basic stitches to make this bag:
- Chain (ch): The foundation of the project
- Slip Stitch (sl st): Used to join rounds
- Single Crochet (sc): Creates a tight and sturdy fabric
- Double Crochet (dc): Adds height and texture (optional)
Simple Crochet Bag Pattern
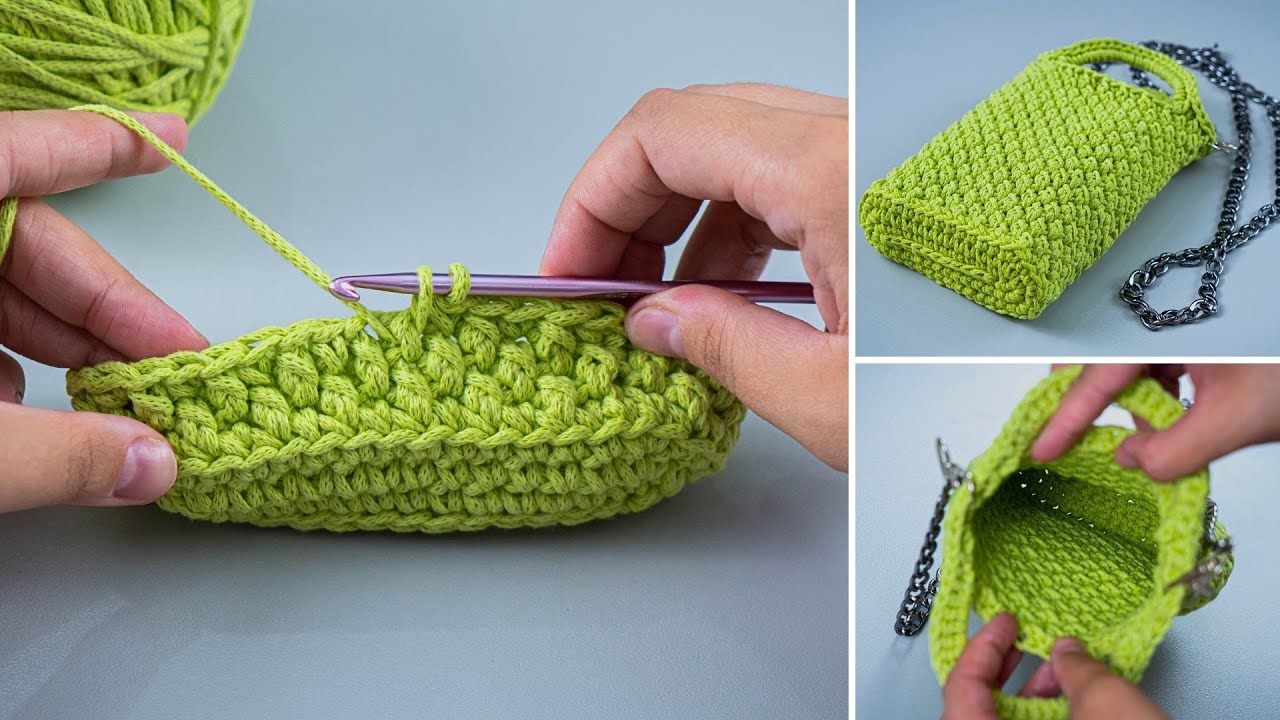
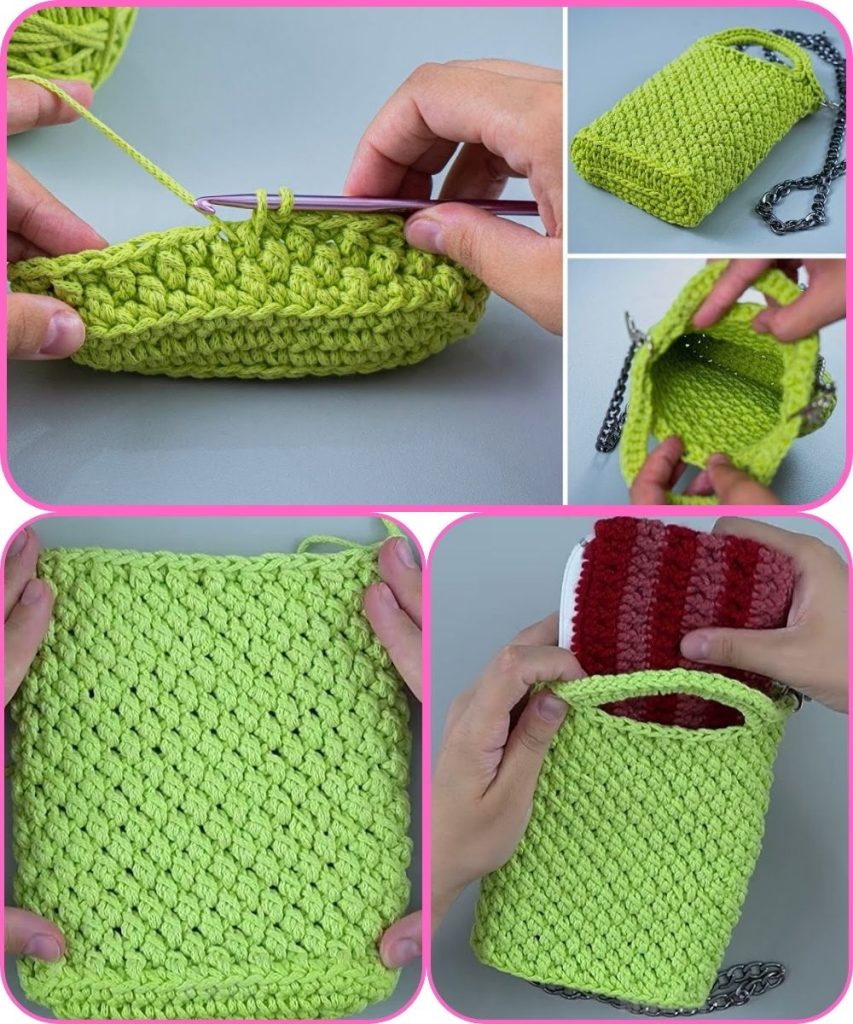
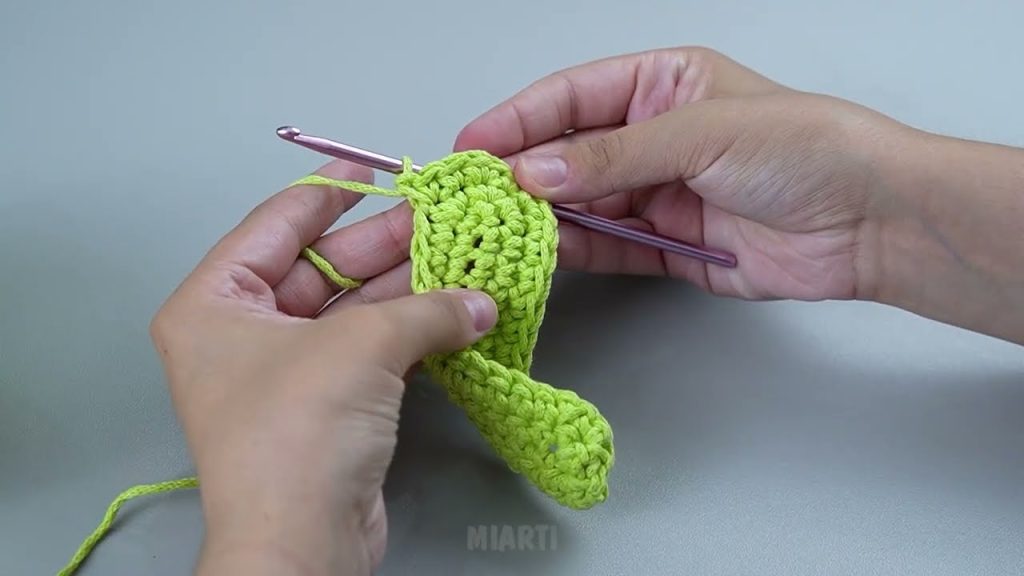
Step 1: Make the Base of the Bag
- Start by making a chain of 31 stitches.
- Single crochet in the second chain from the hook.
- Continue single crocheting across the chain.
- At the last chain, make 3 single crochets in the same stitch.
- Crochet along the opposite side of the chain.
- Make 2 single crochets in the last stitch and join with a slip stitch.
This forms an oval base for the bag.
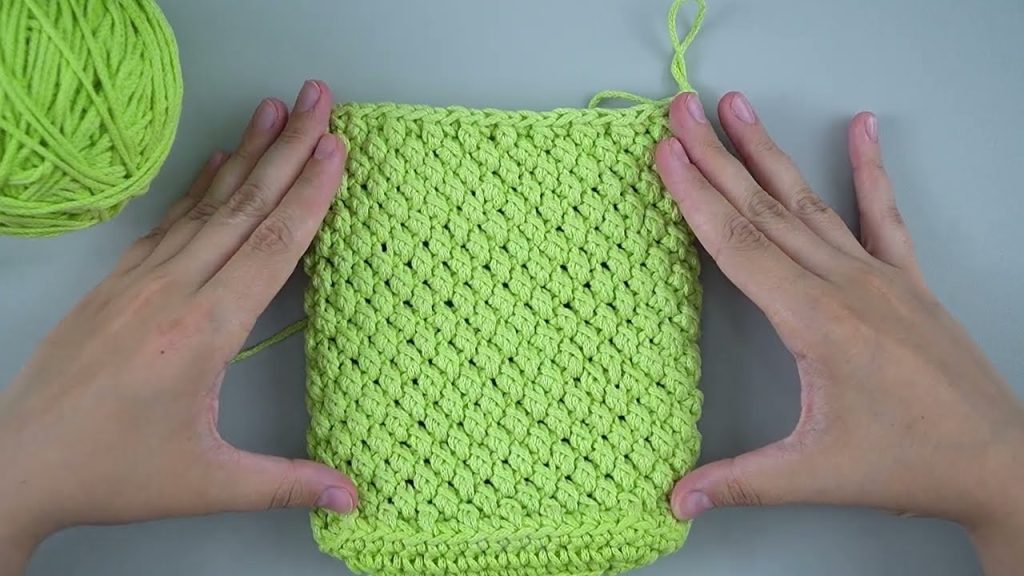
Step 2: Crochet the Body of the Bag
- Chain 1 (does not count as a stitch).
- Single crochet in each stitch around.
- Join with a slip stitch at the end of each round.
- Repeat this round until the bag reaches your desired height (usually 20–25 rounds).
👉 Tip: Keep your stitches tight to make the bag strong.
Step 3: Add Texture (Optional)
For a simple design upgrade:
- Alternate rows of single crochet and double crochet
- Or crochet in the back loop only for a ribbed effect
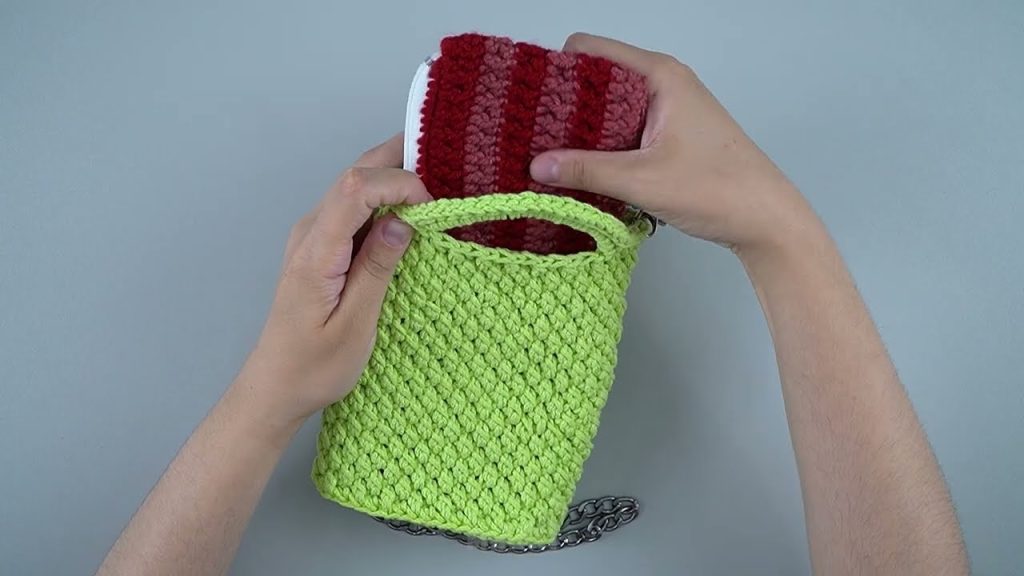
Step 4: Create the Handles
- Mark two opposite sections on the bag.
- Chain 30–40 stitches (depending on handle length).
- Skip the same number of stitches on the bag.
- Single crochet to the next marker.
- Repeat for the second handle.
- On the next round, single crochet around, including the chain spaces.
Step 5: Finish the Bag
- Fasten off the yarn.
- Use a yarn needle to weave in all loose ends.
- Optionally add:
- A lining
- Buttons or magnetic snaps
- Tassels or crochet flowers
Final Tips
- Cotton yarn makes the bag more durable and less stretchy.
- Practice even tension for a neat look.
- You can change colors to create stripes or patterns.
- Adjust the size by increasing or decreasing the number of rounds.
Conclusion
Crocheting a bag with a simple pattern is an excellent project for beginners and experienced crocheters alike. With just a few basic stitches and some patience, you can create a beautiful, functional handmade bag. Once you master this pattern, you can experiment with colors, textures, and shapes to make unique designs.
If you want, I can also:
- Simplify this for kids or beginners
- Turn it into a PDF pattern
- Add images or stitch diagrams
- Rewrite it for a blog or school assignment
Watch tutorial: