 by
by Here is a clear, detailed, step-by-step tutorial on how to make an easy crochet granny square bag. This is perfect for beginners and works well for blogs, assignments, or craft guides.
How to Make an Easy Crochet Granny Square Bag
Step-by-Step Tutorial
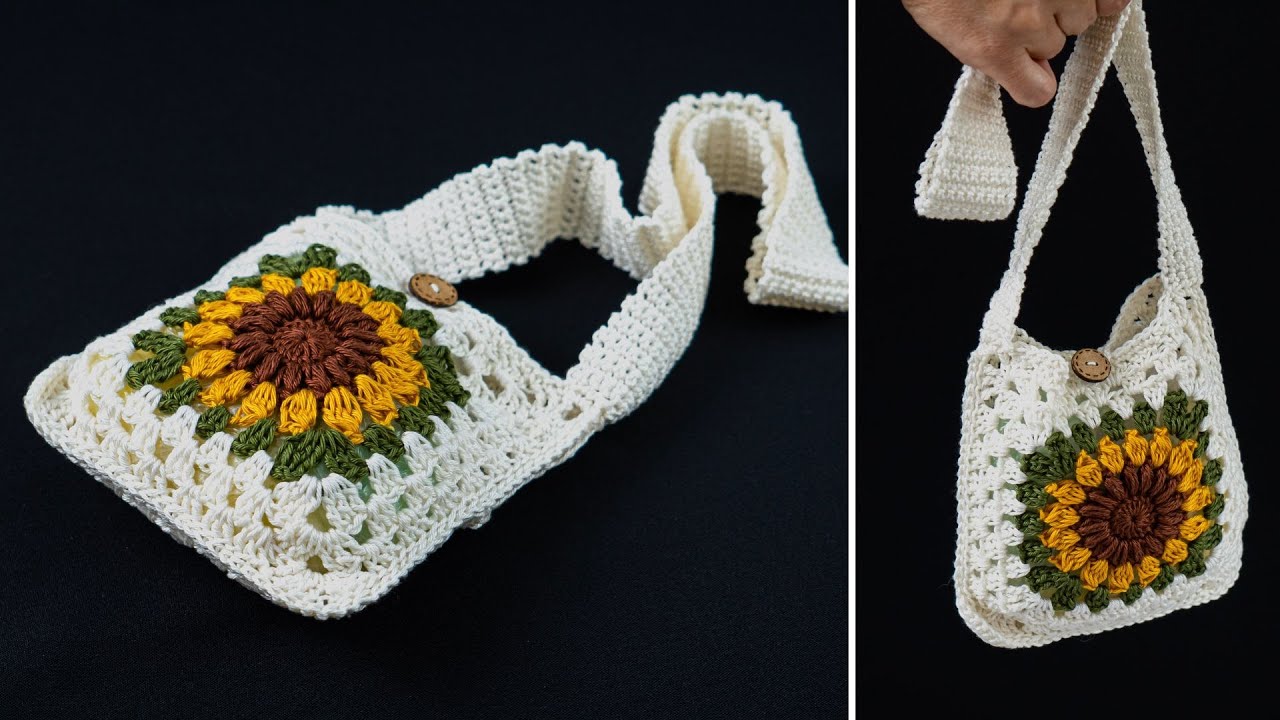
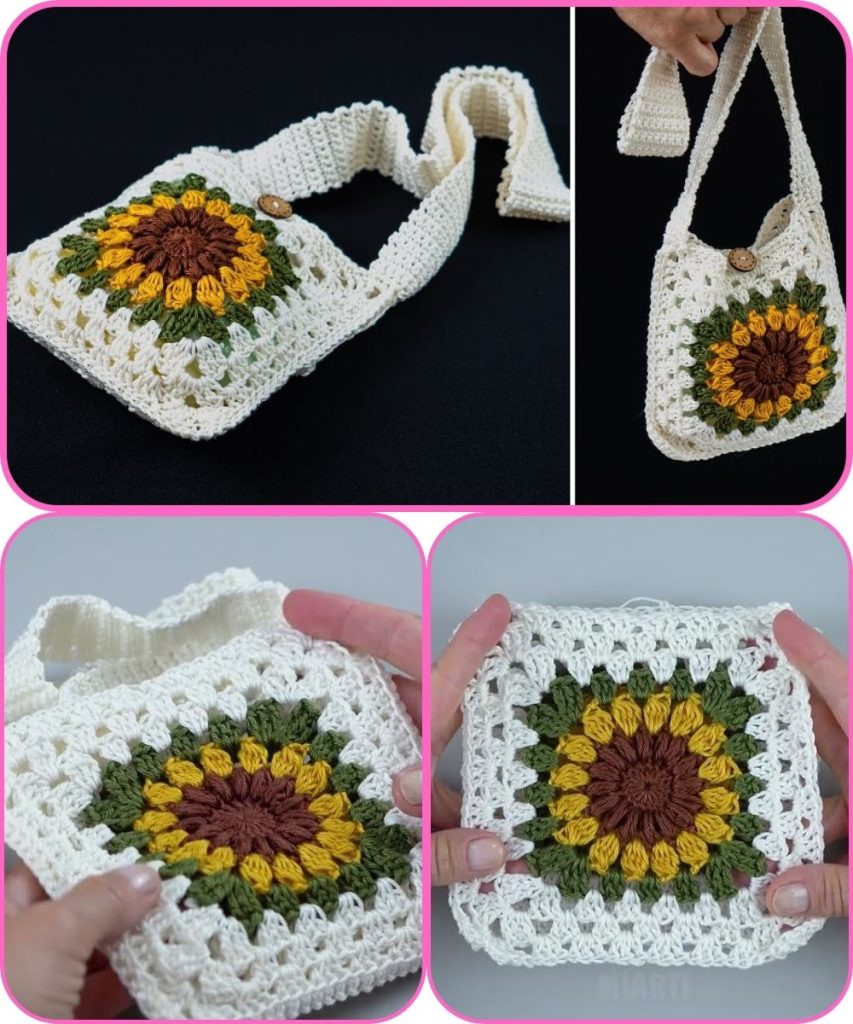
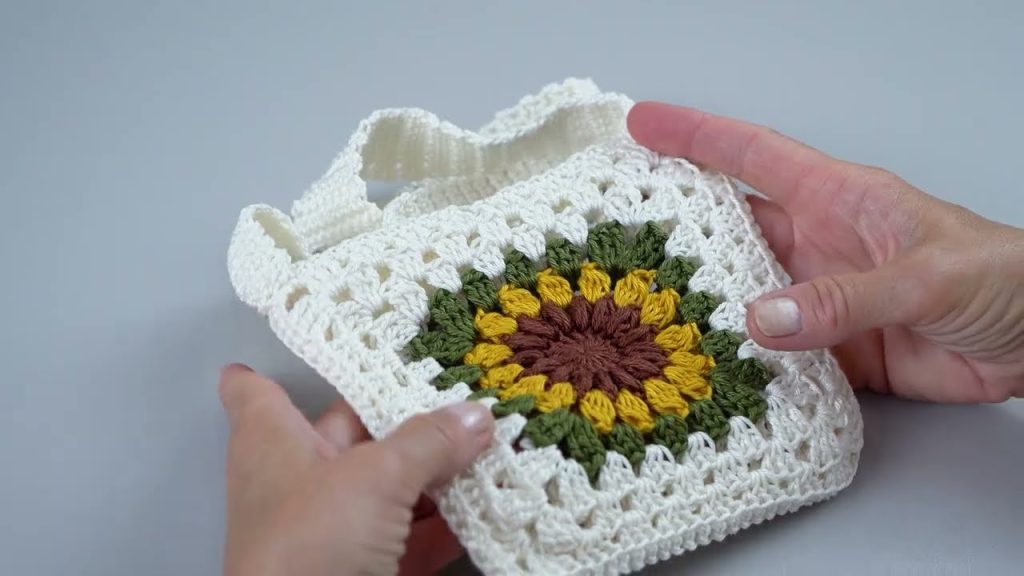
A granny square bag is one of the easiest and most popular crochet projects. It is beginner-friendly, customizable, and stylish. By joining simple granny squares, you can create a beautiful handmade bag suitable for daily use.
Materials Needed
Before you begin, gather the following supplies:
- Yarn: Medium-weight yarn (cotton yarn is ideal for bags)
- Crochet Hook: 4 mm – 5 mm (check yarn label)
- Scissors
- Yarn Needle: For sewing squares and weaving ends
- Stitch Markers (optional)
- Bag Handles (optional): Wooden, leather, or crochet handles
Basic Crochet Stitches Used
This project uses basic crochet stitches:
- Chain (ch)
- Slip Stitch (sl st)
- Double Crochet (dc)
- Single Crochet (sc)
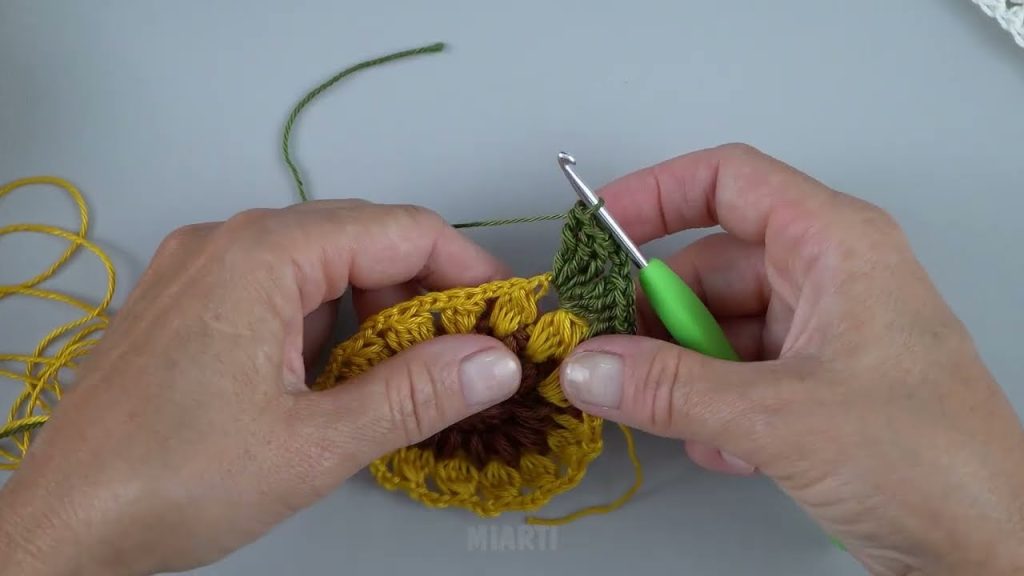
Step 1: Crochet the Granny Squares
Classic Granny Square Pattern
- Make a magic ring (or chain 4 and join with a slip stitch).
- Chain 3 (counts as first double crochet).
- Work 2 double crochets, chain 2.
- 3 double crochets, chain 2 — repeat 3 more times.
- Join with a slip stitch to the top of chain 3.
This completes Round 1.
Round 2 and Beyond
- Slip stitch into the next corner space.
- Chain 3, work 2 double crochets, chain 2, 3 double crochets.
- In each corner space, work (3 dc, ch 2, 3 dc).
- Join with a slip stitch.
Repeat rounds until the square reaches your desired size (usually 5–7 inches).
👉 Make 8–13 granny squares, depending on bag size.
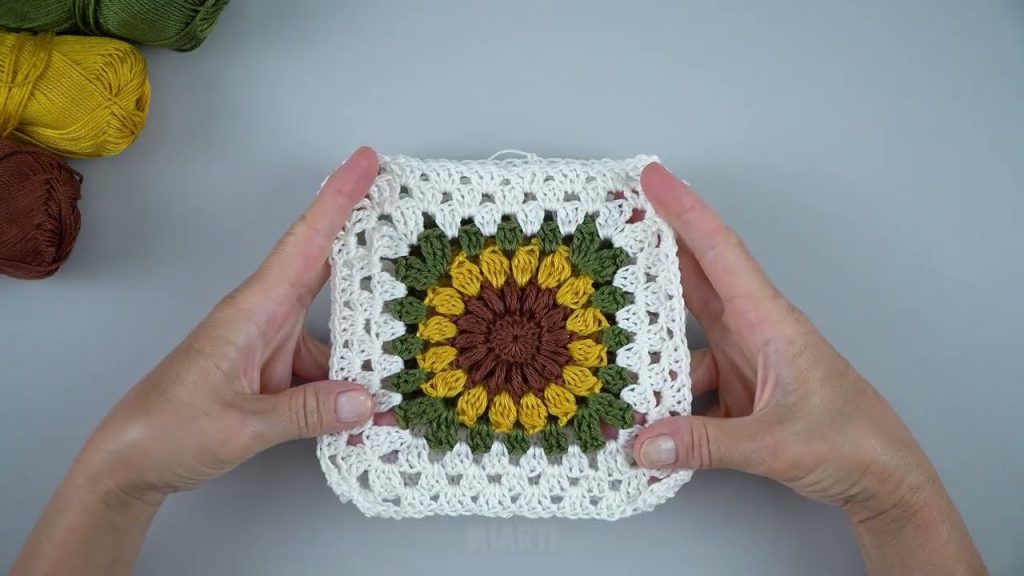
Step 2: Change Colors (Optional)
To make colorful squares:
- Change yarn color at the start of a new round
- Cut and weave in ends neatly
This adds charm and personality to your bag.
Step 3: Join the Granny Squares
Arrange the squares in your desired layout:
- Front: 4 squares
- Back: 4 squares
- Sides & Bottom: Remaining squares (optional)
Joining Methods:
- Slip stitch join
- Single crochet join
- Whip stitch (using yarn needle)
Join squares carefully, keeping seams neat and even.
Step 4: Form the Bag Shape
- Once squares are joined flat, fold them to form a bag shape.
- Sew or crochet the side seams.
- Leave the top open.
You now have the basic bag structure.
Step 5: Crochet the Bag Border
- Attach yarn to the top edge.
- Single crochet evenly around the opening.
- Work 2–3 rounds for a sturdy finish.
- Join each round with a slip stitch.
Step 6: Make the Handles
Crochet Handles:
- Attach yarn to one side of the bag.
- Chain 50–70 stitches (adjust for length).
- Attach to the opposite side with a slip stitch.
- Single crochet along the chain for strength.
- Repeat for second handle if desired.
Alternative Handles:
- Sew on leather or wooden handles
- Attach metal rings for a modern look
Step 7: Finish the Bag
- Fasten off yarn.
- Weave in all loose ends.
- Optional additions:
- Fabric lining
- Buttons or magnetic snaps
- Tassels or charms
Tips for Beginners
- Use cotton yarn to prevent stretching.
- Keep stitches tight for durability.
- Block granny squares before joining for even shape.
- Adjust size by adding or removing squares.
Final Thoughts
An easy crochet granny square bag is a fun and rewarding project for crocheters of all skill levels. With simple stitches and creative color choices, you can design a bag that is both functional and fashionable. Once you master this technique, you can experiment with different square patterns, bag sizes, and embellishments.
If you want, I can:
- Simplify this for absolute beginners
- Write it as a short tutorial
- Create a PDF or printable version
- Add stitch counts or diagrams
Watch tutorial: