 by
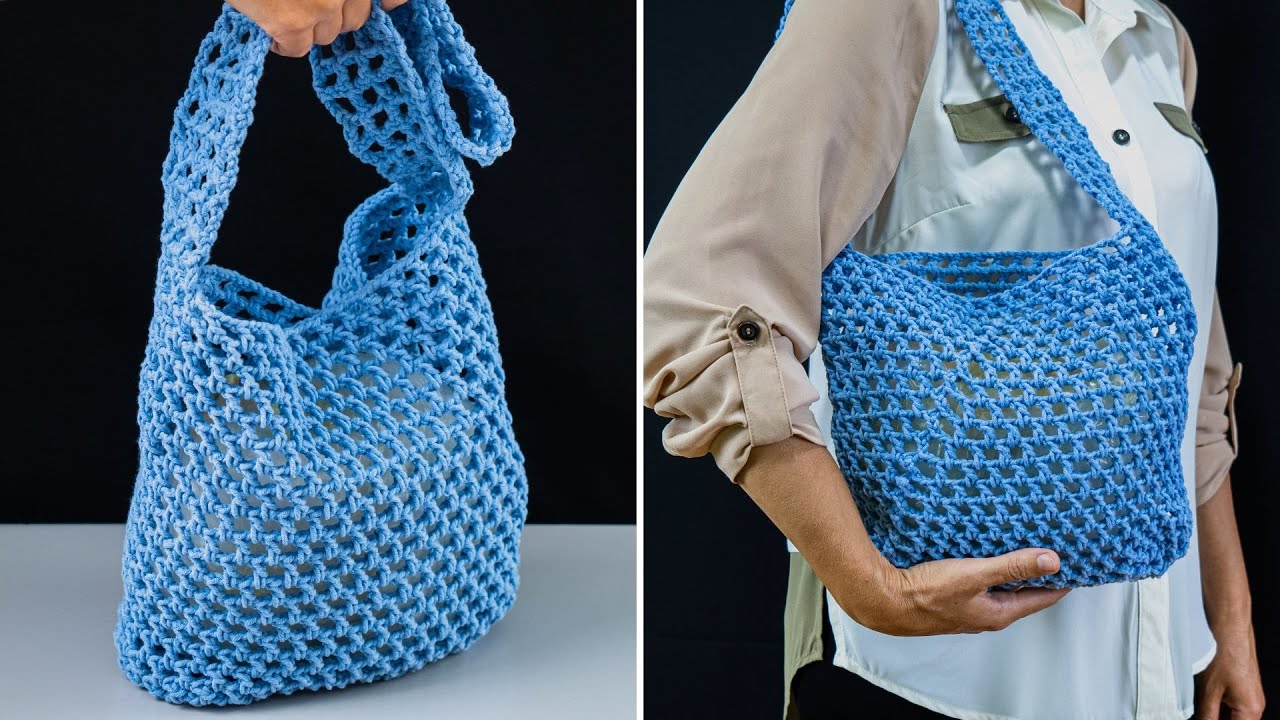
by Here’s a detailed, beginner-friendly guide on how to crochet a net bag quickly and easily. This is perfect for making a lightweight, reusable, and stylish bag for groceries, beach trips, or everyday use.
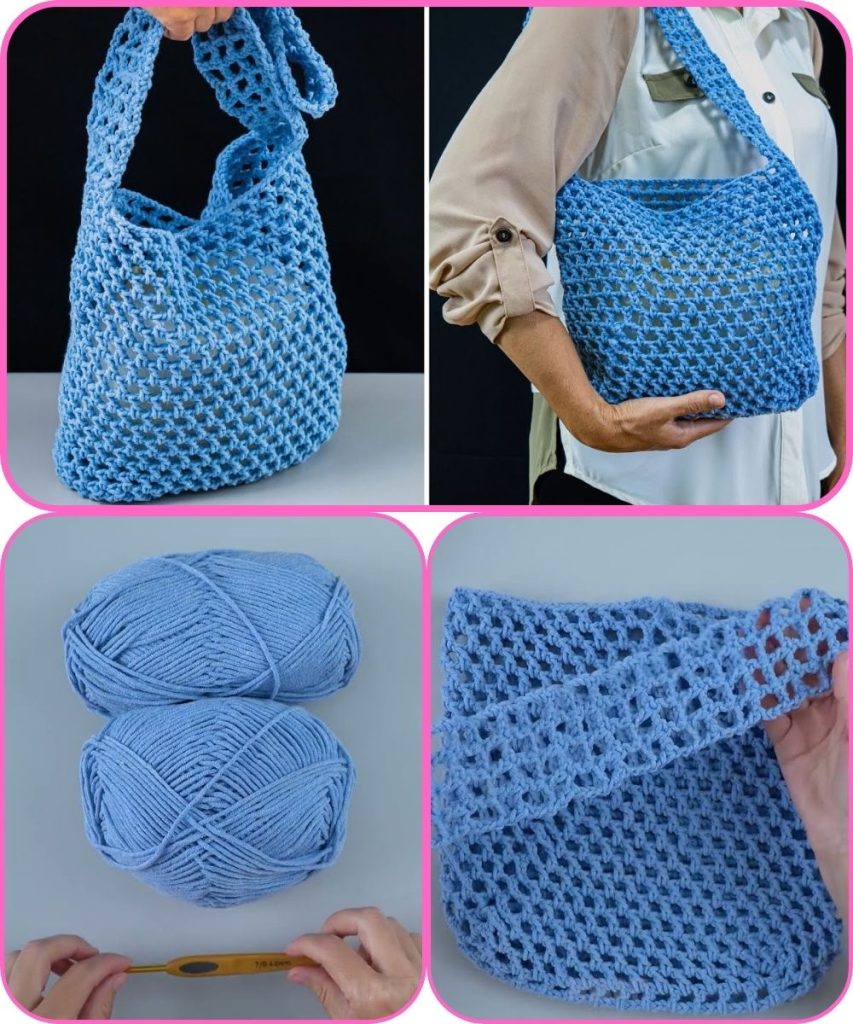
How to Crochet a Net Bag Quickly and Easily – Step by Step
Crochet net bags are fast, fun, and functional. They require minimal yarn, basic stitches, and a simple construction, making them an ideal project for beginners or anyone who wants a practical bag in a short time.
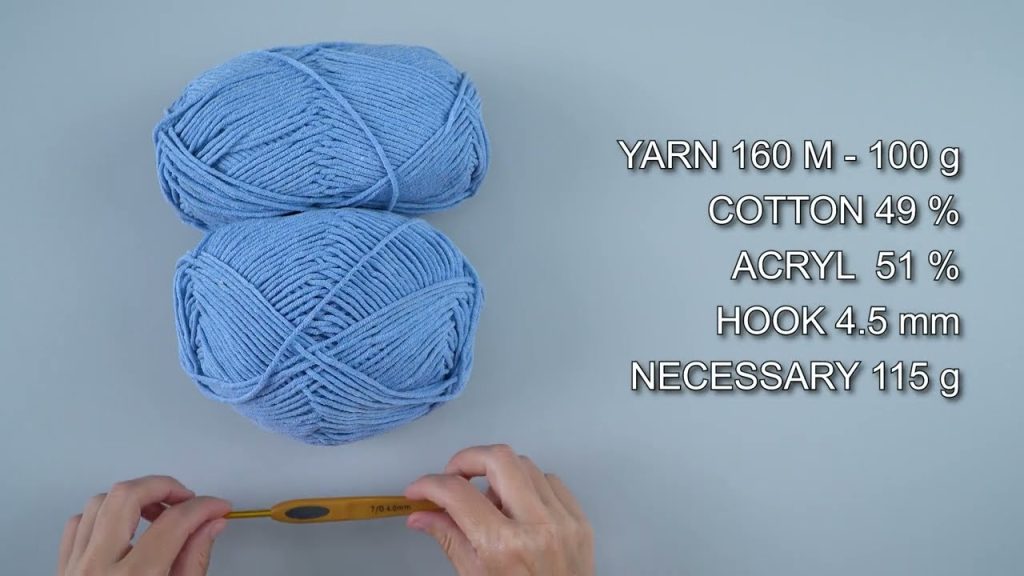
Materials Needed
- Yarn: Medium-weight cotton yarn (strong and durable for carrying items)
- Crochet Hook: 4–5 mm (check yarn label for recommended size)
- Scissors
- Yarn Needle: For weaving in ends
- Optional: Stitch marker
Basic Crochet Stitches Used
- Chain (ch) – foundation stitch and mesh
- Single Crochet (sc) – for top and bottom edges
- Double Crochet (dc) – for mesh netting
- Slip Stitch (sl st) – to join rounds
No advanced stitches are required, making this beginner-friendly.
Step 1: Crochet the Bottom of the Bag
- Chain 6 stitches.
- Join with a slip stitch to form a ring.
- Chain 3 (counts as first dc).
- Work 11 double crochets into the ring.
- Join with a slip stitch to the top of the chain 3.
You now have a small round base for your bag.
Step 2: Increase for the Base
- Round 2: 2 dc in each stitch around.
- Round 3: 1 dc in first stitch, 2 dc in next stitch repeat around.
- Round 4: 2 dc in next stitch, 1 dc in next 2 stitches repeat around.
Continue increasing until the base reaches your desired width (usually 15–20 cm for a standard tote).
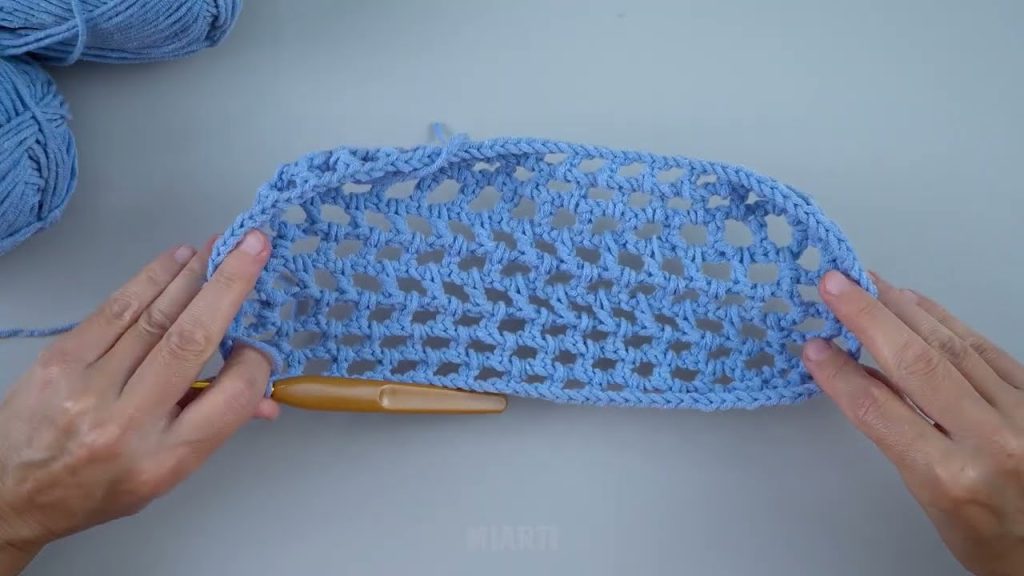
Step 3: Crochet the Net Mesh Body
- Chain 4 (counts as 1 dc + ch 1).
- Skip 1 stitch, dc in next stitch, ch 1; repeat around.
- Join with slip stitch at the beginning of the round.
- Repeat this round until the bag reaches the desired height (usually 25–30 cm).
The chain spaces create the open, airy mesh characteristic of net bags.
Step 4: Make the Bag Opening (Optional)
- If you want a wider opening, stop increasing the chain spaces in the last few rounds.
- You can also switch to simple double crochet rounds at the top for a sturdier edge.
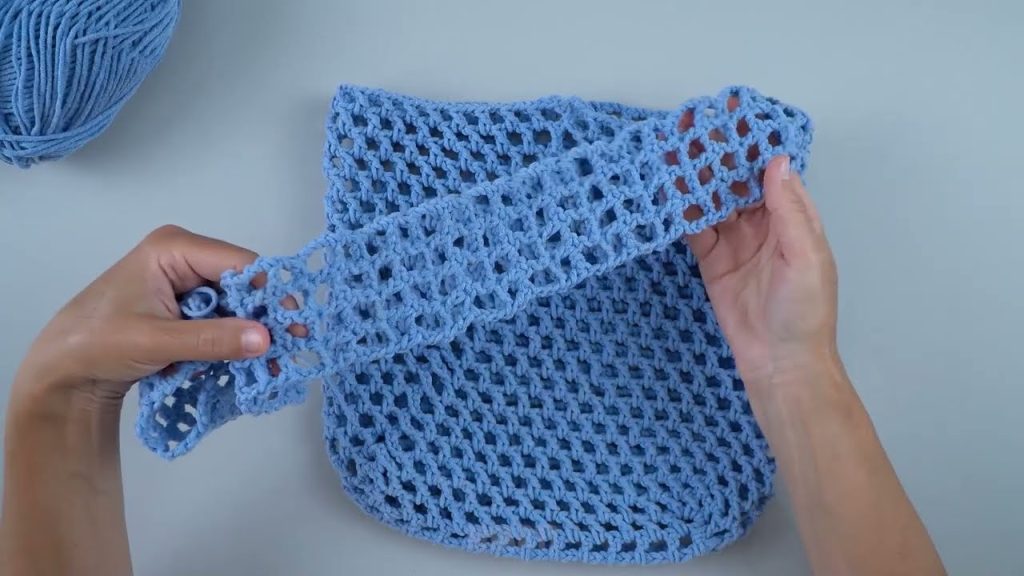
Step 5: Crochet the Handles
- Decide the placement and length of your handles.
- Chain the desired length (usually 30–40 stitches for shoulder handles).
- Skip the same number of stitches along the top edge.
- Attach with single crochet.
- Repeat for the second handle.
- Work a round of sc around the handles and top edge for reinforcement.
Handles can also be made sturdier by doubling the yarn or using chain + sc combination.
Step 6: Finish the Bag
- Fasten off the yarn.
- Weave in all loose ends with a yarn needle.
- Optional: Add a small decorative knot, bead, or tassel for flair.
Tips for Beginners
- Use cotton yarn to keep the bag strong and slightly stretch-resistant.
- Keep even tension to maintain uniform mesh.
- Measure the bag’s base and height while crocheting to ensure the right size.
- Start small; net bags are forgiving and easy to resize.
Variations and Customization
- Larger Market Bag: Increase base diameter and add extra mesh rounds.
- Decorative Top Edge: Add scallops, picots, or ribbing.
- Colorful Bag: Use stripes or color changes for a fun look.
- Compact Bag: Reduce mesh rounds for a small, purse-sized net bag.
Why This Bag Is Great for Beginners
- Uses only basic stitches
- Minimal yarn and materials needed
- Quick to make (can finish in a few hours)
- Practical, stylish, and environmentally friendly
Final Thoughts
Crocheting a net bag is an easy, fast, and rewarding project. Even beginners can create a functional bag with just basic stitches and a little shaping. Once you’re comfortable, you can experiment with size, colors, and decorative edges to make your net bag unique.
I can also create:
- A step-by-step diagram with mesh pattern and measurements
- A beginner-friendly printable pattern with handle placement
- Ideas for different sizes, from mini tote to large market bag
Watch tutorial: