 by
by Here is a clear, detailed, and beginner-friendly guide you can use for a blog post, pattern description, or tutorial.
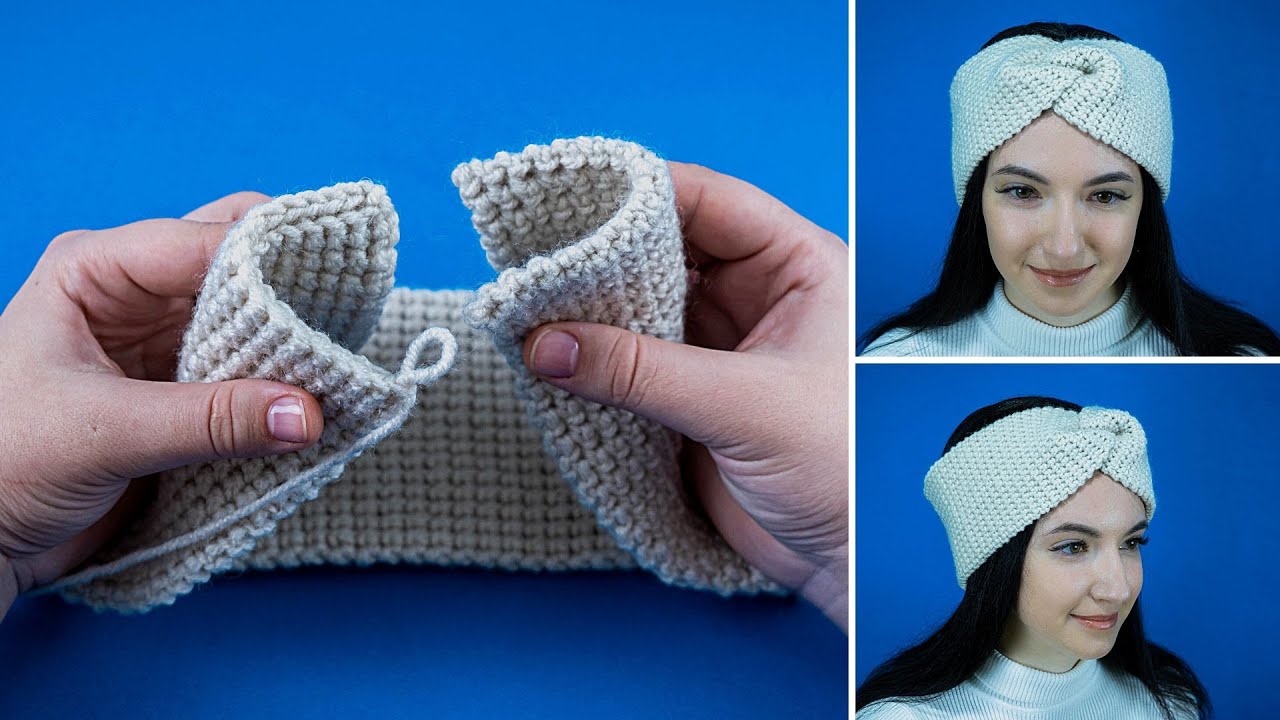
How to Make the Simplest Crochet Headband – Even a Beginner Can Handle It!
A crochet headband is one of the easiest and most satisfying projects for beginners. It works up quickly, uses very little yarn, and requires only basic stitches. Best of all, even the simplest headband can look stylish and handmade with love.
If you are new to crochet, this is the perfect first project—and if you’re experienced, it’s a great quick make or gift idea.
Why a Crochet Headband Is Perfect for Beginners
- Very small and fast project
- Uses basic crochet stitches
- Easy to fix mistakes
- No shaping or counting stress
- Great for practicing tension
- Perfect for leftover yarn
You can complete a simple crochet headband in less than an hour!
Materials You’ll Need
Gather these basic supplies before you start:
- Yarn: Medium-weight (worsted) yarn
- Acrylic for softness
- Cotton for warmer weather
- Wool blend for winter warmth
- Crochet Hook: Size 4–5 mm (check yarn label)
- Scissors
- Yarn Needle (for sewing ends)
That’s it—no special tools required!

Basic Stitches Used
This project uses only beginner-friendly stitches:
- Chain stitch (ch)
- Single crochet (sc) or half double crochet (hdc)
- Slip stitch (sl st)
If you know how to chain and make basic stitches, you’re ready to go.
Step-by-Step Instructions
1. Measure the Head Size
For an adult headband:
- Length: 50–55 cm (20–22 inches)
- Width: 6–10 cm (2.5–4 inches)
You can adjust easily for children by reducing the length.
2. Create the Foundation Chain
- Chain enough stitches to match the width of your headband
(Usually 10–15 chains) - This determines how wide the headband will be
👉 Tip: Keep your chain loose so the fabric doesn’t curl.
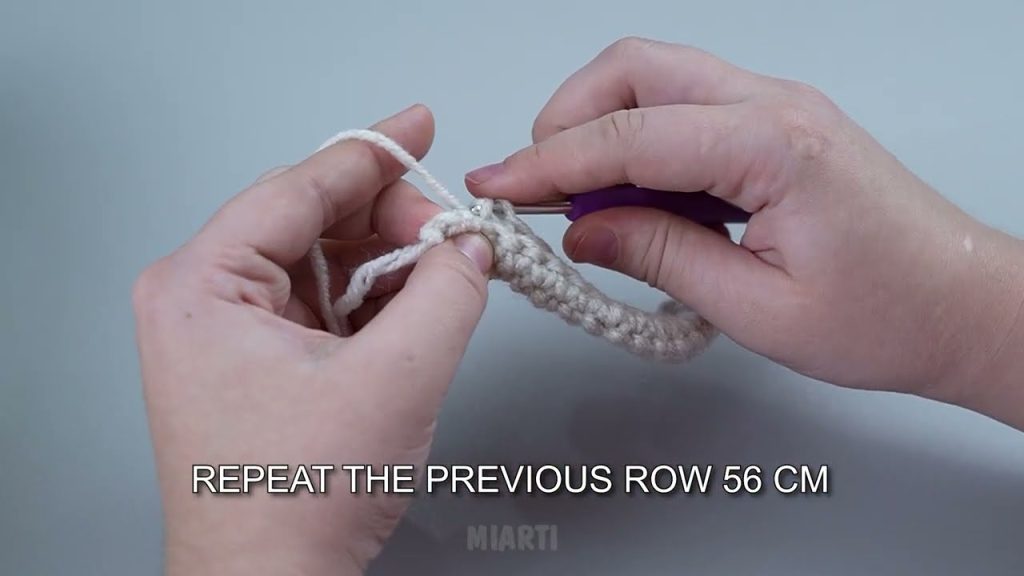
3. Crochet the Headband Body
- Turn your work and crochet single crochet or half double crochet across the row
- Chain 1 and turn at the end of each row
- Continue crocheting back and forth in rows
- Stop when the piece is long enough to wrap around your head comfortably
This creates a simple, clean rectangle.
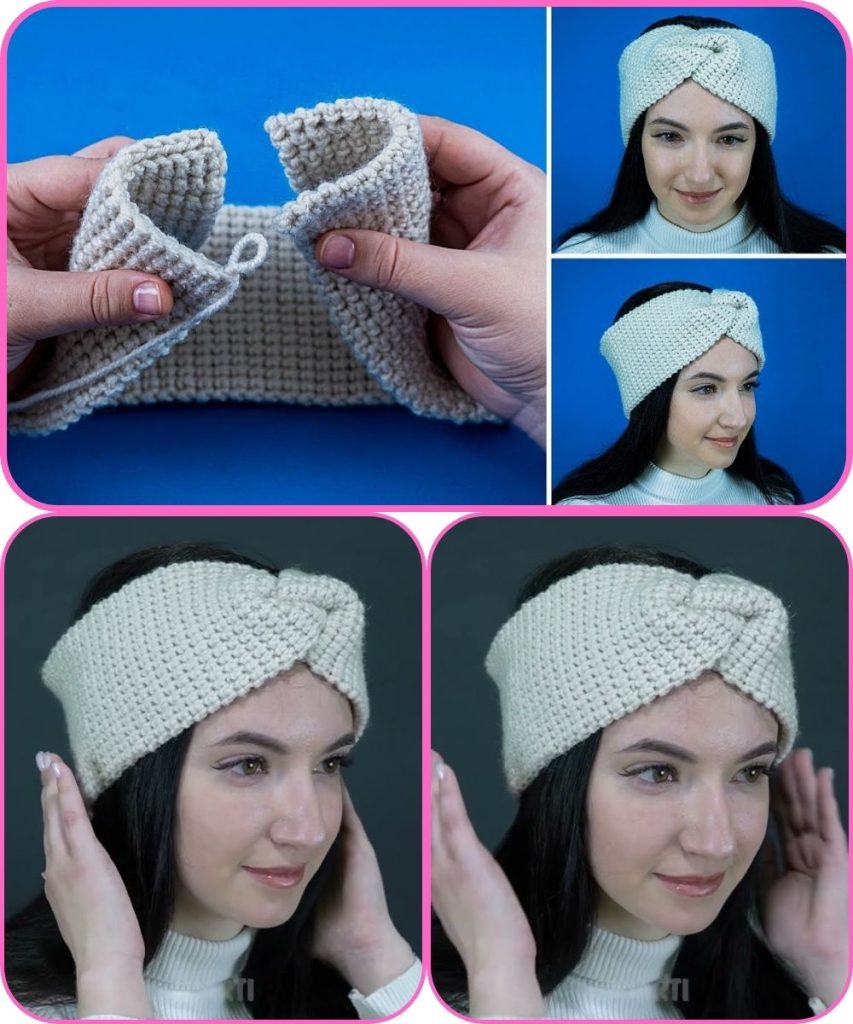
4. Join the Ends
You have two easy options:
Option 1: Sew the Ends Together
- Place short ends together
- Sew using a yarn needle
Option 2: Slip Stitch Join
- Hold ends together
- Slip stitch through both layers
Both methods work perfectly for beginners.
5. Finish Off
- Cut yarn and fasten off
- Weave in all loose ends neatly
- Stretch gently to shape the headband
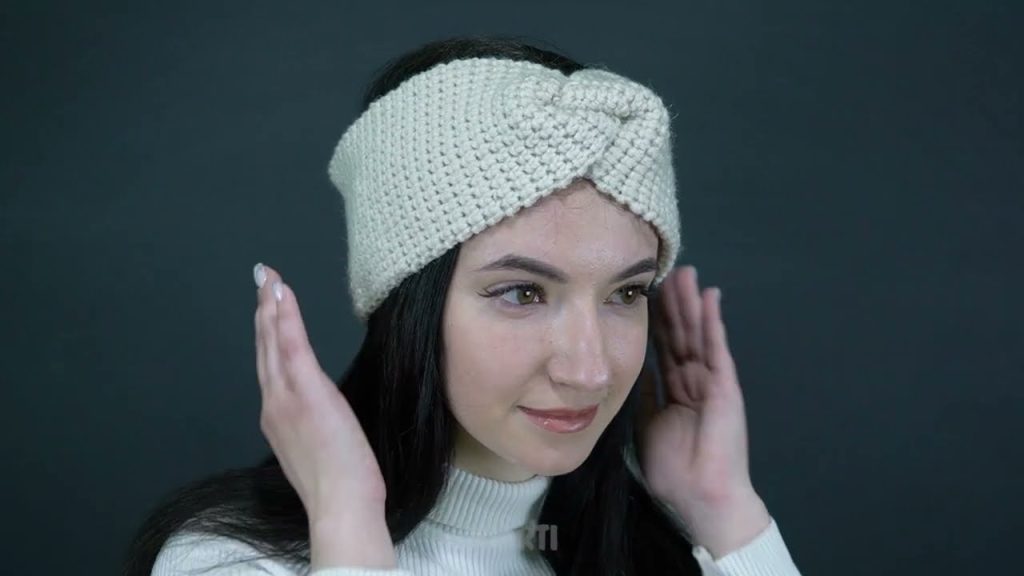
Your headband is now complete!
Optional Simple Variations
Once you’re comfortable, try these easy upgrades:
- Twisted headband: Twist once before sewing ends
- Textured look: Use back-loop-only stitches
- Color change: Add stripes or a contrast edge
- Decorations: Sew on a small flower or button
Beginner Tips for Best Results
- Choose soft yarn for comfort
- Practice even tension for a neat look
- Count stitches to keep edges straight
- Don’t worry if it’s not perfect—handmade is beautiful
Final Thoughts
The simplest crochet headband proves that you don’t need complicated patterns to create something beautiful. With just basic stitches and a little time, beginners can confidently make a stylish and practical accessory.
This project is ideal for learning, relaxing, and building crochet confidence—and once you make one, you’ll want to make more in every color!
If you’d like, I can also:
- Create a super-short pattern
- Write a kid-size or baby version
- Turn this into a printable PDF
- Add photos or stitch diagrams
Watch tutorial: