 by
by Here is a clear, detailed, and beginner-friendly step-by-step tutorial you can use for a blog post, pattern description, or teaching guide.
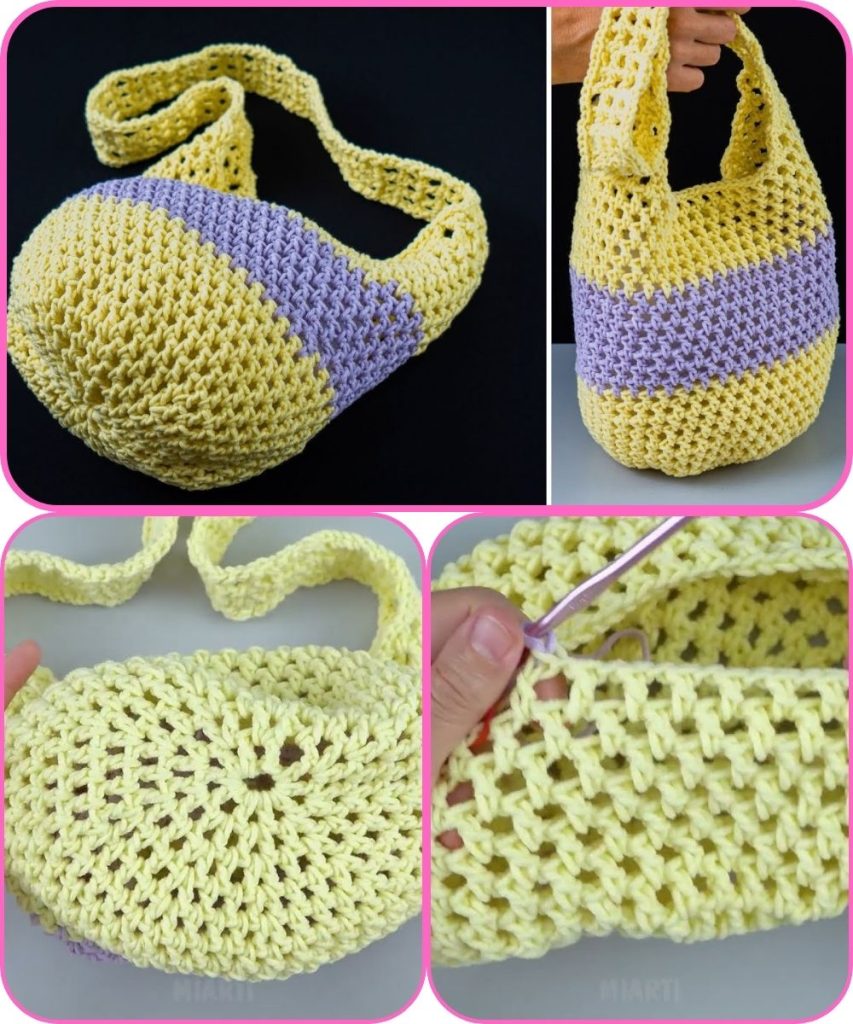
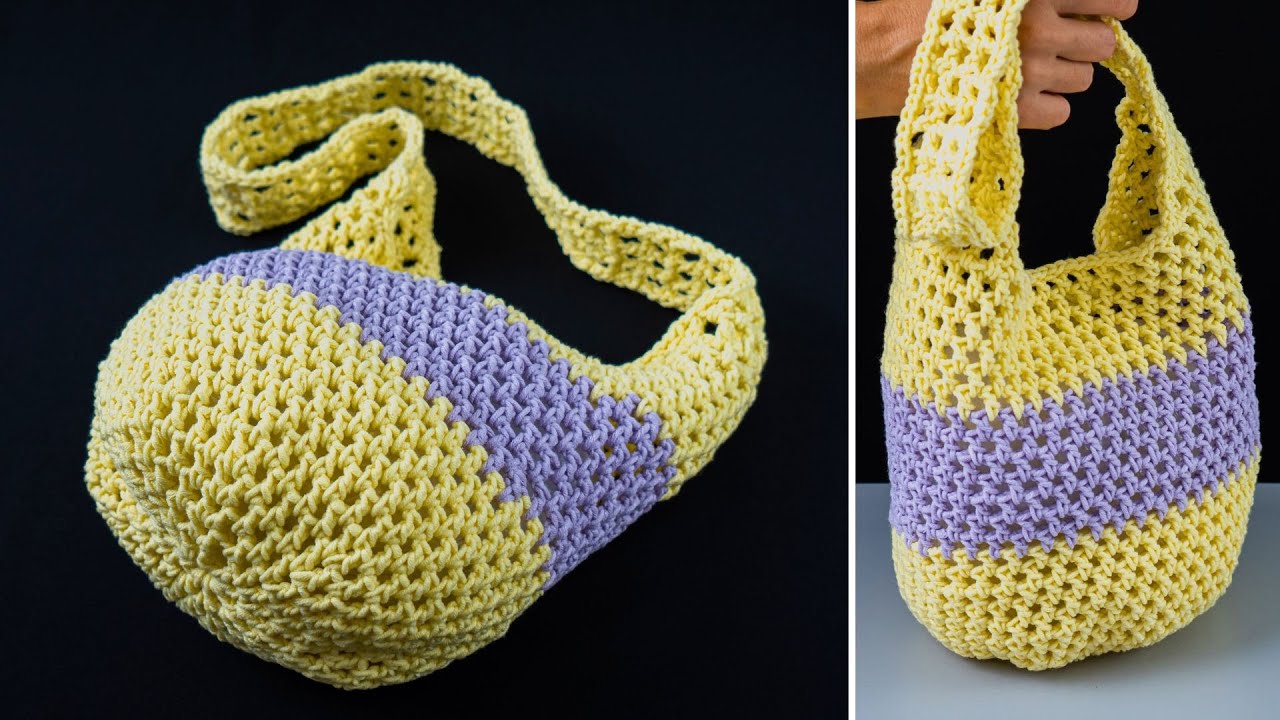
How to Crochet an Easy Net Bag – Step-by-Step Tutorial
A crochet net bag is one of the easiest and most practical crochet projects you can make. It’s lightweight, stretchy, eco-friendly, and perfect for shopping, the beach, or everyday use. Best of all, this project uses simple stitches and repeating patterns, making it ideal for beginners.
This step-by-step tutorial will guide you through the entire process, even if you’ve never crocheted a bag before.
Why a Crochet Net Bag Is Great for Beginners
- Uses basic crochet stitches only
- Simple repeating pattern
- No complicated shaping
- Very forgiving—mistakes are hard to notice
- Works up quickly
- Requires minimal yarn
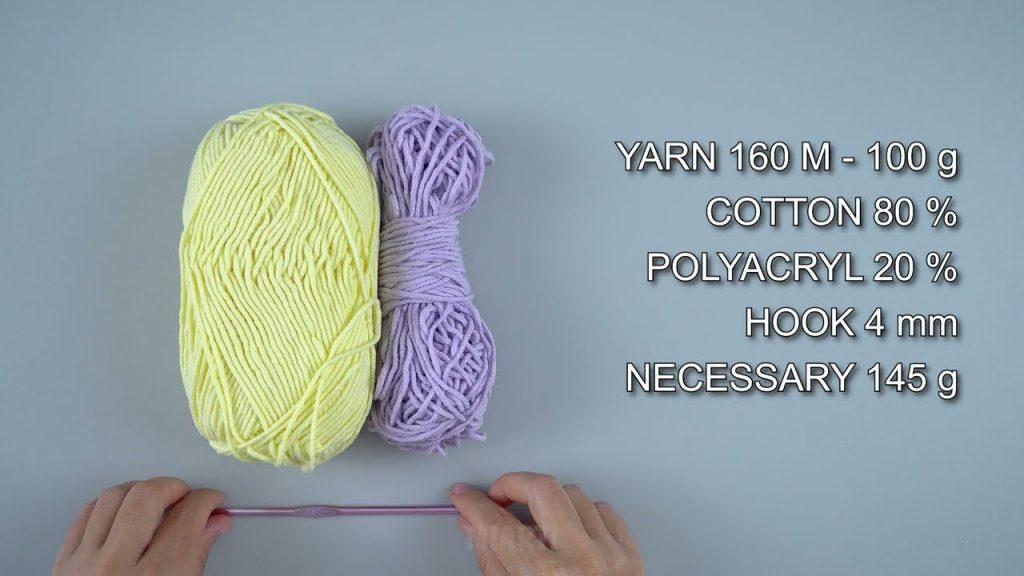
Materials You’ll Need
Prepare the following supplies before you begin:
- Yarn: Cotton yarn (worsted or DK weight recommended)
Cotton is best because it’s strong and doesn’t stretch too much. - Crochet Hook: 4–5 mm (check yarn label)
- Scissors
- Yarn Needle
- Stitch Marker (optional)
Stitches and Techniques Used
This project uses beginner-friendly stitches:
- Chain stitch (ch)
- Slip stitch (sl st)
- Single crochet (sc)
- Double crochet (dc)
If you can chain and double crochet, you can make this bag!
Step-by-Step Instructions
Step 1: Crochet the Base
The base provides structure for the bag.
- Chain 20–30 stitches (depending on desired width).
- Single crochet in the second chain from the hook and across.
- Crochet around both sides of the foundation chain to form an oval base.
- Continue crocheting in rounds, increasing slightly at the ends, until the base reaches your preferred size.
👉 Tip: Keep the base firm so the bag holds its shape.
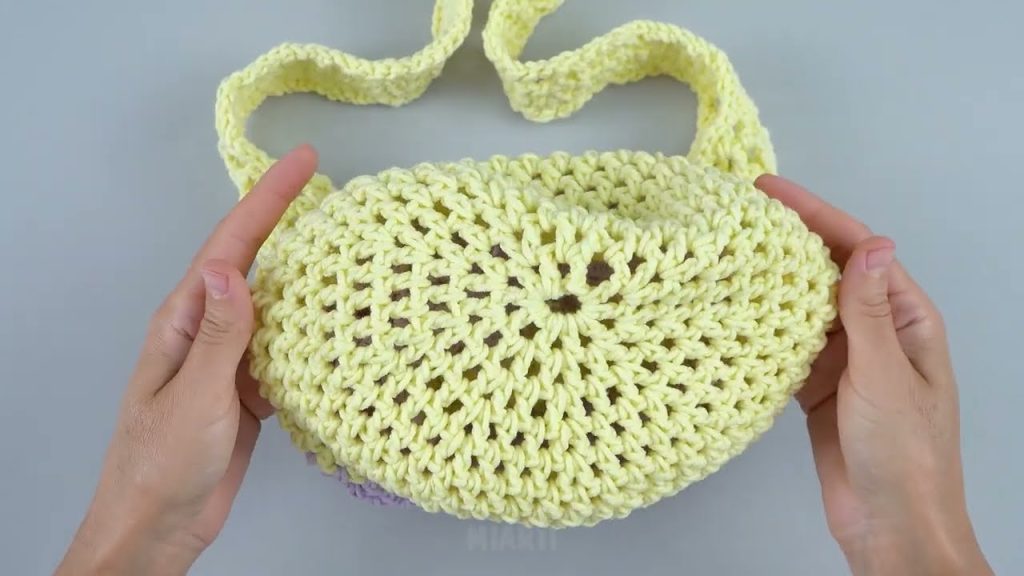
Step 2: Start the Net Pattern
Once the base is complete, you’ll begin the mesh design.
- Chain 4 (counts as double crochet + chain 1).
- Skip 1 stitch, double crochet in the next stitch.
- Chain 1, skip 1 stitch, double crochet in next stitch.
- Repeat around the entire round.
- Join with a slip stitch.
This creates the classic net or mesh look.
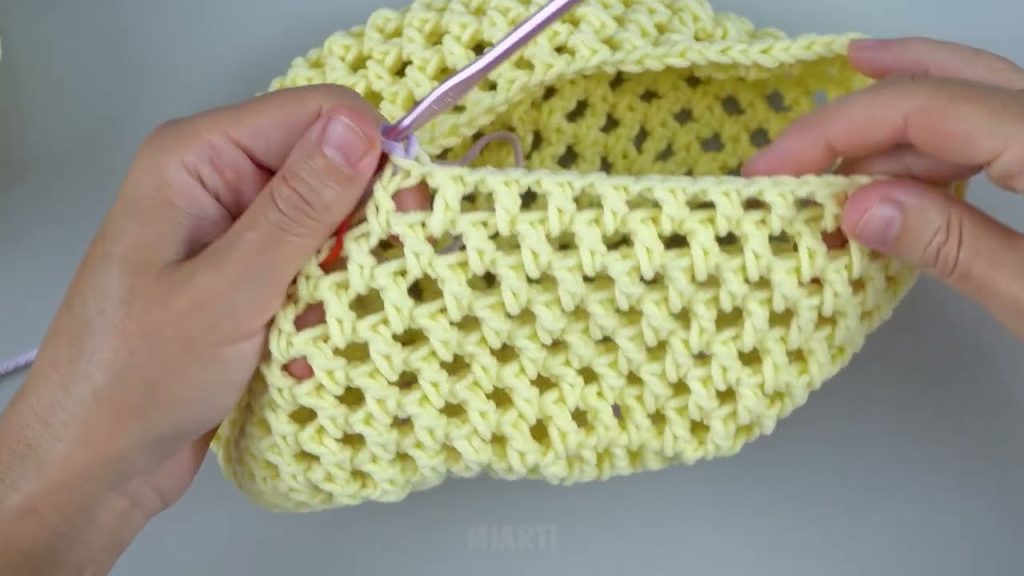
Step 3: Build the Bag Body
- Continue working the mesh pattern in rounds.
- Each round will stack neatly above the last.
- Crochet until the bag reaches your desired height (usually 30–35 cm).
👉 Tip: Try the bag length by gently stretching it—it will grow longer when filled.
Step 4: Strengthen the Top Edge
To keep the opening from stretching too much:
- Crochet 2–3 rounds of single crochet around the top.
- This creates a firm edge and clean finish.
Step 5: Crochet the Handles
Handle Option (Simple Integrated Handles):
- Single crochet across part of the round.
- Chain 25–35 stitches (depending on handle length).
- Skip the same number of stitches and continue single crocheting.
- Repeat on the opposite side for the second handle.
- Crochet one more round of single crochet around the entire top, working into the chains.
This strengthens the handles.
Step 6: Finish the Bag
- Slip stitch to close the round.
- Cut yarn and fasten off.
- Weave in all loose ends securely.
Your crochet net bag is now complete!
Easy Customization Ideas
- Make it longer or shorter
- Use two colors for a striped effect
- Add a fabric lining for smaller items
- Attach tassels or beads
- Adjust handle length for shoulder or hand carry
Beginner Tips for Success
- Use cotton yarn for durability
- Keep stitches relaxed—tight stitches reduce stretch
- Count stitches if you want perfectly even mesh
- Don’t worry about small imperfections
Final Thoughts
Crocheting an easy net bag is a fun, practical, and beginner-friendly project that builds confidence quickly. With a simple base and a repeating mesh pattern, you’ll be amazed at how fast this bag comes together.
Once you make one, you’ll want to crochet net bags in different sizes and colors for shopping, travel, and gifts.
If you’d like, I can also:
- Write a short printable pattern
- Create a photo-guided tutorial
- Design a mini or oversized net bag
- Add handle or base variations
Watch tutorial: