 by
by Here’s a clear, beginner-friendly, and detailed guide you can use as a blog post, tutorial, or pattern introduction.
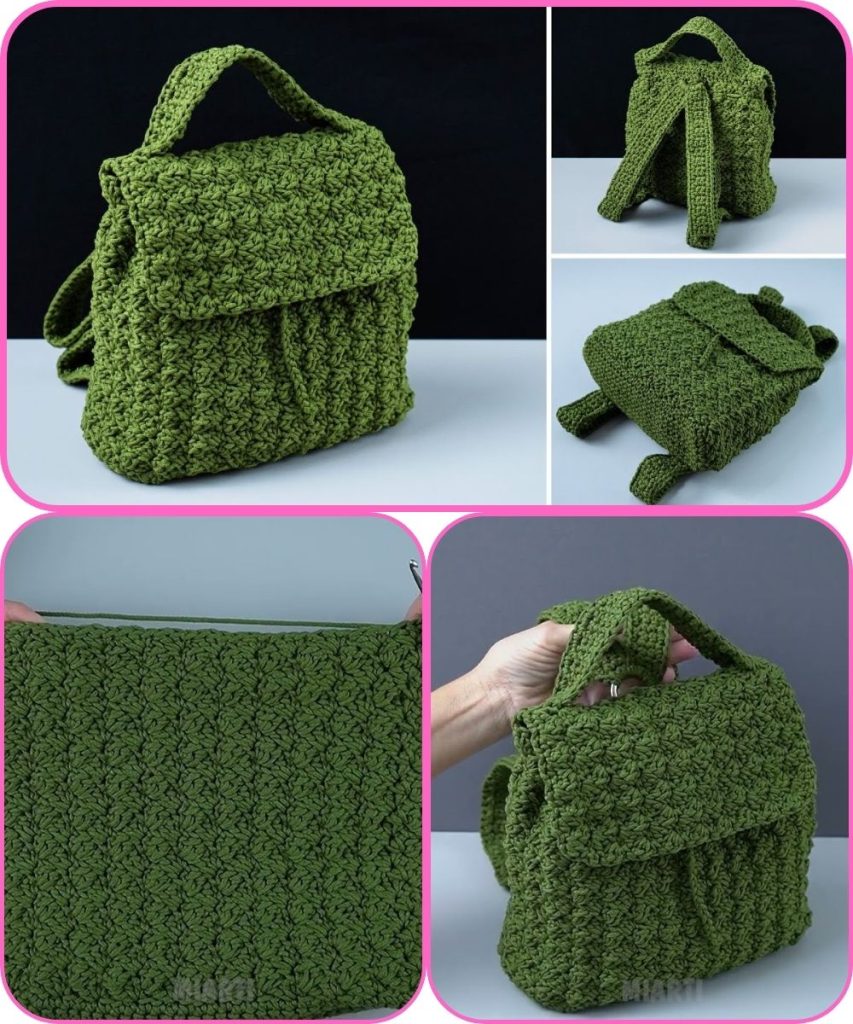
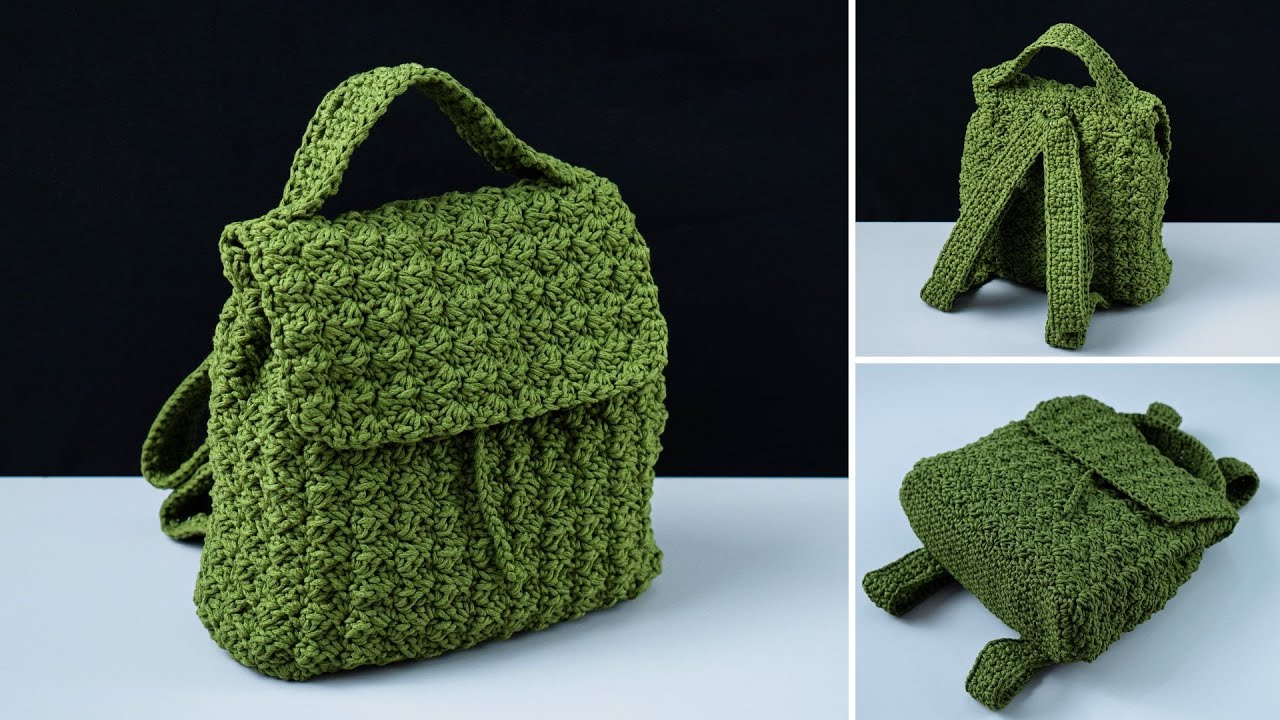
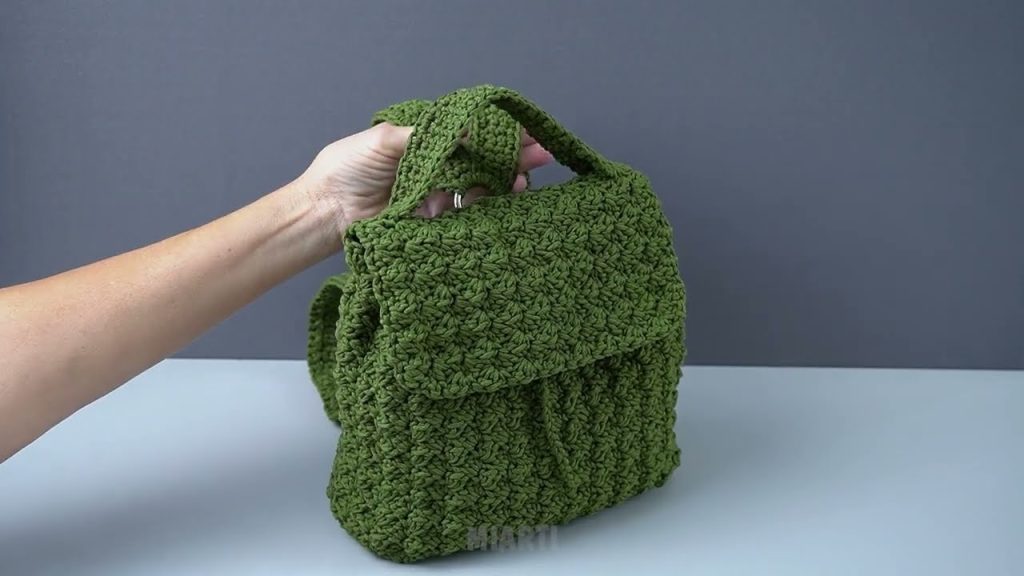
How to Make a Fashionable Crochet Backpack Bag – Even a Beginner Can Handle It!
Crochet backpack bags are stylish, practical, and surprisingly easy to make—even if you’re just starting out. With simple stitches, basic shaping, and a bit of patience, you can create a fashionable handmade backpack that’s perfect for daily use, travel, or gifting.
This guide breaks everything down step by step, using beginner-friendly techniques and easy-to-follow instructions.
Why a Crochet Backpack Is Perfect for Beginners
- Uses basic stitches only
- Requires minimal shaping
- Can be customized in size, color, and style
- Mistakes are easy to fix
- Looks impressive even with simple patterns
You don’t need advanced skills to create something beautiful!
Materials You’ll Need
Before you begin, gather these simple supplies:
- Yarn: Medium-weight (worsted) cotton or acrylic yarn
- Cotton is best for durability and structure
- Crochet Hook: Size 4.5–5.5 mm (check yarn label)
- Scissors
- Yarn Needle (for sewing and weaving ends)
- Stitch Marker (optional but helpful)
- Drawstring, cord, or yarn (for closure)
- Buttons, buckles, or leather straps (optional, for decoration)
Basic Stitches Used
This project is perfect for practicing core crochet stitches:
- Chain stitch (ch)
- Slip stitch (sl st)
- Single crochet (sc)
- Half double crochet (hdc) or double crochet (dc)
If you know these, you’re ready to start!
Step-by-Step Instructions
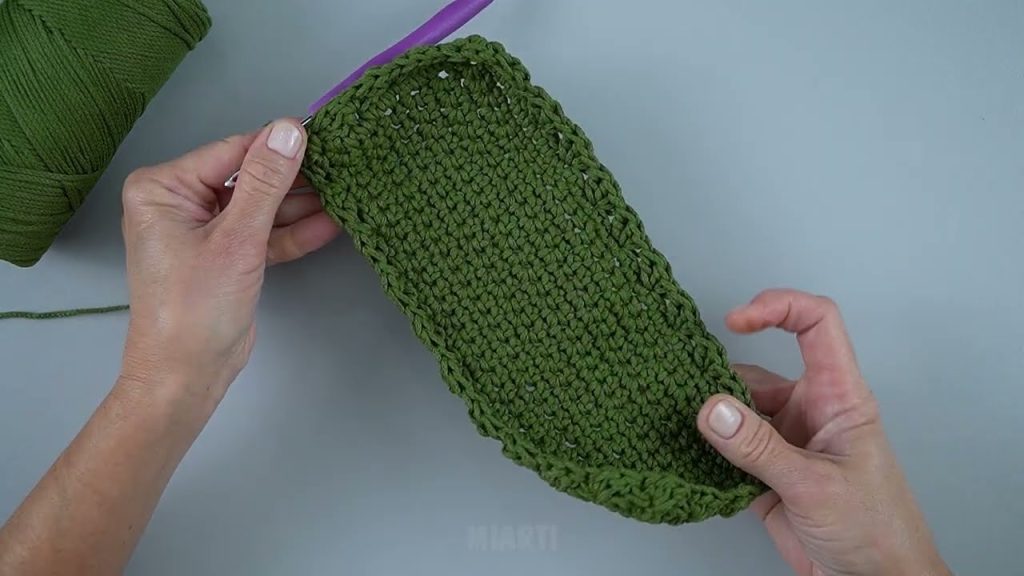
1. Create the Base of the Backpack
The base gives your bag structure.
- Start with a chain of 20–30 stitches, depending on how wide you want your bag.
- Work single crochet stitches along the chain.
- Crochet around both sides of the chain to form an oval base.
- Continue crocheting in rounds, increasing slightly at the ends, until the base reaches your desired size.
👉 Tip: A flat, sturdy base helps the bag hold its shape.
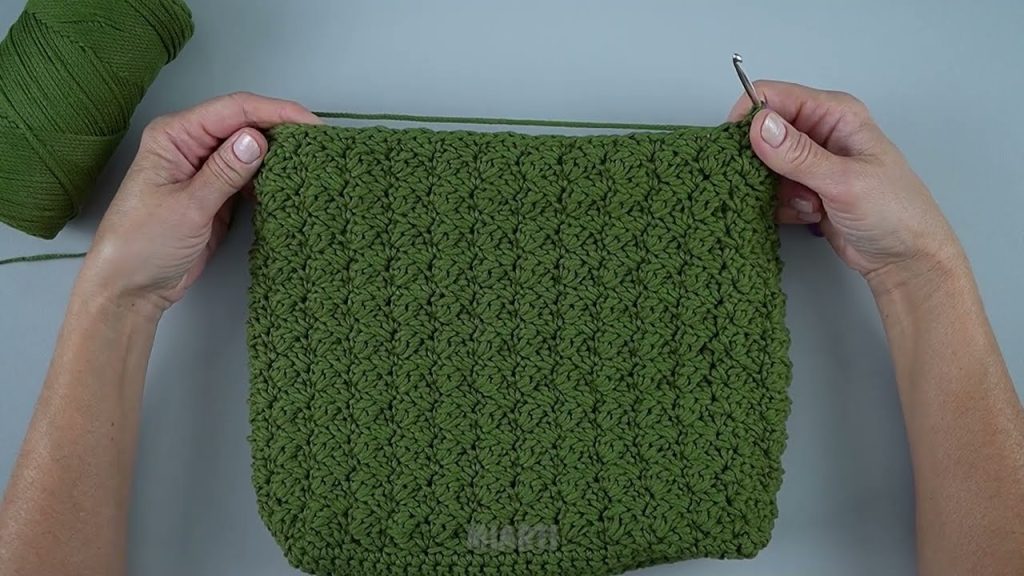
2. Build the Body of the Bag
Once the base is complete:
- Crochet straight up in rounds without increasing.
- Use half double crochet or double crochet for faster progress.
- Continue until the bag reaches your preferred height (usually 25–30 cm).
You can:
- Change colors for stripes
- Use textured stitches for a stylish look
- Keep it simple with one solid color for a modern feel
3. Shape the Top Opening
To create the backpack opening:
- Crochet a few rounds with chain spaces (for a drawstring)
- Example: Chain 2, skip 2 stitches, single crochet
- This creates holes for threading the cord later
4. Make the Drawstring
- Chain a long strand or use a cord or ribbon
- Thread it through the chain spaces using a yarn needle
- Pull gently to close the bag
5. Crochet the Backpack Straps
For each strap:
- Chain 6–8 stitches
- Single crochet back and forth until the strap reaches desired length
- Make two identical straps
- Sew them securely to the back of the bag
👉 Tip: Reinforce the strap ends with extra stitches for strength.
6. Add Finishing Touches
This is where your backpack becomes truly fashionable!
- Attach buttons or buckles
- Add a small crochet flap or pocket
- Sew on labels, tassels, or charms
- Weave in all loose ends neatly
Beginner Tips for Success
- Use light-colored yarn to see stitches clearly
- Count stitches to keep your shape even
- Don’t worry about perfection—handmade charm is part of the beauty
- Practice on a small swatch first if needed
Final Thoughts
Making a crochet backpack bag is a fun and rewarding project that proves beginners can create fashionable accessories with confidence. With simple stitches, a clear structure, and endless customization options, this project is a perfect way to build skills while creating something practical and stylish.
Once you finish your first backpack, you’ll be inspired to make more in different colors and designs!
If you’d like, I can also:
- Simplify this into a short pattern
- Turn it into a blog-ready article
- Create a step-by-step printable guide
- Help you design a kids or mini version
Watch tutorial: