 by
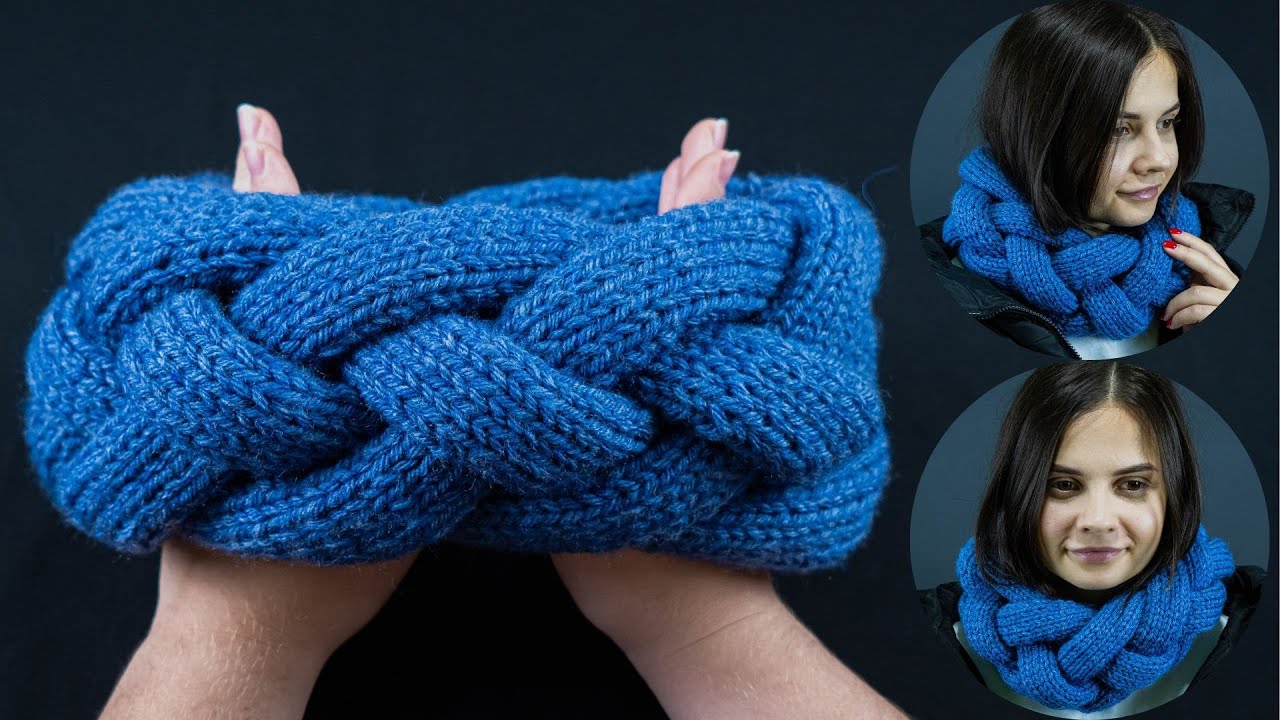
by Here’s a detailed, beginner-friendly guide for making an unusual knitted snood or scarf that’s very simple, yet stylish and unique. I’ll break it down step by step so even beginners can follow along.
How to Make an Unusual Knitted Snood/Scarf Very Simply – Detailed Tutorial
Knitted snoods and scarves are cozy, practical, and versatile accessories. This tutorial will show you how to make an unusual, eye-catching snood using simple stitches and creative textures. Even if you’re a beginner, you can make a scarf or snood that looks impressive without any complex techniques.
Why This Snood/Scarf Is Beginner-Friendly
- Uses basic knitting stitches (no cables or lace needed)
- Simple, repeatable stitch pattern
- Can be adjusted for width and length
- Quick to make with chunky yarn
- Looks unusual and stylish despite being simple
Materials You’ll Need
- Yarn: Bulky or super bulky yarn (for fast knitting and texture)
- Knitting needles: Size 8–10 mm (adjust for yarn thickness)
- Scissors
- Tapestry/yarn needle for finishing ends
- Optional: Stitch markers to track rows
Stitches and Techniques Used
This snood uses only beginner-friendly knitting stitches:
- Knit (k)
- Purl (p)
- Optional: Yarn over (yo) or slip stitch for texture
Even if you know just knit and purl, you can make this project.
Step-by-Step Instructions
Step 1: Choose the Size of Your Snood
- Width: 20–25 cm (8–10 inches)
- Length: 120–150 cm (48–60 inches) if you want a looped snood; shorter for a scarf
Adjust according to personal preference.
Step 2: Cast On
- Cast on the number of stitches needed for your chosen width.
- Example: 30–40 stitches for a chunky, wide snood.
Tip: Use a loose cast-on for elasticity.
Step 3: Set Up the Unusual Pattern
Here’s a simple yet unusual stitch pattern:
Row 1: Knit all stitches
Row 2: Knit 2, purl 2 across the row
Row 3: Purl 2, knit 2 across the row
Repeat these three rows.
This creates a textured, slightly wavy pattern that looks more advanced than it is.
Optional: For extra unusual texture:
- Alternate yarn overs every few rows for tiny holes
- Use slip stitches every 4th row for horizontal ridges

Step 4: Continue Knitting
- Keep repeating the stitch pattern until the snood/scarf reaches desired length.
- Check occasionally for consistency and adjust tension if needed.
Tip: Chunky yarn works well because it knits up quickly and makes the texture stand out.
Step 5: Bind Off
- Bind off loosely to maintain elasticity and comfort.
- Leave a long tail to sew ends if needed.
Step 6: Finishing
- Weave in all ends using a yarn needle.
- Block the snood/scarf lightly if needed to even out stitches.
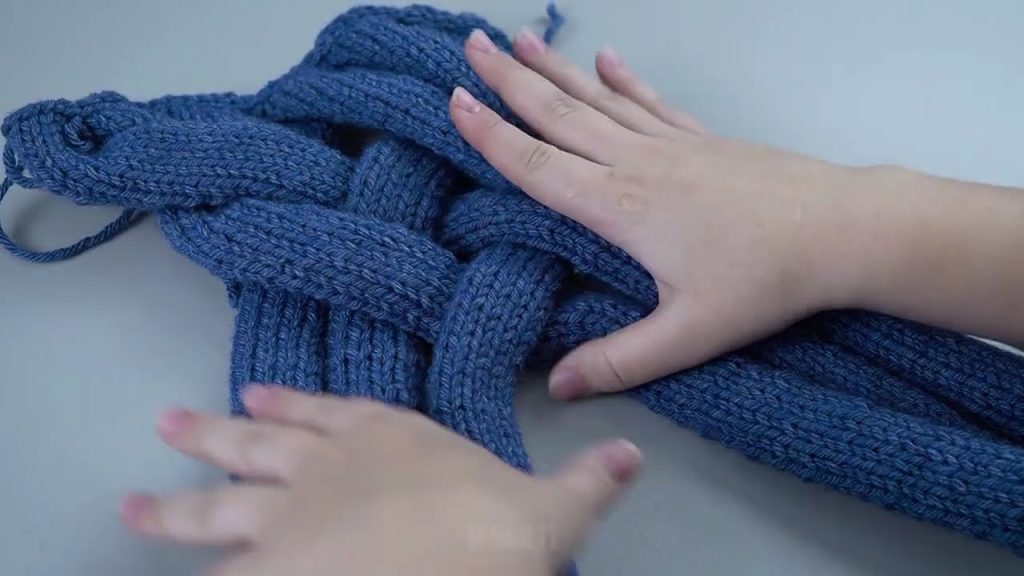
- If making a looped snood, sew ends together neatly to create a circle.
Step 7: Optional Embellishments
- Add fringe to ends for a scarf
- Use two different yarn colors for stripes
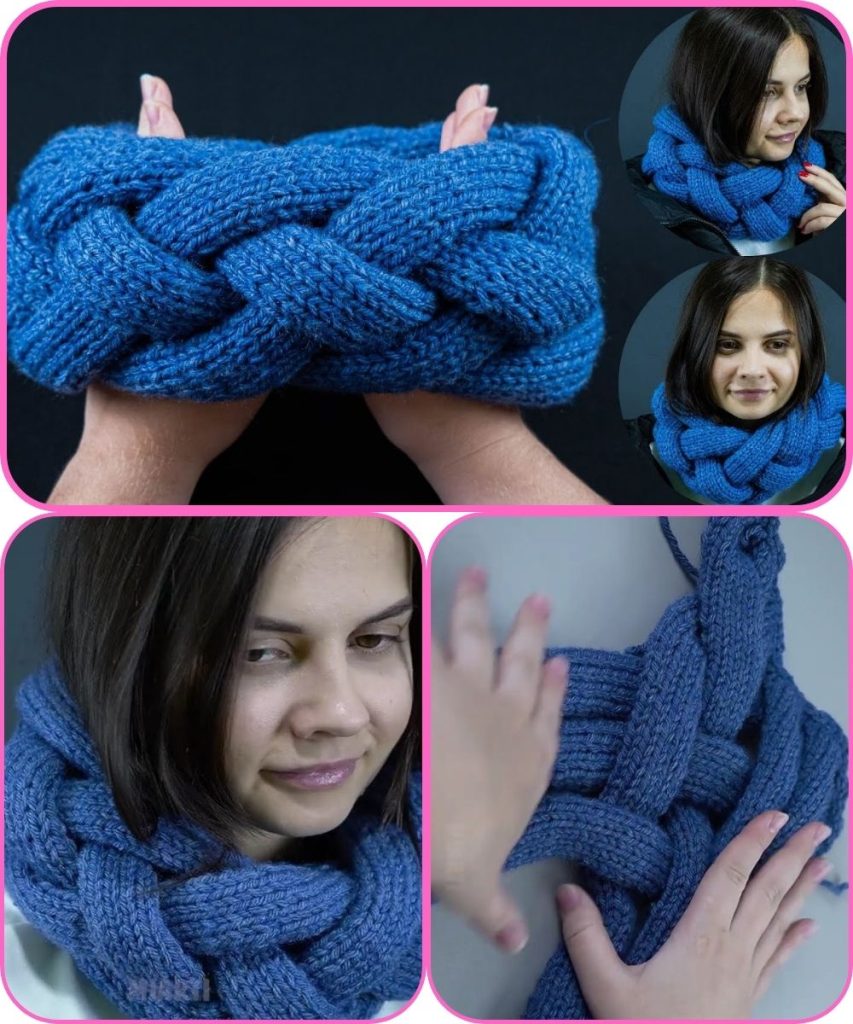
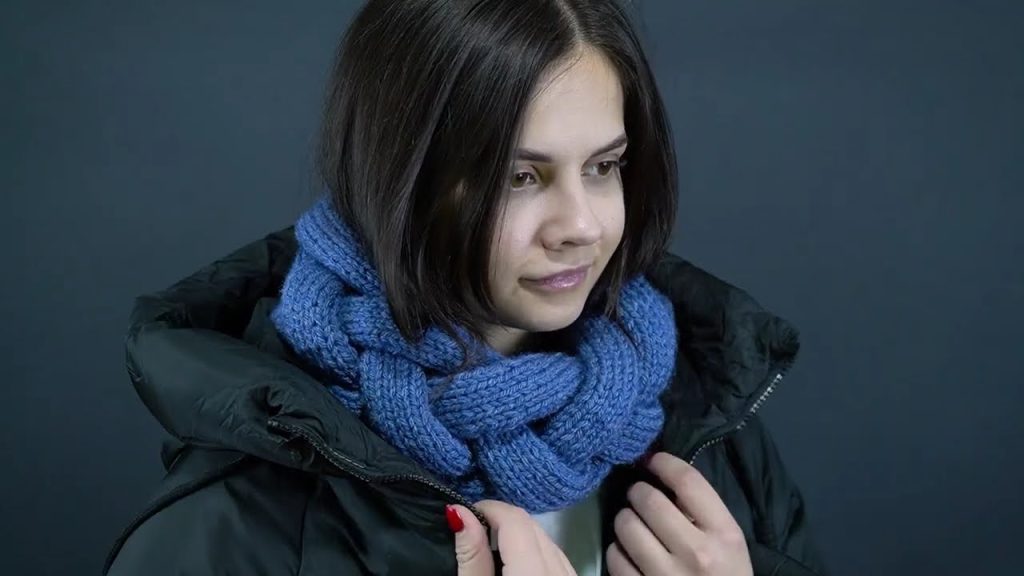
- Twist the snood before sewing ends for a braided effect
- Combine different textures of yarn for a unique look
Tips for Beginners
- Chunky yarn and large needles hide mistakes and knit up quickly
- Keep stitches loose for a soft, stretchy snood
- Use stitch markers if you want to track pattern repeats
- Small imperfections add to the handmade charm
Customization Ideas
- Make it extra-long to wrap twice around the neck
- Add pockets or button closures for a modern look
- Try alternating colors every few rows for a striped snood
- Use novelty yarn like boucle or eyelash yarn for extra texture
Final Thoughts
This unusual knitted snood/scarf is simple, stylish, and perfect for beginners who want to create a functional accessory that looks far more advanced than it really is. With just basic stitches and a little creativity, you can make a cozy and unique snood or scarf to wear yourself or gift.
Once you finish your first one, you’ll see how easy it is to experiment with textures, colors, and lengths for even more unusual designs!
If you want, I can also create a full printable beginner pattern with stitch counts, row-by-row instructions, and optional variations for this snood—ready to follow easily.
Watch tutorial: