 by
by Absolutely! Here’s a detailed, step-by-step tutorial for making an Easy Granny Square Crochet Bag—perfect for beginners and a fun way to use colorful yarn scraps.
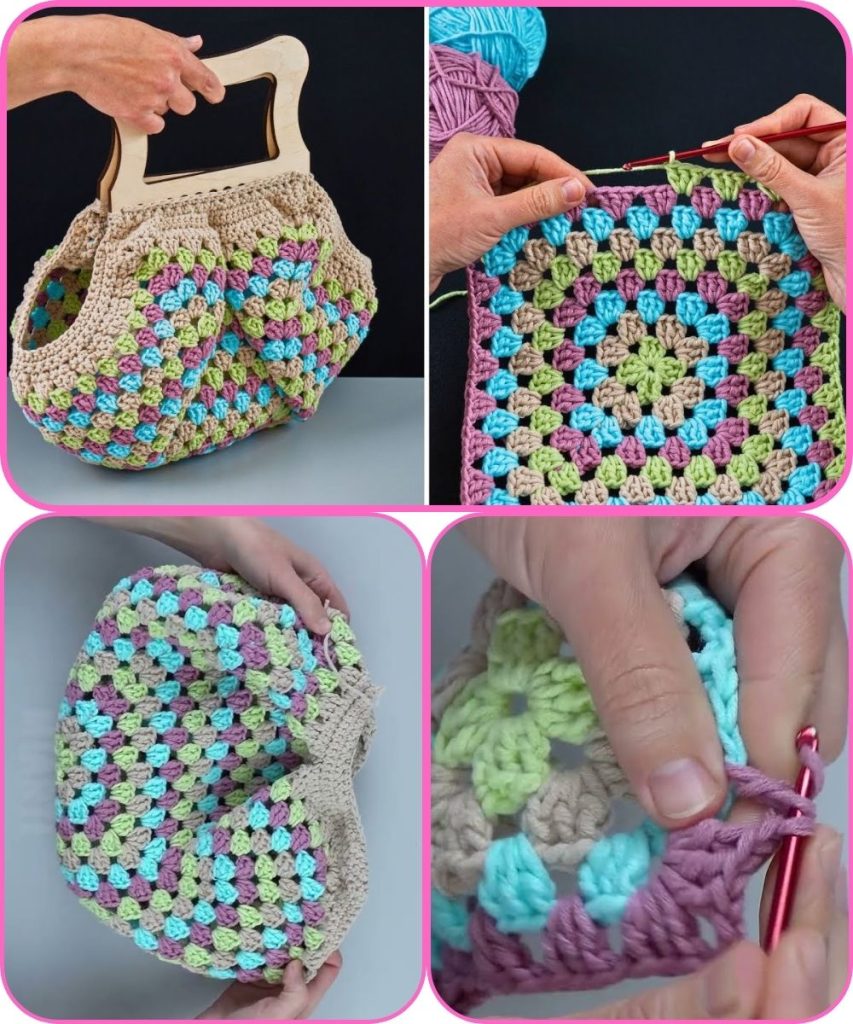
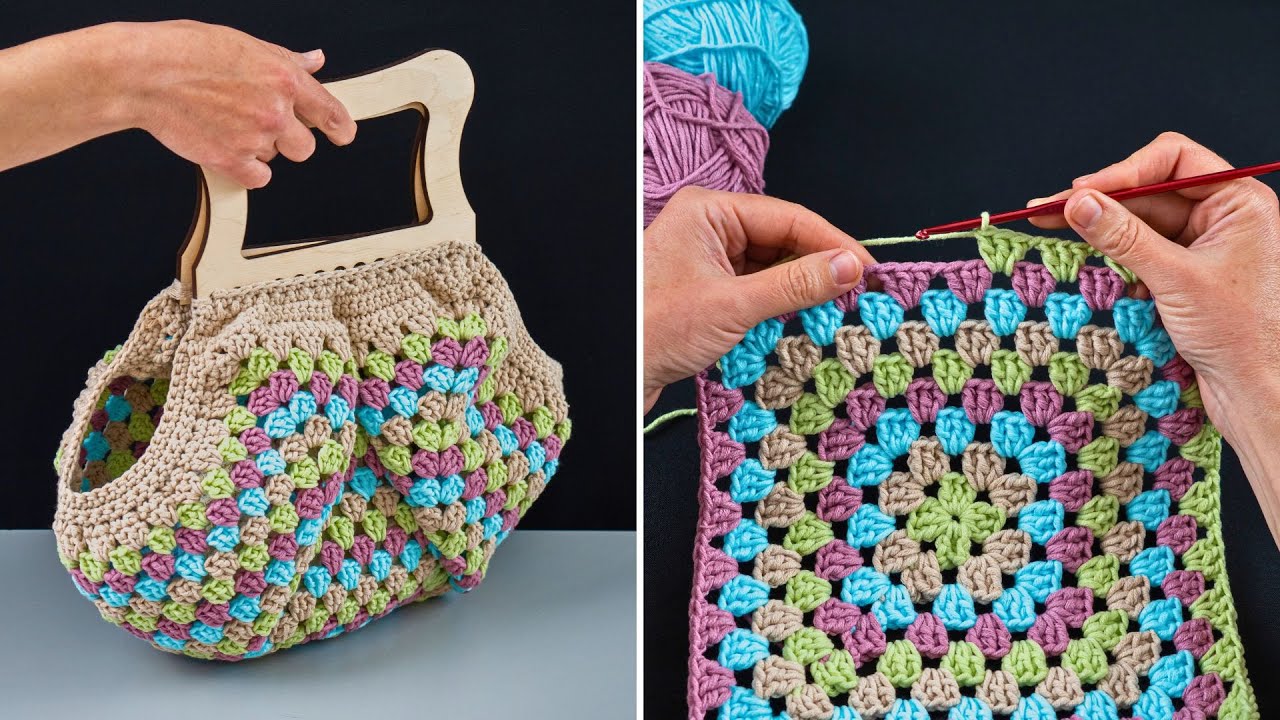
How to Make an Easy Granny Square Crochet Bag
A beginner-friendly, colorful project
Granny squares are classic, versatile, and instantly recognizable. This granny square bag combines several squares into a stylish, practical bag. It’s lightweight, easy to make, and fully customizable in color and size.
Skill Level
Beginner
Materials Needed
- Medium-weight yarn (Category 4) in 3–5 colors
- Crochet hook: 4.5–5.0 mm
- Scissors
- Yarn needle
- Stitch markers (optional)
- Optional: Lining fabric or buttons
Crochet Abbreviations (US Terms)
- ch – chain
- sl st – slip stitch
- sc – single crochet
- dc – double crochet
- tr – treble crochet
- st(s) – stitch(es)
- rep – repeat
Finished Size (Approx.)
- Width: 10–12 inches
- Height: 10–12 inches
Adjust by adding or reducing granny squares.
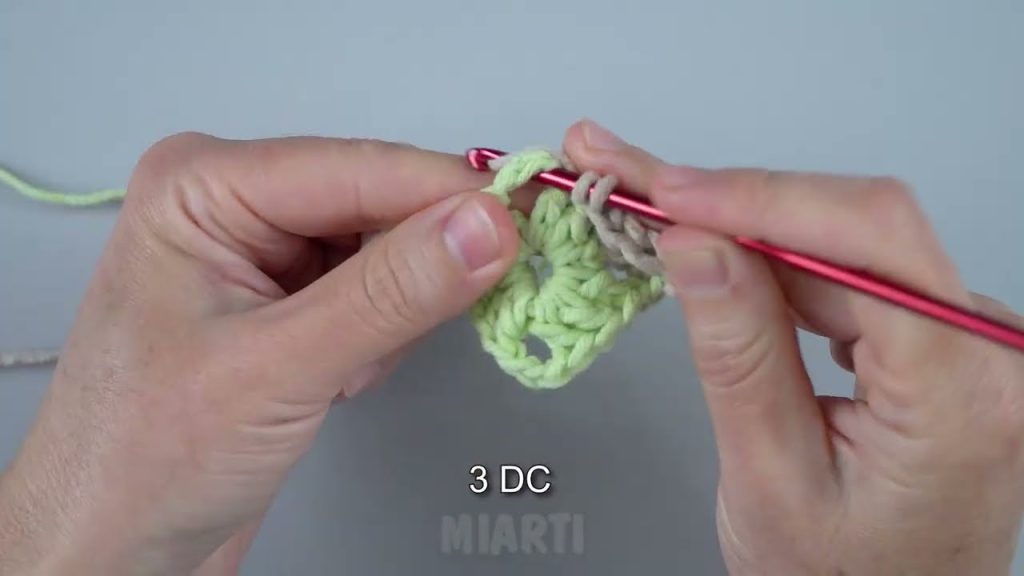
Step 1: Make the Granny Squares
Each square is made individually. A classic 4-round granny square works well.
Round 1
- Ch 4, sl st to form a ring.
- Ch 3 (counts as first dc), dc 2 into ring, ch 2, dc 3, ch 2 three times.
- Join with sl st to top of ch-3.
Round 2
- Sl st into first ch-2 space.
- Ch 3 (counts as dc), 2 dc in same space, ch 2, 3 dc in same space.
- 3 dc, ch 2, 3 dc in each corner ch-2 space.
- Join with sl st.
Round 3
- Repeat Round 2, adding more colors if desired.
- Change color at the start of a new round for multicolor squares.
Round 4
- Optional: Repeat another round to make the square larger.
Make 6–8 squares depending on the bag size you want.
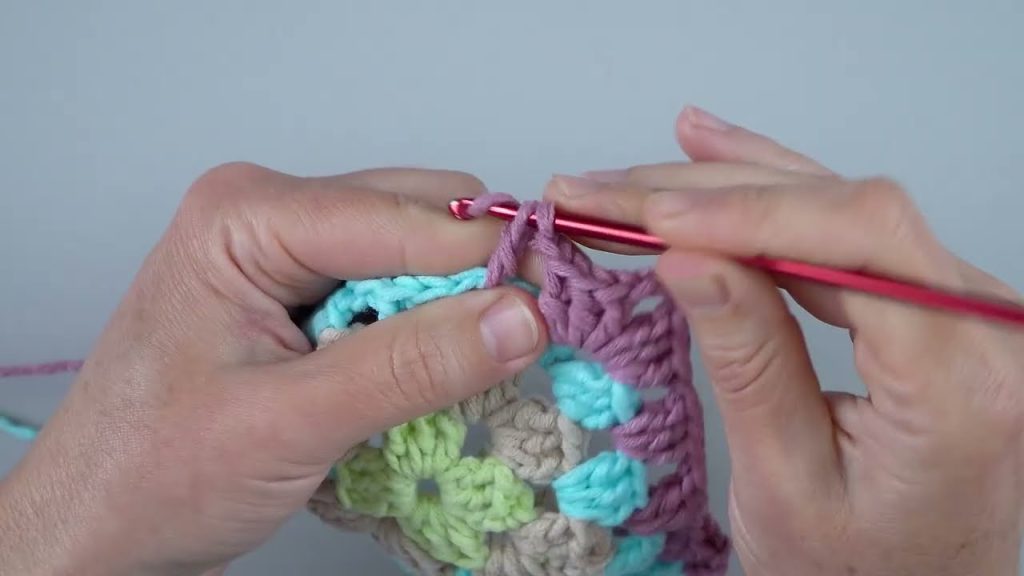
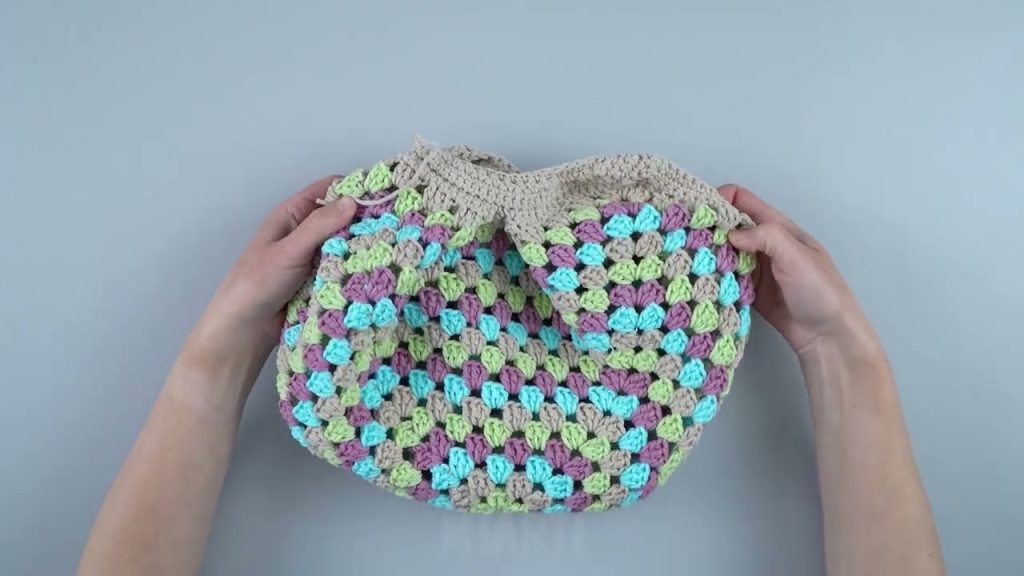
Step 2: Join the Granny Squares
- Arrange the squares in a 2×3 or 2×4 layout (depending on how many squares you made).
- Join using sl st, whip stitch, or single crochet along the edges.
- For a neat finish, sl st each corner and edge stitch.
This forms the front and back panels of the bag.
Step 3: Crochet the Bag Body
- Attach yarn to the bottom corner of a panel.
- Sc evenly along the edge connecting the front and back panels.
- Continue sc along the sides and bottom to form the bag’s body.
- Join with sl st at the starting point.
Continue around until the bag is fully enclosed.
Step 4: Crochet the Top Border
- Sc evenly around the top edge for a neat finish.
- Optional: Make 2–3 rounds of sc for sturdiness.
Step 5: Make the Handles
Option 1: Crochet Handles
- Ch 60–80 (depending on strap length).
- Sc in each ch.
- Attach to opposite sides of the bag.
- Repeat for the second handle.
Option 2: Sew-On Handles
- Attach leather or wooden handles for a stylish look.
Step 6: Optional Lining
- Cut a piece of fabric slightly larger than the bag’s interior.
- Sew by hand or machine.
- Attach lining to the top inside edge.
Step 7: Finishing Touches
- Weave in all loose ends.
- Block the bag lightly to even out squares.
- Optional: Add a button, tassel, or decorative charm.
Final Result
You now have a vibrant, handmade granny square bag—perfect for shopping, the beach, or as a unique gift. This project is also great for using up yarn scraps and practicing color combinations.
If you want, I can also:
- Create a shorter, ultra-beginner version with fewer steps
- Make a PDF printable pattern
- Suggest ways to customize size, shape, or strap style
Do you want me to make a full beginner PDF-style granny square bag pattern next?
Watch tutorial: