 by
by Absolutely! Here’s a detailed, beginner-friendly tutorial for making the simplest crochet headband—perfect even for absolute beginners.
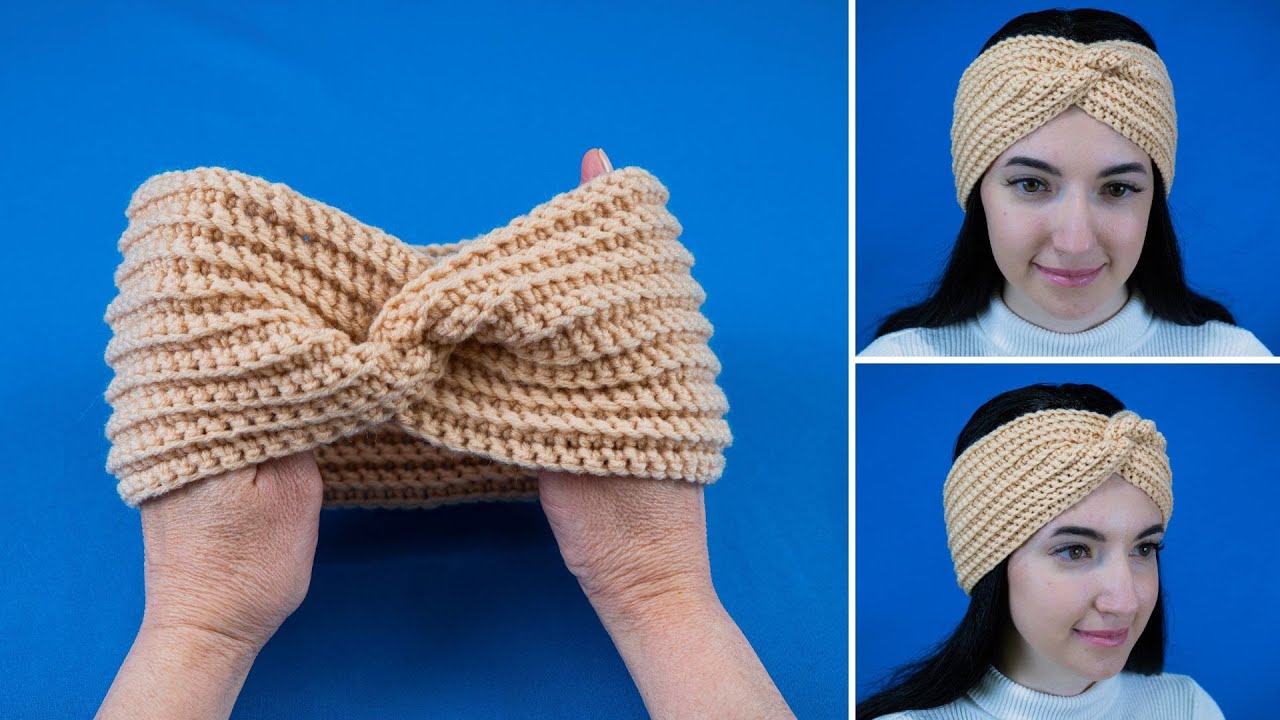
How to Make the Simplest Crochet Headband – Even a Beginner Can Handle It!
A cozy, quick, and stylish accessory
A crochet headband is one of the fastest and easiest projects for beginners. It’s perfect for keeping ears warm, adding a cute accessory to your outfit, or practicing basic stitches. This tutorial uses only single crochet, but I’ll include a small twist variation for a trendy look.
Skill Level
Absolute Beginner
Materials Needed
- Medium-weight yarn (Category 4 – acrylic or cotton)
- Crochet hook: 5.0 mm (H-8)
- Scissors
- Yarn needle
- Stitch marker (optional)
Crochet Abbreviations (US Terms)
- ch – chain
- sc – single crochet
- sl st – slip stitch
- st(s) – stitch(es)
Finished Size (Approx.)
- Length: 18–20 inches (adjust for head circumference)
- Width: 2–3 inches
Size can be adjusted by adding or reducing chains or rows.
Step 1: Measure and Chain
- Measure the circumference of your head (or the intended wearer).
- Chain enough stitches to comfortably fit around the head minus 1 inch (the stretch of single crochet will make it snug).
Example: For an adult head, ch 60–70 stitches depending on yarn thickness.
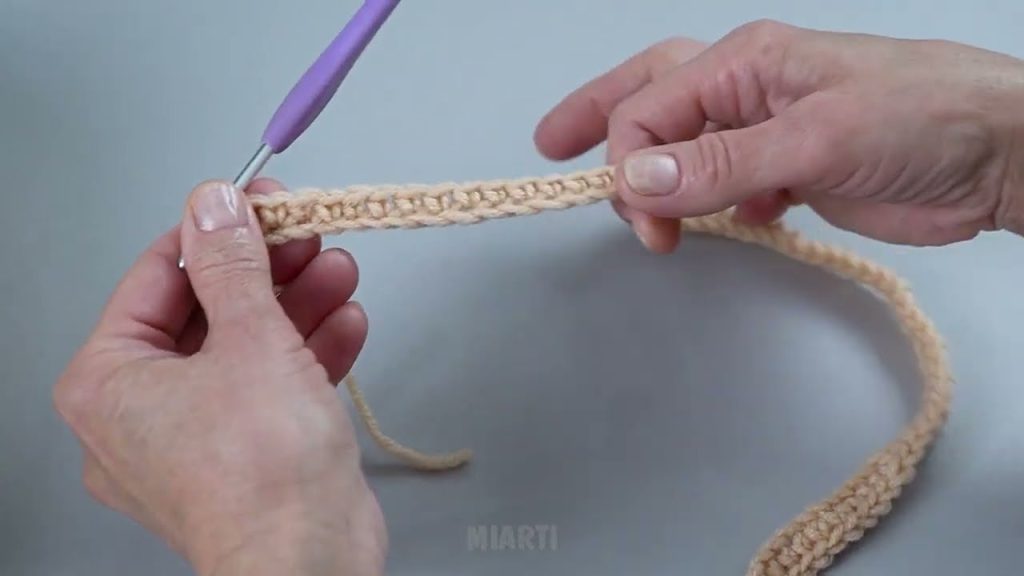
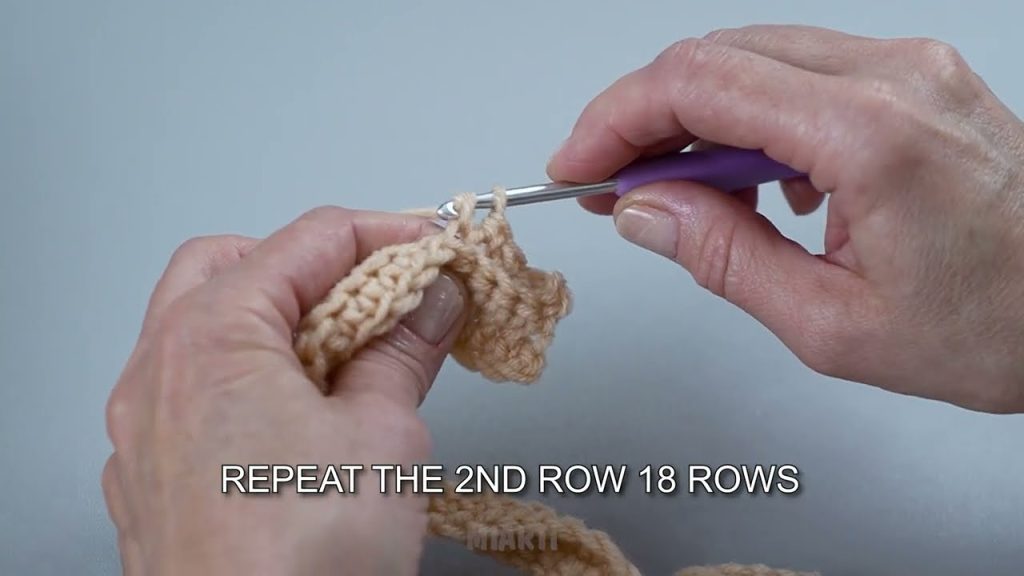
Step 2: Crochet the Band
- Row 1: Sc in 2nd chain from hook and across.
- Ch 1, turn.
- Row 2: Sc in each stitch across.
- Repeat Row 2 until the band is your desired width (about 2–3 inches).
Tip: For a textured look, try alternating front loop only (FLO) sc and back loop only (BLO) sc each row.
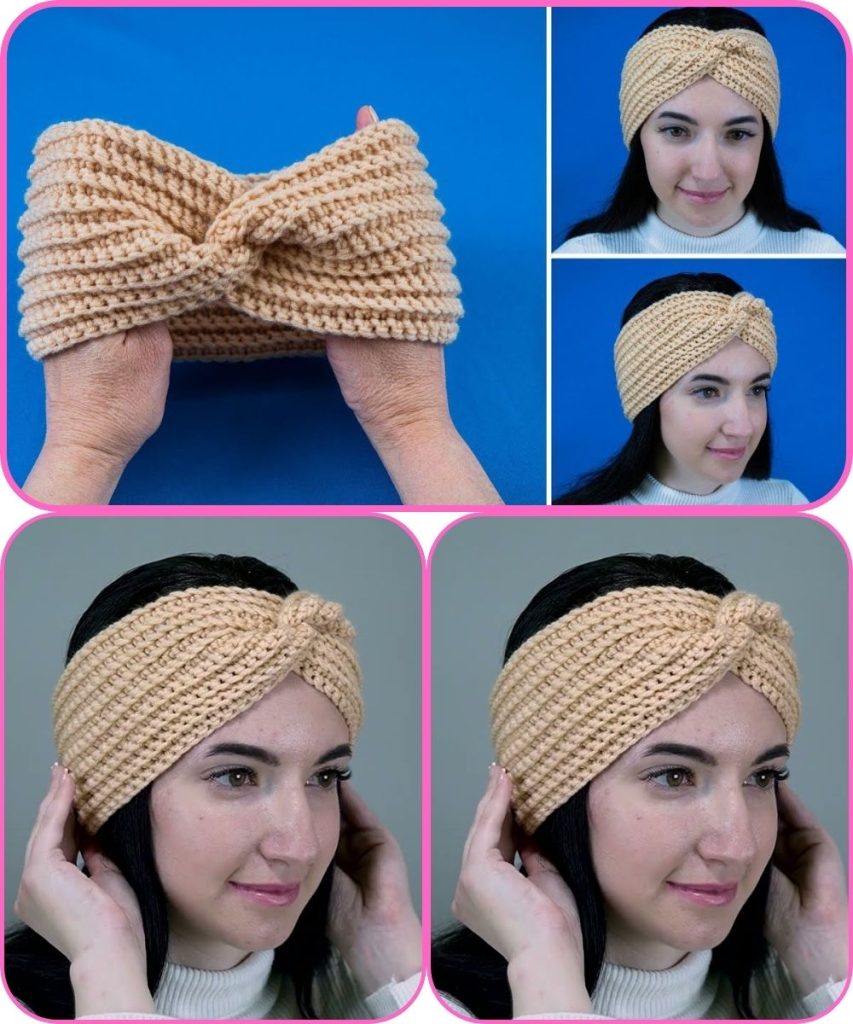
Step 3: Join the Headband
- Fold the band into a circle.
- Use sl st to join the short ends together.
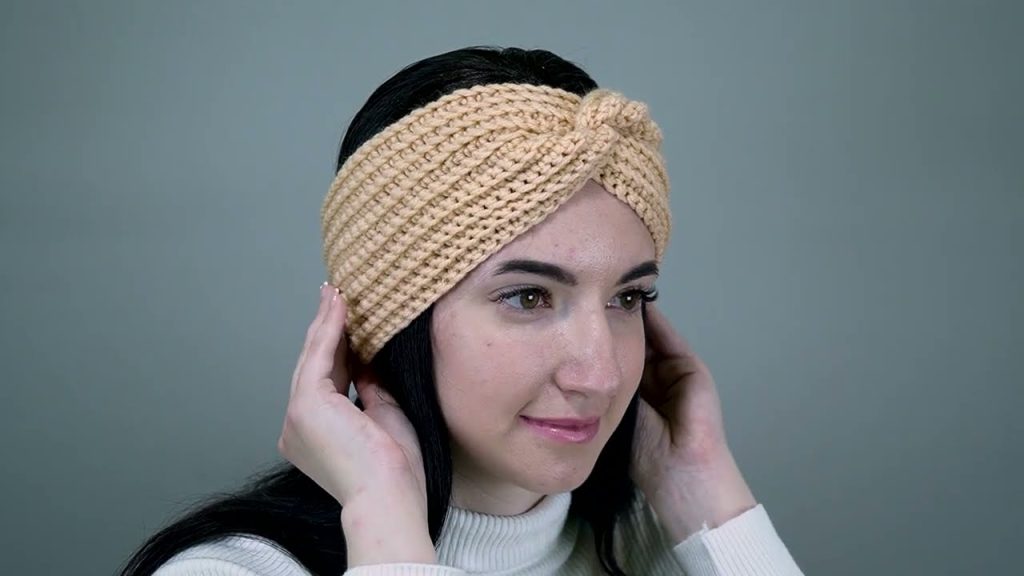
For a twist headband style:
- Twist one end 180° before joining, then sl st.
Step 4: Weave in Ends
- Use a yarn needle to weave in all loose ends for a neat finish.
Optional Variations
- Chunky Headband: Use thicker yarn and larger hook for a cozy winter version.
- Colorful Stripes: Change colors every few rows for a fun striped effect.
- Textured Band: Alternate sc, hdc, or dc rows for subtle texture.
- Decorative Twist: Cross the band in front for a stylish knot-like twist.
Step 5: Styling Tips
- Wear flat across the head for a classic headband look.
- Twist the front and wear as a trendy turban-style headband.
- Match with a simple crochet scarf or hat for a set.
Final Result
You now have a quick, beginner-friendly crochet headband—cozy, stretchy, and stylish. This project is perfect for practicing your single crochet stitches, experimenting with color, and making gifts.
If you want, I can also:
- Create a PDF beginner-friendly pattern with pictures
- Add a step-by-step video script
- Make a twist/bow headband variation tutorial
Do you want me to make a twist-style beginner crochet headband tutorial next?
Watch tutorial: