 by
by Here’s a detailed, beginner-friendly tutorial for making a simple crochet snood scarf with an unusual pattern that stands out:
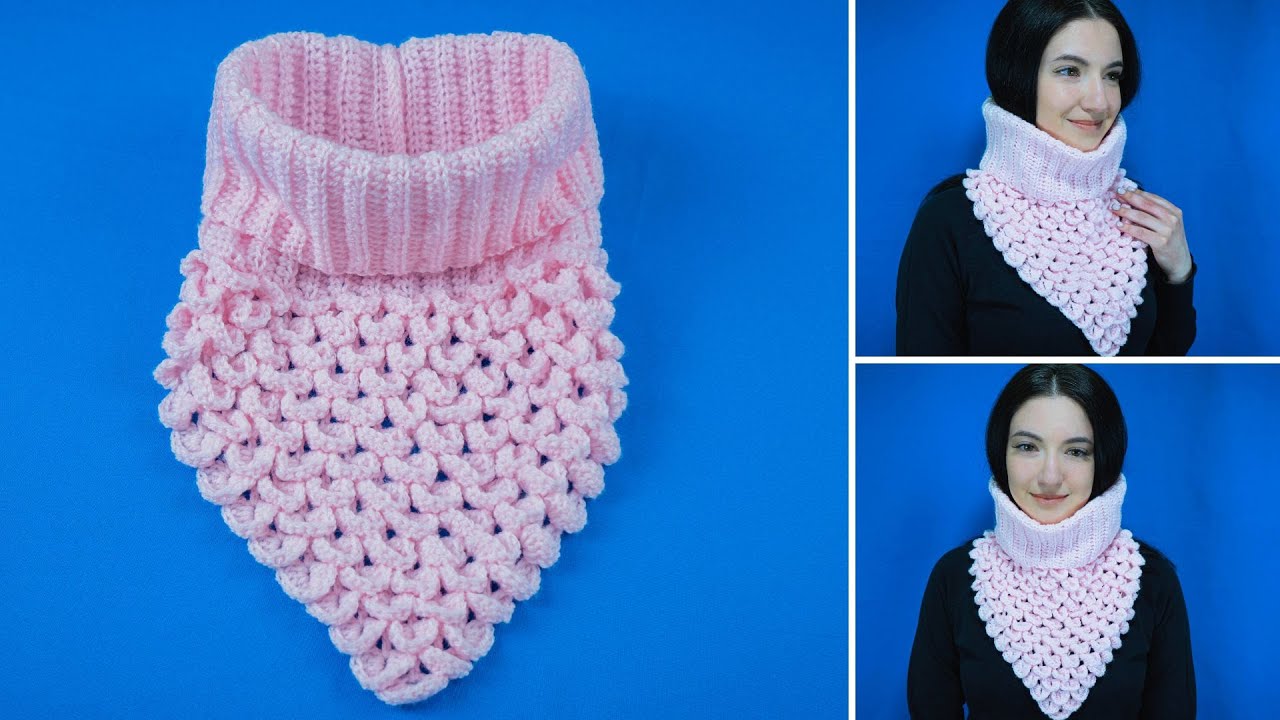
How to Make a Simple Crochet Snood-Scarf with an Unusual Pattern
A step-by-step tutorial for a unique and stylish accessory
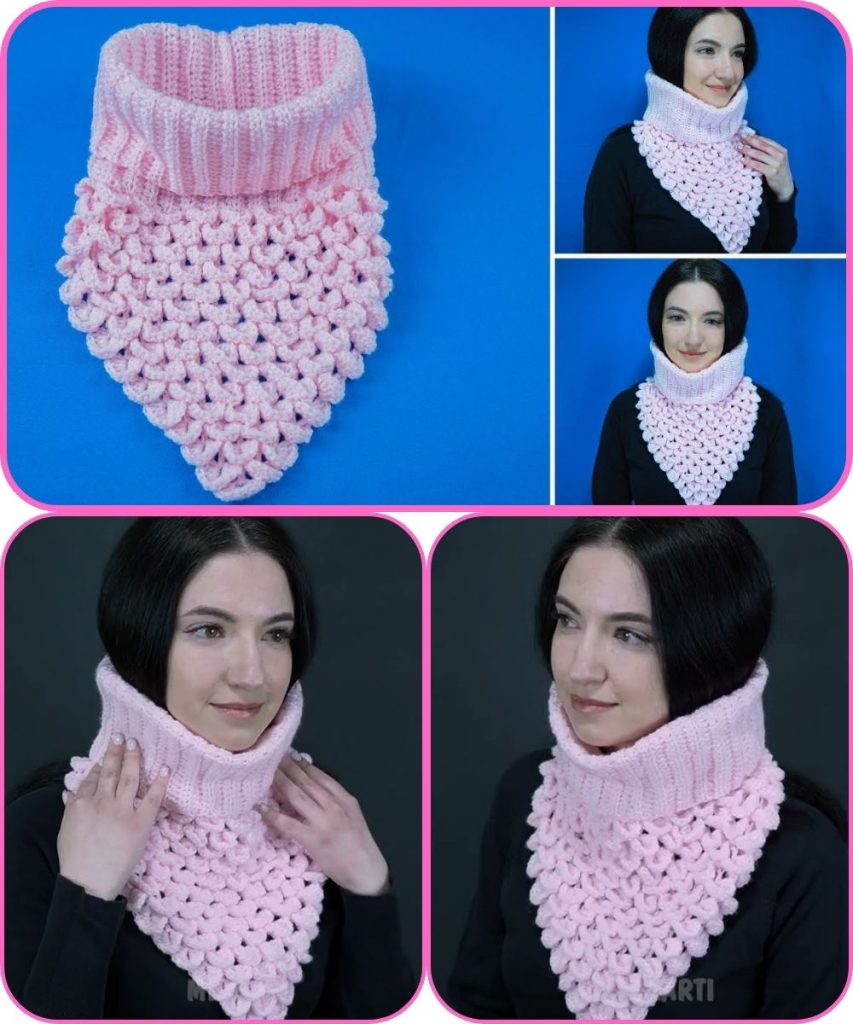
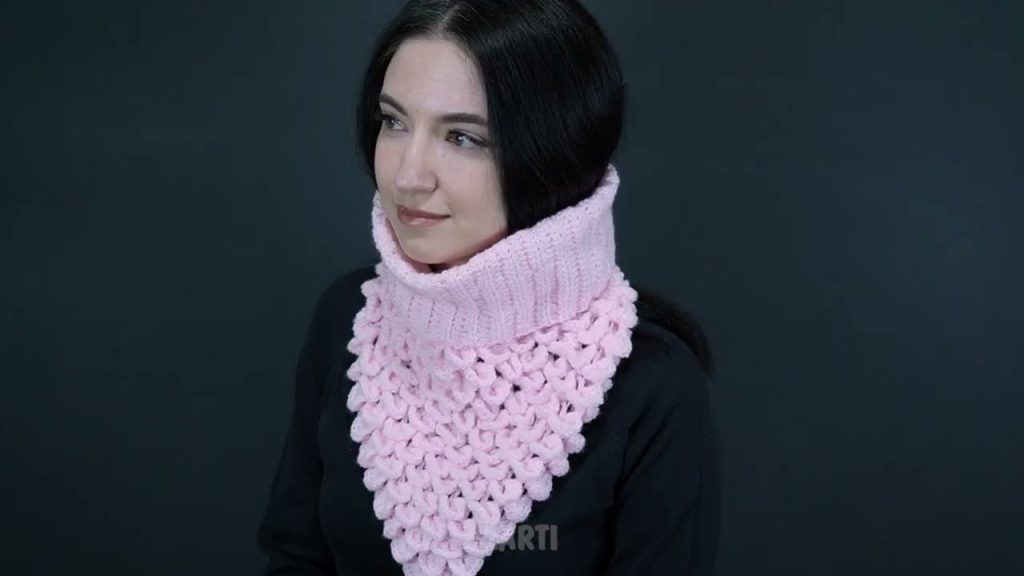
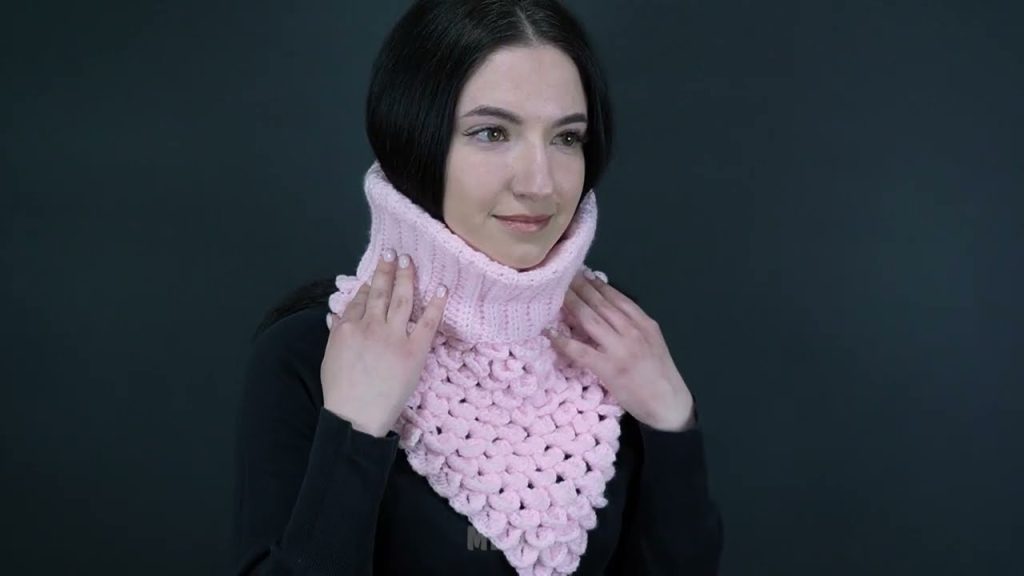
A snood scarf is a cozy, tubular scarf that can be worn around your neck or even as a hood. This pattern combines a simple base stitch with an unusual textured stitch pattern that looks intricate but is easy to make. Perfect for beginners looking for something a little different.
Skill Level
Beginner to Easy Intermediate
Materials Needed
- Medium-weight yarn (Category 4 – wool or acrylic blend recommended)
- Crochet hook: 5.0 mm (H-8)
- Scissors
- Yarn needle
- Stitch markers (optional)
Crochet Abbreviations (US Terms)
- ch – chain
- sc – single crochet
- dc – double crochet
- fpdc – front post double crochet
- bpdc – back post double crochet
- sl st – slip stitch
- st(s) – stitch(es)
- rep – repeat
Finished Size (Approx.)
- Circumference: 22–26 inches
- Height: 10–12 inches
You can adjust the circumference by adding or reducing chains.
Step 1: Foundation Chain
- Chain 60 (or desired circumference, must be a multiple of 4).
- Join with sl st to form a ring (do not twist).
Using a stitch marker here helps to keep track of rounds.
Step 2: Round 1 – Base Round
- Ch 1.
- Sc in each chain around.
- Join with sl st.
This creates a neat, stable base for the unusual stitch pattern.
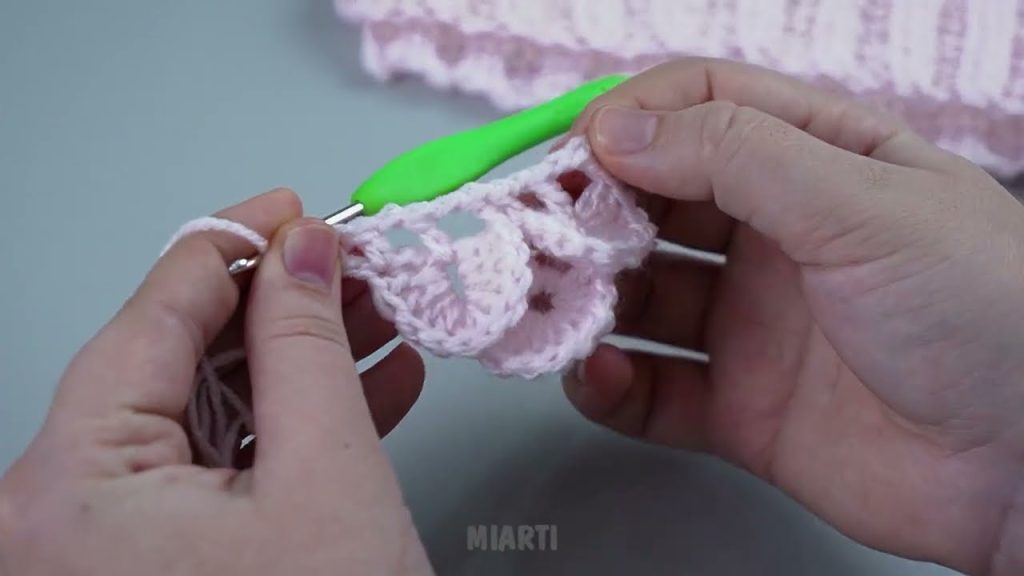
Step 3: Round 2 – Unusual Textured Pattern
This pattern combines front post and back post double crochets to create raised ridges.
- Ch 2 (counts as first dc).
- Fpdc in next stitch, bpdc in next stitch – repeat around.
- Join with sl st.
Step 4: Repeat the Pattern
- Ch 2, then repeat fpdc, bpdc around for each round.
- Continue until the snood reaches your desired height (approx. 10–12 inches).
The fpdc creates raised vertical ridges, while bpdc creates recessed rows, giving a beautiful “ribbed wave” effect.
Step 5: Finishing the Snood
- Fasten off and weave in all loose ends.
- Stretch lightly to shape and let the snood relax for a smooth finish.
Optional Variations
- Two-color snood: Alternate colors every 2 rounds for a striped textured look.
- Chunky style: Use thicker yarn and a larger hook for a bold, cozy snood.
- Beaded accent: Thread small beads onto yarn before crocheting to add sparkle.
- Slouchy style: Chain a few extra stitches in the foundation for a loose, slouchy fit.
Styling Tips
- Wear doubled around your neck for a snug scarf.
- Pull one edge over your head for a hooded look.
- Pair with a matching crochet hat for a complete winter set.
Final Result
You now have a cozy, stylish snood scarf with an unusual textured pattern. It’s soft, warm, and visually interesting, perfect for casual wear or as a handmade gift.
If you want, I can also:
- Create a simplified beginner version with fewer steps
- Make a PDF printable pattern
- Suggest different stitch combinations for even more unusual textures
- Adjust it for kids or oversized snood style
Do you want me to make a full beginner-friendly PDF-style pattern for this snood next?
Watch tutorial: