 by
by Absolutely! Let’s make a cute, stylish crochet scarf with a chic braided stitch pattern. I’ll give you a detailed, step-by-step guide that’s beginner-friendly but still looks sophisticated. 🧶✨
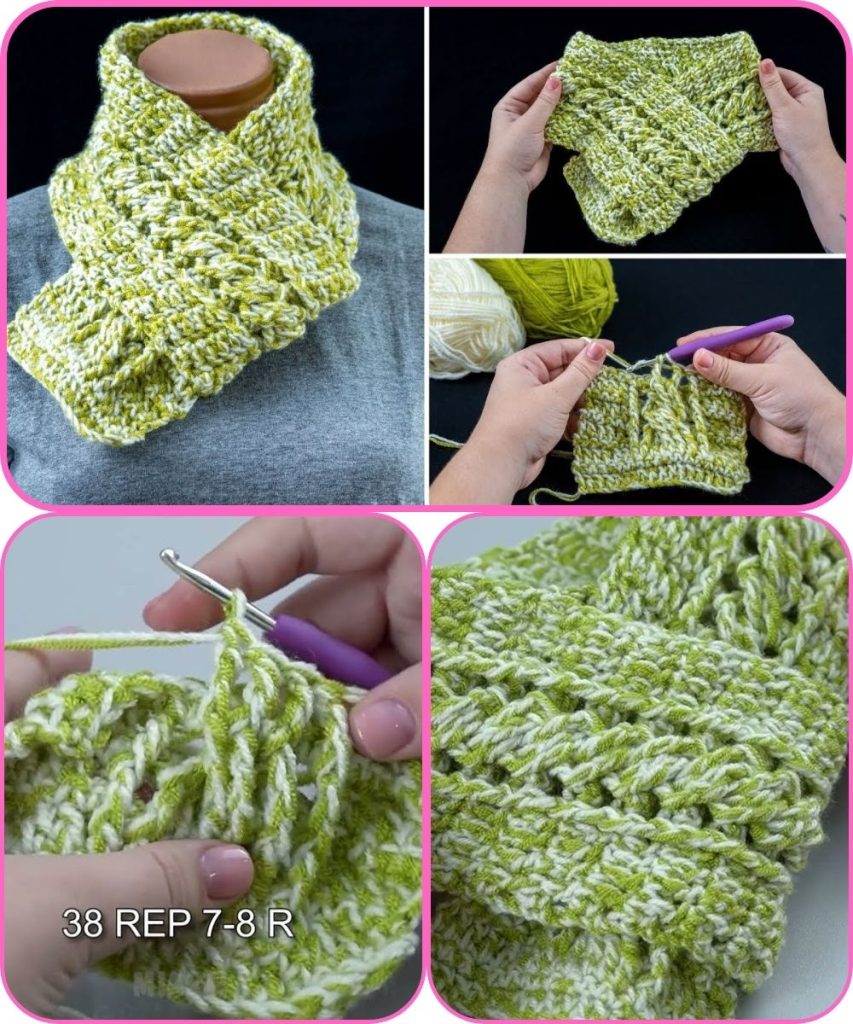
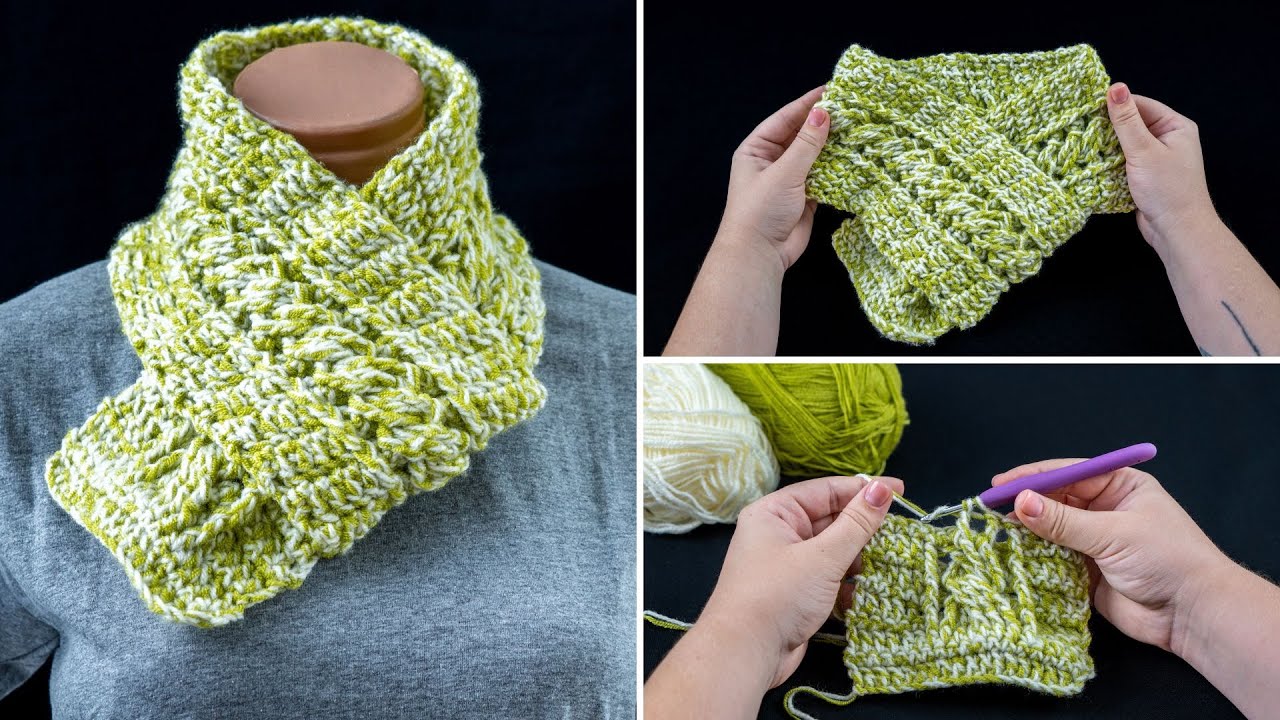
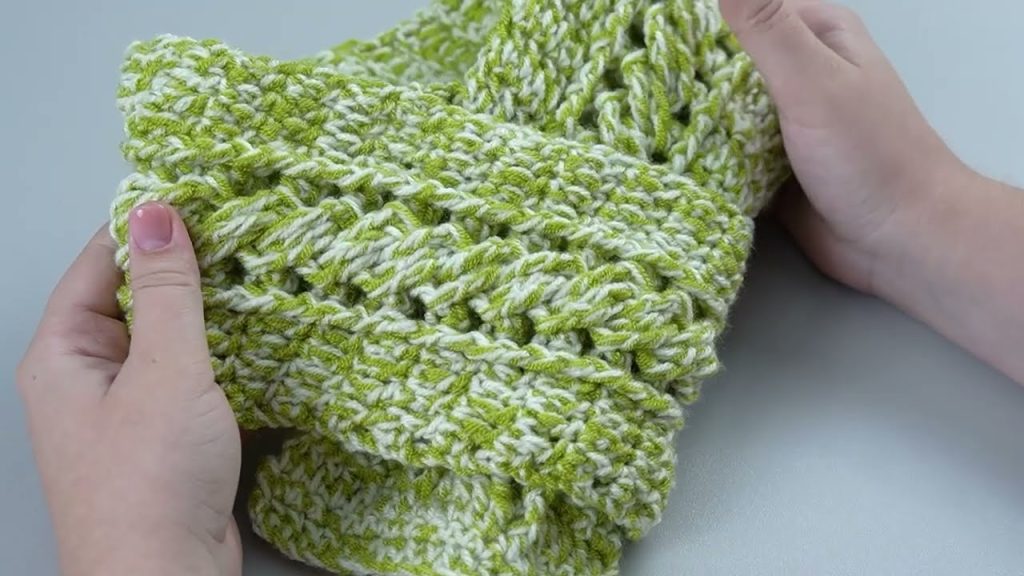
How to Make a Cute Crochet Scarf with a Chic “Braids” Stitch Pattern
This scarf is worked in rows using a simple stitch pattern that mimics braided cables. It’s soft, warm, and stylish, perfect for winter or as a gift.
Materials Needed
- Yarn: Medium-weight (worsted / category 4) yarn
(Soft acrylic, wool, or wool-blend works beautifully) - Hook: 5.0 mm (H/8) crochet hook
- Scissors
- Yarn needle for weaving in ends
Crochet Skills Used
- Chain (ch)
- Single crochet (sc)
- Double crochet (dc)
- Front post double crochet (fpdc)
- Back post double crochet (bpdc)
- Working in rows
Abbreviations (US Terms)
- ch – chain
- sc – single crochet
- dc – double crochet
- fpdc – front post double crochet
- bpdc – back post double crochet
- st(s) – stitch(es)
- sk – skip
Finished Size
- Width: ~6–7 inches
- Length: ~60–70 inches (adjustable)
💡 You can make it longer or shorter by adding/removing rows.
Step-by-Step Instructions
Step 1: Foundation Chain
- Ch 30 (or desired width of scarf + 2 for turning)
- Row 1: Dc in 3rd ch from hook and in each chain across
- Turn
💡 Dc gives a nice base to start the braided texture.
Step 2: Set Up Rows for the Braid Pattern
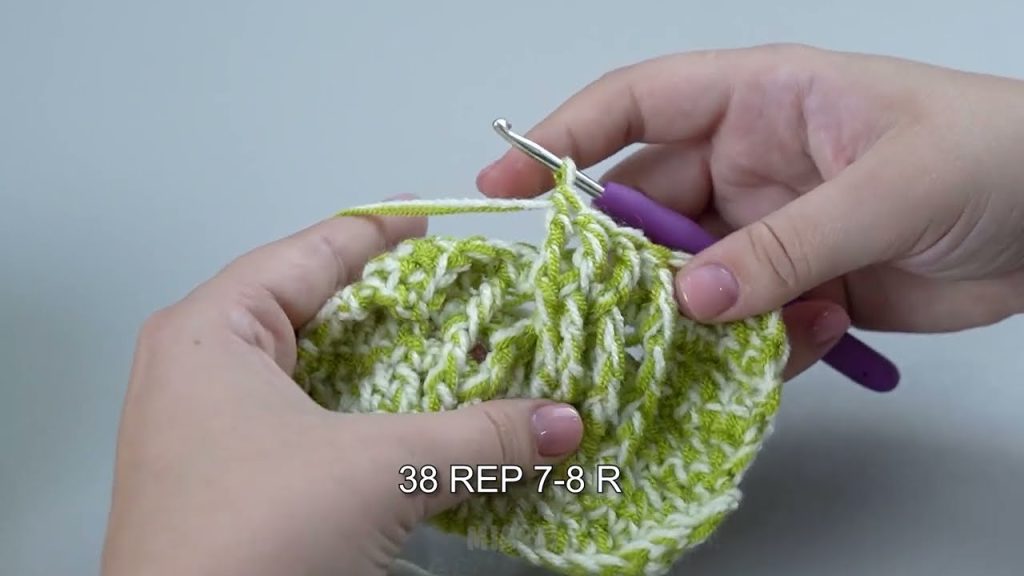
The “braid” pattern is created by alternating front post and back post double crochets. This makes a raised, cable-like effect.
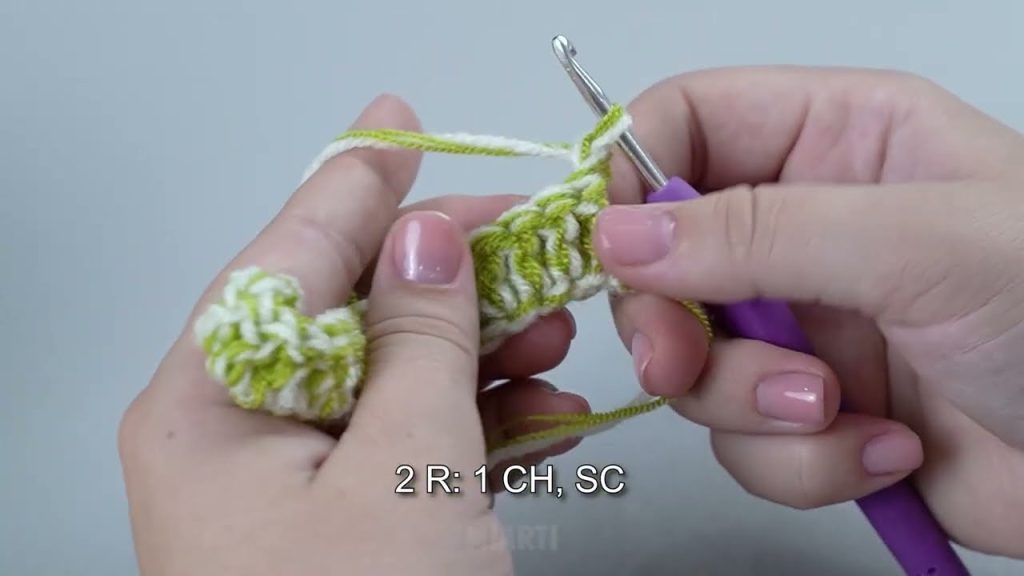
- Row 2: Ch 2 (counts as dc), fpdc around next 2 sts, bpdc around next 2 sts, repeat across, end with dc on top of turning chain
- Turn
Step 3: Start the Braided Texture
- Row 3: Ch 2, bpdc around next 2 sts, fpdc around next 2 sts, repeat across, end with dc on top of turning chain
- Turn
- Row 4: Repeat Row 2
- Row 5: Repeat Row 3
💡 You can adjust the width of the braid by changing how many fpdc/bpdc in each section (e.g., 3 fpdc and 3 bpdc for a wider braid look).
Step 4: Continue Scarf Length
- Repeat Rows 2 and 3 alternately until scarf reaches desired length (~60–70 inches for adult scarf)
Step 5: Finish Edges (Optional)
- To give a polished edge, you can do 1 row of sc all around after the scarf is complete.
- Or leave it raw for a relaxed, cozy look.
Step 6: Add Fringe (Optional)
- Cut yarn into 6-inch lengths
- Fold in half and attach along short edges of the scarf
- Knot securely for cute, playful fringe
Tips for a Chic Look
- Use two colors and alternate every few rows for a striped braided effect
- A chunky yarn gives a warm, dramatic braid
- Soft wool-blend yarn creates a luxurious feel
- Adjust the braid width by changing the number of fpdc/bpdc stitches per braid
Summary
This scarf pattern is simple but looks intricate thanks to the braided texture. It works up quickly with basic crochet stitches and is perfect for beginners who want a chic result.
If you want, I can make a ready-to-follow “braided scarf pattern” with exact stitch counts, rows, and a small diagram for fpdc/bpdc to make it even easier to follow.
Watch tutorial: