 by
by Absolutely! Here’s a clear, beginner-friendly, step-by-step guide you can use as a blog post, tutorial, or pattern intro. I’ll keep it detailed but easy—no scary crochet jargon overload 😊
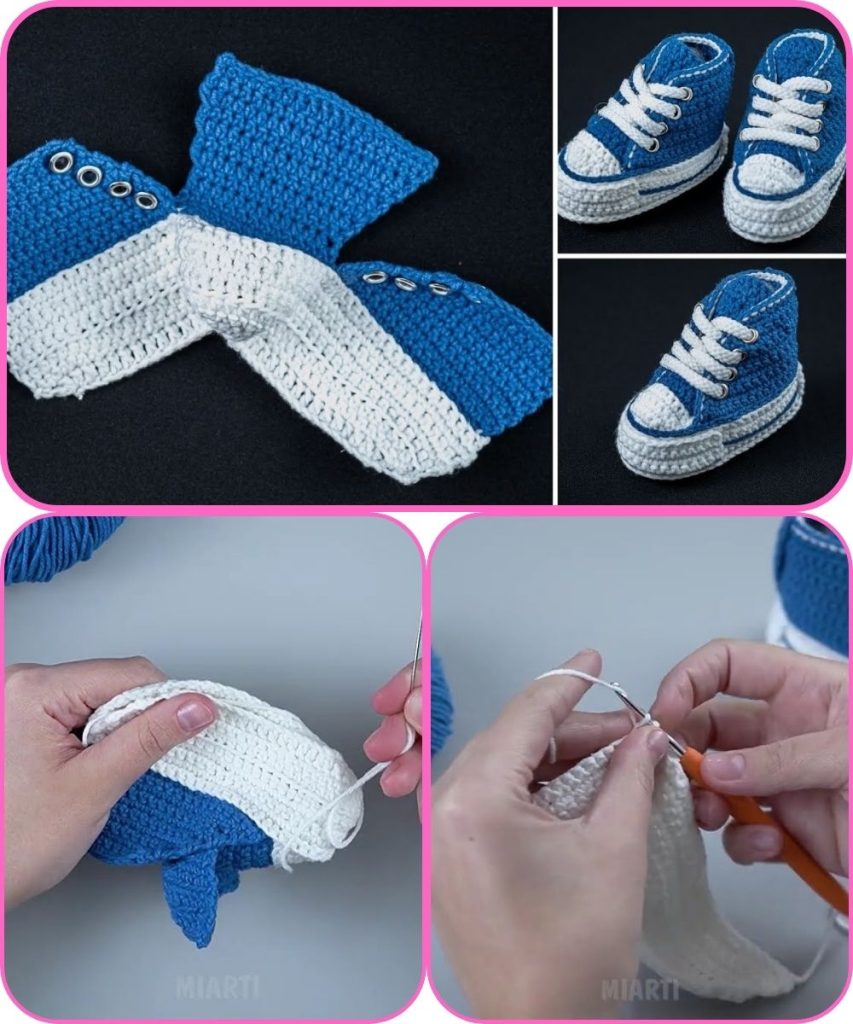
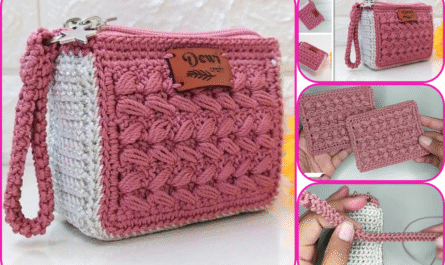
How to Make Easy Crochet Baby Slippers
Even a Beginner Can Handle It!
Crocheting baby slippers is one of the best beginner projects—they’re small, quick to finish, and incredibly cute. Even if you’ve only just learned how to hold a hook, this project is totally doable. Let’s walk through it together, step by step.
Why This Project Is Beginner-Friendly
- Uses basic crochet stitches only
- Works up fast (often under an hour)
- No complicated shaping
- Easy to customize with colors or decorations
What You’ll Need
Materials
- Soft baby yarn (DK or light worsted weight is best)
Choose something gentle and non-scratchy - Crochet hook (usually 3.5–4 mm / US E–G)
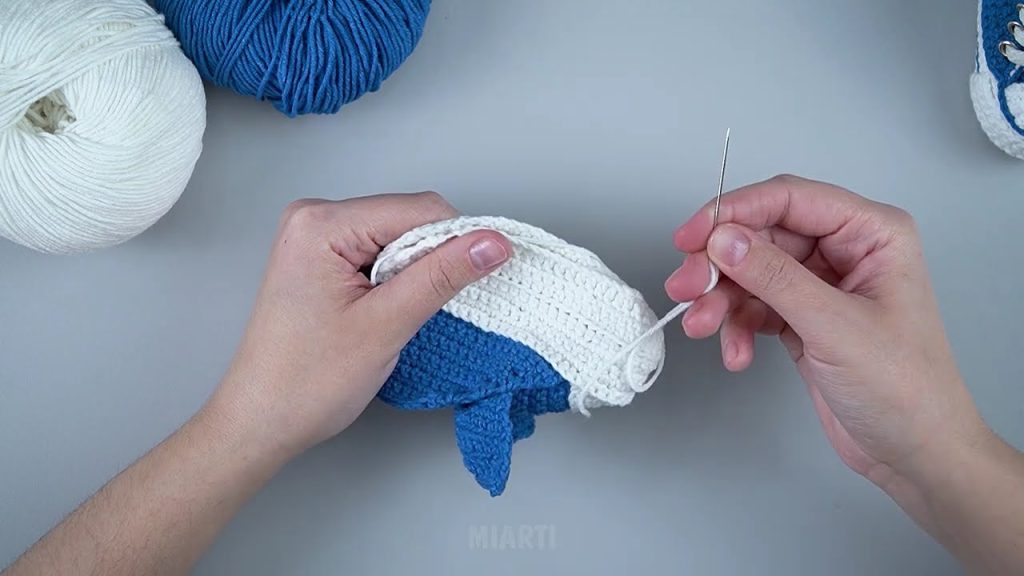
- Yarn needle (for weaving in ends)
- Scissors
Skill Level
✔ Absolute beginner
✔ No prior pattern experience needed
Basic Crochet Stitches Used
If you know these—or are willing to learn them—you’re good to go:
- Chain (ch)
- Slip stitch (sl st)
- Single crochet (sc)
- Half double crochet (hdc) (optional, but beginner-friendly)
Step 1: Crochet the Sole
The sole is the foundation of the slipper.
- Chain 10–12 stitches
(This determines the size—shorter chain for newborns, longer for older babies.) - Single crochet into the second chain from the hook
- Continue single crochet across
- In the last chain, make 3 single crochets (this helps you turn the corner)
- Crochet along the other side of the chain
- Join with a slip stitch to form an oval
👉 Tip: Don’t worry if it looks a little wonky—crochet evens out as you go!
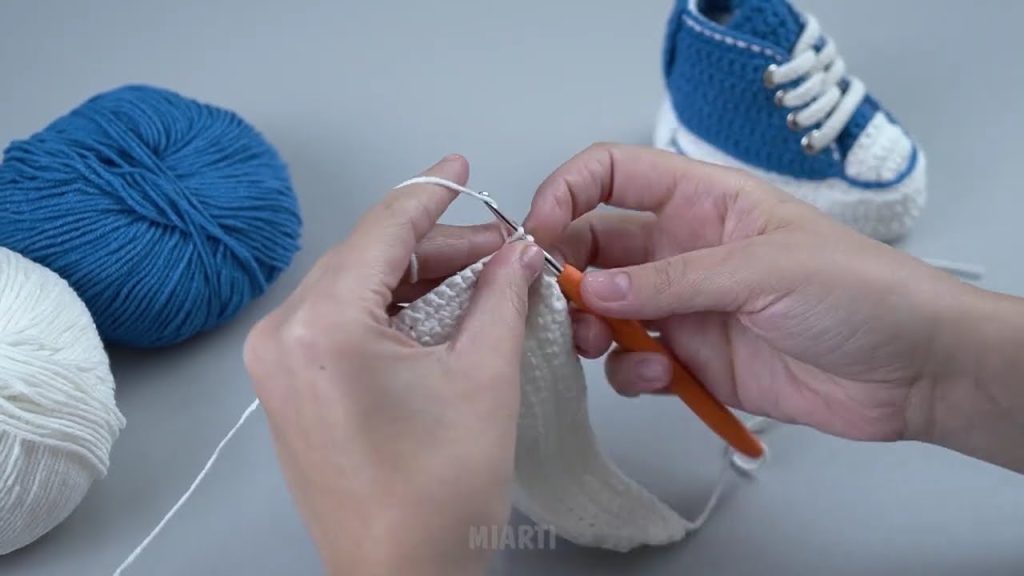
Step 2: Build Up the Sides
Now we turn the flat sole into a slipper shape.
- Chain 1
- Crochet single crochet into each stitch, working in back loops only
(This creates a nice edge and helps the sides stand up.) - Join with a slip stitch
You’ll immediately see the sides starting to form—magic moment ✨
Step 3: Shape the Toe
This is what gives the slipper its cozy front.
- Crochet normally around until you reach the toe area
- Use half double crochet decreases:
- Yarn over, insert hook, pull up loop
- Yarn over, insert hook into next stitch, pull up loop
- Yarn over and pull through all loops
- Repeat decreases across the front
- Single crochet the rest of the way around
- Join with a slip stitch
👉 Don’t stress about perfection—baby slippers are forgiving!
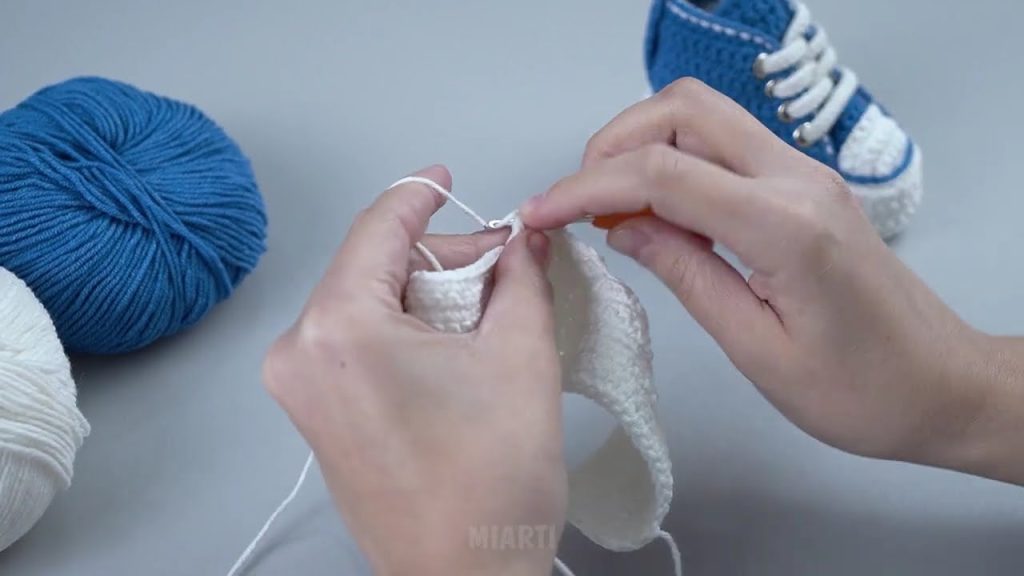
Step 4: Finish the Top Edge
- Crochet one or two more rounds of single crochet
- Keep stitches loose so the slipper slides on easily
- Fasten off and weave in ends
🎉 You’ve just made a baby slipper!
Step 5: Make the Second Slipper
Repeat the same steps for the other foot.
(Pro tip: Count your stitches so both slippers match!)
Optional Cute Add-Ons
Once you’re comfortable, try:
- 🎀 Tiny bows
- 🌸 Crochet flowers
- 🧶 Color changes
- 🪡 A simple button strap (decorative only for safety)
Beginner Tips for Success
- Use light-colored yarn so you can see stitches
- Keep tension relaxed
- If you mess up, undo and redo—every crocheter does it!
- Practice on scrap yarn first if needed
Final Thoughts
Crochet baby slippers are the perfect confidence-boosting project. They’re quick, adorable, and make amazing gifts. Best of all? You don’t need to be an expert—just patient, curious, and willing to try.
If you want, I can:
- Adjust this for newborn vs. 6–12 months
- Turn it into a printable pattern
- Add photos or stitch diagrams
- Rewrite it for a YouTube script or blog SEO
Watch tutorial: