 by
by Absolutely! Let’s make a cute mini crochet bag that’s quick, easy, and perfect for beginners. I’ll give you a detailed, step-by-step guide with tips to customize size, shape, and style. 🧵✨
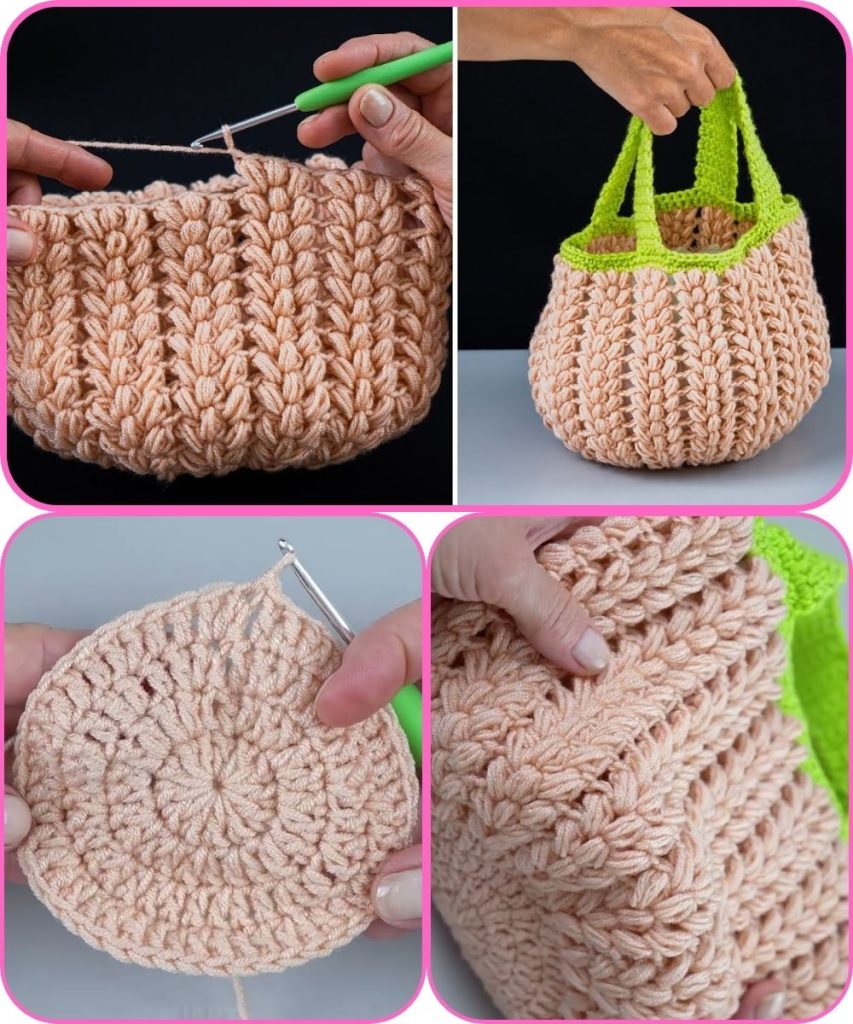
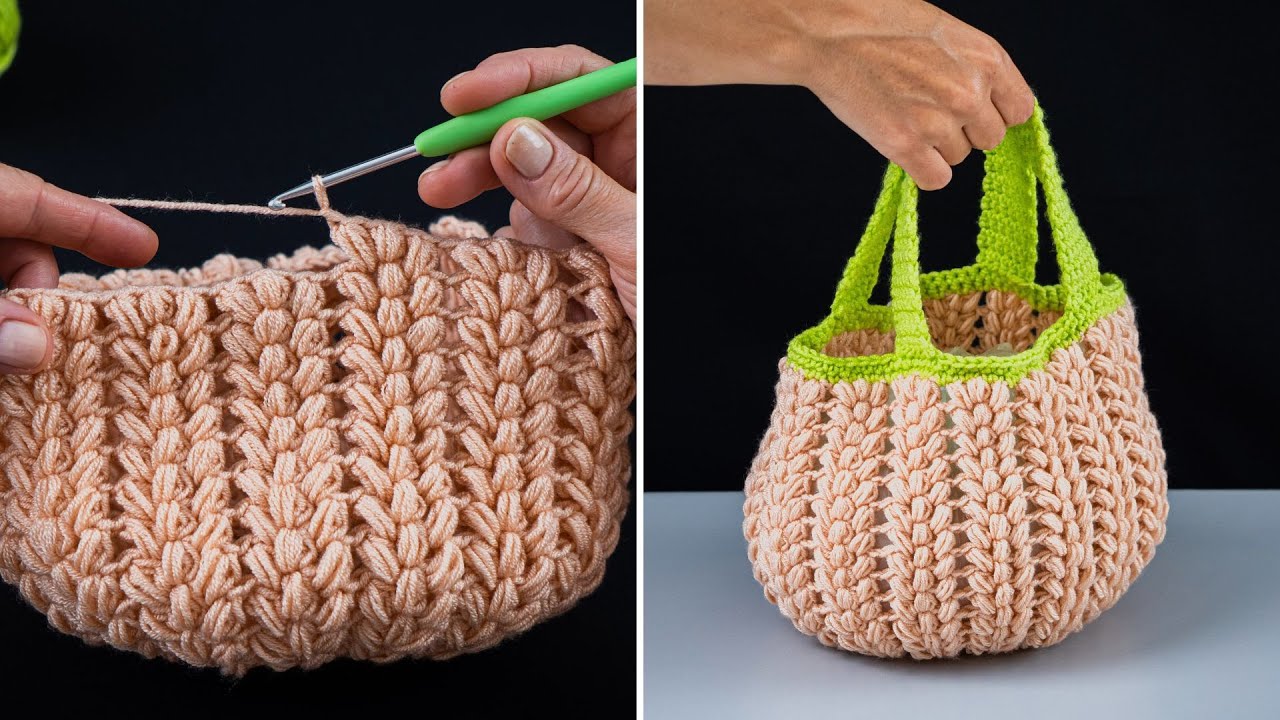
How to Crochet a Cute Mini Bag Quickly and Easily
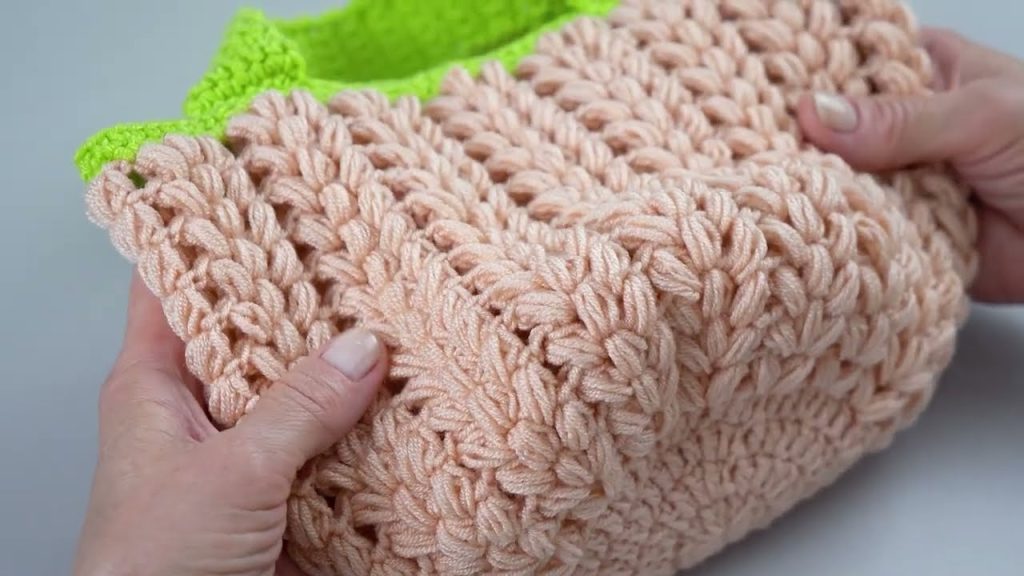
This mini bag is worked in single crochet, making it fast and sturdy. It’s perfect for holding small essentials like coins, lip balm, or keys. You can finish it in 1–2 hours depending on your speed.
Materials Needed
- Yarn: Medium weight (worsted / category 4)
(Soft acrylic, cotton, or blends work well) - Hook: 4.0 mm (G/6) crochet hook
- Scissors
- Yarn needle for weaving in ends
- Optional: Buttons, beads, or applique for decoration
Crochet Skills Used
- Chain (ch)
- Single crochet (sc)
- Slip stitch (sl st)
- Working in rounds
- Increase and decrease
- Fastening off
Abbreviations (US Terms)
- ch – chain
- sc – single crochet
- sl st – slip stitch
- st(s) – stitch(es)
- inc – 2 sc in same stitch
- dec – single crochet decrease
Finished Size
- About 5–6 inches wide and 6–7 inches tall
- Adjustable by adding/subtracting stitches or rounds
Step-by-Step Instructions
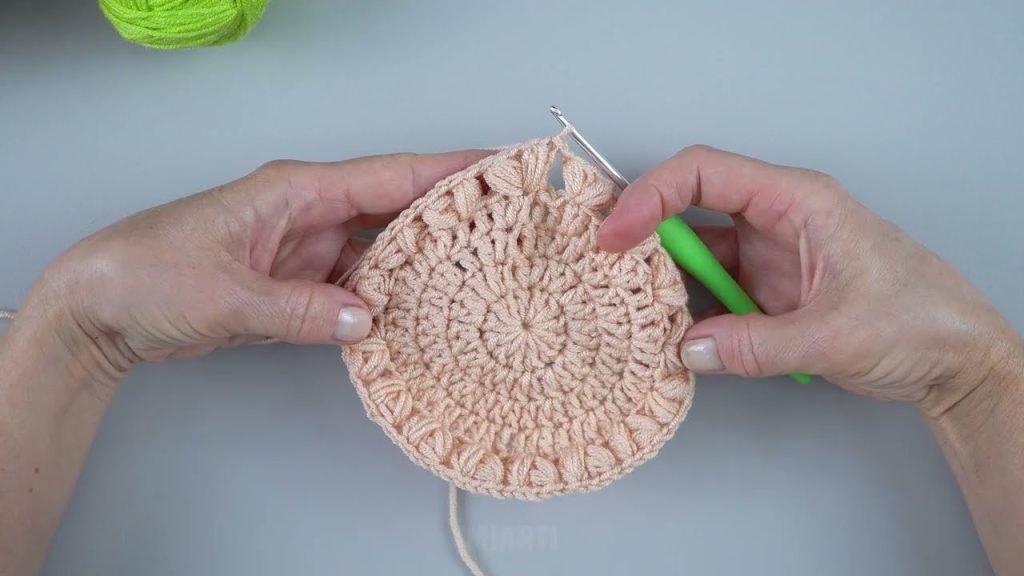
Step 1: Make the Base (Bottom of the Bag)
- Ch 11 (or desired width for your bag base)
- Row 1: Sc in 2nd ch from hook and each ch across (10 sc)
- Row 2–3: Ch 1, turn, sc in each st across
💡 You can make the base longer for a rectangular bag.
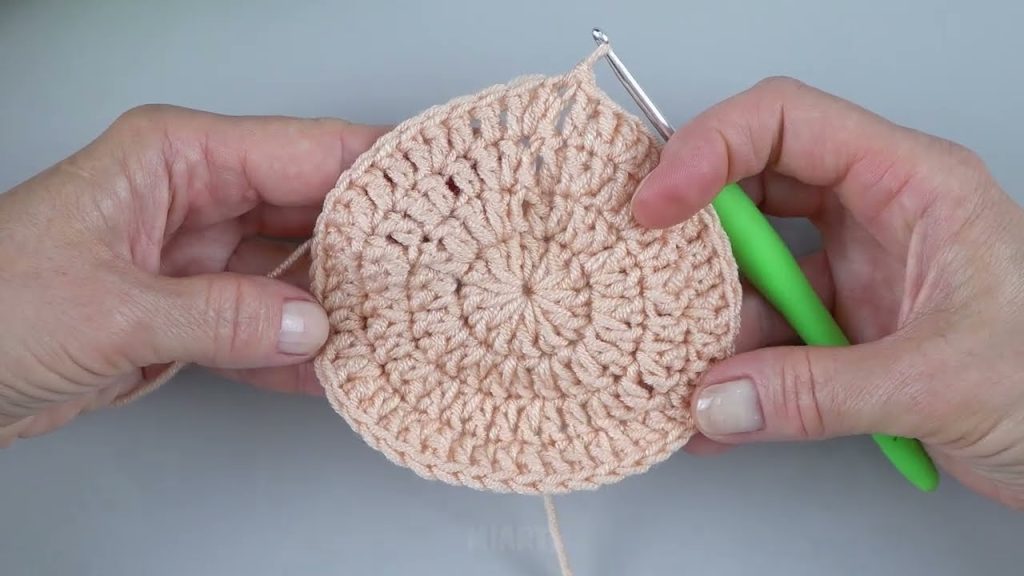
Step 2: Start the Body of the Bag
- Work around the base in continuous rounds (instead of turning).
- Single crochet evenly around the perimeter of the base.
- On corners, work 3 sc in the same stitch to keep corners rounded.
- Continue sc in rounds until the bag reaches desired height (~6–7 inches for mini bag).
Step 3: Shape the Opening
- Once the body is tall enough, you can start finishing the top:
- Round 1: Sc in each st around
- Round 2: Optional: dec every 10 sts for slightly tapered opening
- Fasten off and weave in ends.
Step 4: Add a Strap
- Chain 40–50 (or desired length for shoulder/crossbody)
- Attach ends to opposite sides of the bag using slip stitch or sc for secure hold
💡 For a sturdier strap, work sc along the chain instead of leaving it as chains.
Step 5: Optional Decoration
- Add a button flap: Ch 10, sc back along chain, sew to front
- Add applique: small flowers, hearts, or stars
- Use color changes for stripes or cute patterns
Step 6: Finishing Touches
- Check seams and strap for stability
- Weave in any remaining ends
- Lightly shape the bag
🎉 Your mini crochet bag is ready! Perfect for gifting or personal use.
Tips to Customize
- Bigger bag: Start with a longer base or taller body
- Round bag: Start with a magic ring and work in rounds instead of rows
- Textured look: Try half double crochet or back loop only stitches
- Lining: Add fabric lining for extra durability
If you want, I can make a super quick “Beginner Mini Bag Pattern” with exact stitch counts and rounds, ready to follow in one sitting.
Watch tutorial: