 by
by Sure! Here’s a detailed step-by-step guide on how to crochet a beautiful baby sweater and matching panties outfit. This is a beginner-friendly to intermediate-level project that can be customized with colors, buttons, and trim for a truly stunning handmade baby gift or keepsake.
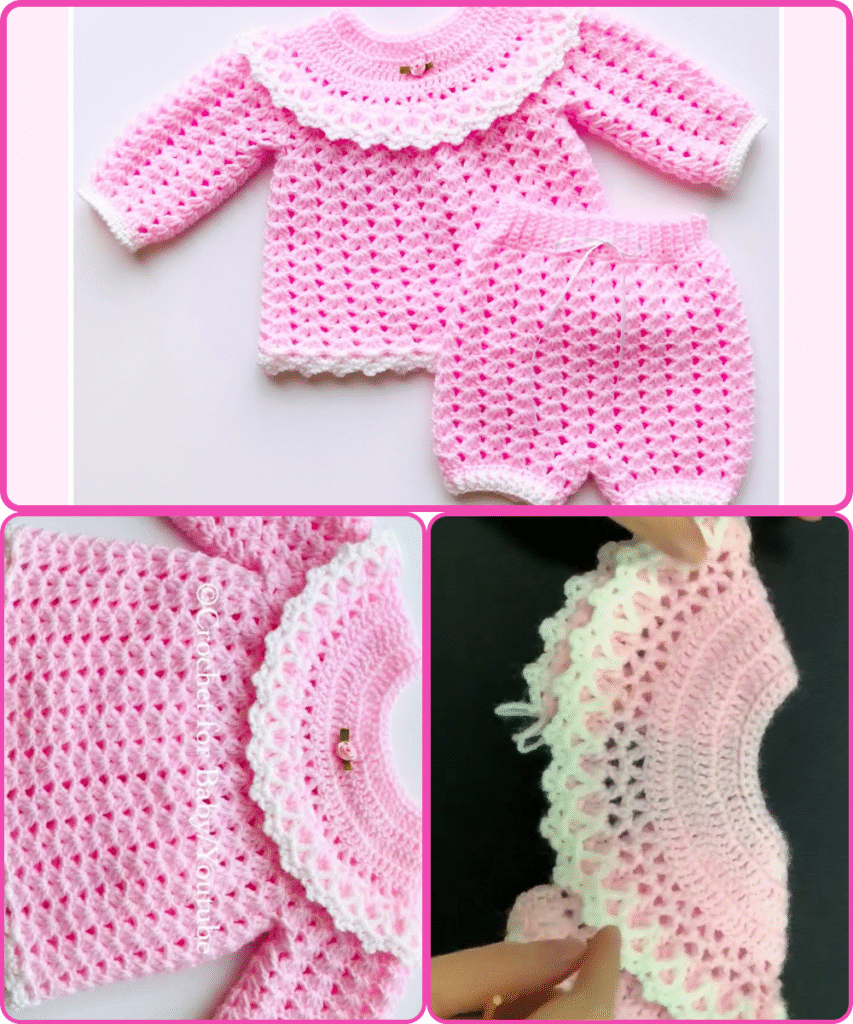
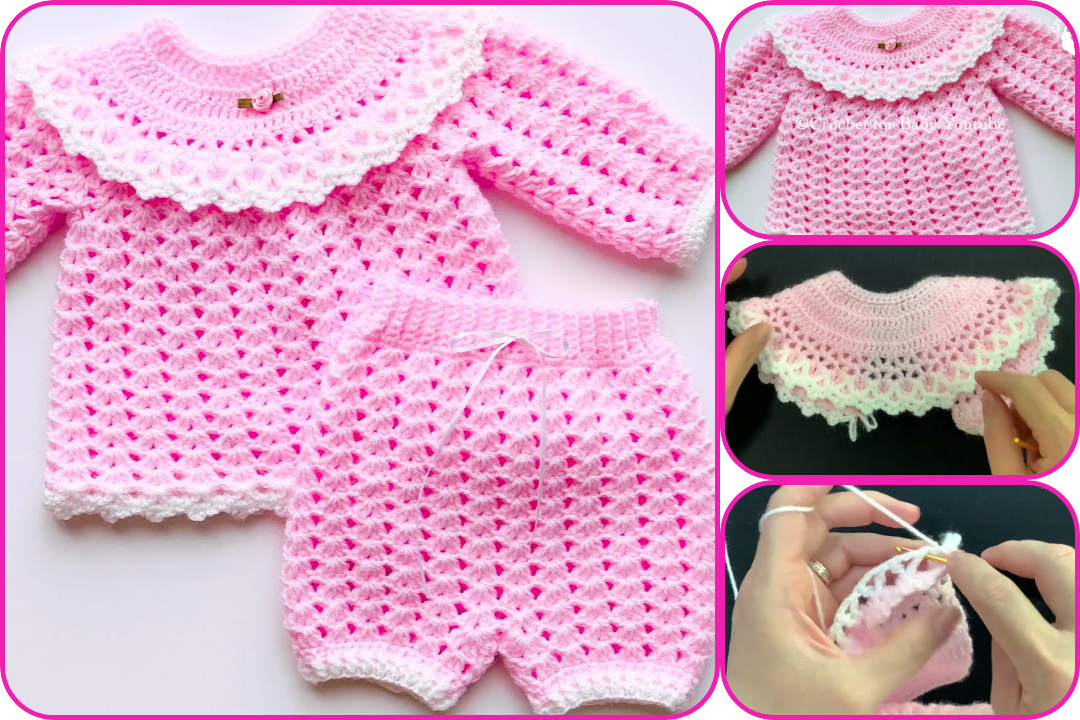
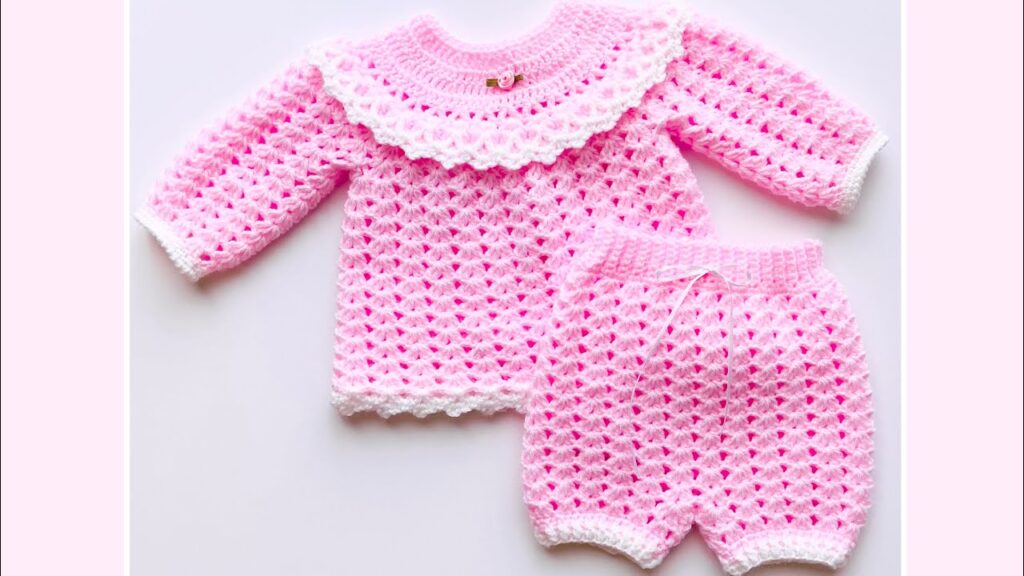
🧶 CROCHET BABY SWEATER & PANTIES SET – Step-by-Step Pattern
Skill Level: Easy to Intermediate
Sizes: 0–3 months (with notes to adjust)
Materials Needed:
- DK or light worsted weight baby yarn (approx. 300–400g total)
- Crochet hook (usually 4.0 mm or size recommended for your yarn)
- Yarn needle
- Stitch markers
- Buttons (optional)
- Scissors
- Ribbon or lace (optional, for decorative trim)
PART 1: CROCHET BABY SWEATER
✨ STEP 1: Yoke (Top Part)
Foundation Chain:
- Ch 52 for newborn size. (Multiple of 8 + 4 for turning)
Row 1:
- Dc in 4th ch from hook and in each ch across. Ch 2, turn.
Row 2 (Start raglan increase):
- Dc in first st, dc, ch 1, dc in every 8th st (4 increase points: chest, back, arms). Continue to end. Ch 2, turn.
Repeat Row 2:
- Work increases at 4 raglan points for about 8–10 rows (or until it fits across the baby’s shoulders when laid flat).
✨ STEP 2: Separate Body and Sleeves
- Place markers to separate sleeves from the body.
- Skip sleeve stitches, and crochet across the body only.
- Continue working in rows or join to work in the round (optional) for about 20 more rows.
Body Edge (Optional):
- Add a row or two of shell stitch, picot, or scalloped edge.
✨ STEP 3: Sleeves
- Join yarn at the armhole.
- Work in rounds, decreasing slightly every 2–3 rounds.
- Continue for 10–12 rounds for short sleeves or longer for full sleeves.
- End with a decorative edge (shell, picot, or ribbing).
✨ STEP 4: Neckline & Button Band
- Add sc border around neckline and front edges.
- Add buttonholes on one side, buttons on the other.
- Optional: work decorative edging or attach lace.

PART 2: CROCHET BABY PANTIES / BLOOMERS
✨ STEP 1: Waistband
- Ch 60–70 (measure baby’s waist), join with sl st to form a ring.
- Work 4–6 rows of fpdc, bpdc ribbing or regular sc rows for waistband.
- Optional: weave ribbon through the band later.
✨ STEP 2: Body of Panties
- Work 8–10 rounds evenly in dc or hdc.
- For shaping the bum, increase 4 stitches every other round at back center.
✨ STEP 3: Leg Holes
- Try the piece flat: sew sides slightly to leave leg openings.
- Work sc or shell edging around each leg opening for a neat finish.
✨ STEP 4: Add Details
- Attach ribbon bows, lace, or crocheted flowers to match sweater.
- Optionally, add a small ruffle at the bum or a contrasting color trim.
💡 TIPS FOR A BEAUTIFUL FINISH
- Use soft, hypoallergenic yarn (like baby acrylic, bamboo, or cotton blends).
- Block your finished pieces for perfect shape and stitch definition.
- Customize colors: try soft pastels, neutrals, or a bold contrast for a modern look.
- Decorate with hand-sewn crochet appliqués, wooden buttons, or lace trim.
Watch video: