 by
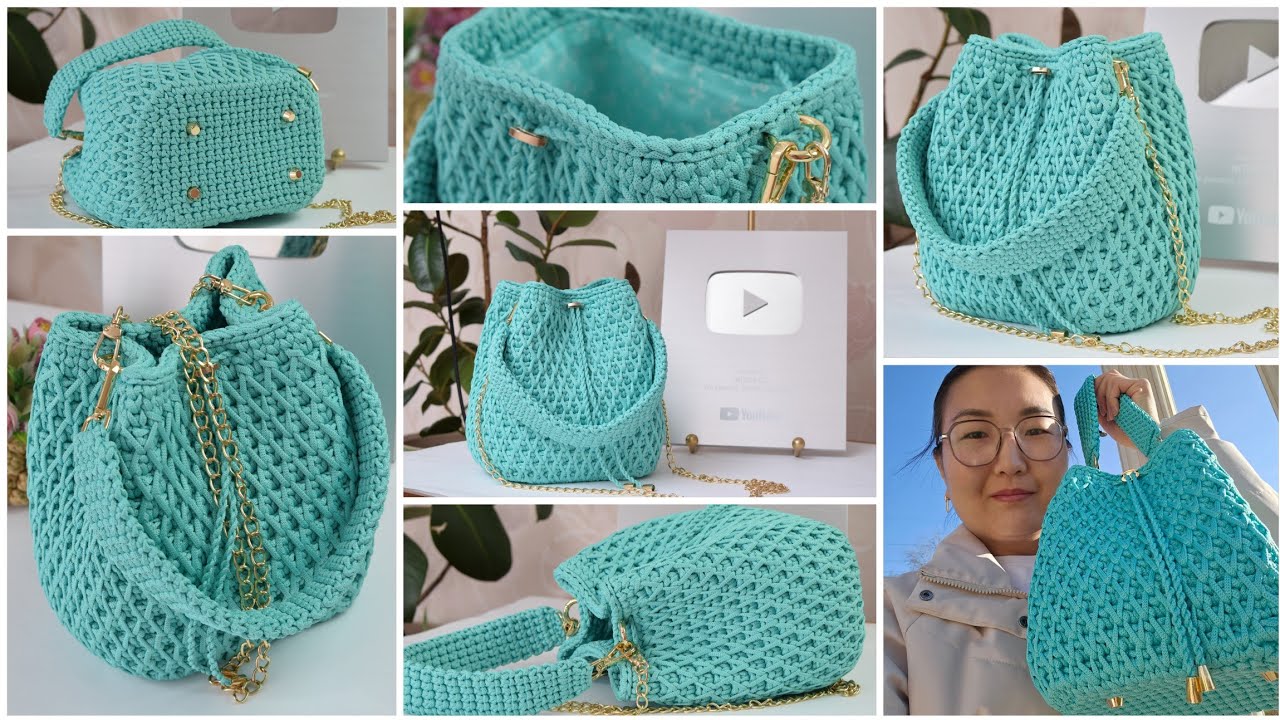
by Sure! Here’s a detailed guide on how to make a crocheted torba bag (torba means bag in several languages like Turkish, Arabic, etc.) with a honeycomb pattern body and a solid bottom. This tutorial is beginner to intermediate level and assumes some basic crochet knowledge (like magic ring, single crochet, double crochet, etc.)
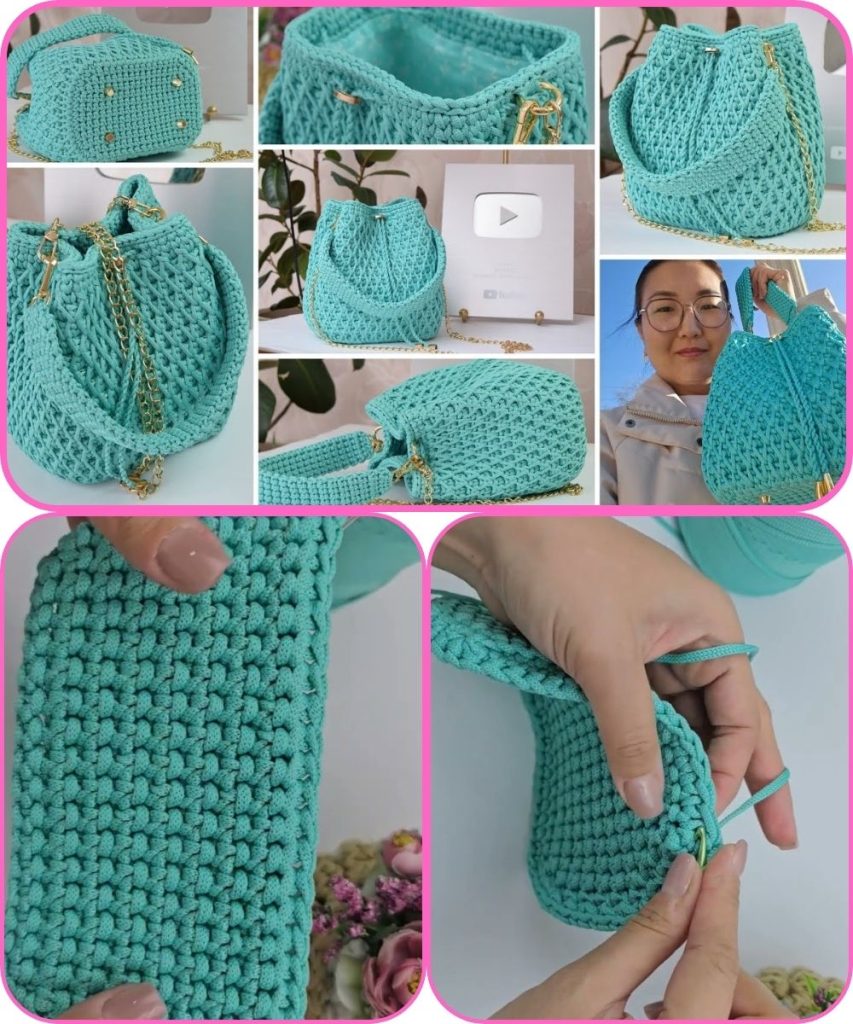
🧶 Crocheted Torba Bag with Honeycomb Pattern and Solid Bottom – Step-by-Step Guide
🧵 Materials Needed:
- Yarn: Cotton or polyester cord (recommended: 3mm thickness)
- Solid color works best to highlight the honeycomb pattern.
- Crochet hook: Size suitable for your yarn (typically 4.0mm – 5.0mm)
- Scissors
- Stitch marker
- Tapestry needle
- Optional: Lining fabric and sewing supplies if you want a fabric lining
🧩 Pattern Structure:
- Solid Flat Base (oval or circular)
- Transition Round to start sides
- Honeycomb Pattern Body
- Bag Top Edge and Handles
✳️ STEP 1: Make the Solid Bottom (Oval)
Option A: Oval Base (recommended for torba)
Foundation Chain: Ch 21 (you can adjust for desired width)
Round 1:
- SC in 2nd ch from hook and next 18 sts
- 3 SC in last ch (this turns the corner)
- Work along the opposite side of the chain: SC in next 18 sts
- 2 SC in the last ch (now you have a full oval)
- Join with a sl st to the first SC (or continue working in spiral)
Round 2:
- SC around, placing 2 SC in each corner stitch (i.e., the 3 stitches on each end get increased)
- Continue increasing each round on corners to keep the oval flat
- Repeat for 4–5 rounds, depending on desired base size
Use a stitch marker if you’re working in a spiral to keep track of rounds.
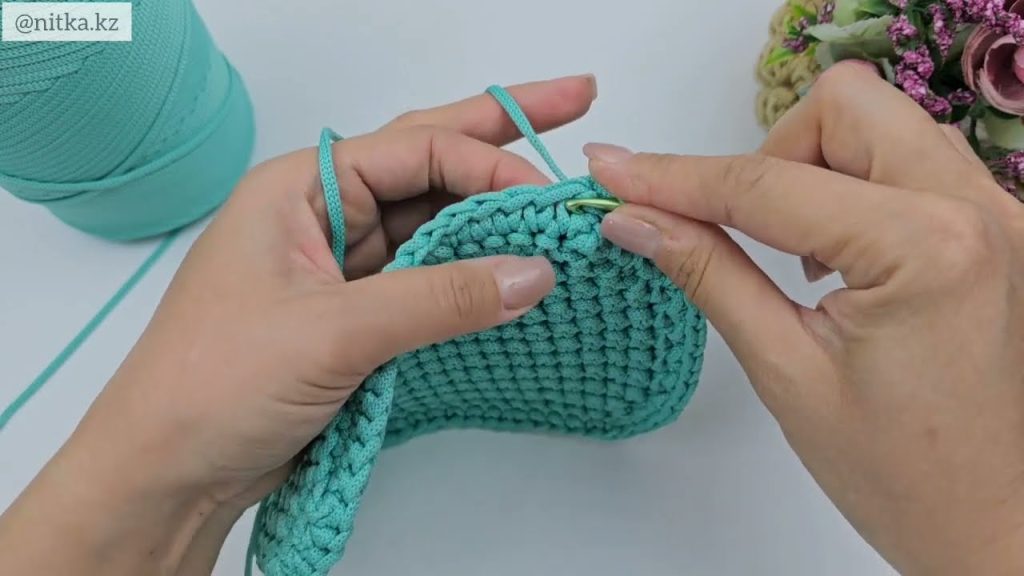
✳️ STEP 2: Transition to Body
Round X (after bottom is done):
- SC in back loop only around – this gives a sharp edge to transition to vertical sides
- Next round: SC in both loops around
- Now, begin honeycomb pattern
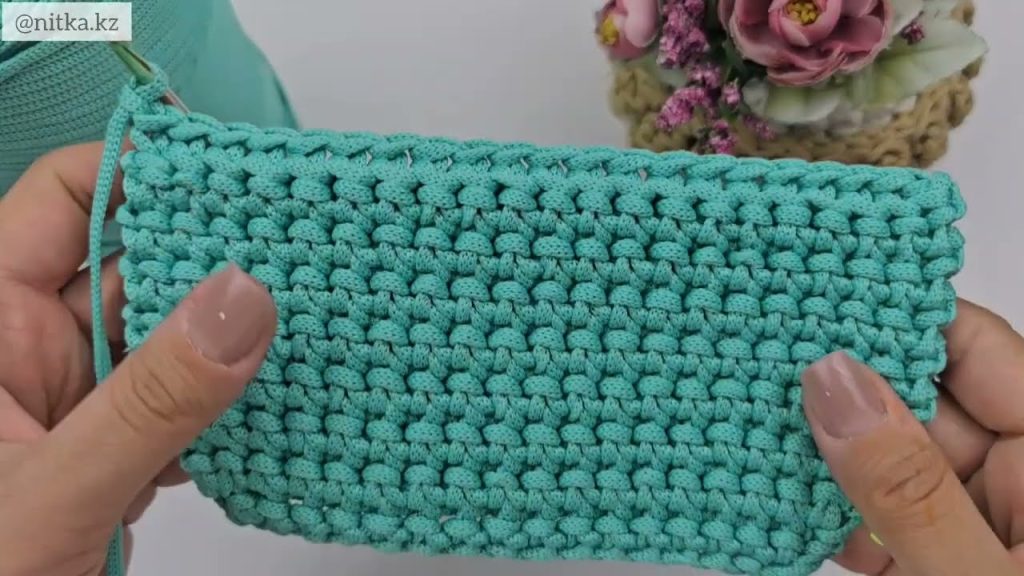
✳️ STEP 3: Honeycomb Crochet Pattern (Mesh Style)
This pattern is made using chains and double crochets to create a hexagonal mesh, resembling a honeycomb.
🧷 Repeat Pattern:
Round 1:
- DC in first stitch, ch 1, skip 1 st — repeat around
- Join with sl st to top of first DC
Round 2:
- Sl st into the first ch space
- DC into ch space, ch 1 — repeat around
- Join with sl st
Repeat Round 2 until desired height (usually 15–25 rounds depending on bag height)
The result is an open, airy honeycomb-style pattern. You can modify to use puff stitches or clusters for a thicker honeycomb if desired.
✳️ STEP 4: Top Edge + Handles
After finishing the body:
Round X (Finishing Edge):
- Work 2–3 rounds of SC to create a firm top edge
👜 Add Handles:
Option 1: Simple Crochet Handles
- After SC rows, ch 30 (or desired length), skip 10–12 stitches, attach with sl st
- SC across the chain in next round to reinforce
- Repeat on opposite side for second handle
Option 2: Add Leather or Wooden Handles
- Sew or crochet into place using metal rings or by looping through reinforced eyelets
🧷 Optional: Lining the Bag
If you want to add a lining (especially since honeycomb is see-through):
- Cut fabric slightly larger than the bag body
- Fold and sew sides to shape
- Insert into bag and hand stitch to the top edge
🧼 Final Touch:
- Weave in all yarn ends
- Steam block gently if needed to shape
🔁 Pattern Recap:
| Section | Stitches Used | Tips |
|---|---|---|
| Bottom | SC | Increase at corners evenly |
| Transition | SC BLO | Creates crisp base edge |
| Body | DC, CH | Use stitch markers for consistency |
| Top Edge | SC | Reinforce before adding handles |
📏 Suggested Dimensions:
- Base: 25cm x 10cm (oval)
- Height: 25–30cm
- Handles: 30–40cm (adjustable)
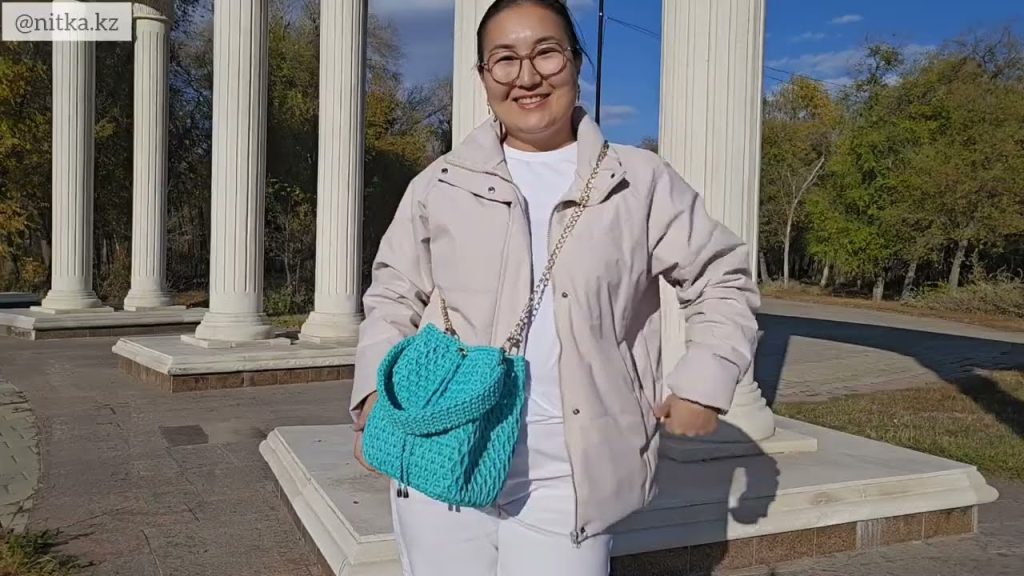
Watch tutorial: