 by
by Sure! Here’s a detailed, step-by-step guide to help you make a 🧶Crochet Granny Bonnet for 0–3 months (newborn to 3 months). This bonnet is soft, cozy, and features the classic granny square design.
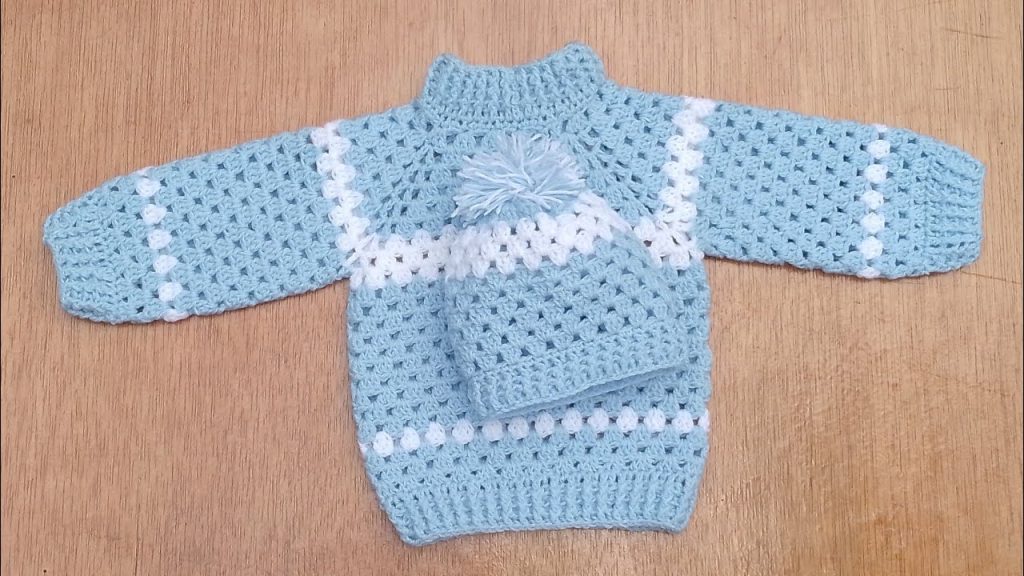
🧶Crochet Granny Bonnet for 0–3 Months – Step-by-Step Guide
✂️ Supplies Needed:
- Yarn: DK (Light worsted/Weight 3) or baby acrylic yarn
- Hook: 4.0 mm (G/6) crochet hook
- Tapestry needle (for weaving in ends)
- Scissors
- Measuring tape (optional, to check size)
📏 Finished Size:
- Width (across forehead): ~13–14 cm (5–5.5 inches)
- Depth (from forehead to back): ~11–12 cm (4.5 inches)
- Fits babies aged 0 to 3 months
🧩 Pattern Overview:
- Make a granny square for the back of the bonnet.
- Add rows on 3 sides of the granny square to form the bonnet shape.
- Crochet a border around.
- Add chin ties or a strap.
🪡 Skill Level: Beginner-Intermediate
You should be familiar with:
- Chain (ch)
- Double crochet (dc)
- Slip stitch (sl st)
- Working in rounds and rows
🧵 Instructions:
🔶 Step 1: Make the Granny Square (Back of Bonnet)
This is a traditional 3-round granny square.
Round 1:
- Ch 4, sl st to first ch to form a ring.
- Ch 3 (counts as dc), 2 dc into ring, ch 2, 3 dc into ring, ch 2 repeat 2 more times.
- Sl st into top of ch-3 to close.
- (You should have 4 clusters of 3 dc and 4 corner spaces.)
Round 2:
- Sl st into next 2 dc and into ch-2 space.
- Ch 3, 2 dc in ch-2 space, ch 2, 3 dc in same space (first corner made).
- (Ch 1, 3 dc in next ch-2 space, ch 2, 3 dc in same space) repeat around.
- Ch 1, sl st into top of ch-3.
Round 3:
- Same as Round 2, but work (3 dc in ch-1 space, ch 1) between corners.
- You can stop here or add a 4th round if you want a slightly bigger bonnet.
✅ You now have the back of the bonnet.
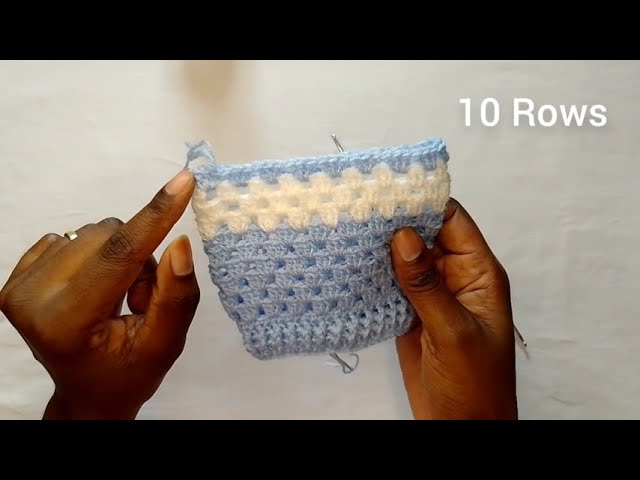
🔷 Step 2: Add the Bonnet “Walls”
We will now work in rows on 3 sides of the square (leave one side open for the face).
Row 1:
- Attach yarn at one corner.
- Ch 3 (counts as dc), work dc in each stitch and ch-space across 3 sides.
- Turn.
Row 2–5 (or until depth is 11–12 cm):
- Ch 3, dc across.
- Turn at end of each row.
This forms the sides and top of the bonnet.
🧶 Step 3: Crochet Border (Optional but recommended)
- Attach yarn at neck corner.
- Work sc or hdc evenly all around the bottom and face edge.
- You can use a contrasting color for a vintage look.
🪢 Step 4: Make Chin Ties
Option 1: Simple Ties
- Attach yarn at bottom corner.
- Ch 30–35 (or desired length), fasten off.
- Repeat on other side.
Option 2: Braided Ties
- Cut 3 long strands of yarn.
- Fold in half and attach with a lark’s head knot.
- Braid and knot the end.
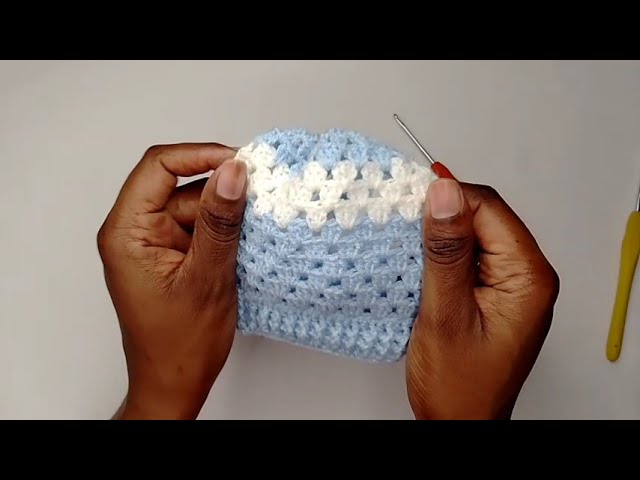
🧼 Finishing
- Weave in all ends with a tapestry needle.
- Block lightly if needed to shape the bonnet.
🎨 Optional Customizations:
- Add a shell stitch border for a feminine touch.
- Use multicolor yarn or make a rainbow square.
- Add a pom-pom or flower applique for decoration.
✅ Notes:
- Adjust hook size or add rounds if your yarn is thinner or thicker.
- Always check size against baby’s head if possible.
- For preemies, stop at Round 2 for a smaller square.
Watch tutorial: