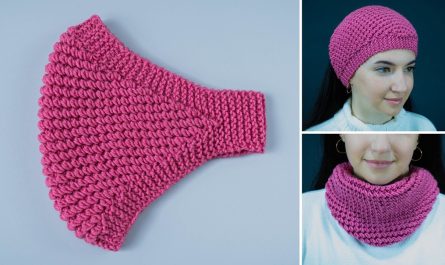
 by
by Sure! Here’s a detailed guide on how to make a honeycomb crochet bag that not only looks beautiful but is also durable and practical. This project is suitable for intermediate crocheters familiar with basic crochet techniques and working in the round.
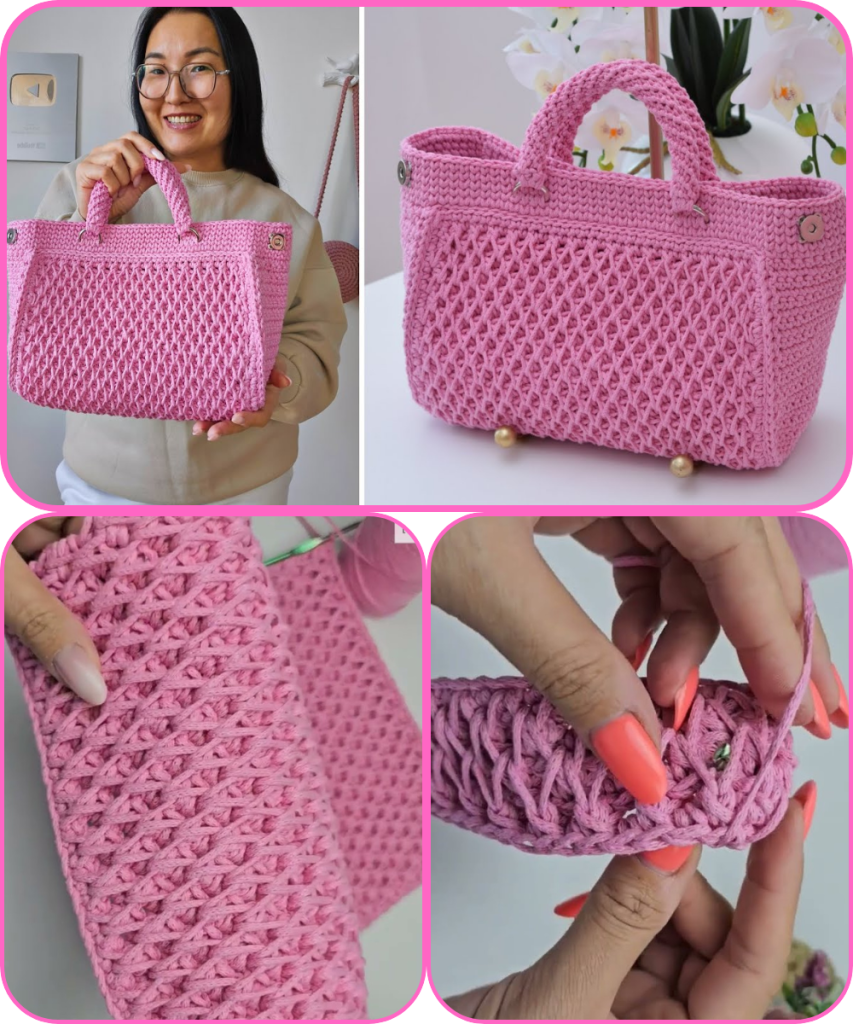
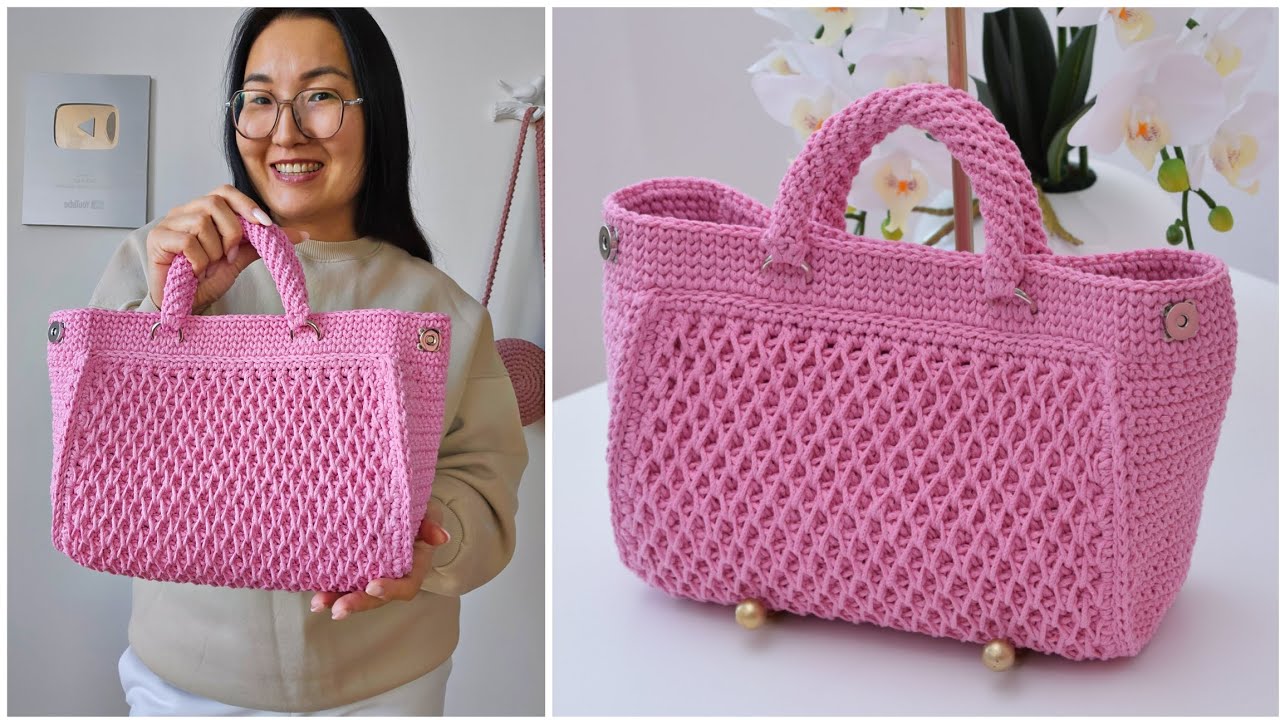
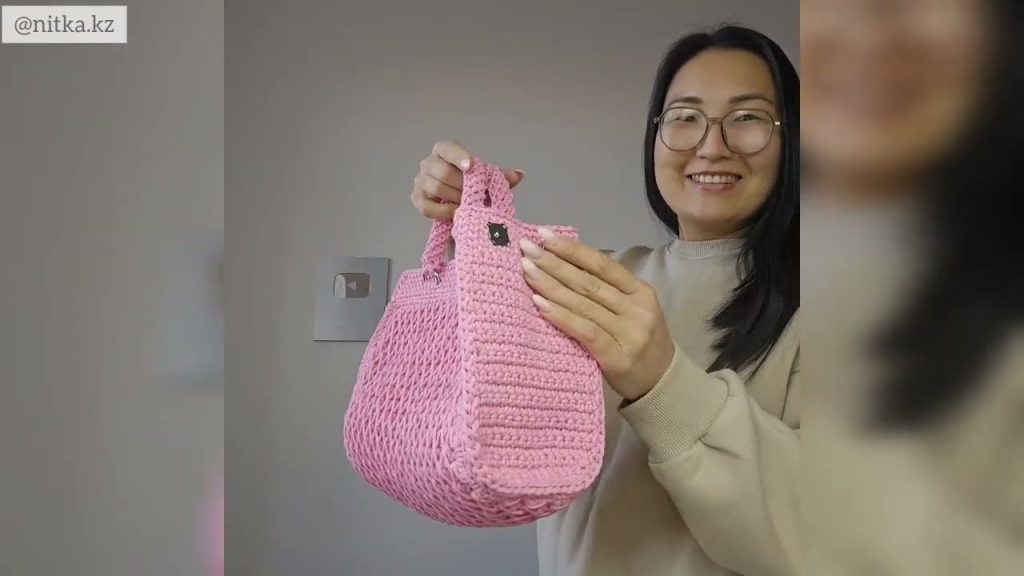
🧶 How to Make a Honeycomb Crochet Bag for a Beautiful Look
🧺 What is a Honeycomb Crochet Bag?
A honeycomb crochet bag features a visually striking hexagonal or diamond-shaped texture, resembling a honeycomb. This pattern adds structure, depth, and style to a handmade bag. The technique often uses post stitches or crochet cables to create a raised effect.
✂️ Materials Needed:
- Yarn: Worsted weight (Cotton or cotton-blend yarn is ideal for bags)
- Approx. 300-500 yards (depending on size)
- Hook: 4.5 mm (or size recommended on the yarn label)
- Scissors
- Tapestry needle for weaving in ends
- Bag handles (wooden, leather, or crocheted)
- Optional: Fabric for lining, magnetic clasp or zipper
🧵 Stitches & Techniques Used:
- Chain (ch)
- Slip Stitch (sl st)
- Single Crochet (sc)
- Double Crochet (dc)
- Front Post Double Crochet (fpdc)
- Back Post Double Crochet (bpdc)
The honeycomb effect is typically achieved using alternating front and back post stitches to form raised shapes in a geometric pattern.
📏 Suggested Bag Size:
- Height: ~10-12 inches
- Width: ~10 inches
- Straps: 16-20 inches (if crocheted or attached)
🧩 Pattern Overview:
This pattern can be worked bottom-up in the round or flat and then seamed. We’ll use a bottom-up, in-the-round version here.
🧶 Step-by-Step Instructions
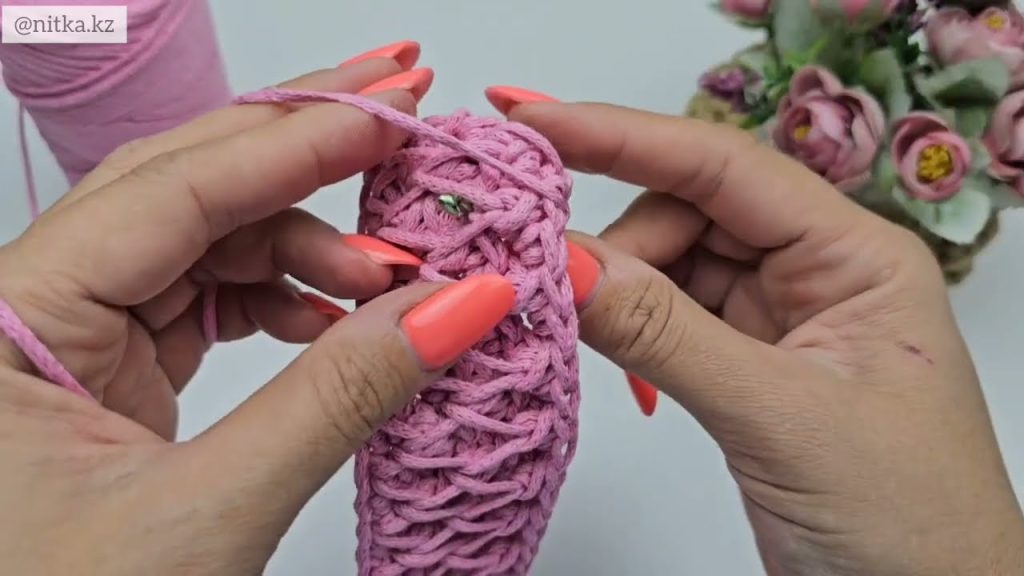
🪡 Step 1: Make the Base
You can either make a flat circular or oval base. Here’s a simple oval base:
Ch 21.
Row 1: Sc in 2nd ch from hook and across (20 sc). Turn the chain and sc across the other side (creating an oval). Join with sl st. (40 sc)
Row 2-5: Continue working in sc around, increasing at both ends to maintain an oval shape.
Adjust the base size depending on how big you want the bag.
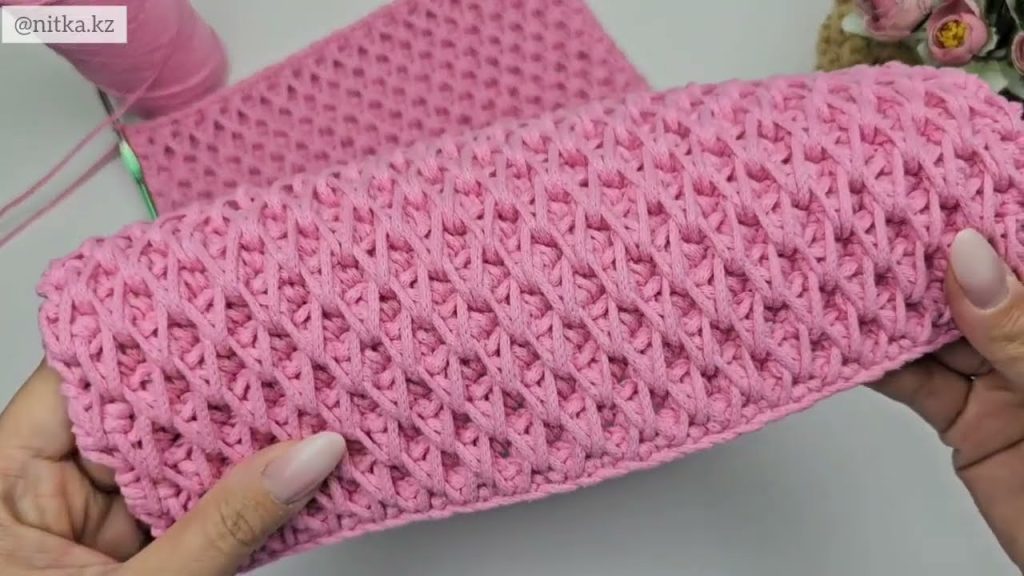
🪡 Step 2: Create the Honeycomb Body
Now we switch to the honeycomb stitch pattern.
Foundation Round:
- Ch 2 (counts as first dc), dc in each stitch around. Join with sl st.
Honeycomb Pattern Rounds (Repeat these):
Note: You’re alternating fpdc and bpdc around the previous row’s dc to create a textured honeycomb look.
Round A:
- Fpdc in next 2 stitches, bpdc in next 2 stitches — repeat around.
Round B:
- Bpdc in next 2 stitches, fpdc in next 2 stitches — repeat around.
Repeat Rounds A and B until the body reaches the desired height (e.g. 8–10 inches).
🪡 Step 3: Add Finishing Rows
To give the bag a neat edge:
- Work 2–3 rounds of sc around the top edge.
- Optional: Add a round of crab stitch (reverse single crochet) for decorative edging.
🪡 Step 4: Add Handles
Options:
- Crocheted straps: Make long sc rows and attach to the inside with strong stitching.
- Ready-made handles: Sew or crochet them onto the bag using yarn and tapestry needle.
🪡 Step 5: (Optional) Add Lining
To protect your bag’s shape and contents:
- Cut fabric slightly larger than the bag’s dimensions.
- Sew sides together to form a pouch.
- Hand-stitch or machine-sew the lining inside the bag before attaching the straps.
💡 Tips for a Beautiful Finish:
- Block the bag: Wet and shape your bag before adding handles. This evens out stitches.
- Use stitch markers when working in the round to track your rows.
- Choose contrasting yarn colors or self-striping yarn to enhance the honeycomb texture.
- For a firmer bag, hold two yarn strands together or use a smaller hook for tighter stitches.
👜 Final Thoughts
A honeycomb crochet bag adds texture and uniqueness to your wardrobe or handmade gift collection. Once you master the post stitches, this pattern becomes a fun and satisfying project!
Watch tutorial: