 by
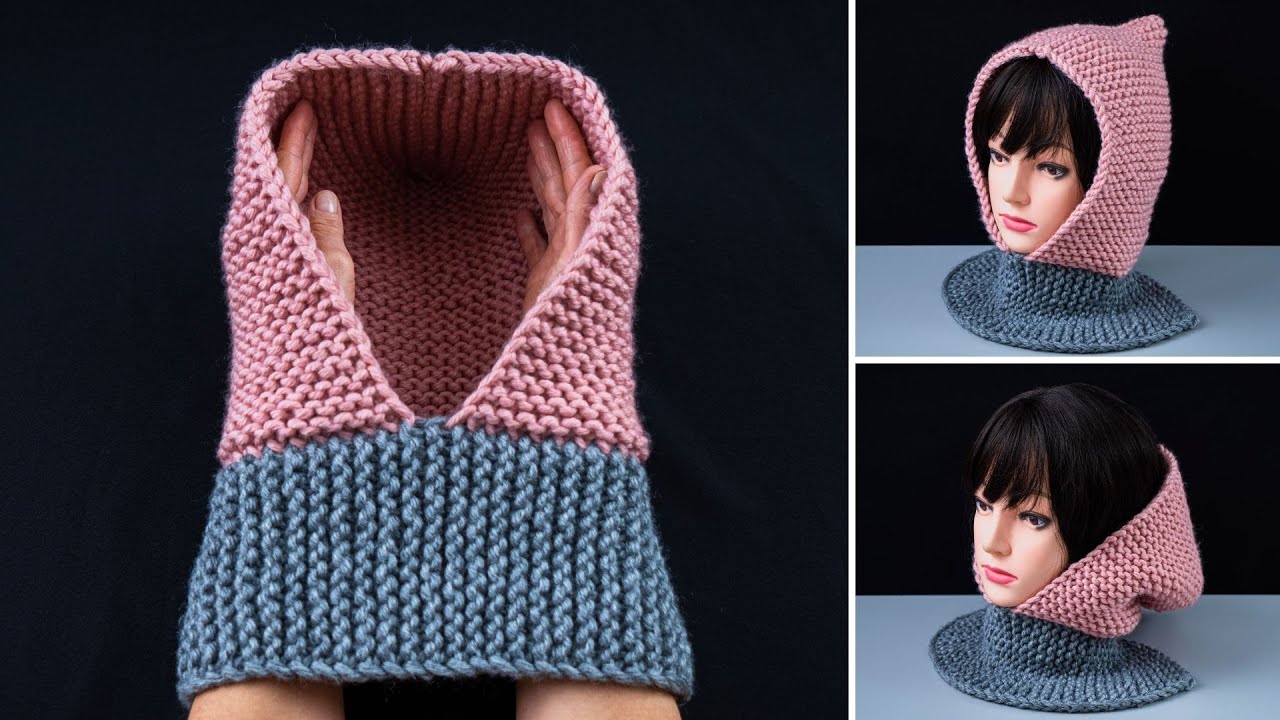
by Absolutely! Let’s go step by step. I’ll give you a clear, beginner-friendly guide for making a simple knitted snood/hood quickly. I’ll focus on easy techniques, minimal shaping, and fast results.
Materials You’ll Need
- Yarn: Chunky or super bulky yarn (this knits up faster)
- Needles: Circular needles or double-pointed needles (size recommended for your yarn; usually 8–12 mm for chunky yarn)
- Scissors
- Tapestry needle (for weaving in ends)
- Stitch markers (optional, but helpful)
Step 1: Choose Your Size
A snood/hood is basically a tube that fits around the head and neck. Here’s a rough guide:
- Adult circumference: 20–24 inches (51–61 cm)
- Length: 12–15 inches (30–38 cm) for a short snood, 18–24 inches (46–61 cm) for a longer, drapey style.
Tip: Use a stretchy cast-on if you want a snugger fit.
Step 2: Cast On
- Cast on enough stitches to fit around the head. For chunky yarn, usually 40–60 stitches is enough.
- Join in the round carefully to avoid twisting your stitches (if using circular needles).
If you don’t have circular needles, you can knit flat and seam the edges later.
Step 3: Knit the Tube
- Use stockinette stitch (knit all stitches if knitting in the round; knit one row, purl one row if knitting flat).
- Keep knitting until the piece measures your desired length from top to bottom.
For beginners: knitting in the round avoids seams and looks neat.
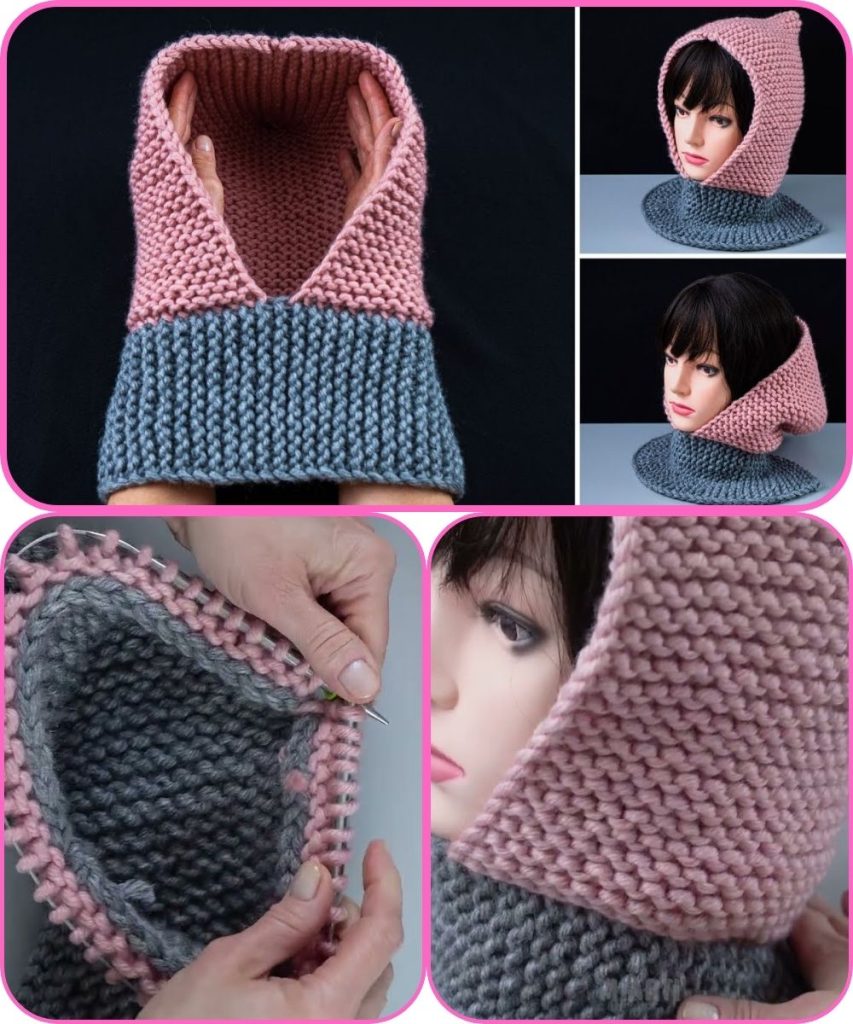
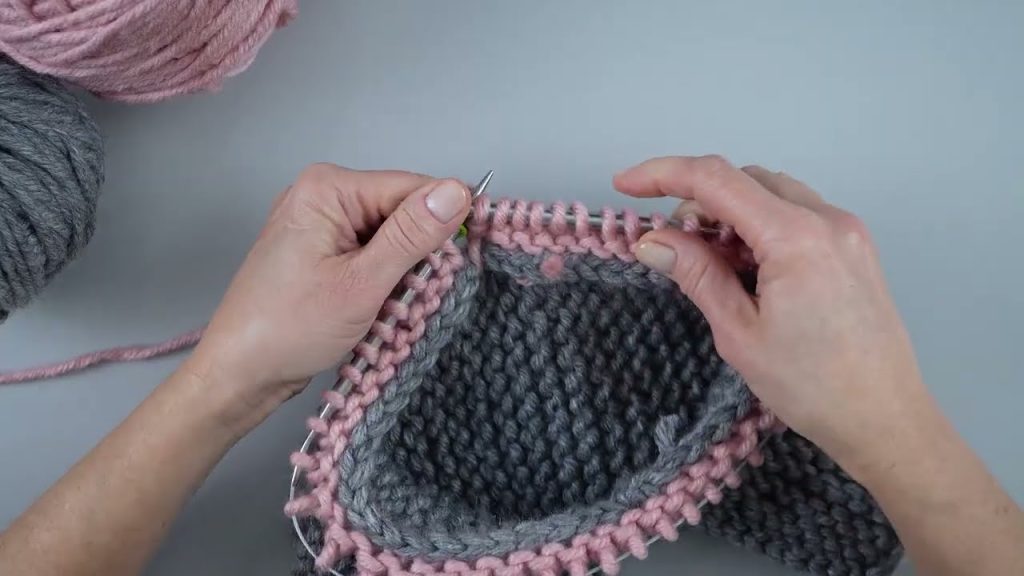
Step 4: Shape the Hood (Optional)
If you want a hooded effect, you can add a simple decrease at the top:
- Knit until the snood reaches about 2/3 of your desired length.
- Begin decreasing to shape the crown:
- Round 1: Knit 6, knit 2 together – repeat around.
- Round 2: Knit all stitches.
- Round 3: Knit 5, knit 2 together – repeat.
- Continue decreasing every other round until a small number of stitches remain.
- Cut the yarn, leaving a long tail, and thread it through the remaining stitches. Pull tight and secure.
Skip this step if you prefer a simple tube without shaping.
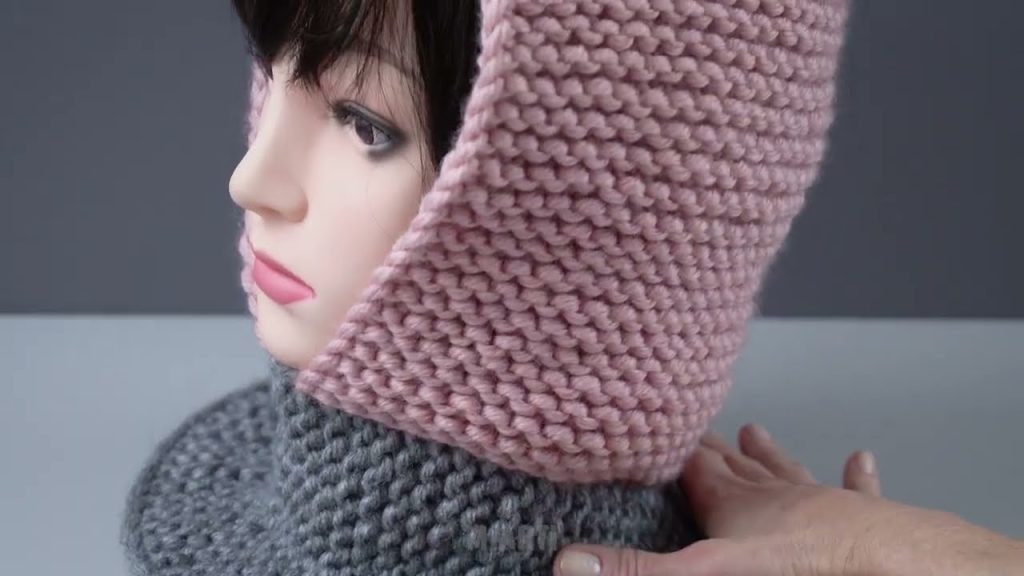
Step 5: Finishing
- Weave in all loose ends with your tapestry needle.
- Optionally, block your snood lightly to even out stitches (just steam or wet block depending on yarn type).
Tips for Beginners
- Chunky yarn + big needles = faster knitting. You can finish a snood in a few hours.
- Use stitch markers to mark beginning of round or decrease points.
- Keep your tension even to make it look neat.
- If you make mistakes, don’t be afraid to pull back rows—chunky yarn is forgiving.
Optional Decoration
- Add a pom-pom at the top for a playful hood.
- Use two-tone yarn for stripes (alternate every few rows).
✅ That’s it! You have a simple, cozy snood/hood ready in a few hours, even as a beginner.
If you want, I can also draw a simple diagram showing the steps and shape—it’s super helpful for visual learners.
Watch tutorial: