by
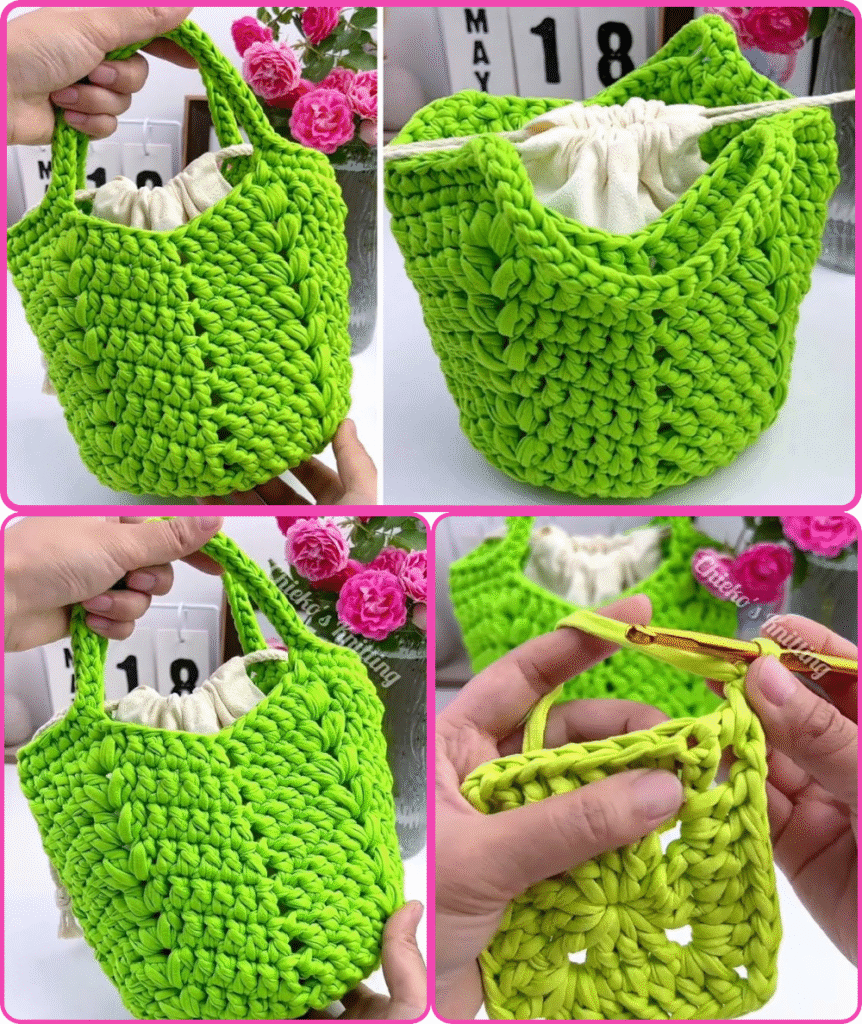
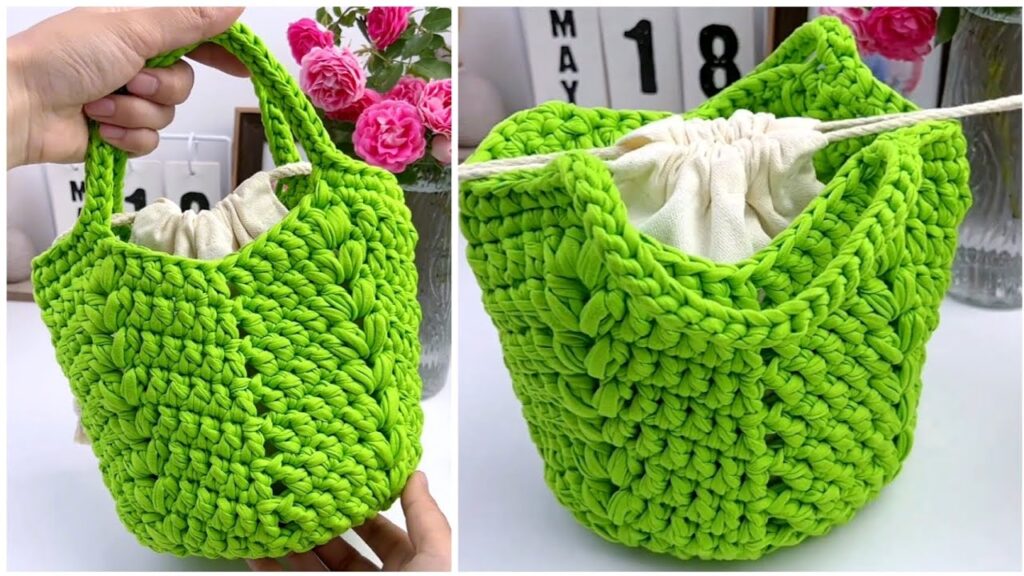
by While I can’t physically show you a video or images like a “🌟Easy Crochet Bag Step by Step Tutorial!🌹Simple and Beautiful” might imply, I can definitely provide a detailed, step-by-step written guide on how to crochet a simple and beautiful bag.
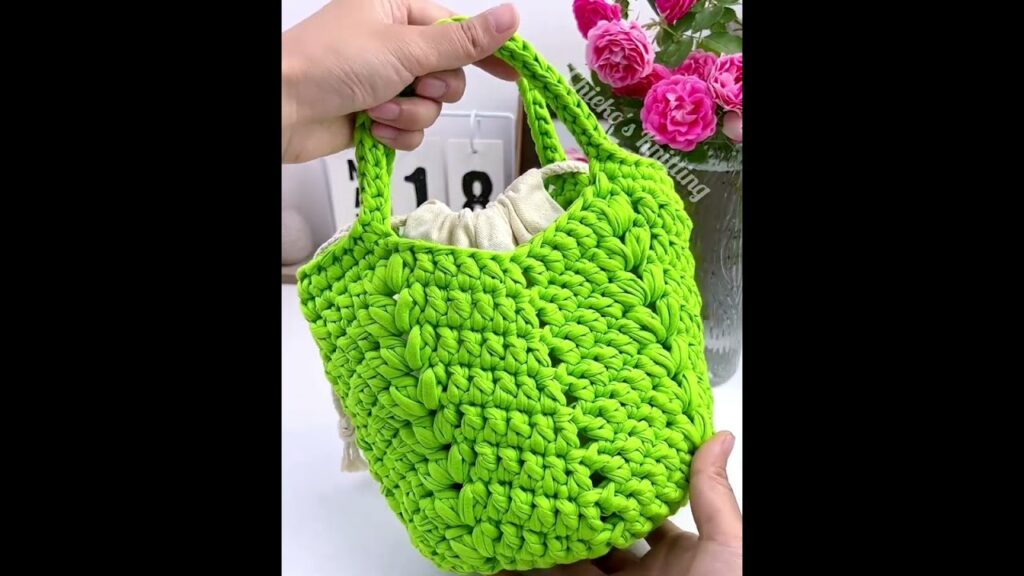
This tutorial will focus on a basic, rectangular tote-style bag, which is excellent for beginners.
How to Make an Easy Crochet Bag: A Step-by-Step Tutorial
This tutorial will guide you through creating a simple and beautiful crochet bag, perfect for beginners. We’ll use basic stitches and a straightforward construction.
Skill Level: Beginner Time Estimate: 4-8 hours (depending on your speed and the yarn/hook size)
Materials You’ll Need:
- Yarn: Approximately 200-300 yards of worsted weight (medium #4) cotton or acrylic yarn. Cotton is great for bags as it holds its shape well. Choose a color you love!
- Tip: Solid colors are easier for beginners to see their stitches.
- Crochet Hook: A hook size appropriate for your yarn. For worsted weight yarn, a 5.0mm (H) or 5.5mm (I) hook is usually a good starting point. Check your yarn label for recommended hook size.
- Yarn Needle (Tapestry Needle): For weaving in ends.
- Scissors: For cutting yarn.
- Stitch Marker (Optional but Recommended): To mark the beginning of rounds if you’re working in the round.
Abbreviations Used:
- ch: chain
- st(s): stitch(es)
- sl st: slip stitch
- sc: single crochet
- hdc: half double crochet
- dc: double crochet (we won’t use this much, but good to know!)
- FO: fasten off
Step-by-Step Tutorial
We will create the bag in two main parts: the body and the straps.
Part 1: The Bag Body (Worked in Rows, then joined)
For a simple rectangular bag, we’ll crochet a large rectangle and then fold it to create the sides.
Option A: Simple Folded Rectangle (Easiest)
- Foundation Chain:
- Make a slip knot and put it on your hook.
- Chain (ch) enough stitches to achieve your desired bag width. For a small to medium bag, a chain of 30-40 stitches is a good starting point.
- Example: Let’s say you chain 35 stitches.
- Row 1:
- Single crochet (sc) in the second chain from the hook and in each chain across.
- You will have one less stitch than your starting chain.
- Example: If you chained 35, you will have 34 sc stitches.
- Chain 1 (ch 1) and turn your work. (The ch 1 does not count as a stitch).
- Row 2 and onwards (Repeating Rows):
- Sc in the first sc stitch and in each sc stitch across the row.
- Ch 1 and turn your work.
- Repeat Row 2 until your rectangle is your desired total height (when folded).
- Tip: If you want a bag that is 10 inches tall when finished, and you are folding it in half, you’ll need the rectangle to be about 20 inches long (plus a little extra for the base). Keep crocheting until your rectangle is about twice the desired height of your finished bag.
- Finishing the Rectangle:
- Once your rectangle is the desired size, do not cut the yarn yet.
- Folding and Seaming the Sides:
- Lay your rectangle flat. Fold it in half, bringing the two shorter ends together. This will form the base of your bag.
- Now, you will seam the sides together. You can use several methods:
- Slip Stitch Seam (Neat and Strong): Insert your hook through both loops of the corresponding stitch on the front and back layers of your folded work. Yarn over and pull through all loops on your hook. Continue slip stitching all the way up the side. Repeat for the other side.
- Single Crochet Seam (More Defined): Work single crochet stitches through both layers as described above. This creates a more textured seam.
- Whip Stitch with Yarn Needle: If you prefer, cut a long tail of yarn (about 2-3 times the length of the side seam). Thread your yarn needle and whip stitch the sides together. This method creates a flat, almost invisible seam.
- Once both sides are seamed, turn your bag right-side out.
Option B: Bottom-Up Construction (Slightly More Advanced but Nicer Base)
- Foundation Chain:
- Chain enough stitches for your desired bag width. Let’s say 30 stitches.
- Row 1 (Working around the chain to form the base):
- Sc in the 2nd ch from the hook and in each ch across until you reach the last chain.
- In the last chain, work 3 sc stitches. This will create the curve for the corner.
- Now, without turning, you will work down the other side of your foundation chain. Sc in each stitch along the bottom side of the chain, until you reach the last stitch (which was your first sc).
- In that last stitch, work 2 sc stitches.
- Sl st to the first sc to join the round. You should now have an oval base.
- Body of the Bag (Working in Continuous Rounds):
- Ch 1 (does not count as a stitch).
- Work 1 sc in each stitch around. Do not join with a sl st at the end of this round. Instead, continue working in a spiral.
- Use a stitch marker to mark the first stitch of each round so you know where your rounds begin and end.
- Continue working sc stitches in continuous rounds until your bag reaches your desired height. This creates a seamless bag body.
- Finishing the Body:
- Once your bag is the desired height, work a sl st into the next few stitches to even out the top edge.
- Cut your yarn, leaving a 6-inch tail, and pull it through the loop on your hook to fasten off.

Part 2: The Bag Straps (Make 2)
Method 1: Simple Chain and SC Strap
- Chain:
- Make a slip knot.
- Chain a long length for your strap. The length will depend on how you want to carry your bag (shoulder, cross-body, hand). A good starting point for a shoulder bag is 60-80 chains.
- Row 1:
- Sc in the 2nd chain from the hook and in each chain across.
- Ch 1 and turn.
- Row 2 (and onwards for thickness):
- Sc in each sc stitch across.
- Ch 1 and turn.
- Repeat Row 2 until your strap is your desired width (usually 2-4 rows for a simple strap).
- Finishing the Strap:
- When you’ve reached your desired width, cut your yarn, leaving a long tail (about 12 inches) for sewing.
- Fasten off.
- Make a second strap the exact same way.
Method 2: Half Double Crochet (HDC) Strap (Slightly Thicker)
- Chain:
- Chain 60-80 stitches.
- Row 1:
- Hdc in the 3rd chain from the hook and in each chain across. (The skipped 2 chains count as the first hdc).
- Ch 2 and turn.
- Row 2 (and onwards):
- Hdc in each hdc stitch across.
- Ch 2 and turn.
- Repeat Row 2 for 2-3 rows (or more for a wider strap).
- Finishing the Strap:
- Cut your yarn, leaving a long tail for sewing.
- Fasten off.
- Make a second strap.
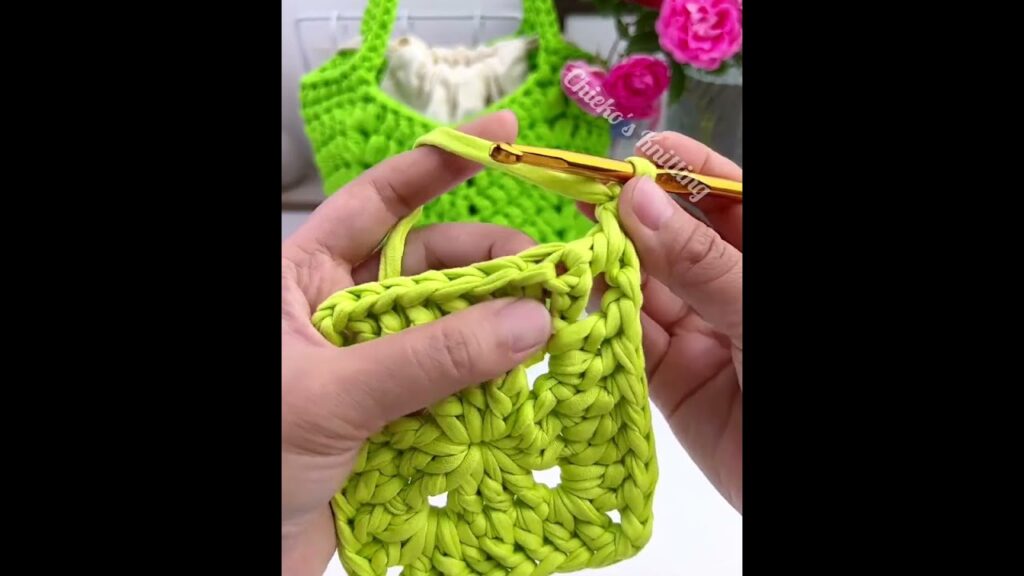
Part 3: Attaching the Straps
- Positioning:
- Lay your bag flat. Decide where you want your straps to be.
- Typically, straps are attached equidistant from the side seams.
- Measure in a few inches from each side seam and mark these spots with stitch markers or scrap yarn. You will have four marked spots on the top edge of your bag for each strap end.
- Sewing:
- Thread one of your long yarn tails from a strap onto your yarn needle.
- Align one end of the strap with one of your marked spots on the bag.
- Carefully sew the strap securely to the top edge of the bag. You can use a whip stitch, backstitch, or mattress stitch for a strong attachment. Go through the stitches of both the strap and the bag to ensure it’s firm.
- Repeat for all four strap ends. Make sure your straps are not twisted before sewing them down.

Part 4: Finishing Touches
- Weave in All Ends:
- Using your yarn needle, carefully weave in all remaining loose yarn tails. Go through several stitches in different directions to secure them and prevent unraveling.
- Embellishments (Optional):
- Add a crochet flower, a tassel, or a button closure for a personal touch.
- Consider lining your bag with fabric for extra durability and to prevent items from falling through stitches.
Tips for Success:
- Gauge is not critical: For a bag, exact gauge (stitches and rows per inch) isn’t as important as it is for garments. However, try to maintain consistent tension for an even fabric.
- Don’t pull too tight: Keep your stitches relaxed to avoid a stiff or warped bag.
- Practice makes perfect: If your first attempt isn’t perfect, that’s okay! Crochet is a skill that improves with practice.
- Watch video tutorials: While this is a written guide, seeing techniques in action can be incredibly helpful. Search for “single crochet tutorial,” “how to join crochet rounds,” or “how to attach crochet straps” on video platforms.
- Read your stitches: Learn to identify your stitches (the “V” shape of a single crochet, the top of a chain stitch). This will help you know where to insert your hook.
- Count your stitches: Especially in the beginning, counting your stitches at the end of each row or round will help you catch mistakes early.
This detailed guide should give you everything you need to create your own beautiful and simple crochet bag! Enjoy the process!
Watch video: