 by
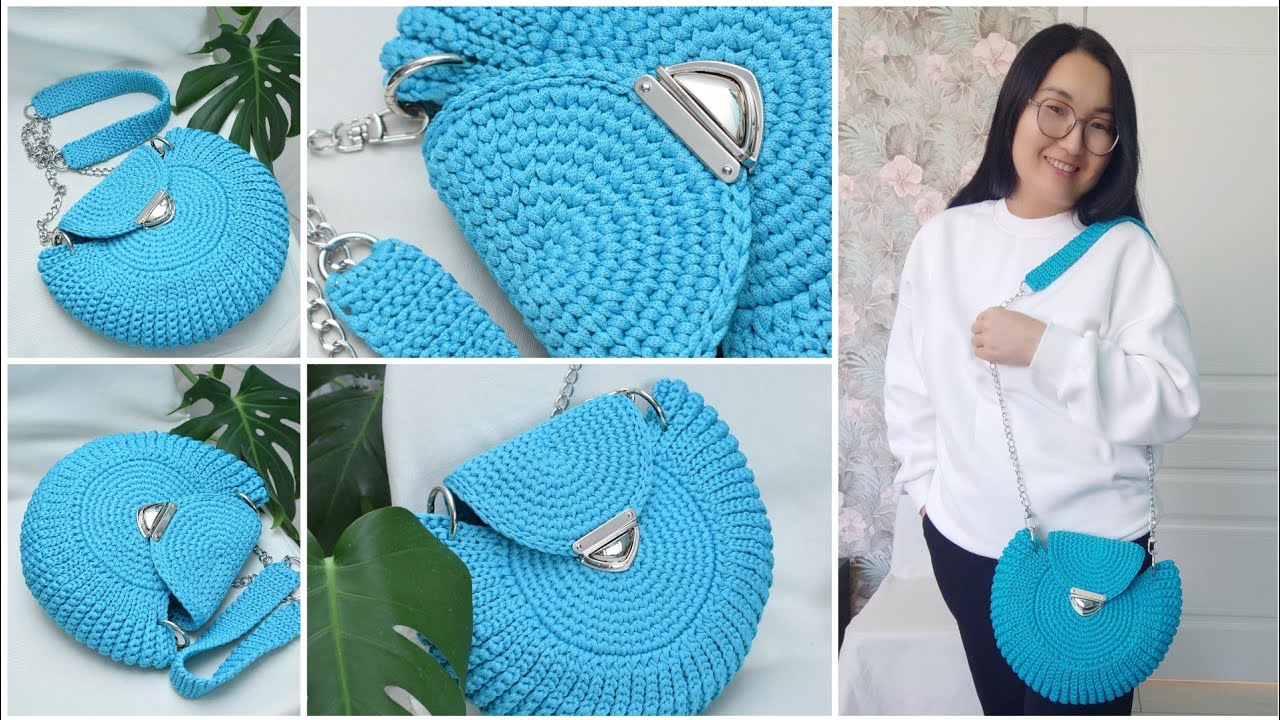
by Absolutely! Let’s dive into a detailed guide on making a crocheted shell handbag that holds its shape well, with emphasis on crocheting circles and ovals—essential skills for structured bags. I’ll break it down step by step with explanations and tips.
1. Choosing the Right Materials
To make a handbag that holds its shape, your choice of yarn and hook is crucial.
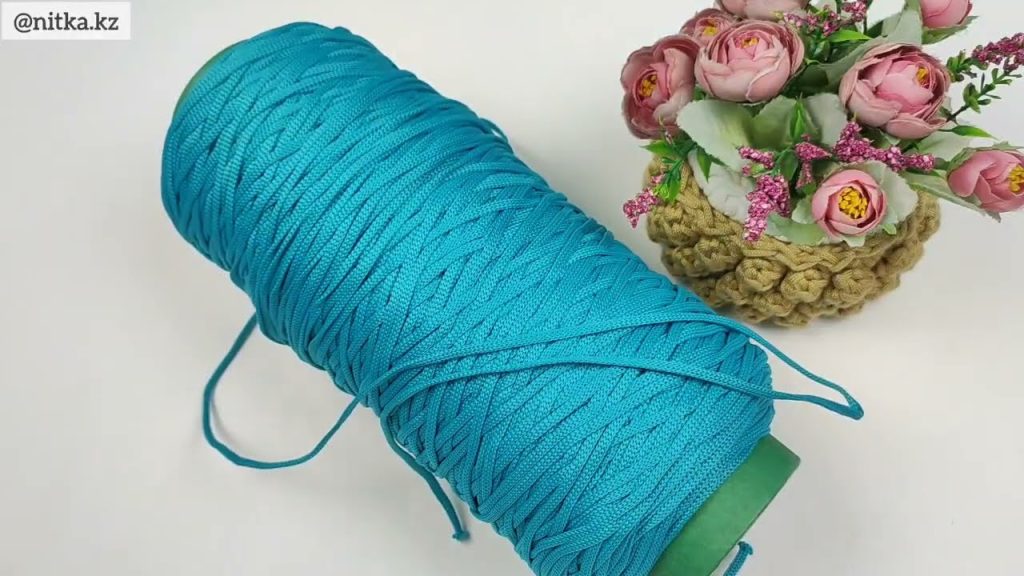
Yarn:
- Use sturdy yarns, such as cotton, cotton-blend, or acrylic. Avoid very soft, floppy yarns like lightweight wool or mohair.
- Size: Worsted weight (medium #4) is ideal for structured bags.
Hook:
- Use a hook slightly smaller than recommended for the yarn. This creates tighter stitches, which helps the bag maintain its shape.
Other materials:
- Lining fabric (optional but highly recommended for structure)
- Interfacing or felt for extra support
- Handles or straps (can be crocheted or bought pre-made)
2. Understanding the Shell Stitch
The shell stitch is a cluster of stitches (usually double crochet) worked in the same stitch or space to create a fan or shell shape.
Basic Shell Stitch:
- Example: 5 double crochets in one stitch.
- It creates a beautiful texture and is perfect for bags, giving a decorative look while remaining sturdy if stitches are tight.
Tips for structured shells:
- Keep stitches tight.
- Avoid long chains between shells unless you want a looser effect.
- Consider crocheting in the round for circles and ovals for the base.
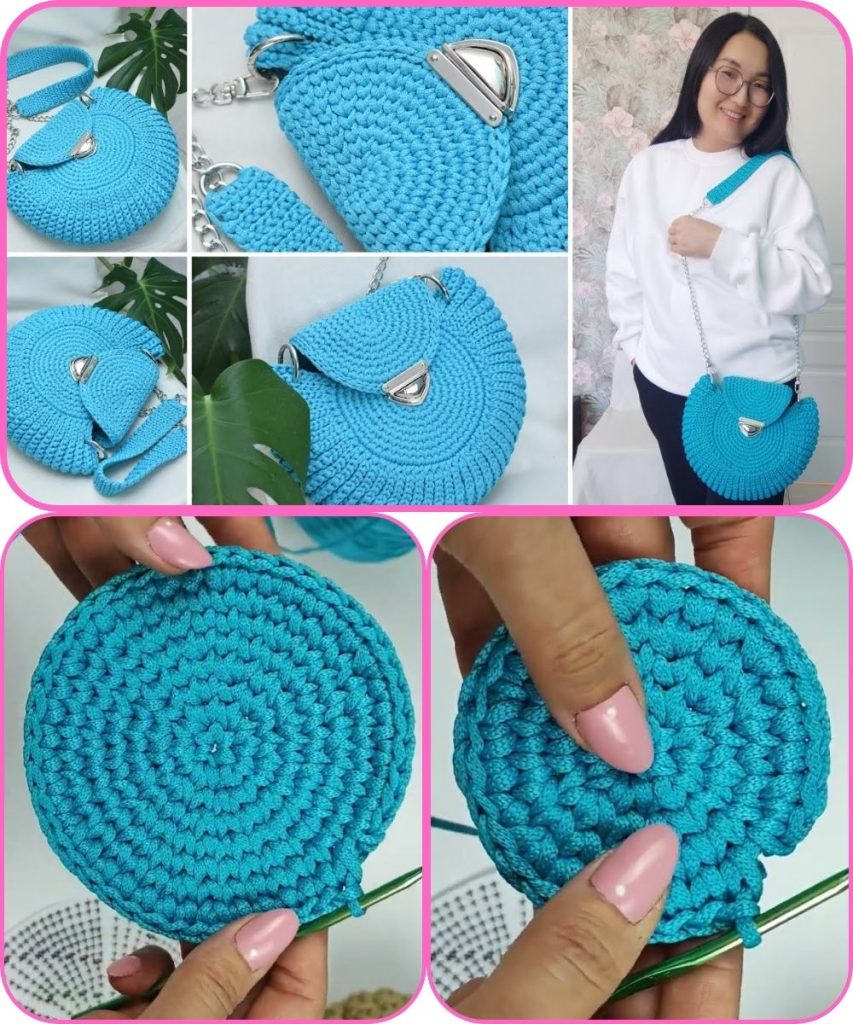
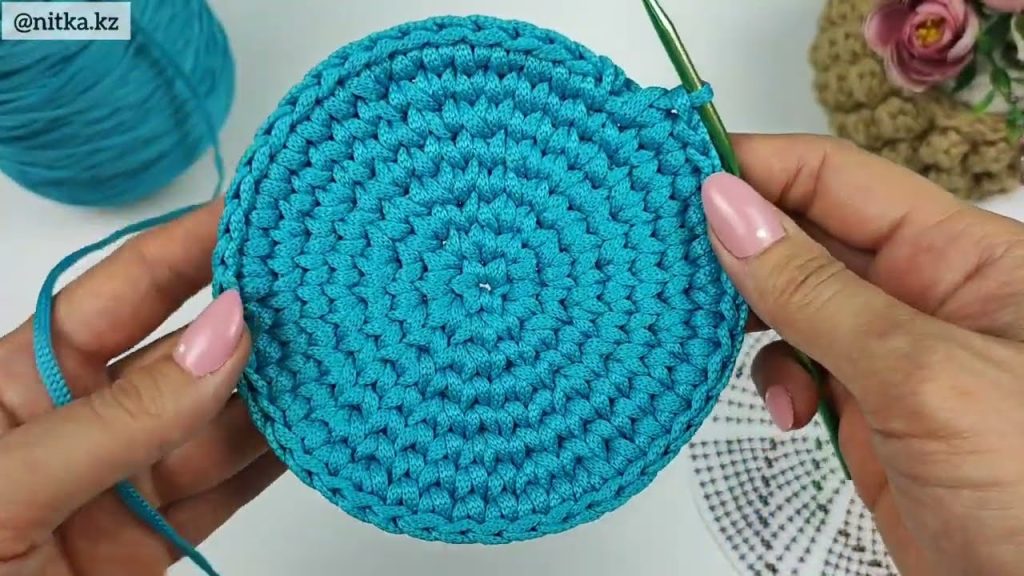
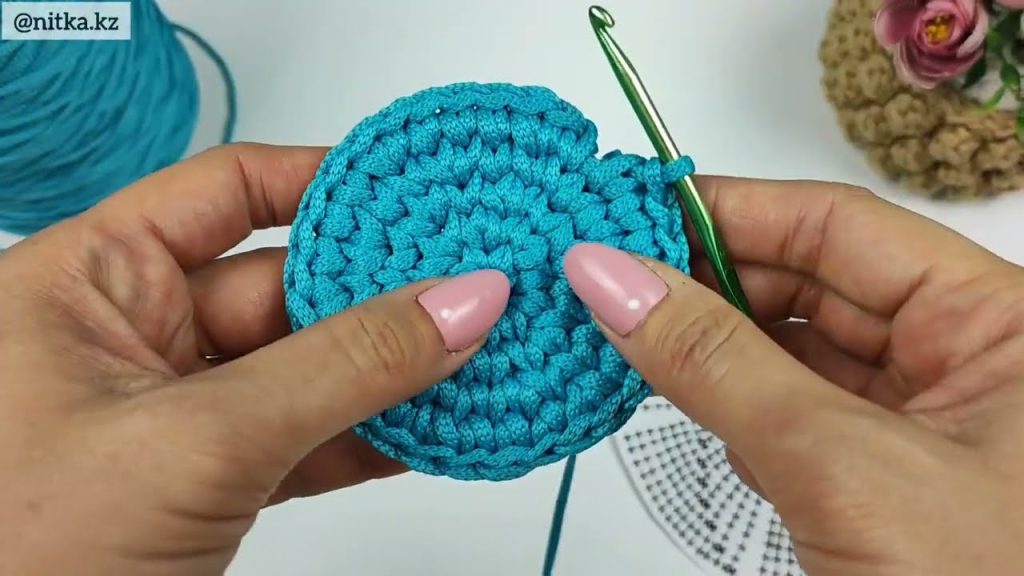
3. Crocheting Circles (for Round Bases)
A circular base is great for making a bag that holds its shape at the bottom.
Steps to Crochet a Circle:
- Magic Ring or chain 4 and slip stitch to form a ring.
- Round 1: Crochet 6 single crochets (SC) or double crochets (DC) into the ring.
- Round 2: Increase in every stitch (2 SC/DC in each stitch) → 12 stitches.
- Round 3: Increase every other stitch → 18 stitches.
- Round 4+: Continue increasing every round, spacing increases evenly to keep a flat circle.
- Formula: Stitches per round = previous round + number of increases needed
- Stop increasing once the circle reaches your desired base diameter.
Tip: Keep it flat by counting stitches carefully—uneven increases make the circle ripple.
4. Crocheting Ovals (for Oval Bases)
Oval bases give a more elegant, elongated shape.
Steps for Oval Base:
- Chain the length of the oval.
- Work single or double crochet stitches across the chain.
- At the ends, work multiple stitches in one chain to curve the corners.
- Example: 3 DC in the same stitch at the ends.
- Continue around the oval, joining rounds if desired.
Tip: Mark the ends of your oval base with stitch markers for consistency in each round.
5. Building the Bag Walls
After the base:
- Work in rounds without increasing, using shell stitches for decoration.
- Tighter stitches = stronger walls.
- Consider single crochet or half-double crochet for the first few rounds above the base for extra stability.
- Optional: Add a stiff lining inside the base and walls to keep the handbag upright.
6. Finishing Touches
- Handles: Crochet handles using sturdy stitches, or sew on pre-made handles.
- Lining: Sew a fabric lining for extra support and prevent stretching.
- Closure: Add a zipper, button, or magnetic clasp.
- Edging: Finish top edge with a row of single crochet for clean finish.
7. Tips for a Structured Handbag
- Tighter tension = more structure.
- Avoid overly soft yarns.
- Reinforce base with interfacing or a plastic canvas insert.
- If using shell stitch, consider alternating rows of single crochet and shells for sturdiness.
Summary
- Use sturdy yarn and tight stitches.
- Master circular and oval bases for a solid foundation.
- Build walls with shell stitch carefully.
- Add lining and reinforcement for a bag that keeps its shape.
Watch tutorial: