 by
by Absolutely! Let’s go step by step. I’ll break it down into materials, basic instructions, stitch pattern, and finishing tips—perfect for beginners.
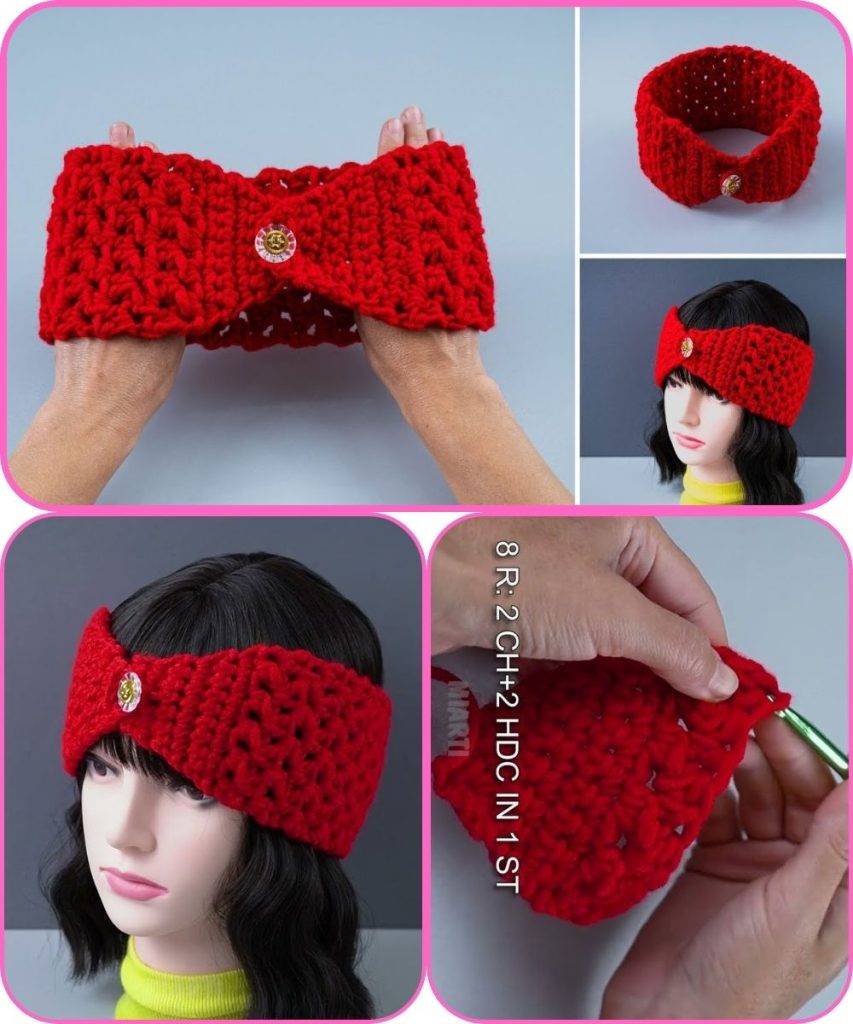
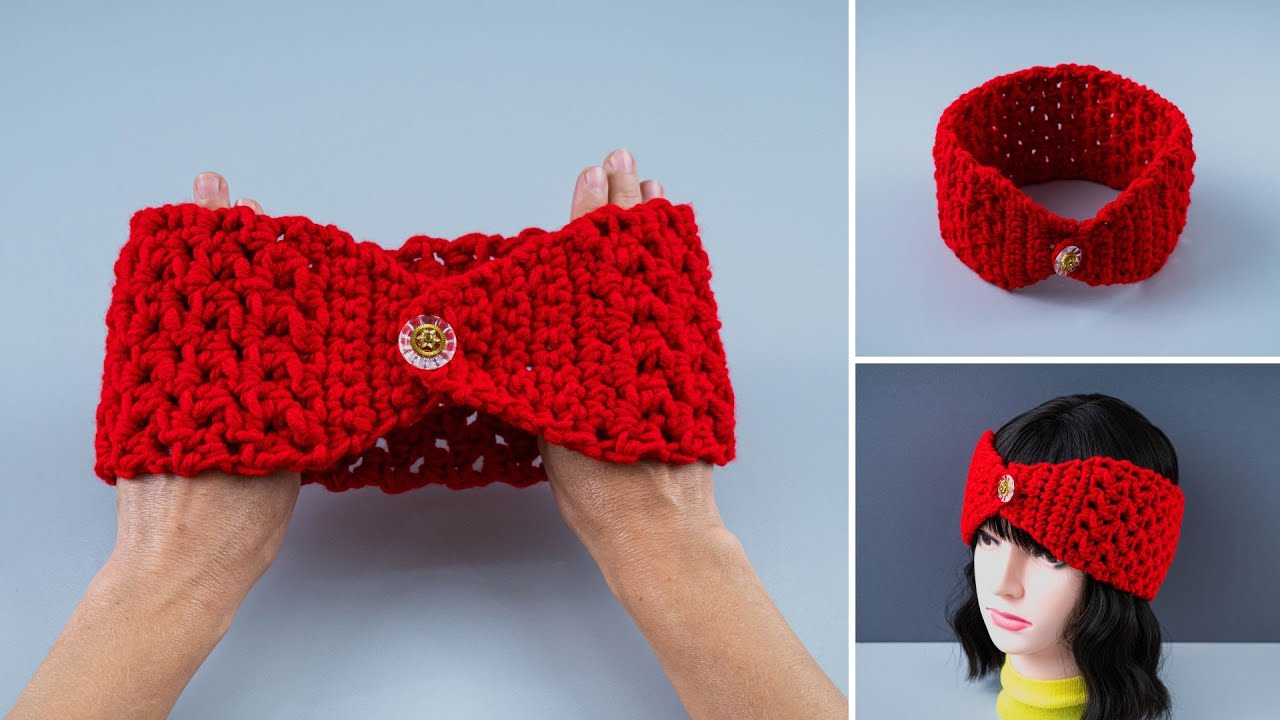
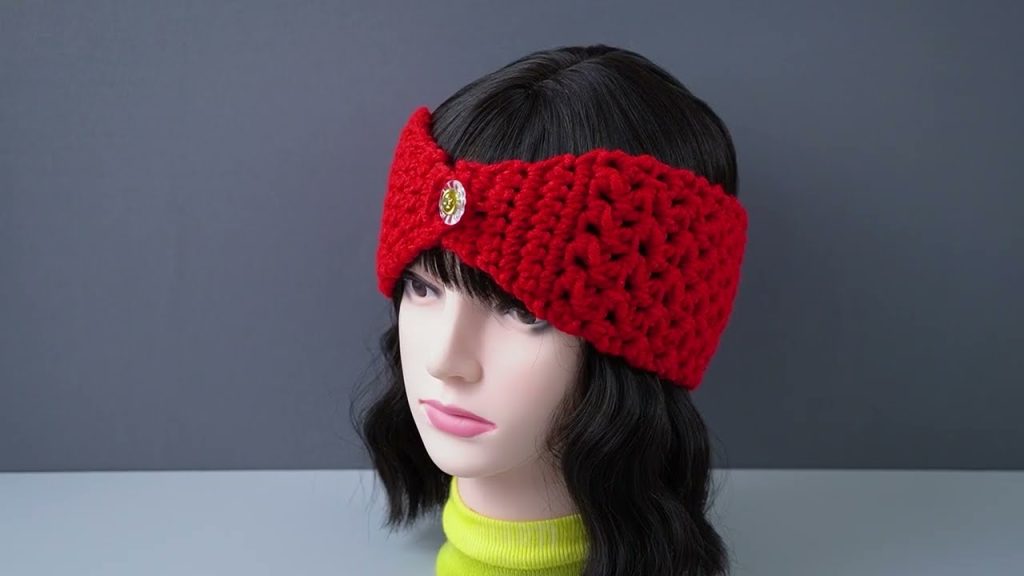
How to Make a Crochet Headband for Beginners
Materials Needed
- Yarn: Choose a medium weight (worsted) yarn. Soft acrylic or cotton works well for comfort.
- Crochet hook: Check your yarn label for recommended size, usually 5mm (H-8) is good for beginners.
- Scissors
- Yarn needle for weaving in ends.
- Measuring tape
Step 1: Measure Your Head
- Measure around your head where you want the headband to sit. Typical headbands are 18–22 inches in circumference.
- Decide how wide you want your headband. For beginners, 2–3 inches wide is easy.
Step 2: Choose a Simple Stitch Pattern
For beginners, a single crochet (SC) or half double crochet (HDC) stitch is ideal. Here’s a basic example:
Option 1: Single Crochet (SC) Headband
- Chain (CH): Make a chain slightly shorter than your head circumference (stretch slightly while measuring).
- Row 1: Insert hook in 2nd chain from hook, SC across. Turn.
- Row 2–until desired width: CH 1, SC across, turn.
- Repeat until the headband reaches your preferred width.
Option 2: Half Double Crochet (HDC) Headband
- Chain (CH): Same as above.
- Row 1: HDC in 3rd chain from hook, HDC across. Turn.
- Repeat until desired width.
Tip: HDC creates a slightly looser, stretchier fabric than SC, which is more comfortable for headbands.

Step 3: Shape and Join
- When your piece reaches your desired width, fold it to form a loop.
- Use a yarn needle and yarn to seam the ends together with a whip stitch or invisible stitch.
- Weave in any loose ends.
Step 4: Optional Decoration
- Add a bow, knot, or small flower for extra flair.
- You can also create a twist effect by giving the band a single twist before joining the ends.

Step 5: Finishing Touches
- Stretch gently to make sure it fits comfortably.
- Block your headband if using natural fibers to make it sit evenly.
Tips for Beginners
- Keep tension consistent—not too tight, not too loose.
- Count your stitches to ensure edges stay straight.
- Try using light-colored yarn; it’s easier to see your stitches.
- Experiment with different yarn textures for variety.
Watch tutorial: