 by
by Sure! Let’s go step-by-step through two simple methods to make a hat — one for crochet and one for knitting. Both are perfect for beginners, with clear instructions and basic materials.
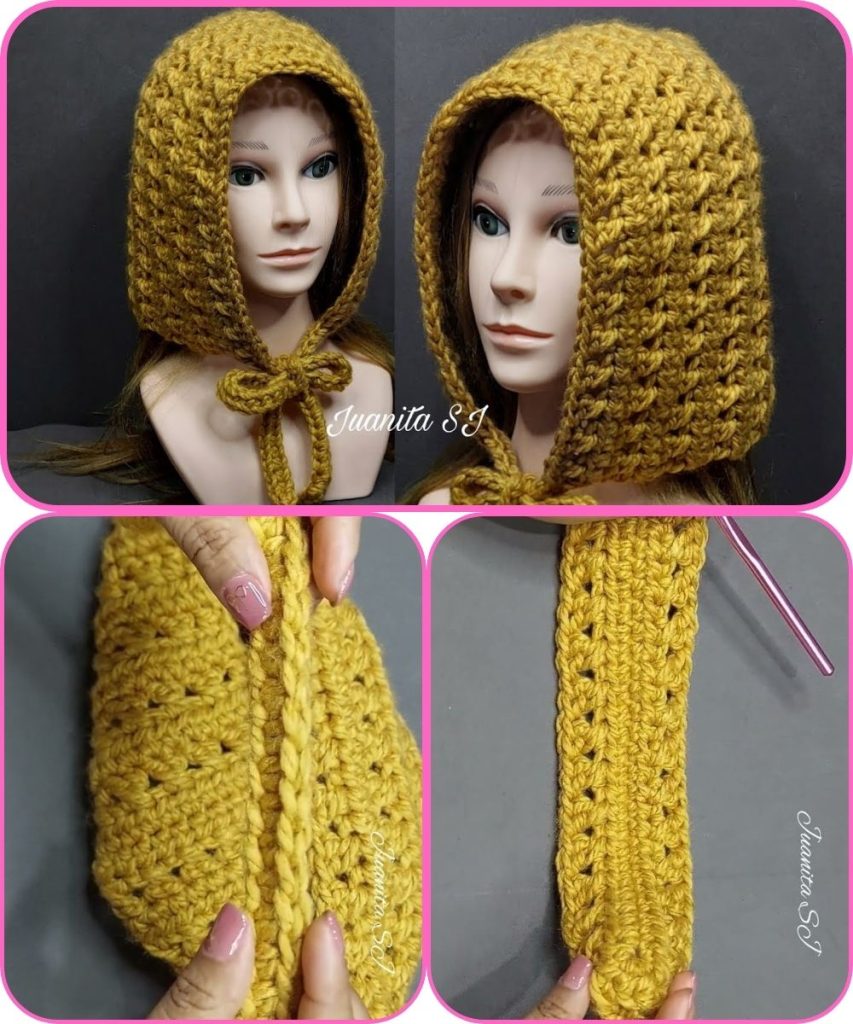
🧶 PART 1: How to Make a Very Easy Crochet Hat (Step by Step)
🌟 Materials Needed:
- Yarn: Medium weight (category 4) acrylic or wool yarn
- Hook: Size H/8 (5 mm) crochet hook
- Tapestry needle for weaving in ends
- Scissors
- Measuring tape
📏 Basic Sizing Guide:
| Size | Head Circumference | Hat Height |
|---|---|---|
| Baby | 14–16 in (35–40 cm) | 6 in (15 cm) |
| Child | 18–20 in (45–50 cm) | 7 in (18 cm) |
| Adult | 21–23 in (53–58 cm) | 8–9 in (20–23 cm) |
🪄 Step-by-Step Crochet Instructions:
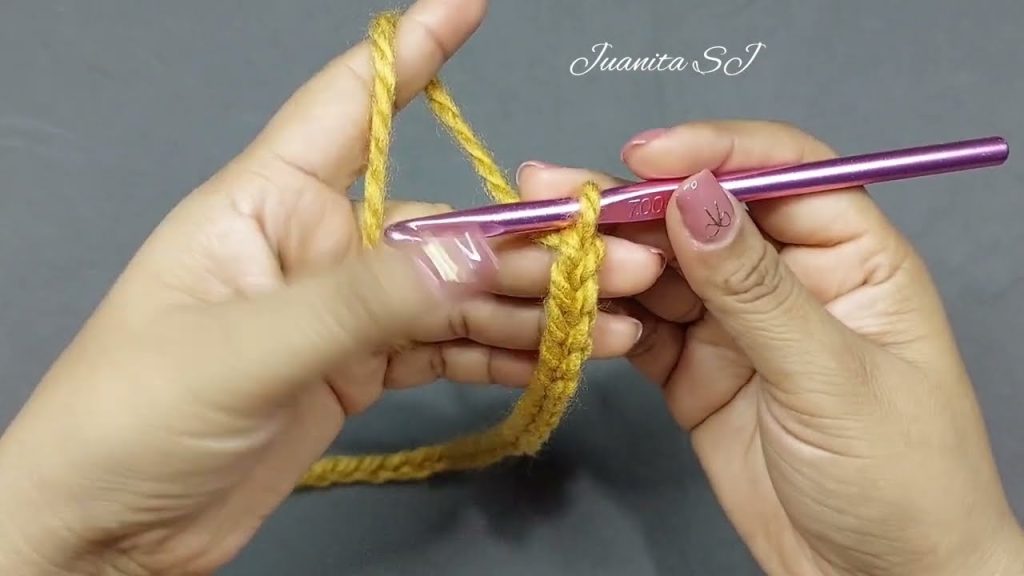
Step 1: Start with a Magic Ring
- Make a magic circle (or chain 4 and slip stitch to form a ring).
- Chain 2 (counts as first half double crochet).
Step 2: Crochet the Crown (Top of the Hat)
- Round 1: Make 9 half double crochets (HDC) into the ring. Join with slip stitch. (10 stitches total)
- Round 2: Chain 2, 2 HDC in each stitch around. Join. (20 stitches)
- Round 3: Chain 2, 1 HDC in next stitch, 2 HDC in next. Repeat around. Join. (30 stitches)
- Round 4: Chain 2, 2 HDC in one stitch, 1 HDC in next two stitches. Repeat. (40 stitches)
- Continue increasing evenly until the circle’s diameter is about:
- 6 in (15 cm) for adult
- 5 in (13 cm) for child
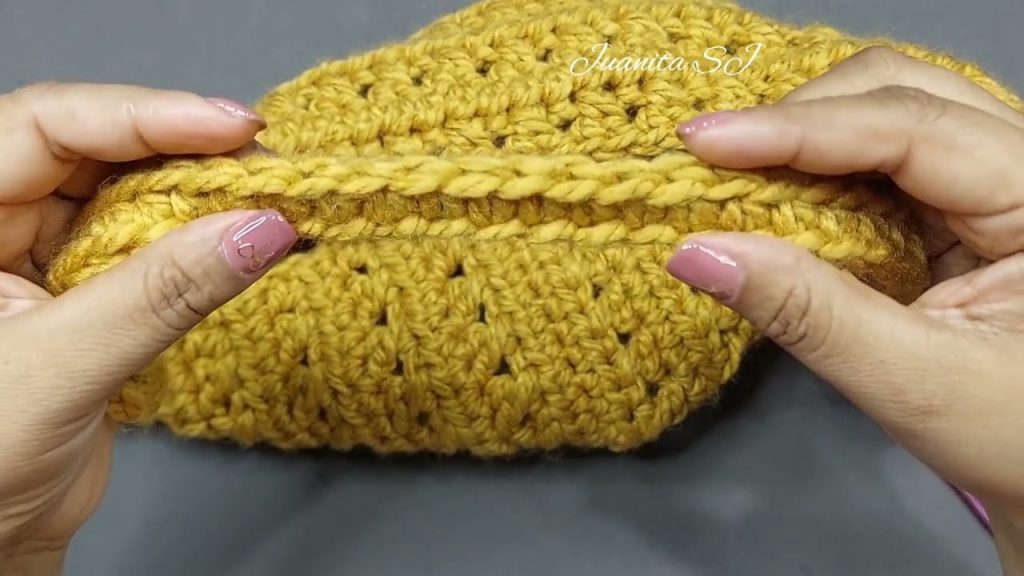
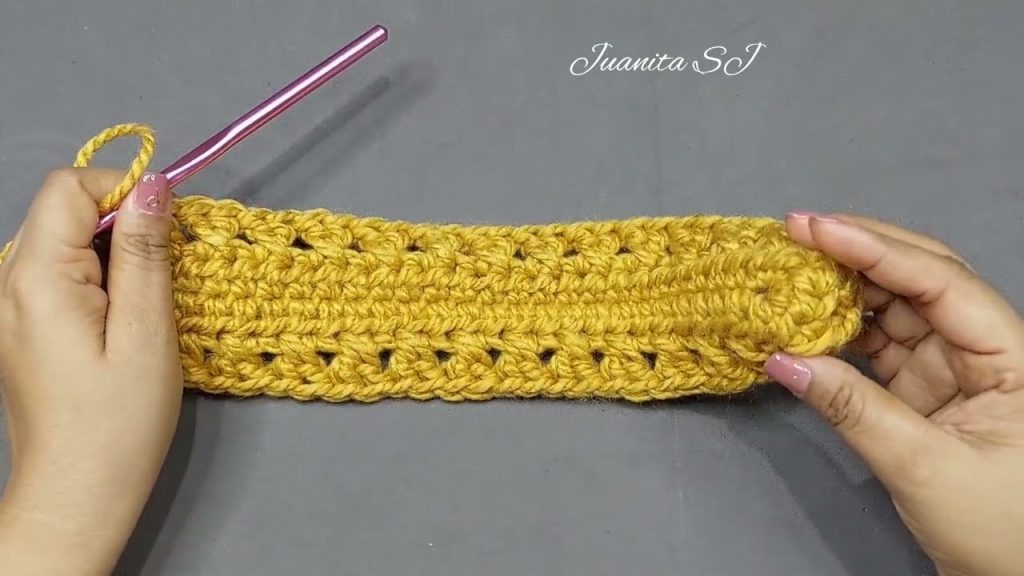
Step 3: Crochet the Sides (Body of the Hat)
- Once the crown is wide enough, stop increasing.
- Work 1 HDC in each stitch around for 6–8 more rounds (depending on desired height).
- Try the hat on occasionally to check the fit.
Step 4: Finishing Edge
- For a simple finish: Do one round of single crochet (SC) around the edge.
- For a ribbed look: Alternate front post HDC and back post HDC for 2–3 rounds.
Step 5: Weave in Ends
- Cut the yarn, leaving a few inches of tail.
- Use the tapestry needle to weave in all ends neatly.
✨ Optional: Add a pom-pom, decorative button, or faux fur topper.
🧵 PART 2: How to Knit a Hat (Step by Step)
🌟 Materials Needed:
- Yarn: Medium weight yarn (category 4)
- Knitting needles: US size 8 (5 mm) 16-inch circular needles or double-pointed needles
- Tapestry needle
- Scissors
- Stitch marker
🪡 Step-by-Step Knitting Instructions:
Step 1: Cast On
- Cast on 80 stitches for a standard adult size (adjust for head size).
- Place a stitch marker and join to work in the round (be careful not to twist stitches).
Step 2: Knit the Brim
- Ribbing: Knit 2, Purl 2 around (K2, P2) for 2–3 inches.
→ This makes a stretchy ribbed brim.
Step 3: Knit the Body
- Switch to plain stockinette stitch (knit every stitch) for about 5–6 inches more.
→ The hat should now be roughly 7–8 inches tall.
Step 4: Shape the Crown (Top of Hat)
Start decreasing:
- Round 1: Knit 8, K2tog (repeat around).
- Round 2: Knit all.
- Round 3: Knit 7, K2tog (repeat around).
- Continue decreasing by 1 less between K2togs each round (K6, K2tog; K5, K2tog…) until about 10–12 stitches remain.
Step 5: Finish the Top
- Cut the yarn, leaving a long tail.
- Thread the tail through the remaining stitches with a tapestry needle.
- Pull tight to close the top.
- Weave in all ends.
✨ Optional: Add a pom-pom or fold up the brim for a cuffed style.
🎁 Tips for Success:
- Use soft, washable yarn if making hats for babies or gifts.
- To adjust the size, measure your gauge: make a 4-inch test swatch before starting.
- Always try on the hat (or measure) before finishing to ensure the right fit.
Watch tutorial: