 by
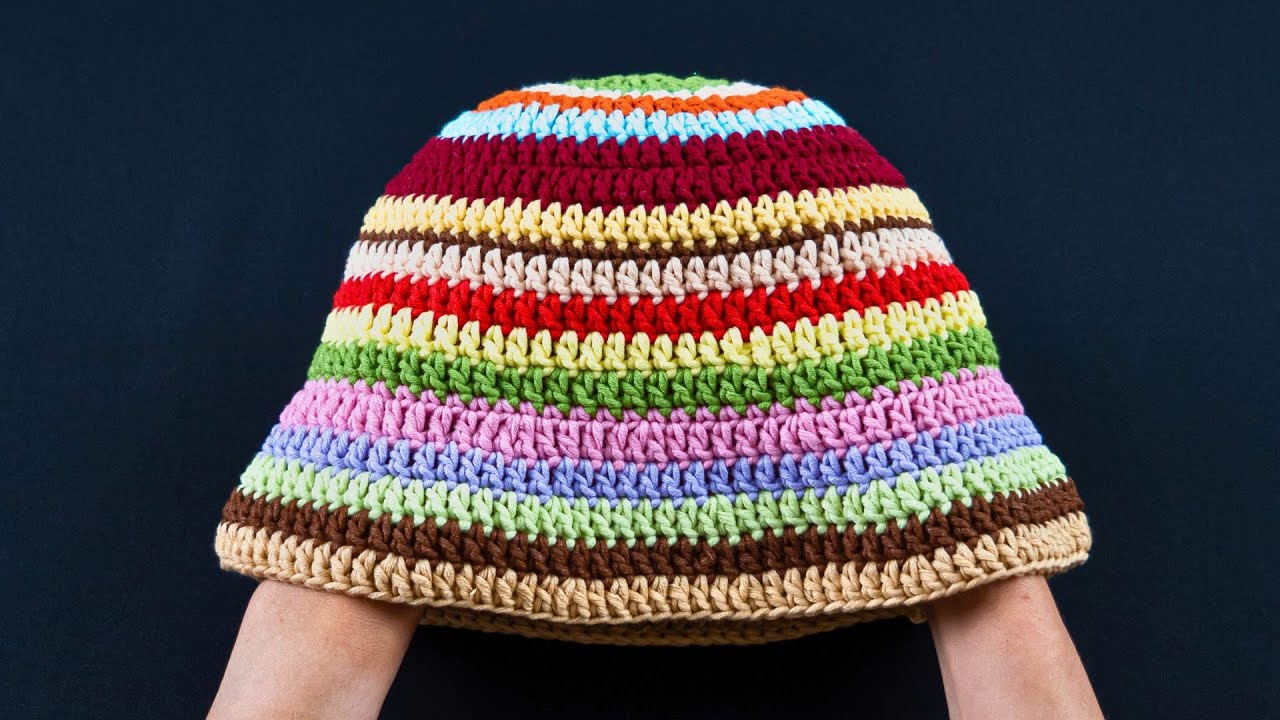
by Absolutely! I can guide you step by step on how to make an easy multicolor crochet bucket hat using scrap yarn. I’ll include a detailed approach, materials, and tips for beginners. This project is perfect for using leftover yarn and experimenting with colors.
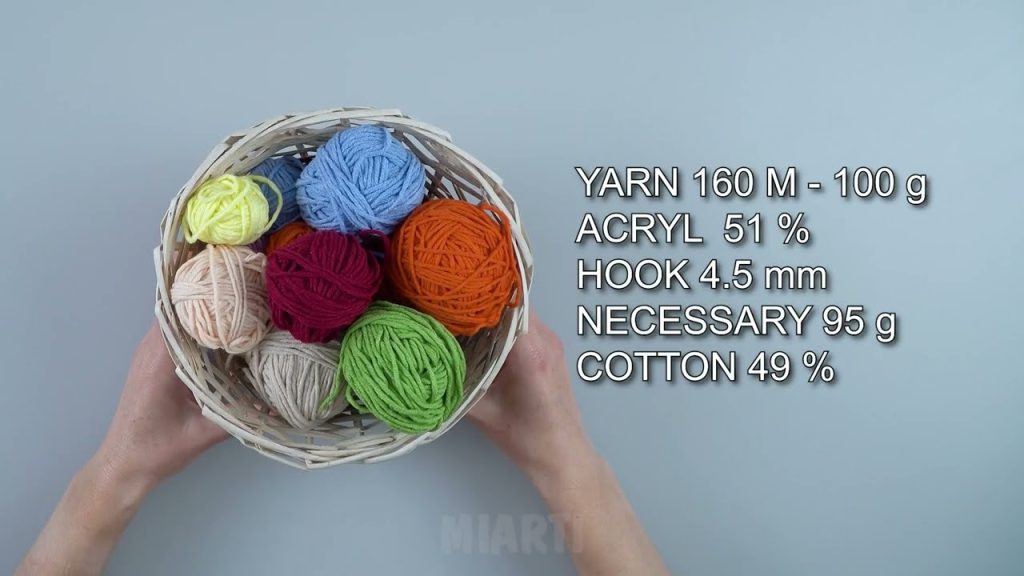
Materials Needed:
- Scrap yarn in multiple colors (any weight will work, but worsted weight is easiest for beginners)
- Crochet hook suitable for your yarn (usually H/5mm for worsted weight)
- Yarn needle for weaving in ends
- Scissors
- Stitch marker (optional, helpful for marking rounds)
Step 1: Make the Crown (Top of Hat)
The crown is the top circular part of the hat. You’ll start with a magic ring or chain method.
- Magic Ring: Wrap yarn around your fingers to make a loop, insert hook, yarn over, pull through, chain 1.
- Round 1: Crochet 6 single crochets (sc) or half double crochets (hdc) into the ring. Pull the ring tight.
- Round 2: Increase each stitch by 2 in each stitch around (12 stitches).
- Round 3: 1 stitch in first stitch, 2 in next stitch repeat around (18 stitches).
- Round 4: 1 stitch in first 2 stitches, 2 in next stitch repeat around (24 stitches).
Continue increasing like this, adding one more single crochet between increases each round, until your circle is the diameter you want for the top of the hat. Usually, for an adult size, the crown is about 7–8 inches across.
Step 2: Make the Sides of the Hat
Once the crown is big enough, stop increasing.
- Round 1: Crochet 1 stitch in each stitch around without increasing. This forms the sides.
- Round 2 and onward: Continue crocheting in the round, using single crochet or half double crochet.
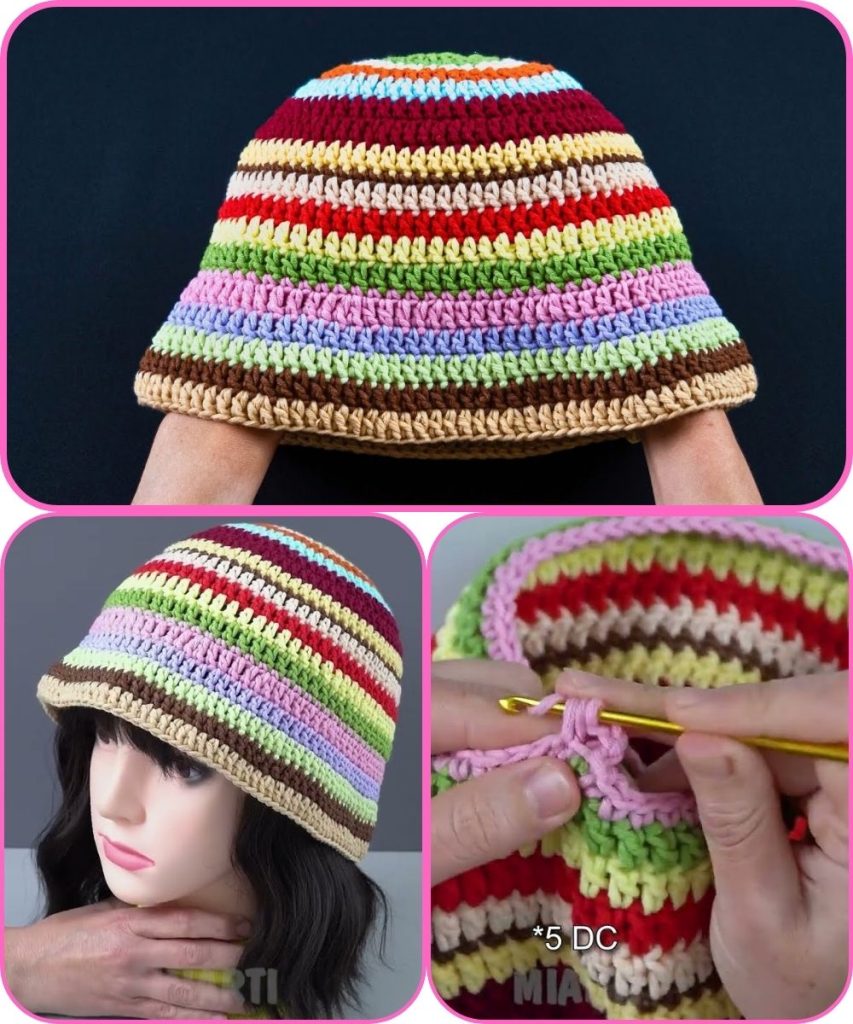
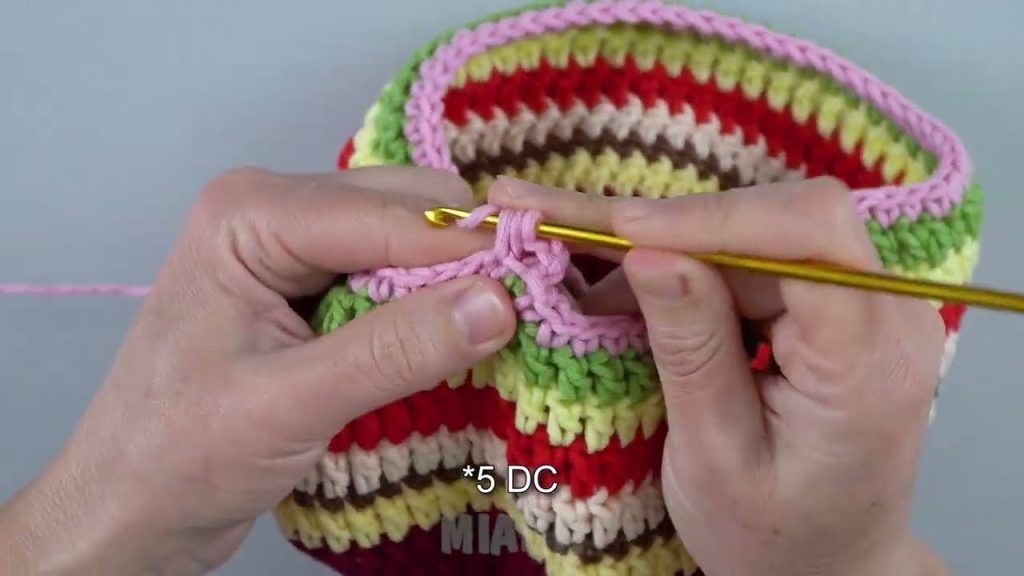
- Change colors whenever you want to use scrap yarn. Simply cut the old color, attach a new one, and continue. You can make stripes of varying widths for a fun multicolor effect.
Tip: Weave in the ends as you go to avoid a tangle later.
Step 3: Make the Brim
The brim flares out to give the bucket hat its shape.
- Round 1: Start increasing again for the brim. Example: 1 stitch in first 4 stitches, 2 in next stitch repeat around.
- Round 2: 1 stitch in first 5 stitches, 2 in next stitch repeat around.
- Continue until the brim reaches your desired width (usually 2–3 inches).
- Optionally, you can make the brim slightly floppy by alternating front post and back post stitches, or keep it stiff by working tighter stitches.
Step 4: Finishing Touches
- Weave in all yarn ends neatly using a yarn needle.
- Optional: Block your hat slightly to give it shape. Just dampen lightly and let it dry.
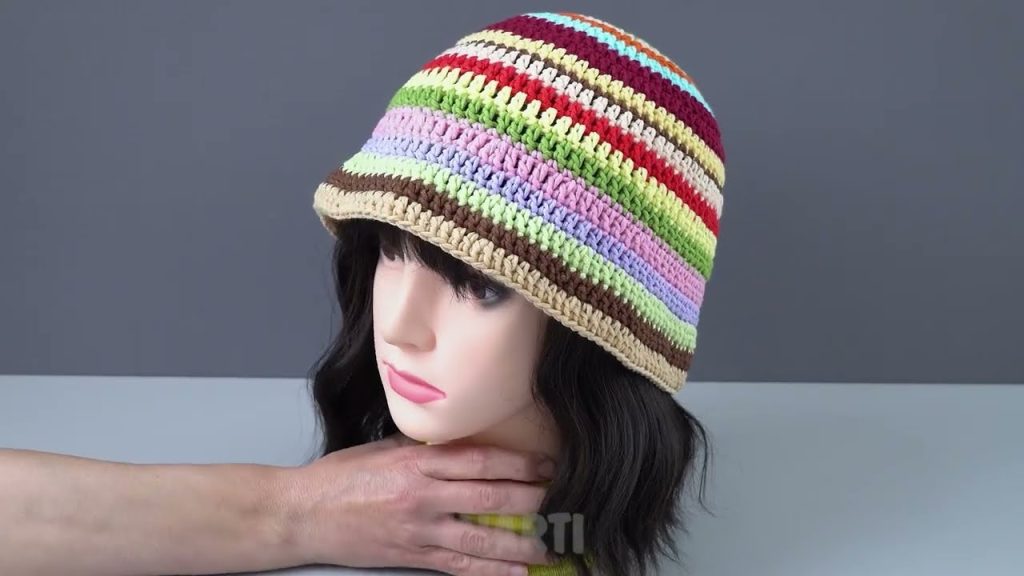
- Enjoy your colorful, eco-friendly bucket hat!
Tips for Using Scrap Yarn
- Mix textures for a fun effect (cotton with acrylic).
- Use contrasting colors for bold stripes, or complementary colors for a subtle look.
- Don’t worry if the stripes are uneven—it adds to the handmade charm!
If you want, I can also make a diagram and color pattern suggestion for a multicolor scrap yarn bucket hat, which makes it really easy to follow visually.
Watch tutorial: