 by
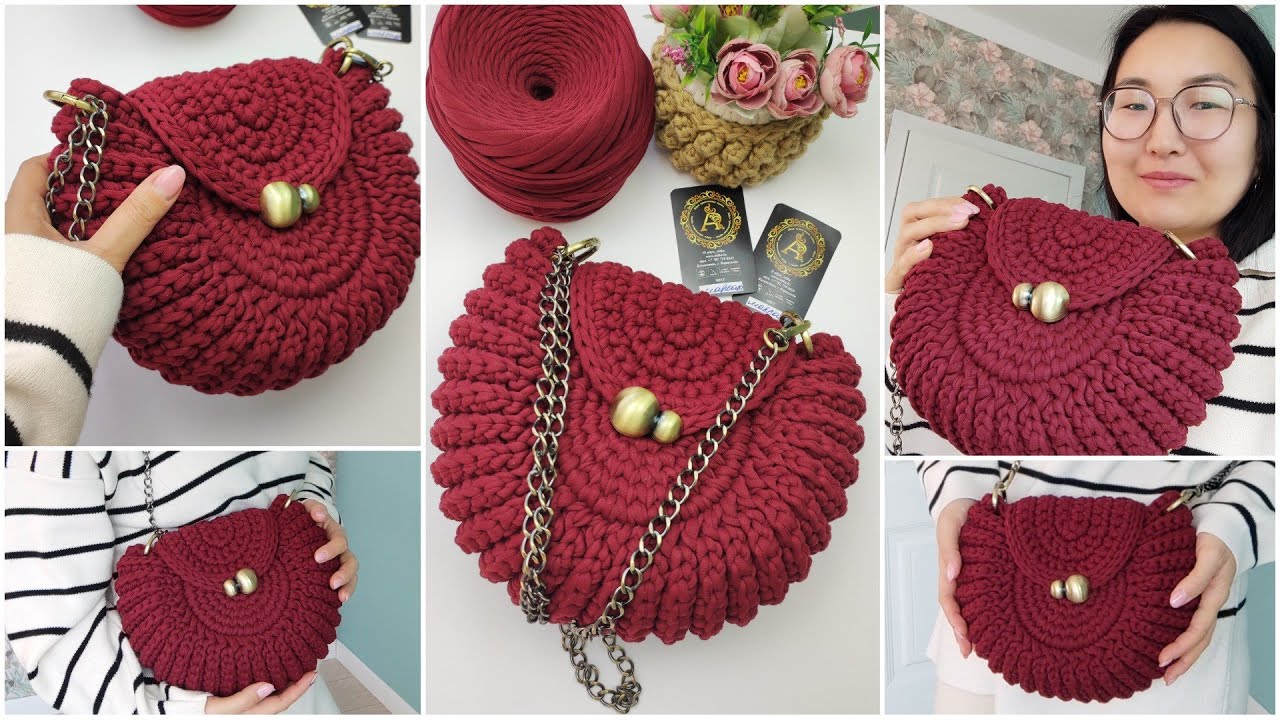
by Sure! Let’s go step by step on how to crochet a shell-pattern round gift bag with your own hands — perfect for gifting jewelry, small treats, or as a decorative accessory. I’ll give you both materials, stitch explanations, and a detailed pattern for beginners to intermediates.
🧶 Crochet Shell Round Gift Bag Tutorial
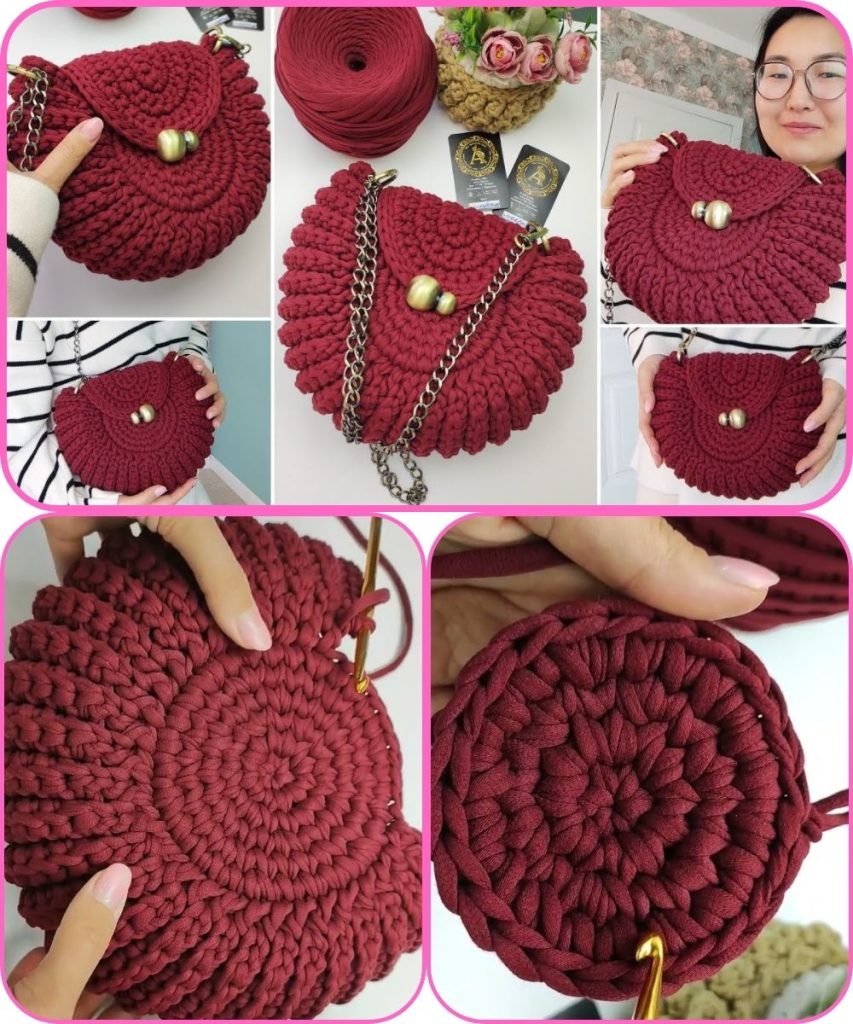
✨ Finished Look:
A small round drawstring bag featuring a shell stitch pattern, giving it a textured and elegant design. It can be made in one color or several for a gradient effect.
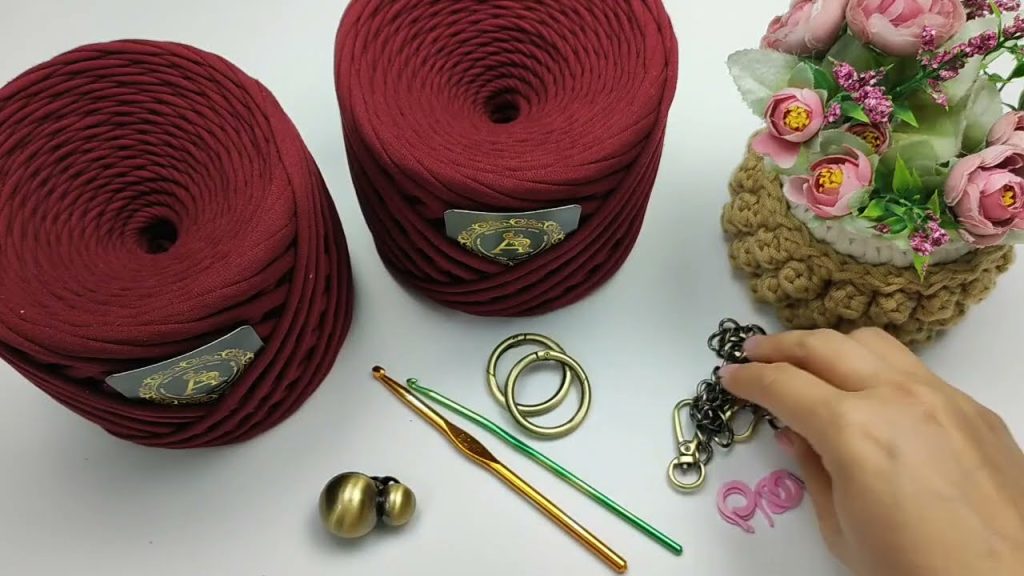
🪡 Materials Needed
| Item | Description |
|---|---|
| Yarn | Cotton or acrylic yarn (light/medium weight – category 3 or 4) |
| Hook | Crochet hook size 3.0 mm – 4.0 mm (match to yarn weight) |
| Yarn needle | For weaving in ends |
| Scissors | For cutting yarn |
| Ribbon or cord | For drawstring closure (optional: crochet your own cord) |
| Stitch marker | To mark the start of each round (useful if working in continuous rounds) |
🧵 Stitches & Abbreviations
| Abbreviation | Stitch Name | Description |
|---|---|---|
| ch | chain | Make a chain stitch |
| sl st | slip stitch | Join or move across stitches |
| sc | single crochet | Basic tight stitch |
| dc | double crochet | Taller stitch |
| sk | skip | Skip a stitch |
| sp | space | Space between stitches |
| st | stitch | One stitch in the pattern |
| shell | shell stitch | 5 dc into the same stitch or space |
🌸 Step-by-Step Instructions
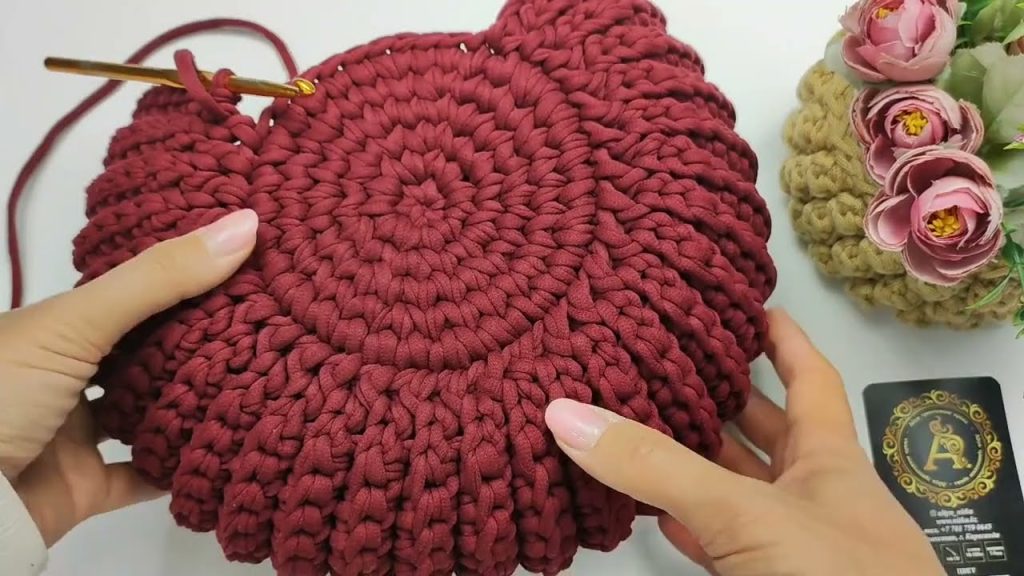
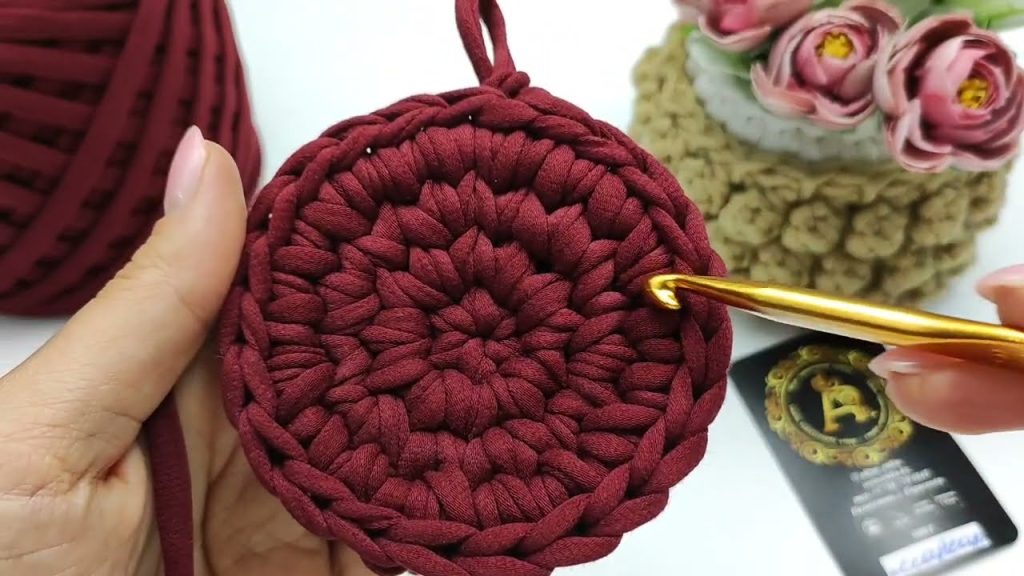
1. Base (Round Bottom)
We’ll start with a flat round base.
- Magic ring, ch 3 (counts as first dc).
- Work 11 dc into ring, join with sl st to top of ch 3. (12 dc total)
- Round 2: ch 3, 1 dc in same st, 2 dc in each st around. Join. (24 dc)
- Round 3: ch 3, 1 dc in next st, 2 dc in next st, repeat around. Join. (36 dc)
- Round 4: ch 3, 1 dc in next 2 sts, 2 dc in next st, repeat. Join. (48 dc)
Keep increasing evenly until the circle reaches about 10–15 cm (4–6 in) in diameter — depending on how big you want your bag.
2. Forming the Body with Shell Stitch
Now we’ll stop increasing and start building up the sides.
- Round 1: ch 1, sc in same st, skip 2 sts, 5 dc in next st (shell made), skip 2 sts, repeat from * to * around. Join with sl st to first sc.
- Round 2: sl st into the 3rd dc of the first shell, ch 1, sc in center dc of shell, shell (5 dc) in next sc, repeat around. Join.
- Repeat Round 2 until the bag is the desired height — typically 10–15 cm tall.
Tip: You can alternate yarn colors every 2–3 rounds for a beautiful layered shell effect.
3. Drawstring Round
After the last shell round:
- ch 3 (counts as dc), ch 1, skip 1 st, dc in next st, repeat around.
- Join with sl st to top of ch 3.
- This creates holes to weave in your drawstring or ribbon.
4. Finishing Edge
To neaten the top:
- Work 1 round of single crochet all around the top edge.
- Fasten off, weave in ends with yarn needle.
5. Drawstring or Ribbon
You have two options:
Option A – Use a Ribbon:
Simply thread a ribbon through the ch-1 spaces made in the drawstring round.
Option B – Crochet a Cord:
Make a long chain (70–90 ch), then sc in 2nd ch from hook and across. Thread it through the holes.
Add beads, tassels, or small crocheted flowers to the cord ends for decoration.
🩵 Optional Embellishments
- Lining (optional): Sew in a small fabric circle and tube for extra structure.
- Decor: Add a crochet flower or button in the center.
- Color change: Alternate yarn colors each round for a gradient “shell” effect.
💡 Tips
- Keep your tension even to maintain the round shape.
- If the base curls up → too tight → go up one hook size.
- If it waves → too loose → go down one hook size.
🌺 Example Color Ideas
- Ocean theme: Shades of turquoise, sea green, white.
- Romantic: Pink, cream, rose.
- Rustic: Beige, brown, olive.
- Festive: Red and gold with metallic thread.
Would you like me to include a visual pattern chart (diagram) or photo tutorial steps (like base, shell section, and top)? I can generate those for you too.
Watch tutorial: