 by
by Sure! Here’s a detailed, step-by-step tutorial on How to Make an Arrow Crochet Headband, perfect for beginners or intermediate crocheters who want a stylish and cozy accessory.
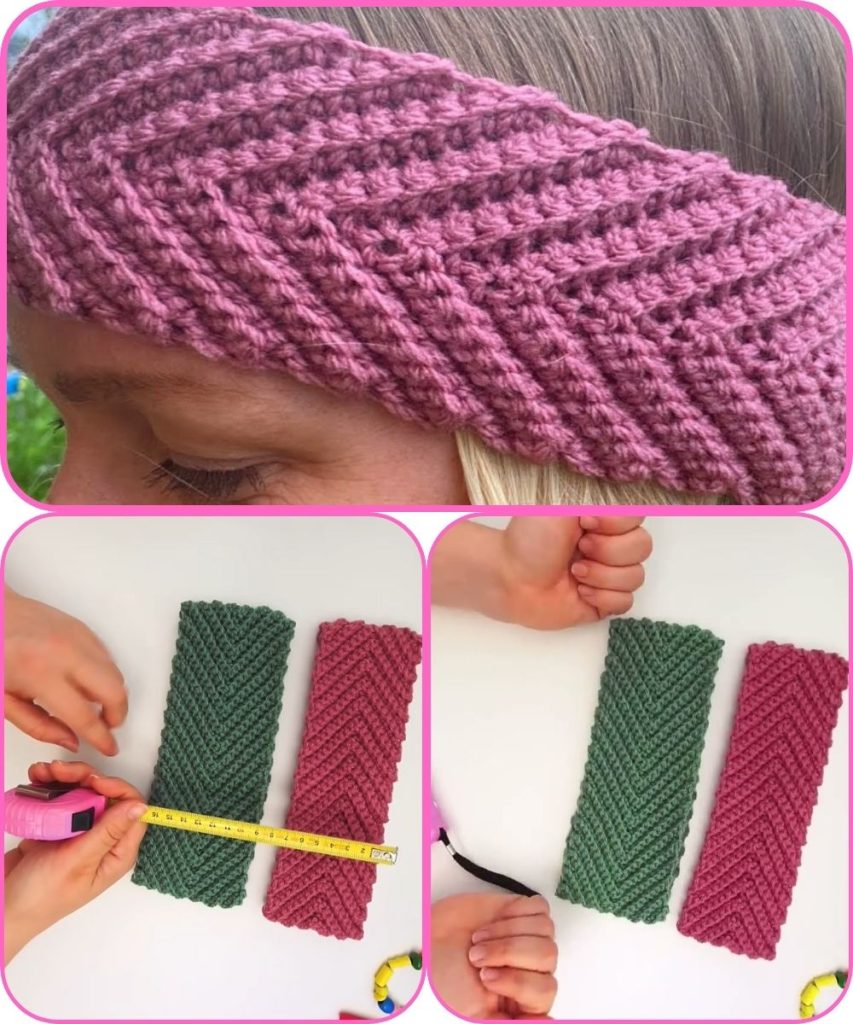
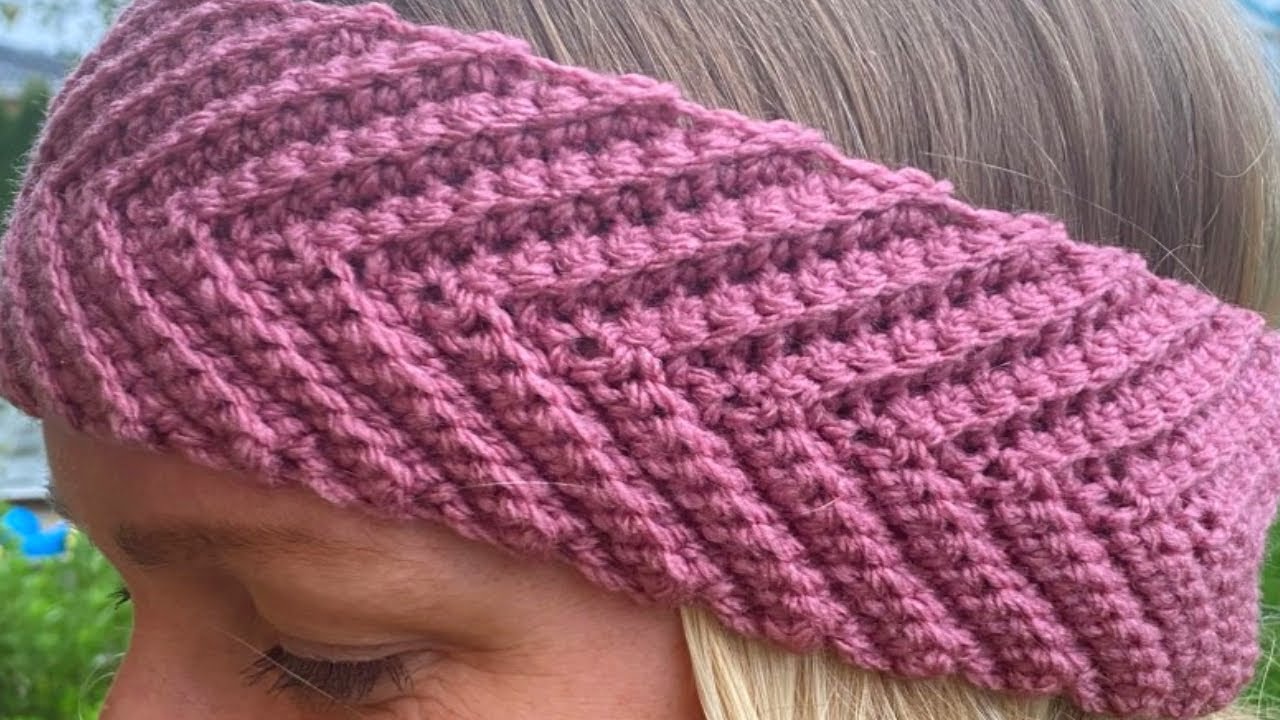
🧶 How to Make an ARROW Headband | Easy Crochet Headband Tutorial
✨ Overview
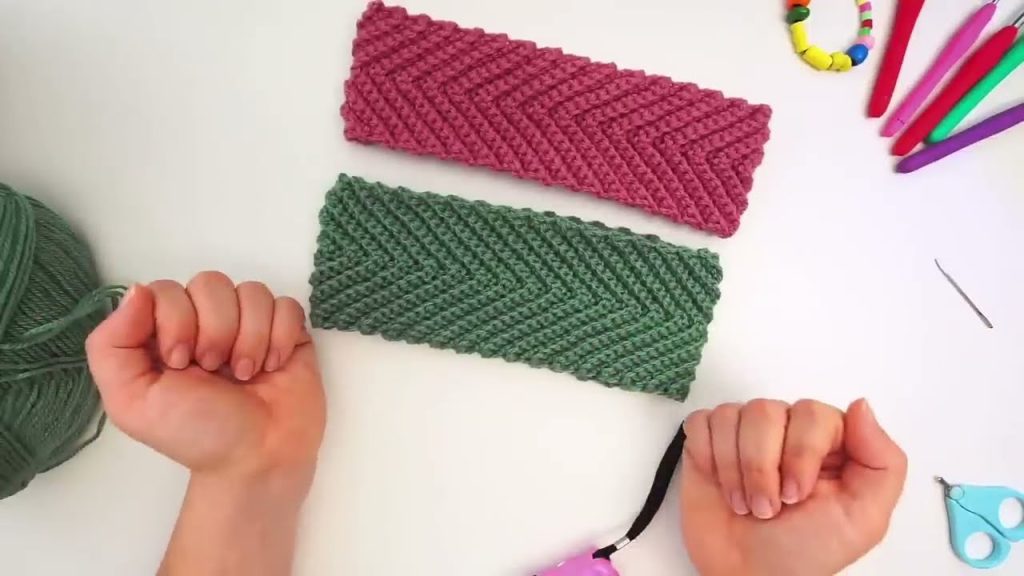
This Arrow Headband features a textured “arrow-like” stitch pattern that gives a modern and eye-catching look. It’s worked flat, then seamed together, making it beginner-friendly and customizable in size.
🧰 Materials Needed
- Yarn: Worsted weight (#4) yarn
(Cotton or acrylic blends work great) - Hook: 5 mm (H/8) crochet hook
- Tapestry needle (for weaving in ends)
- Scissors
- Measuring tape
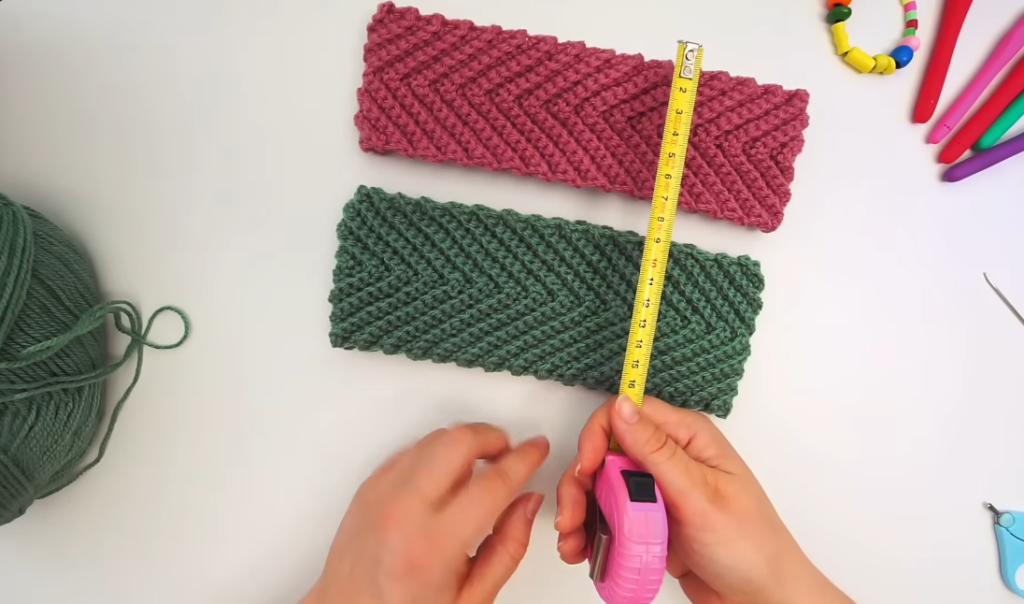
📏 Sizing Guide
You can easily adjust this headband to fit any head size.
| Size | Head Circumference | Finished Width | Suggested Chain |
|---|---|---|---|
| Child | 18–19″ (46–48 cm) | 3″ (7.5 cm) | ~58 chains |
| Teen/Adult Small | 20–21″ (51–53 cm) | 3–3.5″ (8–9 cm) | ~62 chains |
| Adult Medium/Large | 22–23″ (56–58 cm) | 3.5–4″ (9–10 cm) | ~66 chains |
Adjust your foundation chain to match your head circumference minus 1–2 inches (it will stretch).
🪡 Stitches & Abbreviations
- CH – Chain
- SC – Single Crochet
- DC – Double Crochet
- FPDC – Front Post Double Crochet
- BPDC – Back Post Double Crochet
- ST – Stitch
- REP – Repeat
- SL ST – Slip Stitch
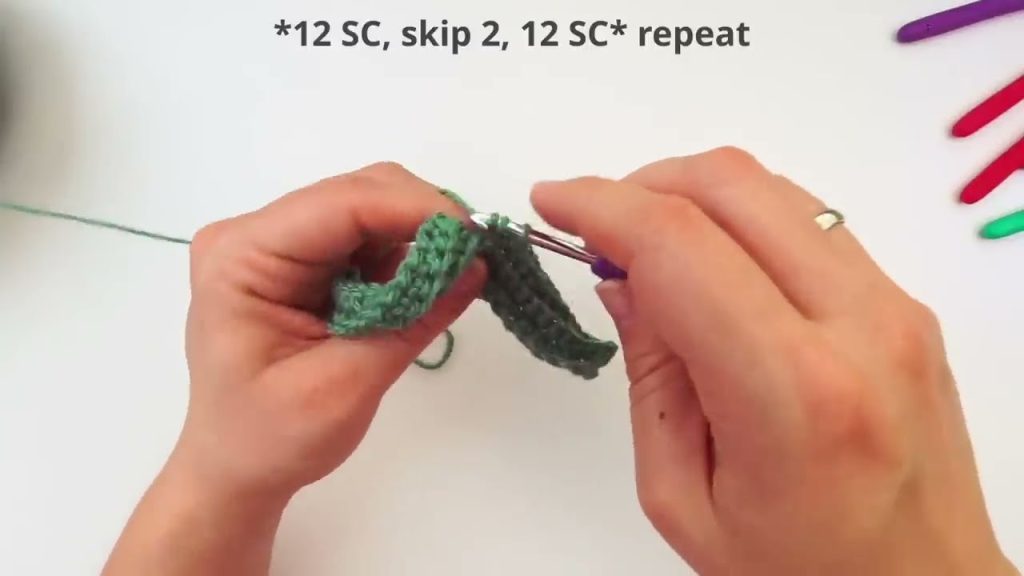
🧵 Pattern Instructions
Step 1: Foundation
- CH a multiple of 2 + 1 (for turning).
Example: CH 61 for adult size. - Row 1: In the 2nd CH from hook, SC across.
CH 2, turn.
Step 2: Begin the Arrow Texture
- Row 2:
DC in 1st ST,
(FPDC around next DC from previous row, DC in next ST) — REP across.
CH 2, turn. - Row 3:
DC in 1st ST,
(BPDC around next FPDC, DC in next ST) — REP across.
CH 2, turn. - Rows 4–10 (or desired width):
Alternate Row 2 and Row 3 to continue the arrow texture pattern.
✨ Tip: The alternating FPDC and BPDC rows create that “arrow” ridged texture!
Step 3: Finishing
- When your headband reaches the desired width (typically 3–4″), fasten off and leave a long tail for sewing.
- Seam the ends together:
Fold your headband in half (short ends together) and use your tapestry needle to whip stitch or mattress stitch the seam. - Weave in all loose ends neatly with your tapestry needle.
🎀 Optional Twist (Turban Style)
For a trendy twisted front, lay your band flat, fold each end in half lengthwise, and interlock the folds before sewing them together. This creates a front knot/twist effect.
🧼 Blocking & Care
- Gently steam or block your headband if needed to shape it.
- Wash gently in cold water; lay flat to dry.
🌸 Customization Ideas
- Use variegated yarn for a colorful pattern.
- Add a faux leather tag for a professional touch.
- Make a matching set with an arrow-textured scarf or wrist warmers.
🕒 Estimated Time
- Beginner crocheters: 2–3 hours
- Intermediate crocheters: ~1.5 hours
🎥 If You’re Making a Video Tutorial
Include:
- A clear intro showing the finished headband.
- Close-up shots of arrow stitches (FPDC/BPDC).
- A slow demonstration of joining the ends.
- A size & yarn guide overlay for viewers.
Would you like me to format this tutorial as a YouTube video script or a blog post version (with headings, SEO keywords, and photo placement tips)?
Watch tutorial: