 by
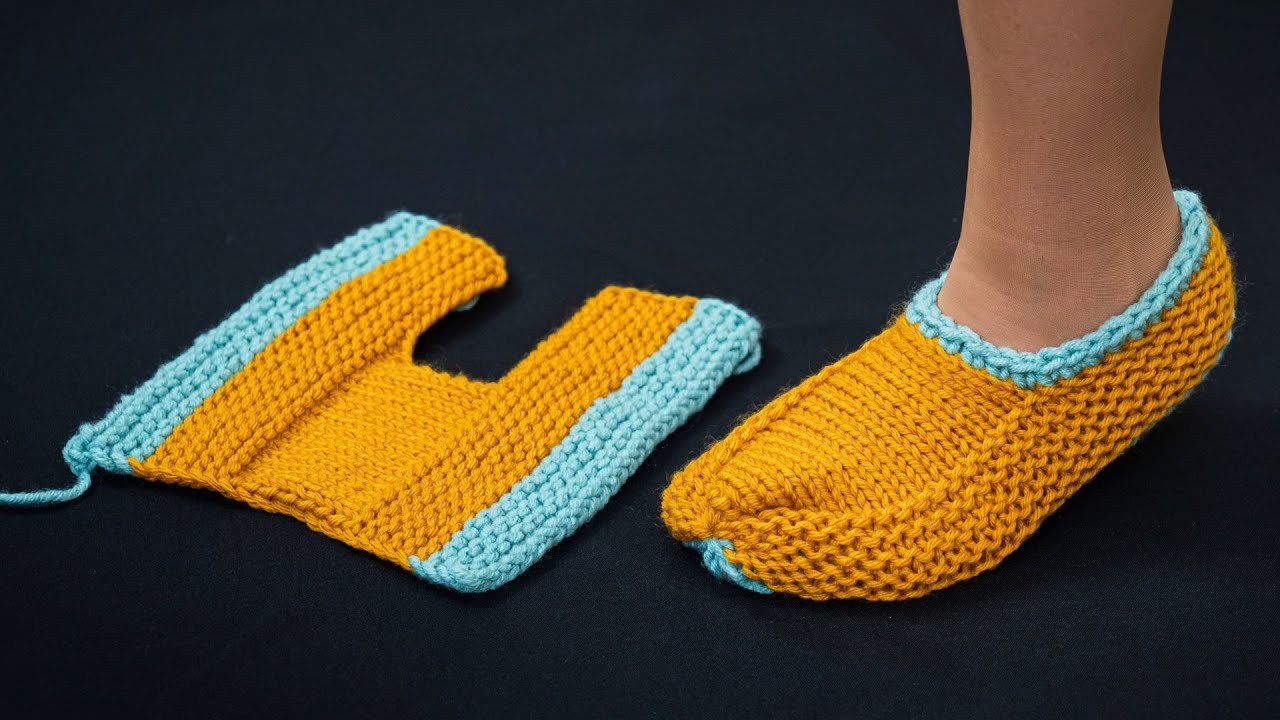
by Absolutely! Let’s go through how to make simple knitted slippers from one square (swatch) — a classic beginner-friendly project that only requires basic knitting skills, one square of knitting, and a bit of clever folding and sewing.
🧶 Project: Simple Knitted Slippers from One Square
Skill Level:
Beginner
Time Required:
1–2 hours per slipper (depending on your knitting speed)
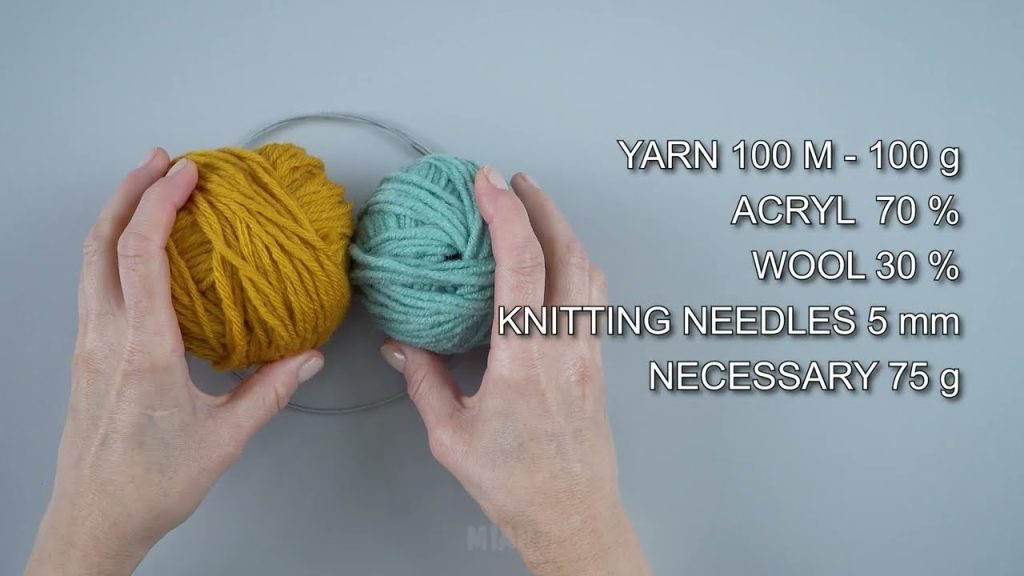
🪡 What You’ll Need:
| Item | Details |
|---|---|
| Yarn | Medium-weight (Category 4) yarn — about 100 g for one pair. Acrylic or wool blends work great. |
| Knitting needles | Size 4.5 mm–5.5 mm (US 7–9), depending on your yarn |
| Tapestry needle | For sewing seams |
| Scissors | For trimming ends |
| Measuring tape | To measure your square |
| Optional: | Stitch markers, decorative buttons, or pom-poms |
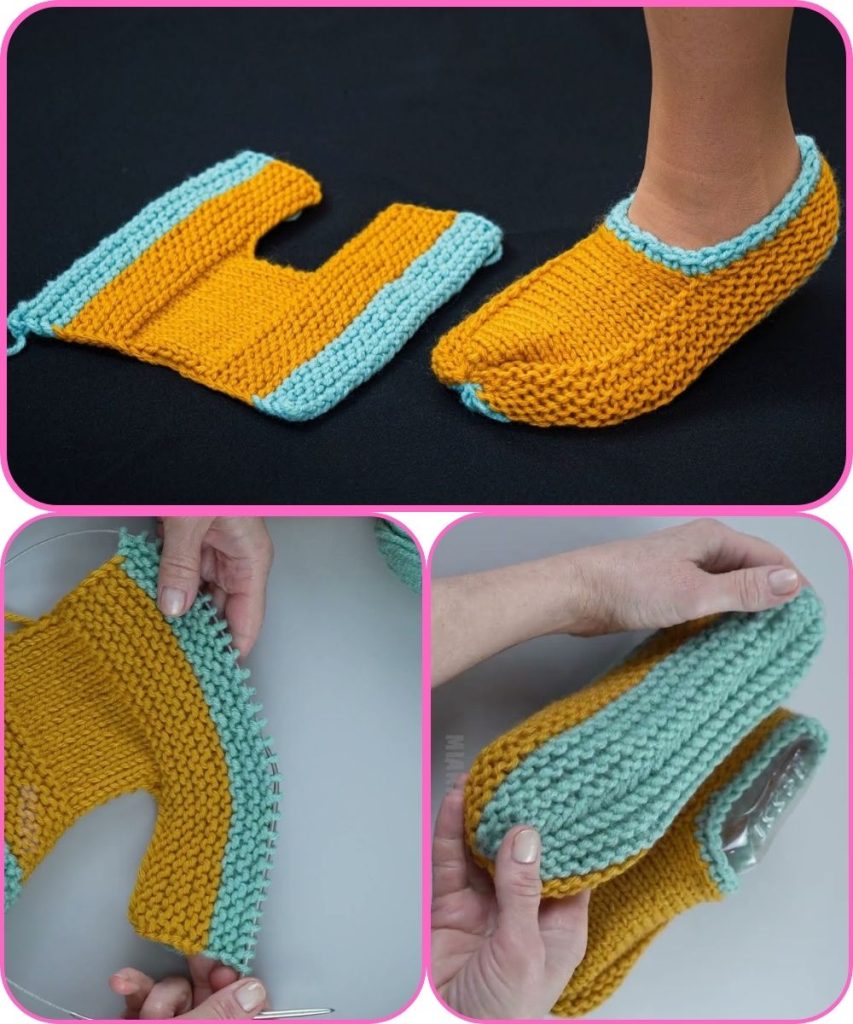
🧵 Step 1: Knit the Square
You’ll make a simple knitted square — this will become your slipper.
Gauge & Size
You’ll need a square that measures approximately:
- For women’s medium (US 7–8): 8 x 8 inches (20 x 20 cm)
- For men’s medium: 9 x 9 inches (23 x 23 cm)
- For children: 6 x 6 inches (15 x 15 cm)
You can adjust the size to fit your foot — bigger square = bigger slipper.
Pattern Options
You can knit your square in:
- Garter stitch (knit every row) — super stretchy and beginner-friendly.
- Stockinette stitch (knit 1 row, purl 1 row) — smoother look, but edges may curl (block it flat later).
- Ribbing (K2, P2) — gives a snug fit.
Example (Garter Stitch Square):
Cast on 30–36 stitches (depending on your yarn and gauge).

Knit every row until the piece forms a perfect square.
Bind off loosely.

✂️ Step 2: Folding the Square into a Slipper
This is the fun part!
- Lay your square flat, like a diamond (so one corner points toward you).
- Fold the side corners (left and right) toward the center — it will start to look like a slipper shape.
- The bottom corner (the one pointing toward you) becomes the toe, and the top corner becomes the heel.
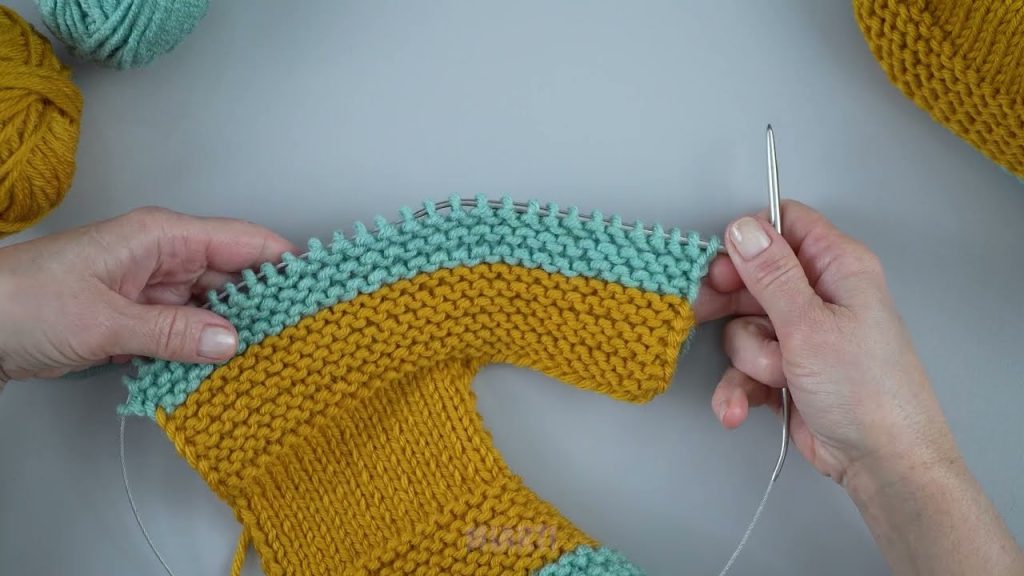
🪡 Step 3: Sewing the Seams
Use your tapestry needle and yarn tail (or a separate piece of yarn) to sew.
- Toe seam:
- Fold the bottom corner up toward the center.
- Sew about ⅓ of the way up the slipper to close the toe.
- Heel seam:
- Fold the top corner down.
- Sew a short seam up the back for the heel.
💡 Tip:
Try the slipper on before fully closing seams — you can adjust the fit by sewing more or less at the toe or heel.
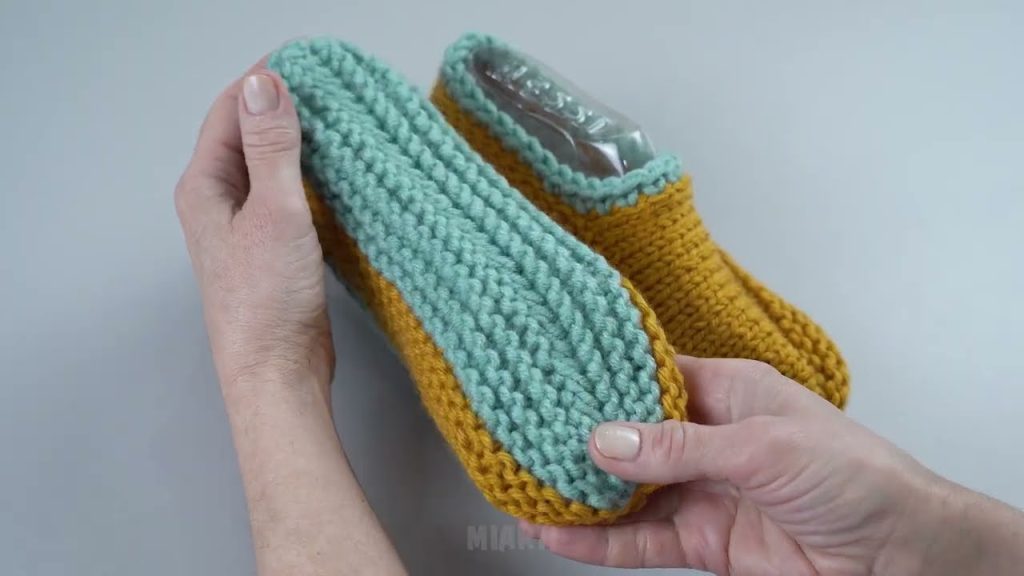
🌟 Step 4: Finishing Touches
- Weave in all yarn ends.
- Optionally add decorations:
- Buttons or pom-poms on the toe
- Crochet or knitted edging around the opening
- If you used stockinette, block the slipper gently to shape it.
🧍♀️ Step 5: Make the Second Slipper
Repeat all steps to create a matching slipper.
🎉 Optional Variations
| Style | Description |
|---|---|
| Striped Slippers | Use leftover yarns to knit color stripes across your square. |
| Ribbed Top | Knit the last few rows in K1, P1 ribbing for a snug ankle fit. |
| Fuzzy Comfort | Use a soft, fluffy yarn or line the inside with fleece. |
🧦 Simple Sizing Tip
Measure your foot’s length from heel to toe:
- Your knitted square should roughly match this measurement diagonally (corner to corner).
That ensures the slipper fits comfortably.
✅ Summary
| Step | What You Do |
|---|---|
| 1 | Knit a square (garter stitch recommended) |
| 2 | Fold it diagonally into slipper shape |
| 3 | Sew toe and heel seams |
| 4 | Weave ends, decorate, and enjoy! |
Would you like me to include a diagram or visual folding guide (step-by-step drawing of how to fold and sew the square)? It really helps visualize how the slipper comes together.
Watch tutorial: