 by
by Here is a clear, detailed, beginner-friendly guide you can use as a blog post, assignment, or tutorial.
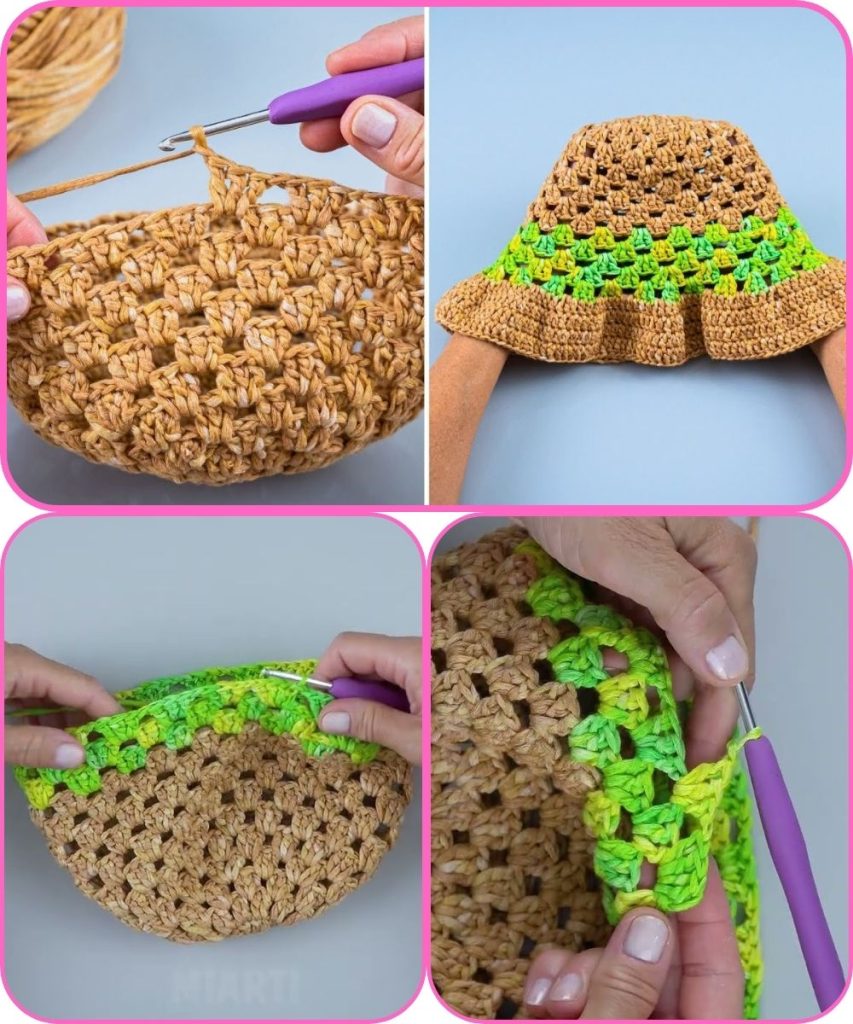
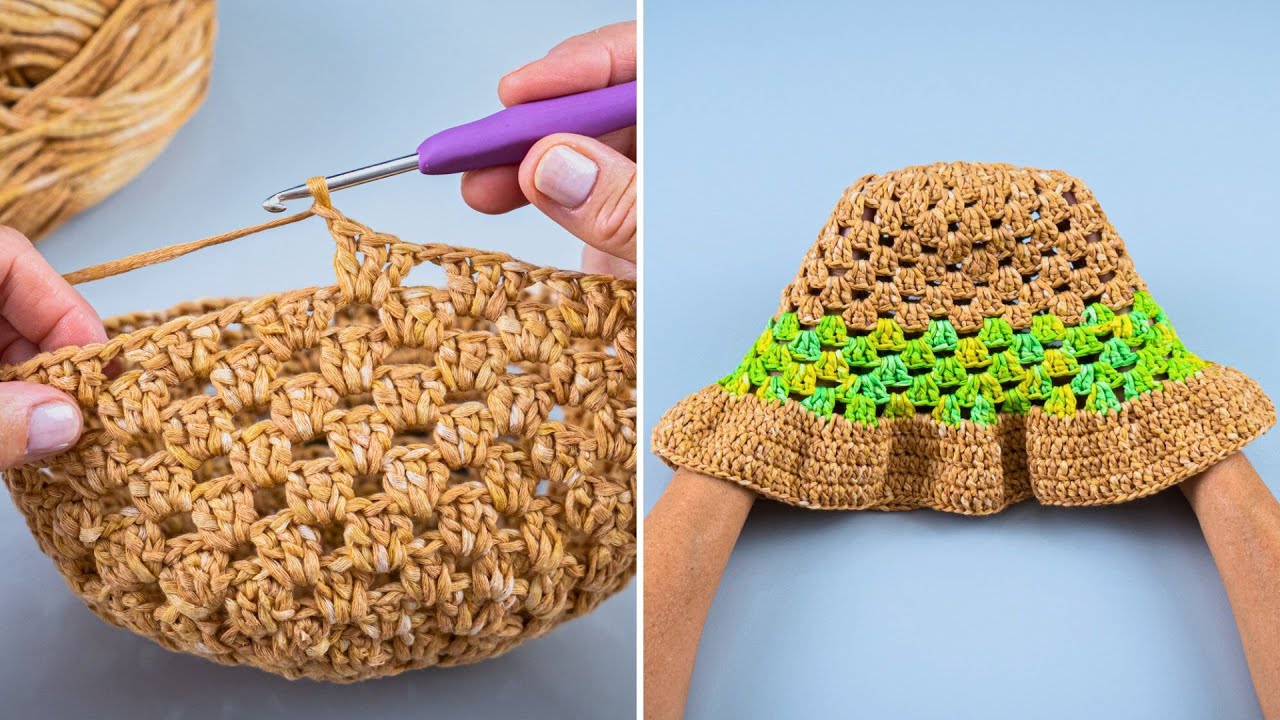
How to Make a Granny Square Bucket Hat Easily
Crocheting a granny square bucket hat is a fun and creative project that combines classic crochet techniques with a modern fashion style. This project is perfect for beginners who already know basic crochet stitches and want to create a stylish handmade accessory.
Materials You Will Need
Before starting, gather the following supplies:
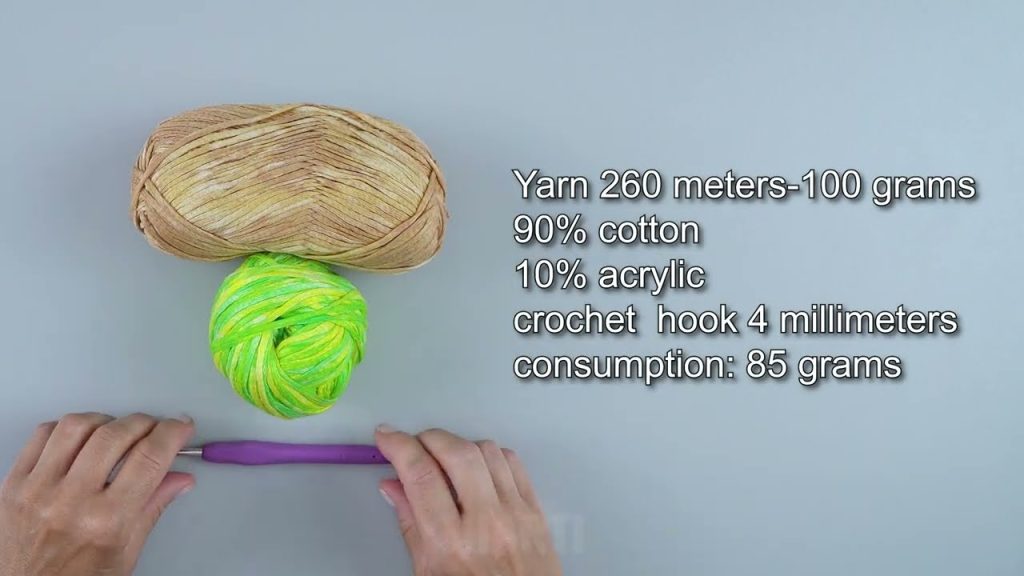
- Yarn: Medium-weight (worsted weight) yarn works best. Choose one color or multiple colors for a vibrant look.
- Crochet Hook: Size 4.5 mm–5.5 mm (check your yarn label).
- Scissors
- Yarn Needle: For weaving in ends
- Stitch Marker (optional)
- Measuring Tape
Basic Crochet Skills Required
To make this bucket hat, you should know:
- Slip knot
- Chain stitch (ch)
- Slip stitch (sl st)
- Single crochet (sc)
- Double crochet (dc)
- Magic ring (or chain circle)
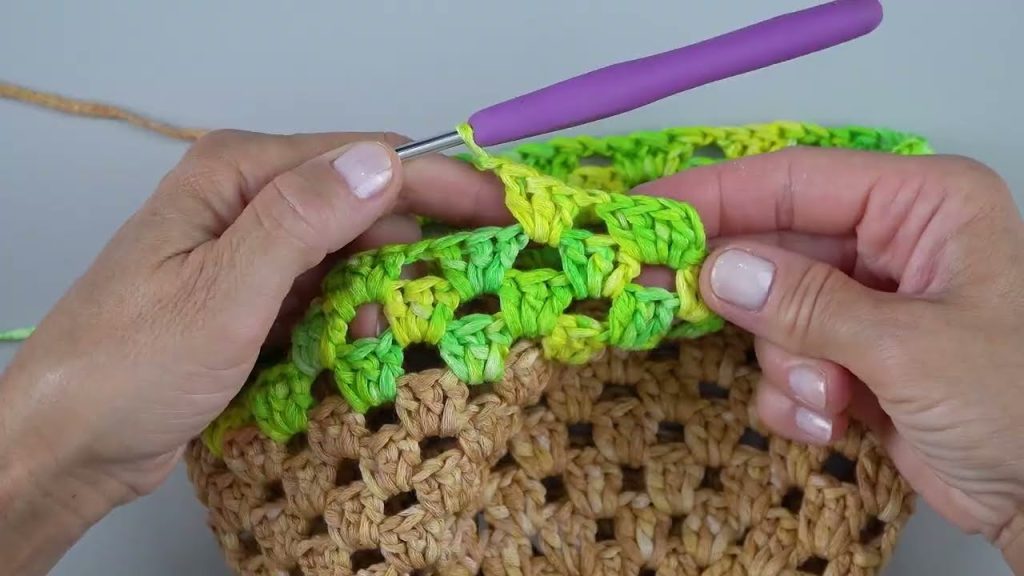
Step 1: Crochet the Granny Squares
Granny squares form the main structure of the hat.
- Start with a Magic Ring
- Chain 3 (counts as first double crochet).
- Work 2 double crochets into the ring.
- Chain 2, then work 3 double crochets.
- Repeat this pattern until you have 4 clusters of 3 double crochets.
- Join with a slip stitch to the top of the starting chain.
- Second Round
- Slip stitch into the corner space.
- Chain 3, work 2 double crochets, chain 2, and 3 double crochets into the same corner.
- Chain 1, then repeat the corner pattern in each corner space.
- Join with a slip stitch.
- Change Colors (Optional)
- You can change yarn colors at the end of each round for a classic granny square look.
- Finish the Square
- Make 3–5 rounds depending on the size you want.
- Fasten off and weave in ends.
👉 Make 5–6 granny squares for an adult bucket hat.
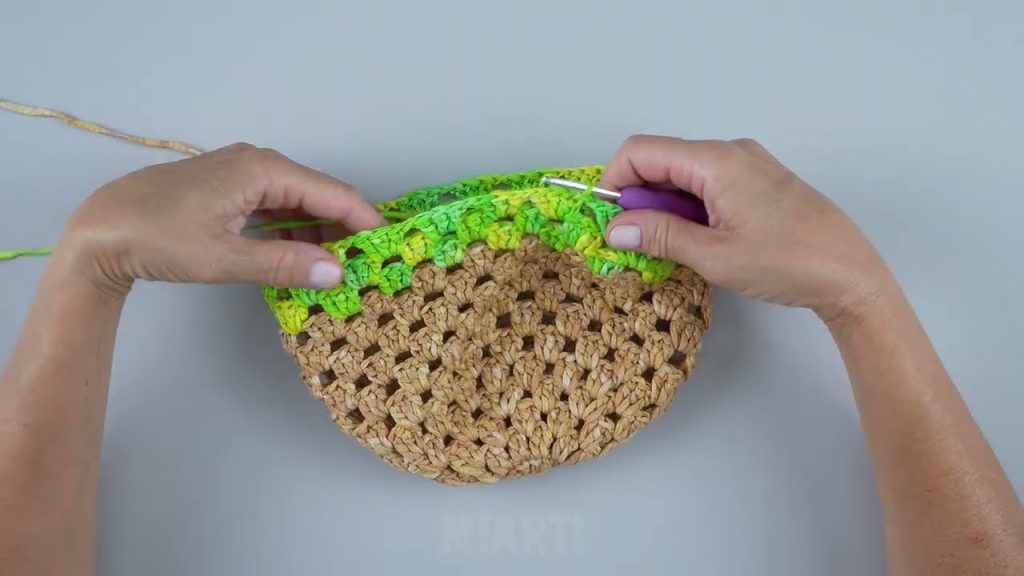
Step 2: Join the Granny Squares
- Arrange the Squares
- Place them in a circle to form the crown of the hat.
- Join the Squares
- Use slip stitch, single crochet, or a yarn needle to sew them together.
- Make sure the seams are neat and secure.
This forms the top of the bucket hat.
Step 3: Crochet the Sides of the Hat
- Attach yarn to the edge of the joined granny squares.
- Crochet single crochet stitches evenly around the entire edge.
- Join each round with a slip stitch.
- Continue crocheting rounds until the hat reaches your desired depth (usually 4–5 inches).
💡 Tip: Try the hat on as you go to ensure a good fit.
Step 4: Create the Bucket Hat Brim
- Begin increasing stitches:
- Crochet 2 single crochets into every 4th stitch.
- Continue increasing evenly in each round.
- Crochet 3–5 rounds until the brim flares out nicely.
For a stiffer brim, use tighter stitches or a smaller hook.
Step 5: Finish the Hat
- Fasten off yarn.
- Weave in all loose ends with a yarn needle.
- Lightly block the hat if needed to shape it.
Tips for Beginners
- Use light-colored yarn to clearly see your stitches.
- Count stitches to keep the shape even.
- Watch video tutorials if you are a visual learner.
- Practice granny squares before starting the hat.
Final Thoughts
A granny square bucket hat is a stylish and customizable crochet project that allows endless creativity with colors and patterns. Once you master this technique, you can experiment with different yarn types, square sizes, and brim styles to make unique hats for every season.
Happy crocheting! 🧶✨
If you want, I can also:
- Simplify this for absolute beginners
- Write it for a blog, school project, or YouTube script
- Create a step-by-step pattern with stitch counts
Watch tutorial: