 by
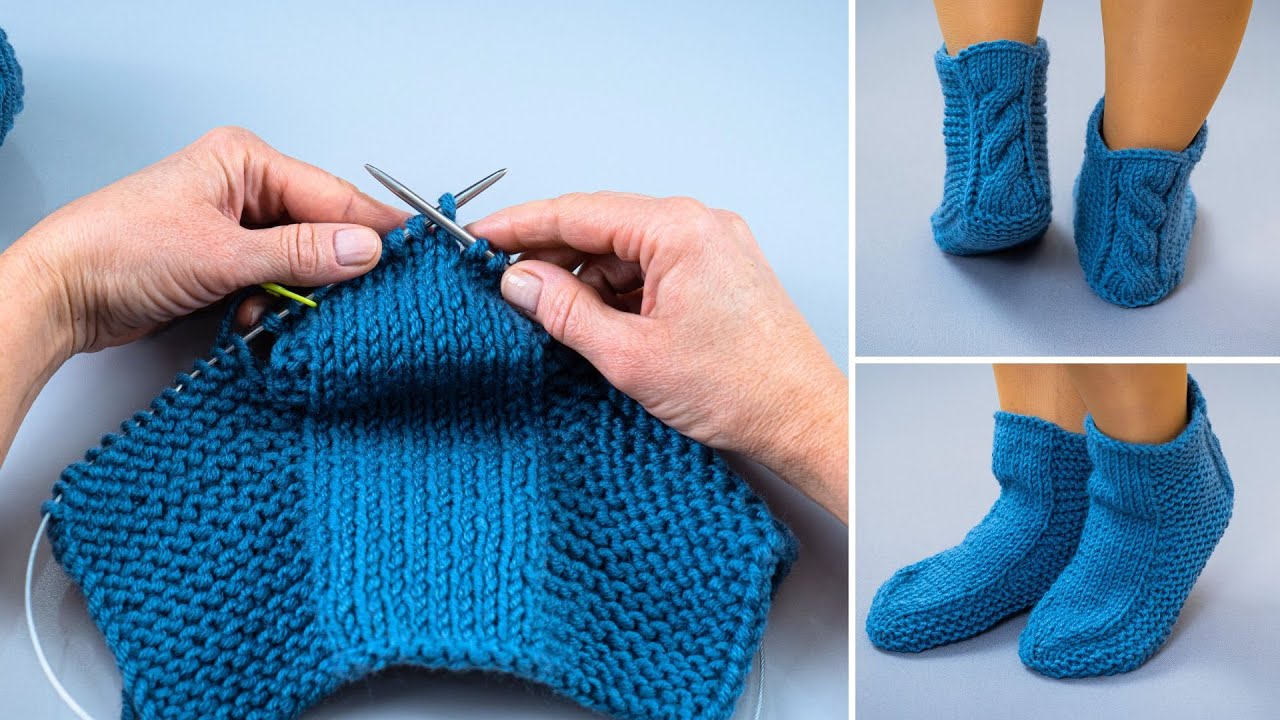
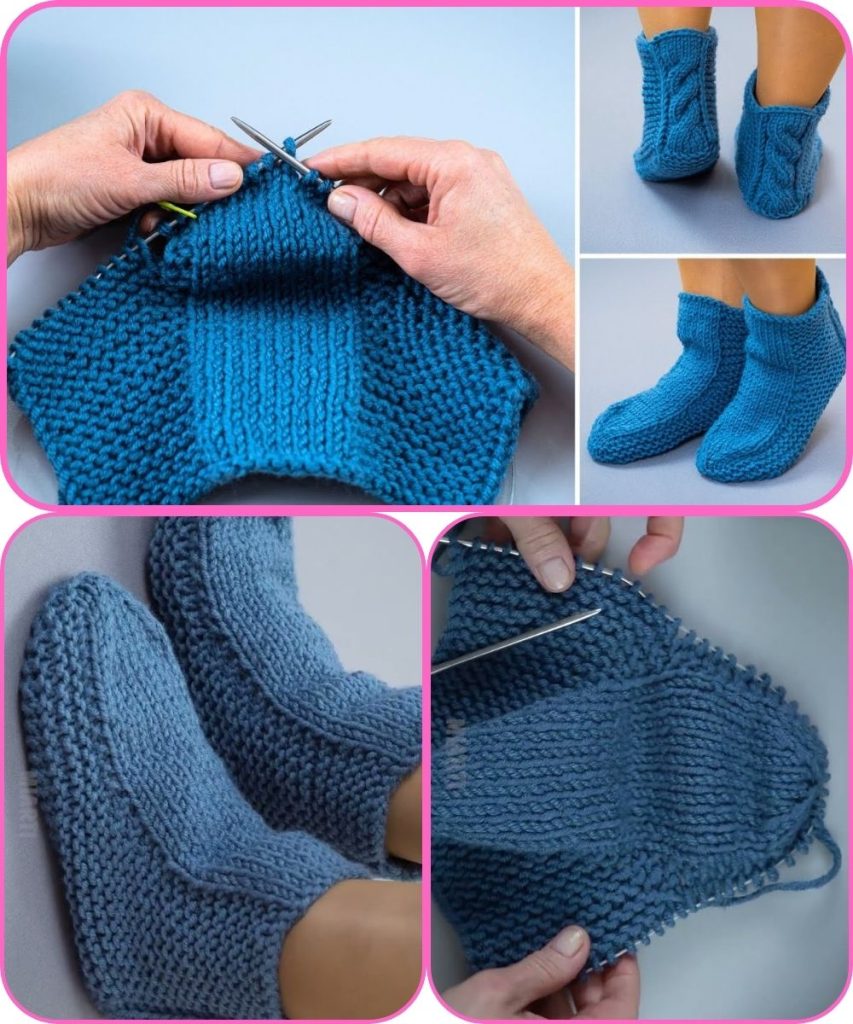
by Absolutely! I can give you a detailed, step-by-step guide for making slipper socks (also called slipper socks or slipper booties) on 2 knitting needles—completely seamless and beginner-friendly. These are worked flat, and then shaped and folded to form a slipper-like sock. Let’s break it down.
Materials Needed
- Yarn: Medium (worsted) weight yarn, soft and warm. Wool or acrylic blend works well.
- Needles: 2 straight knitting needles, size appropriate for your yarn (check the yarn label; usually US 7-9 / 4.5–5.5 mm for worsted).
- Scissors
- Tapestry needle for weaving in ends.
- Optional: non-slip fabric paint or felt for soles.
Step 1: Gauge and Measurements
Before starting, measure:
- Foot length (heel to toe)
- Foot circumference (around the widest part of the foot)
For a basic slipper sock:
- Cast on a multiple of 4 stitches that fits the width of the foot.
- Example: For adult medium foot, cast on ~36–40 stitches.
Step 2: Cast On
- Use long-tail cast on (or preferred method) for a stretchy edge.
- Cast on the number of stitches that matches your foot width.
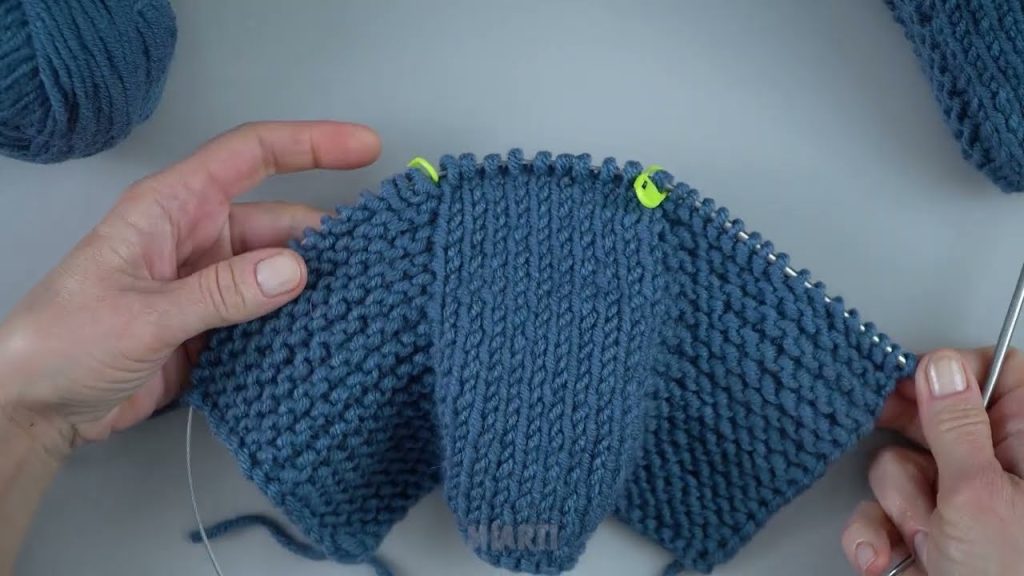
Step 3: Work the Sole (Bottom of Slipper)
- Knit flat in garter stitch (knit every row) or stockinette (alternate knit/purl) until the piece measures the length of the foot from toe to heel.
- Optional: For extra comfort, you can make the sole slightly longer to fold up for the slipper top.
Step 4: Shape the Toe (Front of Slipper)
- To form a rounded toe:
- Row 1 (RS): Knit across.
- Row 2 (WS): Knit or purl across.
- Row 3 (RS): Knit 2 together (k2tog), knit to last 2 stitches, slip-slip-knit (ssk).
- Repeat these decrease rows every other row until about 6–8 stitches remain.
- When you have ~6 stitches left, bind off loosely.

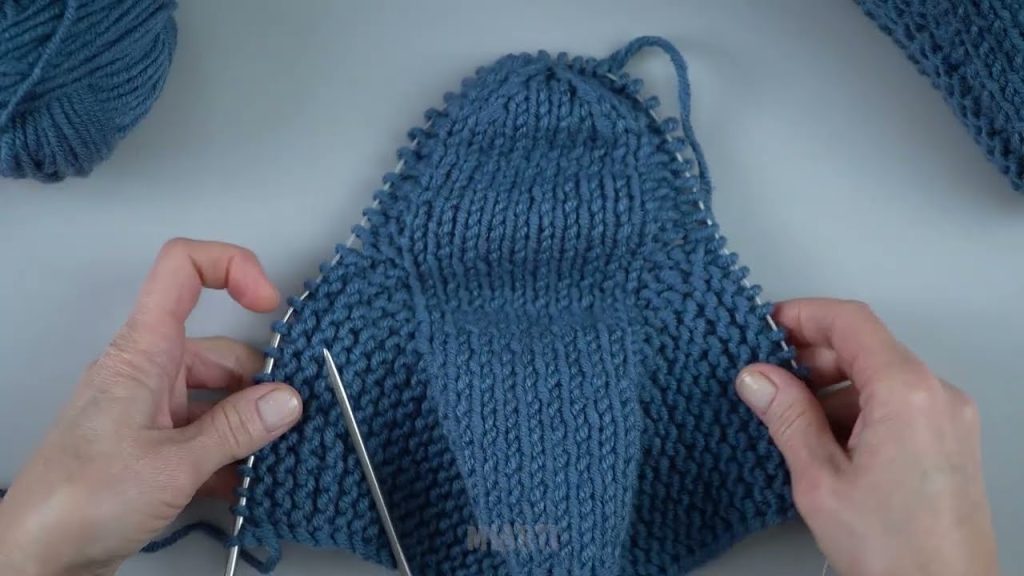
Step 5: Form the Top of the Slipper
- Pick up stitches along one side of the sole (if you want a folded cuff/top) or knit straight up from the toe/sole for a bootie style.
- Knit in stockinette or rib for 2–3 inches (or desired height for slipper top).
- For ribbing: K1, P1 or K2, P2 rib for elasticity and snug fit.
- Optional: Fold the cuff over for a cozy finish.
Step 6: Fold and Seamless Finish
This method uses a folded sole technique:
- After knitting the top, fold the piece along the sole so that the bottom of the foot is aligned with the sides.
- Using a three-needle bind-off or simply slip stitches together, join the back of the heel and sides.
- Since the decreases at the toe are already shaping, you may only need a tiny seam, or you can work the slipper completely flat and just fold at the end—no sewing required.
Step 7: Finishing
- Weave in all ends with a tapestry needle.
- Optional: Add non-slip dots or felt to the sole to prevent slipping.
- Fold cuff over if desired, and your slippers are ready to wear.
Tips for a Simple Seamless Look
- Use a slightly stretchy cast-on to make it easier to slip the foot in.
- Garter stitch works best for slipper socks because it lies flat and stretches.
- Pick up stitches along the sides of the sole instead of sewing afterward—this keeps it seamless.
- Make one slipper, try it on, and adjust the number of stitches for the second slipper to ensure fit.
✅ Result: You get a soft, warm, and seamless slipper sock, knit flat on two needles, with minimal finishing.
If you want, I can also draw a simple step-by-step diagram showing exactly how to fold and knit the slipper flat, which makes it much easier to visualize than just instructions.
Watch tutorial: